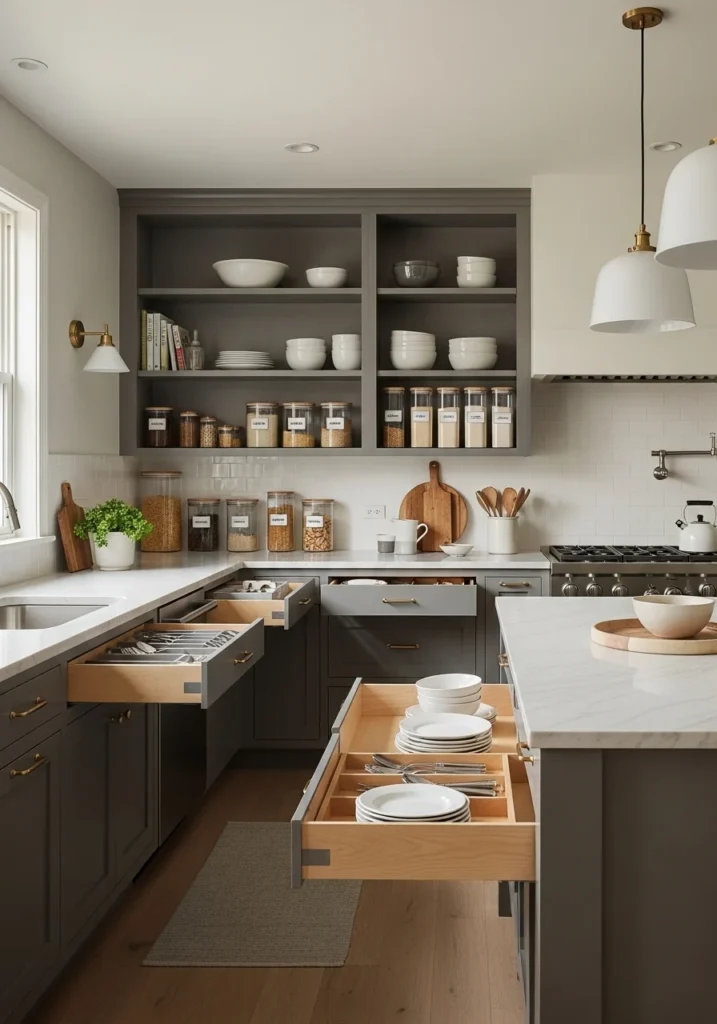
A well-organized kitchen isn’t just about aesthetics—it’s about creating a functional and enjoyable space that supports your lifestyle. Whether you’re a busy parent trying to prepare meals on the fly or a culinary enthusiast who loves experimenting with new recipes, having an orderly kitchen can make all the difference. Cluttered cabinets can lead to lost ingredients, expired goods, and unnecessary stress. But when everything has its place, cooking becomes more efficient, less time-consuming, and far more enjoyable.
This comprehensive guide will walk you through everything you need to know about how to organize kitchen cabinets effectively, regardless of your kitchen’s size or layout. You’ll begin by understanding why cabinet organization matters—not just for cleanliness, but for your peace of mind, time management, and even food safety. Then, you’ll follow step-by-step instructions to declutter your space, eliminate what you don’t need, and create a system that works for you.
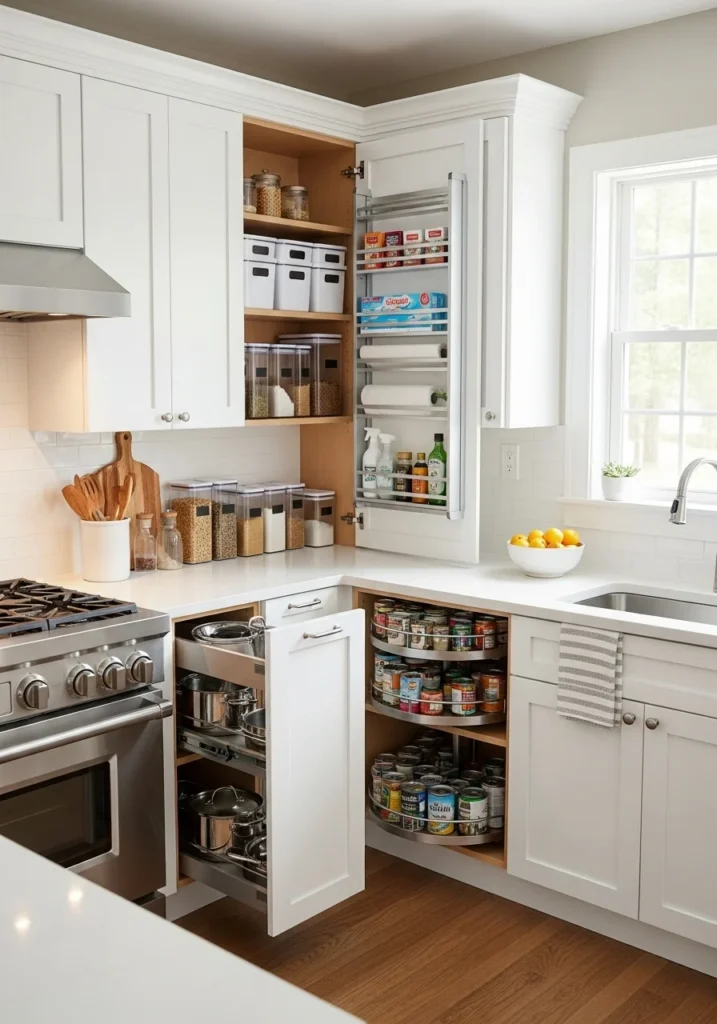
Next, explore a range of smart storage solutions designed to maximize every inch of space—think pull-out shelves, stackable containers, lazy Susans, door-mounted racks, and labeled bins. Whether you’re dealing with deep drawers or awkward corner cabinets, you’ll find practical tips to make your storage more efficient and accessible.
Finally, this guide provides maintenance tips to help you keep your kitchen cabinets tidy all year round. Learn how to implement quick daily habits, monthly check-ins, and seasonal resets that ensure your kitchen stays as functional and beautiful as the day you organized it.
No matter your skill level or kitchen setup, this guide empowers you to take control of your cooking space and turn your kitchen into a place where efficiency meets inspiration. Ready to get started?
Declutter Your Kitchen Cabinets
Before you can organize your kitchen effectively, it’s essential to start with a clean slate. Decluttering is the foundation of any successful organization project—it allows you to evaluate what you actually use, what’s taking up unnecessary space, and how best to structure your cabinets for daily efficiency. Think of this step as a reset for your kitchen, helping you clear out the excess and make room for the essentials. Here’s how to declutter thoroughly and thoughtfully:
a. Empty All Cabinets
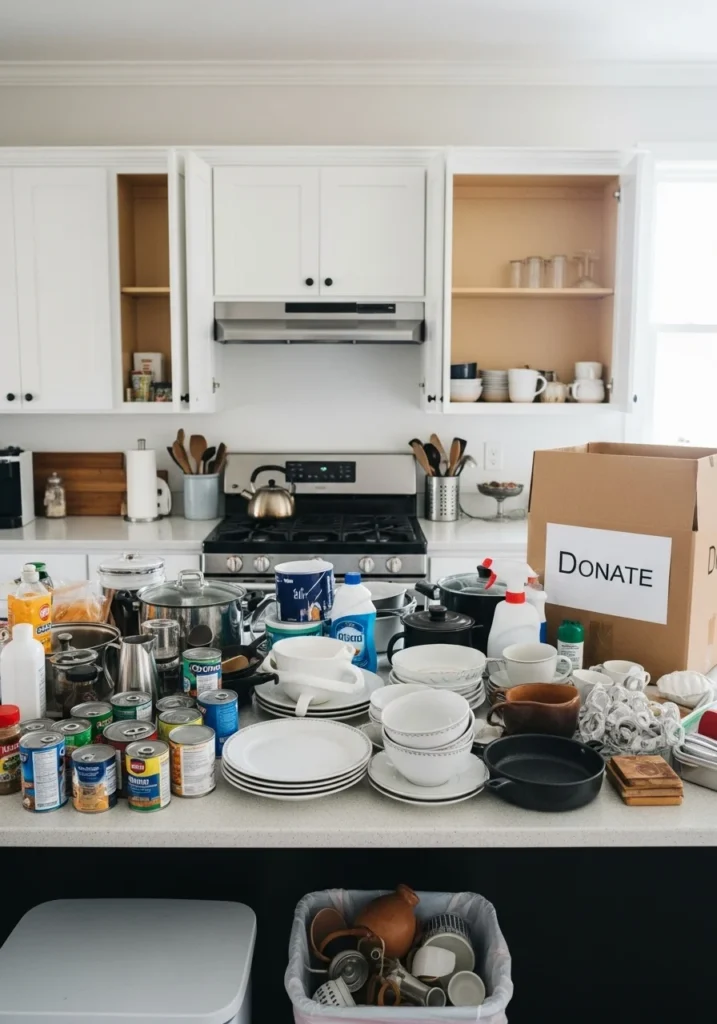
Start by completely emptying out your kitchen cabinets. Yes—all of them. It might feel overwhelming at first, but this step is crucial. Removing everything allows you to see exactly what you own, identify duplicates, and clean the inside of your cabinets, which often get overlooked during regular cleaning routines. Place all items on a clean, flat surface such as your countertop, kitchen island, or dining table. As you do this, take a moment to wipe down cabinet shelves with a damp cloth or mild cleaner to remove crumbs, dust, or spills.
b. Sort Items into Categories
Once everything is out in the open, begin grouping similar items together. This visual categorization helps you see where you have excess and what might be missing. Some useful categories include:
- Spices and seasonings: Group jars and bottles, checking for duplicates or expired items.
- Canned goods: Line them up by type—vegetables, soups, beans, etc.
- Baking supplies: Gather flour, sugar, baking powder, sprinkles, and measuring tools.
- Cookware: Pile together pots, pans, baking sheets, and lids.
- Dinnerware: Stack plates, bowls, glasses, and mugs.
- Food storage containers: Match containers with lids and toss anything that’s warped or lidless.
- Cleaning supplies: Group dish soaps, sponges, garbage bags, and sprays.
This sorting process not only makes the next step easier, but also reveals how much of each category you truly have—and often, how much you don’t need.
c. Discard or Donate Unused Items
Now it’s time to make some decisions. Go through each group and be honest about what you use regularly versus what’s just taking up space. Here’s a simple rule: If you haven’t used it in the last 6 to 12 months, it probably doesn’t need to stay.
- Toss: Throw away expired food, damaged tools, cracked dishes, or mismatched containers that are no longer functional.
- Donate: If you come across duplicates or items in good condition that you rarely use (like an extra set of mugs or a pan you never touch), consider donating them to a local charity, food pantry, or shelter.
- Recycle: Remember to recycle appropriate items like glass jars, cardboard packaging, and plastic containers that are no longer useful.
Decluttering isn’t just about getting rid of things—it’s about making space for what matters. By the end of this step, you’ll have a clear understanding of what you own, what you need, and how to best proceed with organizing in a way that supports your cooking habits and lifestyle.
Clean the Cabinets Thoroughly
Now that your cabinets are completely empty and decluttered, it’s the perfect time to give them a deep and thorough clean. Even in the most careful households, kitchen cabinets accumulate dust, crumbs, grease, and spills over time. Cleaning them properly not only refreshes your space, but also prepares the surfaces for a more hygienic and organized storage system going forward.
Here’s how to tackle this essential step with care:
Wipe Down the Interior with a Mild Cleaner
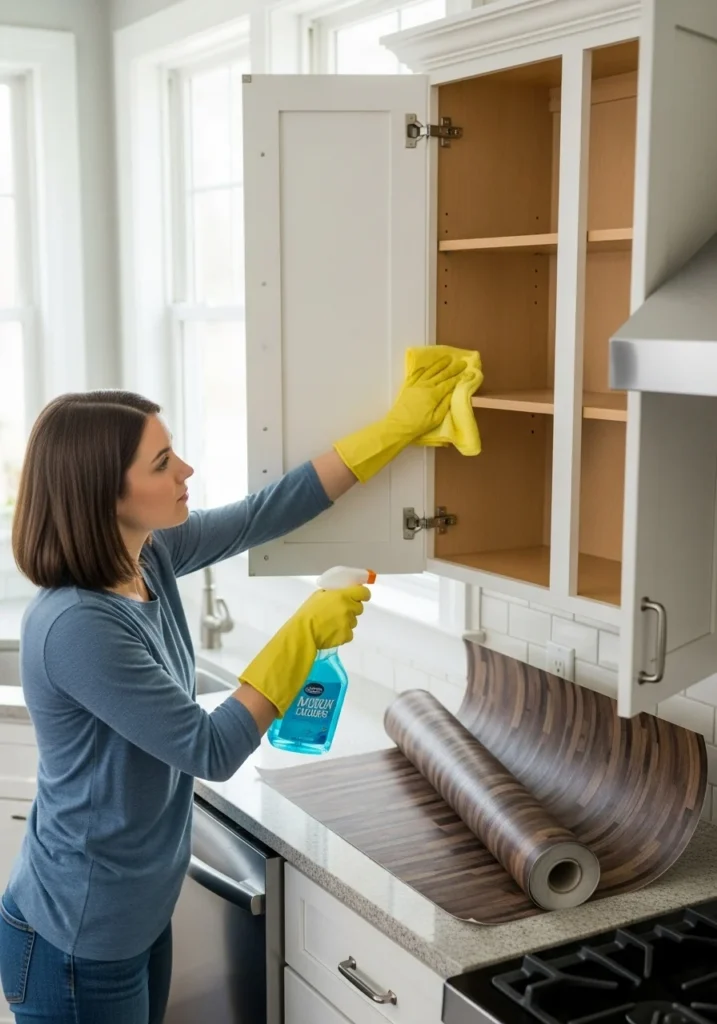
Start by vacuuming or gently brushing out any loose debris, like crumbs or dust. Then, using a soft cloth or sponge, wipe down the interior of each cabinet with a mild, non-toxic cleaner. You can use a commercial multi-surface spray or make your own solution using warm water mixed with a bit of dish soap or white vinegar. Be sure to clean:
- The bottom surface of each shelf
- Cabinet walls and corners
- The inside of doors
- Hinges and handles, which can collect grime
For stubborn grease spots (especially in cabinets near the stove), you might need a degreasing cleaner or a paste made of baking soda and water. Apply gently with a soft cloth, then rinse with clean water and wipe dry with a towel.
Let the cabinets air dry completely before putting anything back. Moisture can lead to mold or warped materials, so it’s important to ensure everything is fully dry.
Use Shelf Liners for Added Protection and Easier Maintenance
Once the cabinets are clean and dry, consider installing shelf liners. These are an often-overlooked secret to keeping cabinets cleaner for longer. Liners protect the cabinet surface from scratches, spills, and sticky residue. If something leaks or breaks, you can simply remove the liner and clean or replace it—saving you time and frustration in the future.
There are several types of shelf liners to choose from:
- Non-adhesive liners: Easy to remove, wash, and replace. Great for renters.
- Adhesive liners: Stick directly to the surface for a more permanent solution.
- Grippy liners: Provide traction to prevent items from sliding around.
- Decorative liners: Add a stylish touch to the inside of your cabinets.
Cut the liners to size using scissors or a utility knife, and press them down evenly so there are no air bubbles or edges that curl up. If you’re lining drawers or deeper shelves, it’s also helpful to tape or clip them in place to avoid shifting.
Plan Your Storage Strategy
Now that your kitchen cabinets are clean and clutter-free, it’s time to thoughtfully plan how to put everything back in a way that’s intuitive, functional, and tailored to your daily routine. A smart storage strategy helps you maintain order over time and minimizes the need for future overhauls. Rather than just placing items back randomly, take a few moments to intentionally map out where each item will live. This approach transforms your kitchen into a highly efficient space that works for you.
Here’s how to plan your cabinet storage like a pro:
a. Consider Frequency of Use
One of the most important principles in kitchen organization is accessibility. Think about how often you use each item, and store it accordingly.
- Everyday essentials like plates, bowls, glasses, and frequently used cookware should be kept within easy reach, ideally between waist and eye level. This saves time and prevents unnecessary stretching or bending.
- Cooking oils, spices, utensils, and other tools you use daily should be placed close to your stove or prep area for convenience.
- Rarely-used appliances, specialty baking tools, seasonal dishes, or backup pantry items can be stored on higher shelves or in lower cabinets that are harder to reach.
- If you entertain often, consider dedicating a lower shelf or cabinet to serveware, wine glasses, or platters, so they’re easy to grab when guests arrive.
By organizing based on how often you use something, you’ll create a natural workflow in your kitchen that makes daily tasks smoother and more enjoyable.
b. Group Items by Function
Another effective organizing method is to store items by purpose. Grouping like-items together helps you find what you need quickly and ensures everything has a logical place.
Here are a few examples of functional grouping:
- Baking supplies: Store flour, sugar, baking powder, cupcake liners, and mixing tools in the same cabinet or shelf. Consider using bins or baskets to keep smaller items contained.
- Coffee and tea station: Keep mugs, coffee pods, filters, sugar, and spoons near the coffee maker to create a simple morning routine.
- Cleaning supplies: Designate a cabinet (often under the sink) for dish soap, sponges, trash bags, and surface cleaners. Use bins to prevent spills from damaging cabinet interiors.
- Food storage containers: Nest similar sizes together and keep lids in an upright file sorter or basket for easy matching.
- Lunch-making zone: Place sandwich bags, lunchboxes, thermoses, and snack containers in a single drawer or basket for busy mornings.
Function-based organization not only saves time, but also makes it easier for other household members to find and return items correctly.
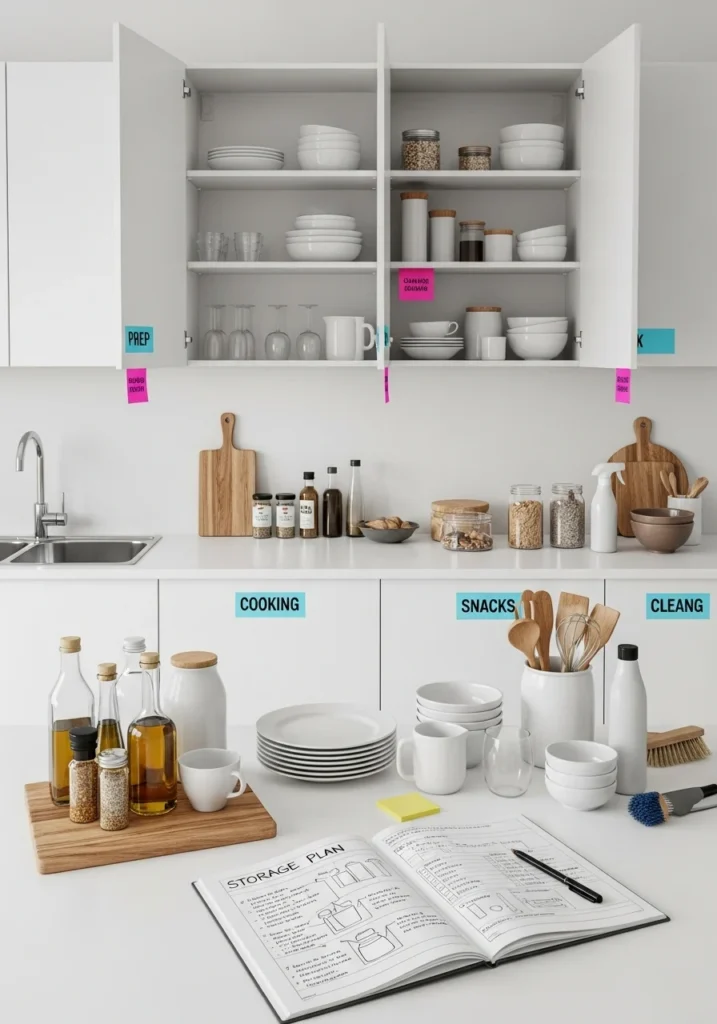
c. Use Zones
To take your storage strategy a step further, organize your kitchen into zones—specific areas designated for particular tasks. This zoning concept is used by professional chefs to streamline movement and reduce time spent searching for tools or ingredients.
Here are some key zones you can create in your kitchen cabinets:
- Prep Zone: Store mixing bowls, measuring cups, cutting boards, knives, and prep tools in cabinets or drawers near your countertop workspace.
- Cooking Zone: Keep pots, pans, cooking utensils, spatulas, oven mitts, and hot pads near the stove or oven. This makes it easier to grab what you need while cooking.
- Baking Zone: Dedicate space near your prep area or mixer for baking sheets, muffin tins, rolling pins, flour, sugar, and measuring tools.
- Snack Zone: Set up a kid- or guest-friendly area stocked with grab-and-go snacks, granola bars, and small plates. Use bins or clear containers so items are visible and accessible.
- Cleaning Zone: As mentioned earlier, keep all your cleaning supplies under the sink or in one central cabinet to avoid mixing them with food storage or tools.
- Breakfast Zone: For busy mornings, have cereal, bowls, spoons, and breakfast bars grouped in one cabinet.
Zoning your kitchen cabinets creates a logical layout that aligns with how you cook, clean, and move through your kitchen. It reduces chaos, makes routines smoother, and supports long-term organization.
Maximize Storage with Organizers
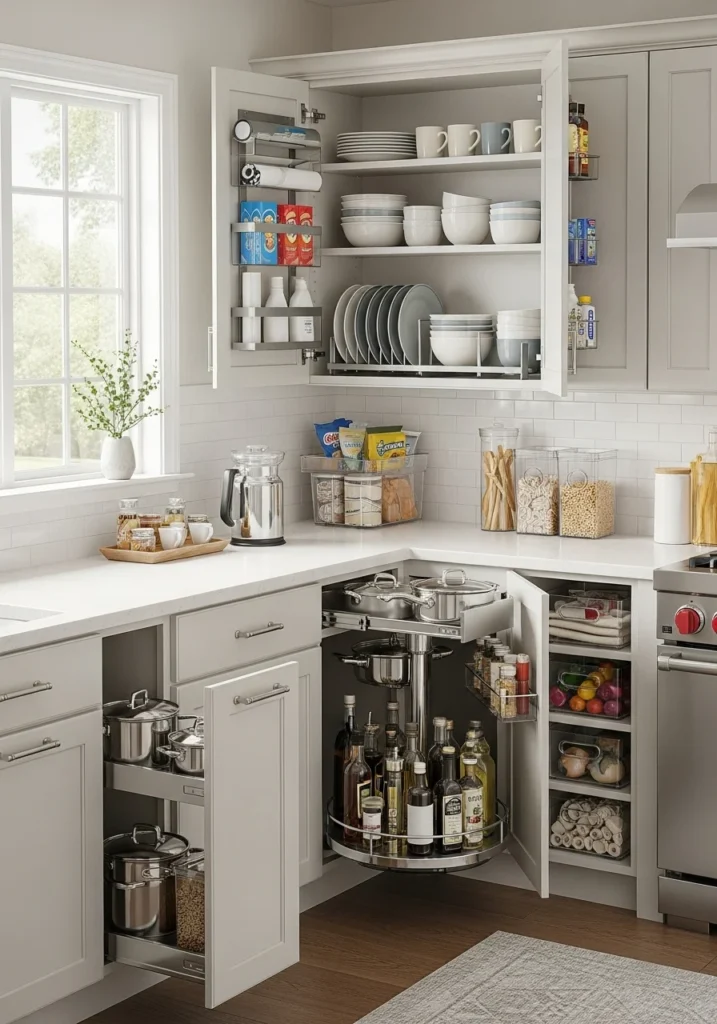
Now that you’ve decluttered, cleaned, and thoughtfully planned your cabinet layout, it’s time to take your kitchen organization to the next level. Even the best planning can fall short without the right tools to support it—especially if you’re working with limited space. That’s where storage organizers come in.
Investing in a few well-chosen organizing tools can dramatically increase your usable space, make items more accessible, and reduce daily frustration. These tools help create order and prevent cabinets from becoming a chaotic jumble over time. Whether you’re dealing with deep drawers, narrow shelves, or oddly-shaped cabinets, there are smart solutions available for every kitchen.
Below are some of the most effective storage organizers to consider:
a. Shelf Risers
Shelf risers are a game-changer for cabinets with tall or underutilized vertical space. They allow you to double your shelf space by creating an extra tier for stacking dishes, mugs, canned goods, or spices. Without risers, items often get stacked on top of each other in unstable piles, making them difficult to access and more likely to break.
Use risers to:
- Store coffee mugs above dinner plates
- Separate small bowls from large ones
- Make it easier to see what’s in the back of the cabinet
Look for risers with non-slip surfaces or adjustable heights to best suit your cabinet dimensions.
b. Pull-Out Drawers
Pull-out drawers or sliding shelves are excellent for deep lower cabinets where items often get lost in the back. These drawers let you access everything with ease, eliminating the need to bend down and rummage through heavy pots or stacks of baking sheets.
Install pull-out organizers for:
- Cookware and lids
- Food storage containers
- Pantry staples like flour and sugar
- Cleaning supplies under the sink
Many models are easy to install with just a few screws, and they instantly make deep storage spaces more functional and frustration-free.
c. Lazy Susans
A Lazy Susan (rotating turntable) is a classic and versatile organizing tool that works wonders in both upper and lower cabinets, especially in hard-to-reach corner spaces. Instead of shuffling through rows of bottles or containers, you can simply spin to find what you need.
Use Lazy Susans for:
- Spices and seasonings
- Cooking oils and vinegars
- Condiments and sauces
- Vitamins or medications
Choose a multi-tier Lazy Susan for even more vertical storage, or a clear one to keep everything visible.
d. Clear Bins and Baskets
Clear bins and baskets are perfect for grouping smaller items together and keeping your cabinets neat and visually organized. Transparent containers let you see exactly what you have at a glance, reducing overbuying and food waste.
Use them to organize:
- Snack packs, granola bars, and tea bags
- Baking ingredients (think: sprinkles, cookie cutters, piping bags)
- Packets, pouches, or seasoning mixes
- Extra toiletries or paper products
Label each bin for extra clarity, especially if multiple people in your household use the kitchen. Stackable options can help maximize shelf height, while handles make it easy to pull bins in and out.
e. Door-Mounted Racks
Don’t forget the inside of cabinet doors—an often overlooked goldmine of storage space. Door-mounted racks or hooks can help store a surprising number of items without cluttering your shelves or drawers.
Try door-mounted organizers for:
- Cutting boards and pot lids
- Measuring spoons and oven mitts
- Plastic wrap, foil, and sandwich bags
- Spices or smaller pantry items
These racks are available in adhesive or screw-mounted options, making them suitable for both renters and homeowners. Just be sure to measure your cabinet doors first to ensure a proper fit.
Label Everything
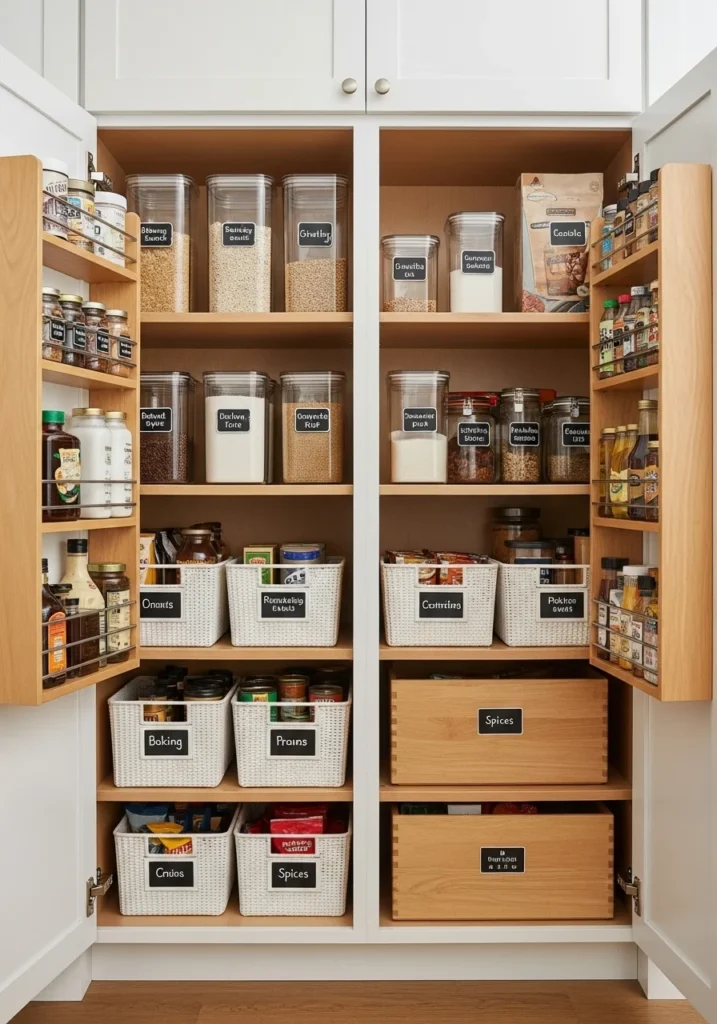
You’ve decluttered, cleaned, planned, and outfitted your cabinets with smart storage tools—now it’s time to put the finishing touch on your organized kitchen: labels. Labeling might seem like a small detail, but it plays a crucial role in maintaining long-term organization and keeping your kitchen functional for the whole household.
When every bin, shelf, and container is clearly labeled, it eliminates confusion and makes it easier for everyone in your home to know where things go—and more importantly, to put them back in the right place. Whether you live alone, with kids, or with roommates, labels create consistency and order, helping to preserve all the hard work you’ve put into organizing.
Here’s how to label effectively and creatively:
Why Labeling Matters
- Promotes consistency: When everything is clearly labeled, you’re more likely to return items to their designated spots, which helps maintain a clutter-free kitchen.
- Saves time: No more digging through bins or opening every container to find what you need. Labels make everything easy to identify at a glance.
- Makes the system universal: Labels communicate your storage strategy to everyone in your home—so whether it’s a spouse unloading groceries or kids grabbing snacks, they’ll know exactly where things belong.
- Reduces waste: Clear pantry labels help you keep track of what you have, preventing unnecessary purchases and minimizing expired items.
What and Where to Label
Consider labeling these key areas in your kitchen:
- Pantry bins and baskets: Label bins holding snacks, pasta, grains, baking supplies, or canned goods.
- Containers and jars: Especially useful for dry goods like flour, sugar, oats, or rice—labeling prevents mix-ups and helps with inventory.
- Shelves: If you’ve grouped items by function or created zones, labeling the front edge of shelves can serve as a visual guide.
- Fridge and freezer bins: Use labels to categorize leftovers, dairy, produce, or frozen meals.
- Cleaning supplies: Label under-sink baskets for sponges, sprays, dish soap, and garbage bags to keep things in order.
Labeling Options to Match Your Style
There are plenty of ways to label your kitchen in a way that’s both functional and aesthetically pleasing. Here are a few popular labeling tools and ideas:
- Chalkboard Labels: These are a charming and flexible option. They’re reusable, easy to update, and add a farmhouse or rustic vibe to your kitchen. Great for containers that may change contents frequently. Use a chalk marker for cleaner, smudge-free writing.
- Printed Adhesive Labels: Pre-printed or custom labels in clear or decorative fonts offer a polished look. They’re ideal for labeling pantry jars, baskets, or shelf edges. You can purchase these online or make your own at home using printable sticker paper.
- Label Makers: A favorite among organization pros, a label maker gives you neat, uniform labels that work on nearly any surface. They’re especially helpful for labeling drawer fronts, clear bins, or the inside of cabinet doors.
- Handwritten Tags or Stickers: For a more personal or creative touch, handwritten labels using blank tags, washi tape, or adhesive sticker paper can work beautifully—especially if you enjoy a DIY approach.
Tips for Effective Labeling
- Keep it simple and clear: Use short, specific words like “Snacks,” “Pasta,” or “Baking Supplies.” Avoid overly cute or vague labels that may confuse others.
- Be consistent: Use the same font style, size, and placement across your kitchen to create a clean, unified look.
- Label both sides (if needed): For baskets or bins that are pulled in and out, consider labeling both the front and back for easy identification.
- Use waterproof materials: Especially in kitchens, where spills and humidity are common, opt for waterproof or laminated labels to prevent smudging or peeling.
Maintain the System
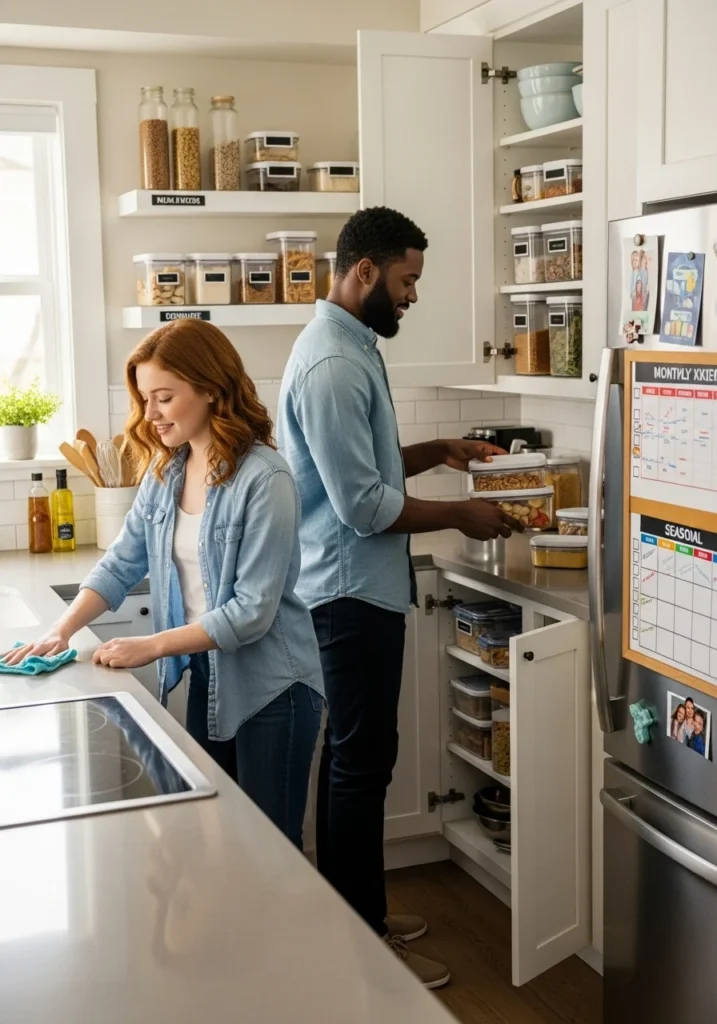
Creating an organized kitchen is a rewarding accomplishment—but keeping it that way is where the real magic happens. The truth is, organization isn’t a one-time event; it’s an ongoing process that requires small, consistent habits to ensure your cabinets remain tidy, functional, and stress-free.
Fortunately, maintaining your system doesn’t need to be time-consuming or overwhelming. With just a few intentional practices—and a bit of help from your household—you can keep your kitchen in order and avoid the cycle of re-cluttering that often sneaks in over time.
Here’s how to maintain your organized kitchen year-round:
Do a Quick Weekly Tidy-Up
Set aside just 10 to 15 minutes once a week to scan your kitchen cabinets and make small adjustments. During this weekly check-in:
- Put stray items back in their labeled bins or zones
- Toss out expired or stale food
- Wipe down any crumbs or spills inside shelves or drawers
- Re-stack dishes or containers that have shifted
Think of this as a reset—by doing a little bit each week, you’ll prevent small messes from becoming big headaches. You can even build this habit into your regular cleaning routine, such as while waiting for coffee to brew or after putting away groceries.
Reassess Your Storage Every 3–6 Months
Every few months, it’s helpful to re-evaluate how your storage system is working—especially as seasons change, families grow, or cooking habits shift.
Ask yourself:
- Are any zones becoming cluttered or overflowing?
- Have your needs changed (e.g., more meal prep, fewer baking projects)?
- Are certain items consistently hard to reach or access?
- Is there a cabinet that seems to attract random clutter?
This is your chance to fine-tune your setup. You might need to add an extra bin, relocate some items, or remove things you no longer use. Periodic reassessments keep your system responsive and effective over the long term.
Bonus tip: Try to schedule these reassessments around seasonal transitions—like after the holidays, before summer entertaining, or during spring cleaning.
Involve the Whole Family
The most successful organization systems are the ones that everyone in the household understands and participates in. If you live with others, take a few minutes to explain the zones, bins, and labels you’ve set up. Show them where everyday items go and encourage everyone to help keep things in order.
Here’s how to make it easier:
- Assign responsibilities: Older kids can be in charge of snack bins or unloading the dishwasher.
- Use visual labels: For younger children or visual learners, consider picture labels to make things intuitive.
- Encourage routines: Remind everyone to return items to their rightful spots after use—whether it’s putting spices back in the Lazy Susan or returning Tupperware lids to their basket.
- Celebrate consistency: When the system is working well, acknowledge the effort! Positive reinforcement helps build long-lasting habits.
By involving the whole household, you reduce the burden on yourself and turn your kitchen into a shared space that works for everyone.
Final Thoughts
Maintenance is what turns an organized kitchen into a lasting lifestyle. It’s not about perfection—it’s about building simple habits that support a clean, calm, and efficient space. With just a few minutes a week and occasional check-ins throughout the year, you can keep your kitchen feeling fresh and functional.
The best part? Once your system is in place and running smoothly, you’ll spend less time managing clutter and more time enjoying the things that matter—like cooking delicious meals, hosting family and friends, or simply savoring a peaceful cup of coffee in your beautifully organized kitchen.
Additional Tips for Small Kitchens
If you’re working with a small kitchen, staying organized can feel like a constant challenge—but the good news is that even the tiniest kitchens can be transformed with a bit of strategy and creativity. When every inch counts, the key is to think beyond traditional storage and make the most of every available surface, corner, and cabinet.
Whether you’re in a studio apartment or a compact home kitchen, these smart, space-saving tips will help you maximize storage without sacrificing style or functionality.
Use Vertical Space
In small kitchens, height is your hidden asset. Rather than trying to squeeze more into your lower cabinets and drawers, look up and take advantage of unused vertical space.
Here’s how:
- Install tall shelving units that go all the way to the ceiling for storing lesser-used items.
- Add extra shelves inside cabinets with risers to double up on vertical room for plates, mugs, or pantry goods.
- Hang wall-mounted shelves or pegboards to hold everyday items like spices, utensils, or small kitchen tools.
Even above your refrigerator or on an empty wall, vertical storage can dramatically increase your available space and reduce countertop clutter.
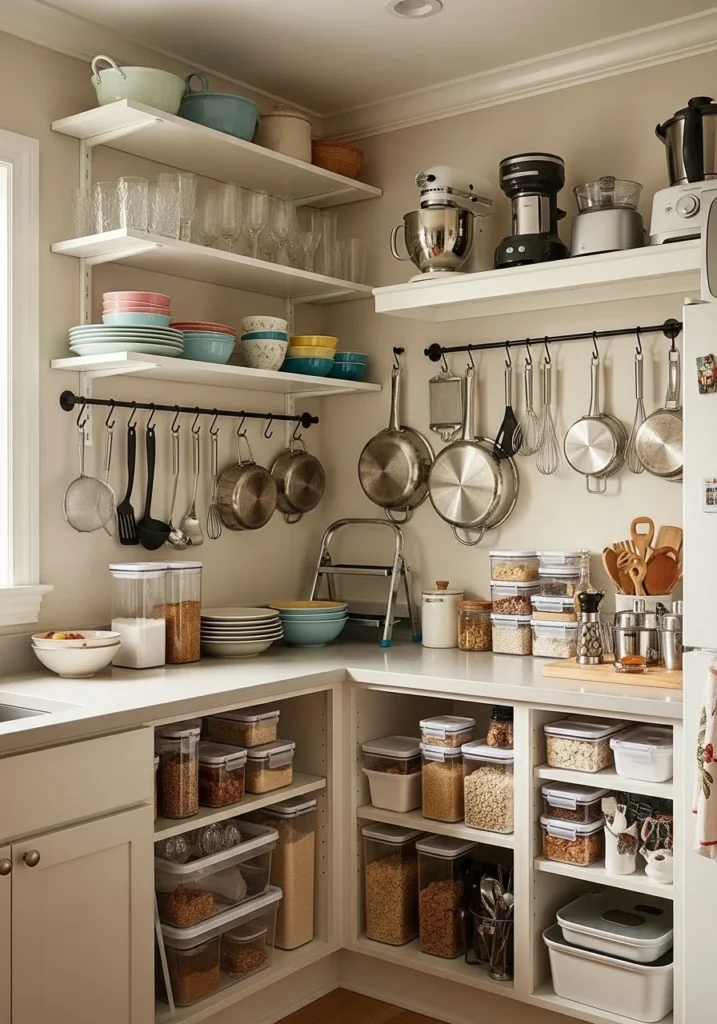
Hang Utensils or Pots on Wall-Mounted Racks
Don’t let your walls go to waste. Wall-mounted racks, hooks, or rails can free up valuable drawer and cabinet space by giving you a stylish and practical way to display frequently used tools.
Try hanging:
- Cooking utensils near your stove using a magnetic strip or bar with S-hooks
- Pots and pans on a pegboard or pot rack above your cooking area
- Cutting boards or oven mitts on the inside of cabinet doors or along backsplash rails
Not only do these solutions save space, but they also keep everything within easy reach while adding a touch of personality to your kitchen décor.
Choose Stackable Containers
In small spaces, bulky or mismatched containers can waste precious room. Instead, opt for stackable storage containers that make the most of shelf and drawer space. This is especially useful for organizing:
- Dry goods like flour, rice, and pasta
- Leftovers in the fridge or freezer
- Snacks, baking ingredients, or seasoning packets
Clear, uniform containers also help reduce visual clutter, making your cabinets feel neater and more spacious. Choose square or rectangular shapes over round ones to maximize shelf efficiency.
Bonus tip: Look for containers with labels or write-on surfaces so you always know what’s inside without opening each one.
Store Rarely-Used Appliances Elsewhere
Appliances can quickly take over a small kitchen, especially if you keep them all on your countertop or in prime cabinet real estate. If you don’t use a certain appliance every week, consider storing it outside the kitchen—in a nearby closet, pantry, or storage bench.
Appliances to consider relocating:
- Slow cookers or pressure cookers
- Food processors or mixers
- Ice cream makers or specialty gadgets
Only keep daily-use items (like a coffee maker or toaster) in your main kitchen space. By clearing out bulky appliances you rarely use, you create more room for the tools and ingredients you reach for every day.
Final Thoughts for Small Spaces
A small kitchen doesn’t have to feel cramped or chaotic. With thoughtful planning and a few creative storage solutions, you can build a space that’s both efficient and enjoyable to use. The key is to think vertically, use multi-functional storage, and keep surfaces as clear as possible. Even a single shelf or hook in the right place can make a big difference.
Remember: it’s not about having more space—it’s about using your space more wisely.
Final Thoughts
Learning how to organize your kitchen cabinets is more than just a weekend project—it’s a long-term investment in your daily comfort, efficiency, and peace of mind. When your kitchen is thoughtfully arranged and free from clutter, everything from preparing meals to cleaning up afterward becomes faster, easier, and far more enjoyable. But beyond convenience, an organized kitchen reflects a deeper shift: a move toward intentional living.
Rather than scrambling to find that missing lid or digging through overstuffed drawers for the right spice, you’ll know exactly where everything is. You’ll feel empowered each time you walk into your kitchen, knowing it supports your routines rather than slows them down. And the benefits go beyond just cooking—an organized kitchen can reduce daily stress, encourage healthier eating habits, and even foster better family involvement in meal prep and cleanup.
The key to success lies in choosing a system that works for you—your space, your lifestyle, and your household. Whether you live in a tiny apartment or a sprawling home, whether you love to cook or just need your kitchen to function well, the steps outlined in this guide can help you build a system that’s both beautiful and practical. From decluttering and planning to labeling and maintenance, every step contributes to a kitchen that feels less like a chore zone and more like the heart of your home.
And remember: organization isn’t about perfection—it’s about creating flow. It’s okay if your system evolves. Your needs may shift with the seasons, with growing kids, or with lifestyle changes. What matters most is that you’ve taken the time to build a foundation of order—a system you can return to, refine, and rely on.
So whether you’re starting small with a single cabinet or embarking on a full kitchen overhaul, know that every label you stick on, every bin you fill, and every shelf you tidy is a step toward a calmer, more efficient home. Let your organized kitchen inspire confidence, creativity, and connection—one well-placed item at a time.
