Reviving old furniture is more than just a DIY project—it’s a chance to create something beautiful, unique, and full of character. Whether you’re looking to update a vintage dresser, breathe new life into a worn-out chair, or give a forgotten coffee table a modern twist, painting your old furniture is one of the most cost-effective and creative ways to transform your space. With just a bit of effort and the right technique, even the oldest pieces can look like they just came off a showroom floor.
In this comprehensive guide, we’ll take you step-by-step through the entire furniture painting process—from choosing the right tools and materials to prepping, priming, and applying paint for a smooth, durable finish. You’ll learn how to avoid common mistakes, explore popular paint colors and finishes, and discover design ideas that match your personal style or home decor. Whether you’re going for a rustic farmhouse look, a sleek modern finish, or a bold bohemian vibe, painting furniture can help you achieve the perfect aesthetic.
This blog is ideal for beginners and seasoned DIYers alike. We’ve also included expert tips to ensure professional-looking results every time, plus sustainable ways to reuse old furniture instead of throwing it out. It’s time to roll up your sleeves and turn that old piece collecting dust into a showstopper that reflects your taste and creativity.
From budget-friendly transformations to eco-conscious upcycling, this article covers everything you need to know to paint your old furniture like new. Whether you’re working on a weekend project or planning a full room makeover, you’ll leave with inspiration, confidence, and the skills to bring any piece of furniture back to life.
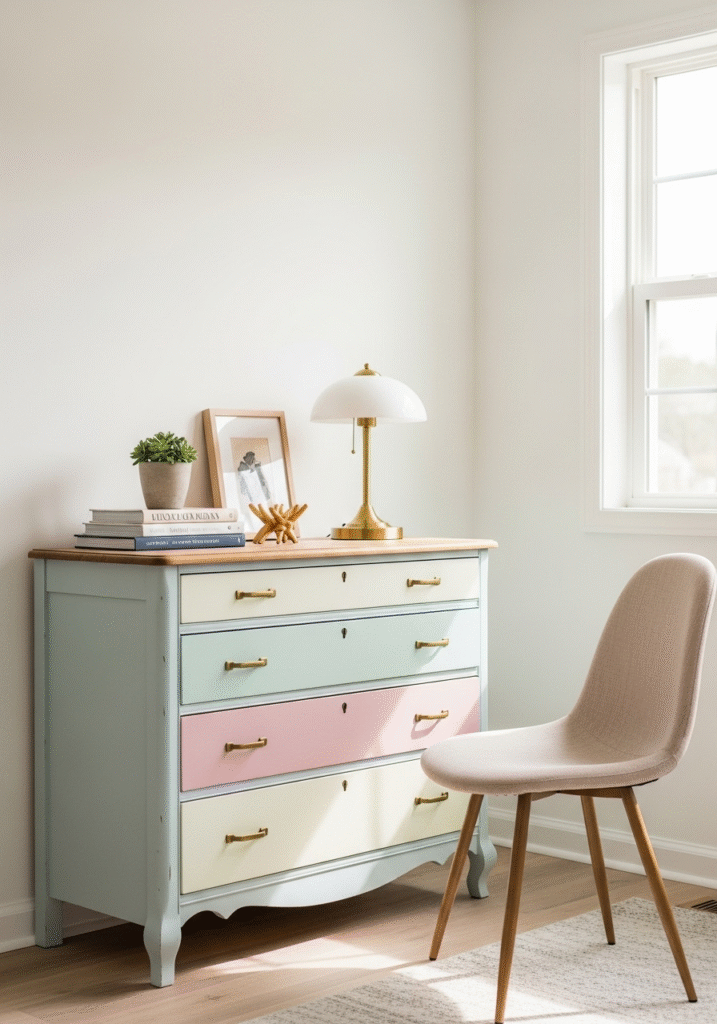
Why You Should Paint Your Old Furniture
Painting old furniture isn’t just a trend—it’s a creative, practical, and eco-conscious way to update your living space without breaking the bank. Whether you’re on a tight budget, aiming for a greener lifestyle, or simply wanting to add a personal touch to your home, repainting furniture offers a wide range of benefits. Let’s take a deeper look at why this DIY practice has become a favorite among homeowners, renters, interior decorators, and design lovers alike.
1. Budget-Friendly Makeover
One of the most compelling reasons to paint old furniture is the cost savings. Buying brand-new furniture can be quite expensive, especially when you’re furnishing an entire room or house. On the other hand, a small investment in sandpaper, brushes, and a can of paint can give you an entirely new-looking piece at a fraction of the price. It’s a cost-effective solution that allows you to stretch your decorating budget while still achieving beautiful, professional-looking results. Plus, it’s a great option for students, renters, or families trying to refresh their space without spending too much.
2. Eco-Friendly and Sustainable
In a world increasingly concerned with sustainability, reusing and repainting old furniture is a smart environmental choice. Instead of discarding your old furniture in landfills, painting helps extend its life and reduces overall waste. This practice cuts down on the demand for newly manufactured furniture, which often involves deforestation, energy-intensive production, and global shipping. By choosing to restore rather than replace, you’re making a responsible, earth-friendly decision that supports a greener planet.
3. Complete Creative Freedom
Another major advantage of painting furniture is the creative control it gives you. You’re not limited to what’s available in stores or online. You can choose from an endless array of paint colors, finishes, and techniques—from matte chalk paints to glossy enamels or distressed antique looks. Whether you want to match your furniture to a room’s color scheme or make a bold design statement, painting gives you the power to customize every detail to suit your taste and personality.
4. Preserve Sentimental and Heirloom Pieces
Many of us have old furniture pieces passed down from family members or items that hold personal memories. While these pieces might not always match your current decor, they don’t have to be thrown out or left in storage. Painting allows you to honor their sentimental value while updating them to fit your home’s style. That old wooden dresser from your grandparents or the vintage coffee table from your first apartment can become a meaningful centerpiece when given a modern refresh.
5. Learn and Grow Your DIY Skills
Painting furniture is also a fun and rewarding skill that you can continue to develop. Whether you’re a DIY beginner or someone looking to improve their techniques, every project teaches you something new—how to prep surfaces, choose the right primer, apply smooth coats, or experiment with stenciling and patterns. The confidence you gain from completing a furniture makeover can lead to more ambitious home improvement projects in the future.
6. Instant Home Transformation
Sometimes all it takes is one painted piece of furniture to transform the entire feel of a room. A brightly painted side table can add a pop of color to a neutral space, while a matte-black dresser can bring a sleek, modern edge to a bedroom. Painted furniture allows you to experiment with your interior design and freshen up your decor without undertaking a full renovation.
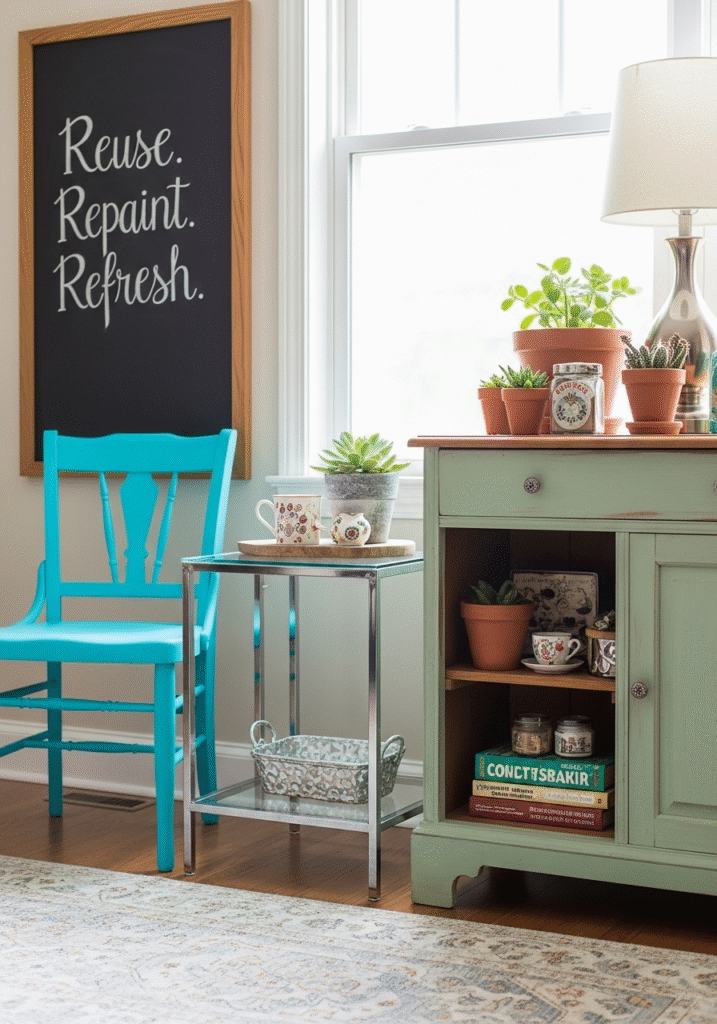
Tools and Materials You’ll Need
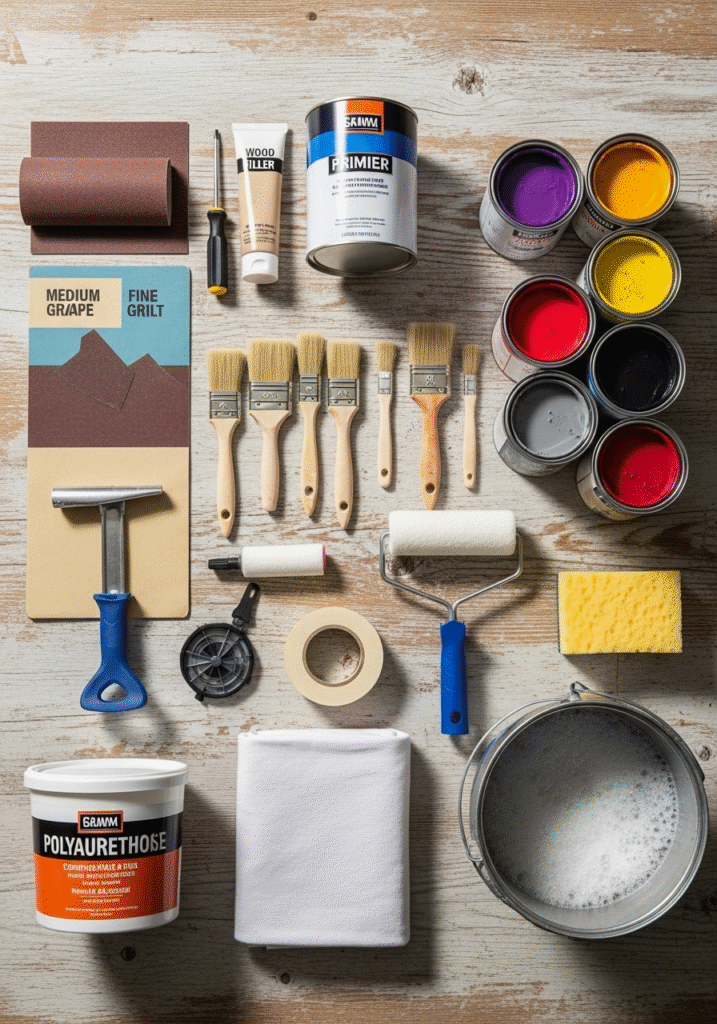
Before you dive into transforming your old furniture, it’s important to gather all the tools and materials you’ll need for a smooth and successful painting process. Having the right supplies on hand will not only make your work easier but also ensure a cleaner finish and longer-lasting results. Whether you’re a DIY novice or a seasoned furniture flipper, this checklist will guide you through every essential item to prepare like a pro.
1. Sandpaper (Medium and Fine Grit)
Sanding is a crucial step in prepping furniture for paint. It helps remove old finishes, smooth out rough surfaces, and create a texture that allows new paint to adhere properly. Use medium-grit sandpaper (like 120–150 grit) to strip away old paint or varnish, and follow with fine-grit sandpaper (220 grit or higher) for a smooth, paint-ready surface.
2. Screwdriver (To Remove Hardware)
Before you begin sanding or painting, it’s a good idea to remove all hardware, such as knobs, handles, and hinges. A basic Phillips or flat-head screwdriver will help you take off these components easily, preventing damage and making it easier to achieve clean lines and even coverage around the furniture’s edges.
3. Wood Filler (For Cracks, Holes, or Scratches)
If your furniture has any dents, deep scratches, nail holes, or cracks, use wood filler to patch them before painting. Once dry, sand the filled areas until they’re flush with the surface. This step ensures your final paint job looks flawless and professional.
4. Primer
Using a primer is key to ensuring your paint adheres well and lasts for years. It also helps block stains or discolorations from bleeding through the paint. Priming is especially important when painting dark wood or surfaces with a glossy finish. Choose a primer that suits your paint type (water-based or oil-based).
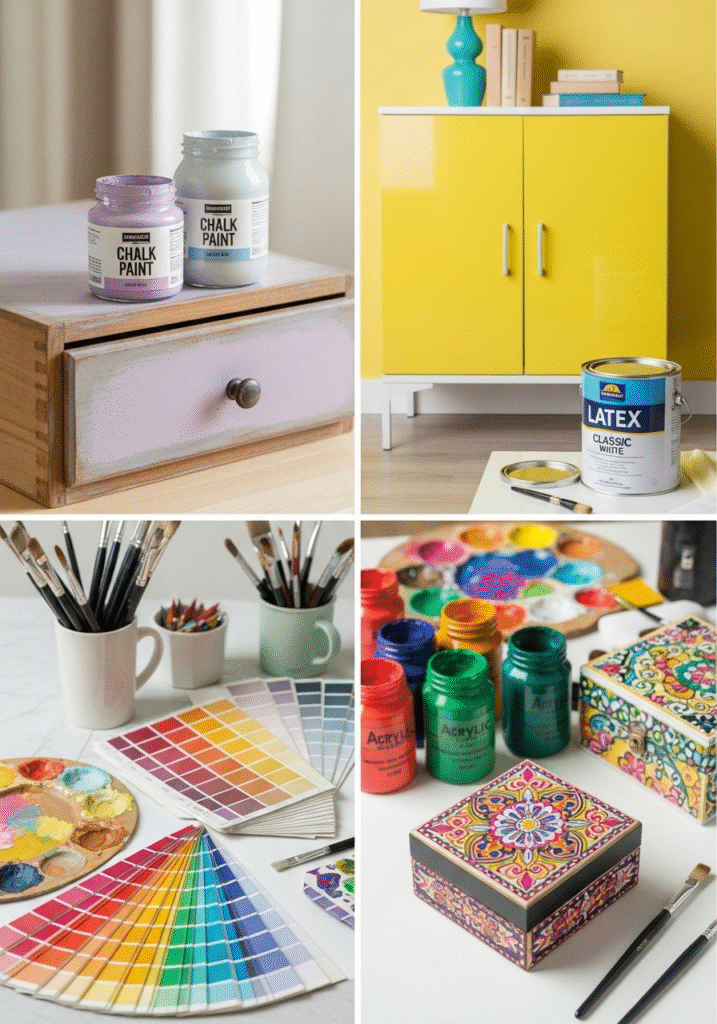
5. Paint (Latex, Chalk, or Acrylic)
There are several types of paint suitable for furniture, each with its own look and feel:
- Latex paint is affordable, dries quickly, and is easy to clean.
- Chalk paint gives a matte, vintage appearance and requires minimal prep work.
- Acrylic paint offers vibrant colors and a durable finish.
Select a paint type based on the look you want and the furniture’s purpose (e.g., high-traffic areas may need tougher finishes).
6. Paintbrushes and/or Rollers
Different parts of your furniture may require different applicators:
- Use angled brushes for corners, edges, and details.
- Foam rollers are ideal for large, flat surfaces and help avoid brush marks.
Investing in high-quality brushes and rollers can greatly improve the final result and reduce streaking or uneven coverage.
7. Drop Cloth or Newspaper
Protect your workspace by covering the floor with a drop cloth, old sheet, or layers of newspaper. This helps prevent paint drips or stains and makes cleanup much easier, especially if you’re working indoors.
8. Painter’s Tape
Use painter’s tape to mask off areas you don’t want to get paint on—such as drawer edges, glass panels, or hardware you couldn’t remove. It ensures clean, sharp lines and prevents accidental smudges.
9. Cleaning Supplies (Soap, Water, Cloth)
Before sanding or painting, always clean your furniture thoroughly. Dust, grease, and grime can prevent paint from sticking properly. Use a mild soap, warm water, and a clean cloth or sponge to wipe down the piece. Let it dry completely before moving on to the next step.
10. Protective Finish (Wax, Polyurethane, or Polycrylic)
To seal and protect your painted furniture, apply a top coat after the paint dries:
- Furniture wax is ideal for chalk-painted pieces and offers a soft, vintage sheen.
- Polyurethane provides a durable, glossy finish suitable for high-use items like tables.
- Polycrylic is a water-based alternative that’s easier to clean and less likely to yellow over time.
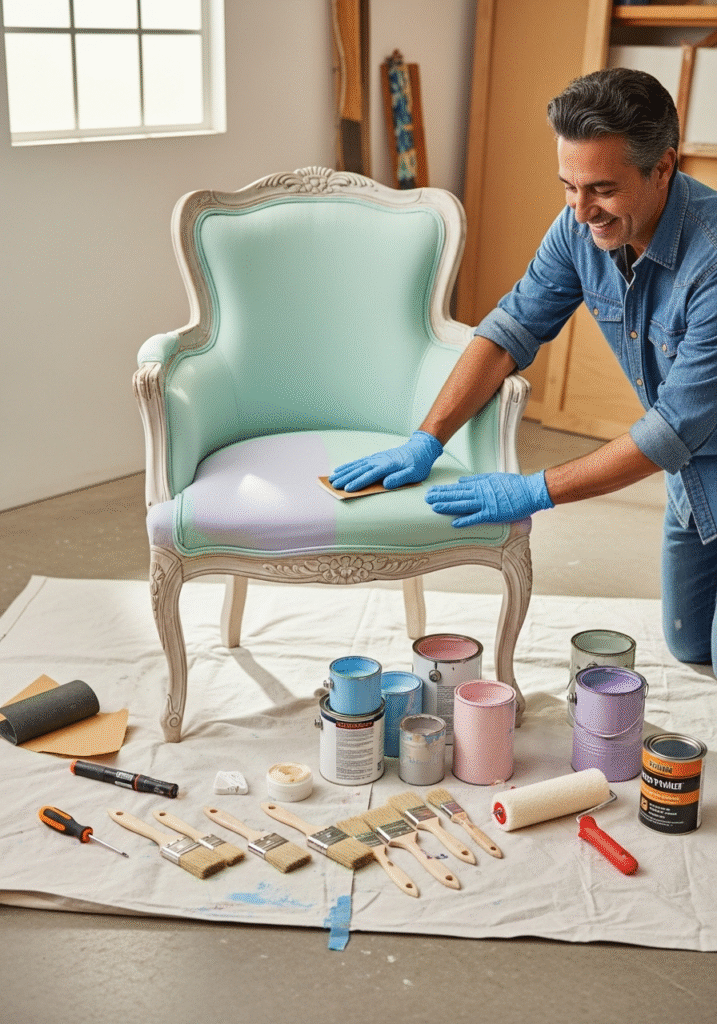
Step-by-Step Guide to Painting Furniture
Painting old furniture can be a deeply satisfying DIY project—but to achieve a polished, long-lasting result, it’s important to follow the right steps. Whether you’re restoring a family heirloom or giving a thrift-store find a stylish new life, this step-by-step guide will walk you through the entire process. From choosing the right piece to applying the finishing touches, each stage plays a critical role in creating a flawless makeover that looks store-bought.
Step 1: Choose the Right Furniture
Before pulling out your paintbrush, assess whether your furniture is a good candidate for painting. Solid wood pieces are the best choice, as they hold paint well and can withstand sanding. High-quality laminate can also work with proper preparation, but avoid cheap particle board, which may absorb moisture or crumble under pressure. Check the structure—look for sturdy joints, minimal water damage, and a smooth, cleanable surface. A well-built piece, even if outdated, is perfect for transformation.
Step 2: Clean the Surface Thoroughly
Clean furniture is essential for a successful paint job. Dirt, grease, and polish residue can prevent paint from adhering properly. Mix warm water with a mild soap or degreaser, then use a cloth or sponge to wipe down the entire surface. Focus on corners, handles, and carved areas where grime can hide. Let the piece dry fully before moving on—moisture trapped under paint can cause peeling or bubbling later.
Step 3: Remove Hardware and Accessories
Using a screwdriver, carefully remove all hardware such as knobs, handles, hinges, or drawer pulls. Taking these parts off allows you to paint evenly without awkward brushwork around obstacles. Label and store the hardware in a safe place so you can easily reattach it after painting. If you’re planning to replace the hardware, this is also the perfect time to measure and shop for updated pieces.
Step 4: Sand the Surface
Sanding is one of the most important prep steps. Use medium-grit sandpaper (around 120–150 grit) to gently scuff the surface. This helps remove old paint or glossy varnish and gives the new paint something to grip onto. For intricate or detailed furniture, consider using a sanding sponge that can get into small grooves. After sanding, wipe the furniture with a tack cloth or damp rag to remove all dust.
Step 5: Fill in Imperfections
Inspect the furniture for any visible cracks, holes, dents, or deep scratches. Use wood filler to patch these flaws, applying it with a putty knife. Once the filler dries completely (as per package instructions), sand the area smooth so it blends seamlessly with the rest of the surface. This step ensures that your final paint finish is even and professional-looking.
Step 6: Apply Primer
Primer is the foundation of any great paint job. It seals porous wood, blocks stains, and creates a uniform surface that enhances paint adhesion. Use a high-quality primer that matches your paint type (water-based or oil-based), and apply it in thin, even coats with a brush or roller. One coat is often sufficient, but dark or uneven wood may need a second layer. Let the primer dry fully before painting—rushing this step can lead to peeling or blotchiness.
Step 7: Start Painting
Now comes the fun part—painting! Choose a high-quality latex, acrylic, or chalk paint depending on your desired finish. Use a brush for detail work, corners, and edges, and a foam roller for large, flat areas. Apply the paint in thin, even layers, allowing each coat to dry completely before adding the next. Most projects require 2–3 coats for full coverage. Don’t overload your brush or roller—light layers dry faster and reduce the risk of streaks or drips.
Step 8: Add a Protective Finish
After your final coat of paint is completely dry (this may take 24–48 hours), apply a clear protective finish to seal your work and extend the furniture’s life. For a soft, vintage feel, use furniture wax—ideal for chalk paint. For a durable, glossy finish suitable for tabletops or dressers, choose polyurethane or polycrylic. Use a clean brush and apply the topcoat in even strokes. This finish protects against scratches, moisture, and daily wear.
Step 9: Reattach Hardware and Enjoy
Once all paint and protective coatings are fully cured (check the product’s instructions for curing times), reattach any hardware you removed. You can also take this opportunity to update old knobs with modern replacements for a fresh look. Now step back and admire your newly transformed piece—it’s ready to shine in your home!
Types of Paint for Furniture
Selecting the right type of paint is one of the most important decisions when transforming old furniture. The paint you choose will not only determine the final look of the piece but also how well it wears over time. From smooth modern finishes to rustic farmhouse vibes, each type of paint offers its own unique benefits, textures, and application methods. Below, we’ll explore the most popular types of furniture paint to help you choose the best fit for your next DIY makeover.
1. Chalk Paint – Vintage Charm with Minimal Prep
Chalk paint has become a favorite among DIYers for good reason. It has a matte, velvety finish that’s perfect for creating a shabby-chic or vintage aesthetic. One of the biggest advantages of chalk paint is that it requires very little surface preparation—in many cases, you can skip priming and sanding altogether, saving time and effort. It adheres well to most surfaces, including wood, metal, and laminate.
Chalk paint is ideal for those looking to achieve distressed or layered finishes. It’s also easy to apply and dries quickly, making it perfect for weekend projects. However, because it has a porous surface, a protective topcoat (like furniture wax or polyurethane) is necessary to seal the paint and prevent wear or moisture damage.
Best for: Antique or vintage furniture, decorative pieces, soft and rustic looks.
2. Latex Paint – Durable, Accessible, and Versatile
Your Attractive Heading
Latex paint is one of the most widely available and versatile options for furniture painting. It comes in a variety of finishes—flat, satin, semi-gloss, and gloss—allowing you to customize the final appearance based on your style preference. Latex paint is water-based, so it’s easy to clean up with just soap and water, and it’s also low in toxic fumes.
Thanks to its durability and flexibility, latex paint is an excellent choice for high-use furniture like dressers, desks, chairs, or cabinets. For best results, proper surface preparation (cleaning, sanding, and priming) is important. It works well with both a brush and roller, and most surfaces will need two to three thin coats for a smooth, even look.
Best for: Everyday furniture, bold color updates, modern styles, and high-traffic areas.
3. Acrylic Paint – Great for Small Projects and Detail Work
Acrylic paint is another water-based option that is popular for small furniture projects and detailed designs. It offers vibrant color payoff, dries quickly, and adheres well to many surfaces, including wood, plastic, and metal. Because of its thin consistency and fast drying time, acrylic paint is great for stenciling, decorative accents, and artistic furniture designs.
While acrylic paint is often used for craft projects, it can also work well on furniture—especially when paired with a good primer and sealed with a topcoat. It’s less thick than chalk or latex paint, so multiple layers may be required for full coverage on large surfaces. It’s also ideal if you’re planning to add hand-painted patterns, floral accents, or geometric designs.
Best for: Small furniture, accent pieces, artistic designs, and DIY decor.
Bonus: Milk Paint – An Eco-Friendly Option
Milk paint is a lesser-known but increasingly popular choice for those seeking an eco-friendly, non-toxic furniture paint. Made from milk protein (casein), lime, and natural pigments, it offers a chalky, rustic finish similar to chalk paint. It’s typically sold in powder form and mixed with water, which allows you to control the thickness.
Milk paint is perfect for creating aged, distressed looks and works especially well on raw wood. It requires a bonding agent when used on previously finished or glossy surfaces. If you love vintage farmhouse or cottagecore styles, milk paint is a beautiful, sustainable option.
Best for: Eco-conscious projects, vintage or distressed finishes, rustic and farmhouse decor.
Design Ideas and Inspiration
Painting furniture doesn’t have to mean sticking with a single, solid color. With the right design approach, your DIY project can become a stunning statement piece that reflects your personality and enhances your interior decor. Whether you’re going for bold and modern or soft and rustic, there are countless ways to breathe life into old furniture through color, texture, and artistic flair. Here are some stylish and inspiring design ideas to spark your creativity.
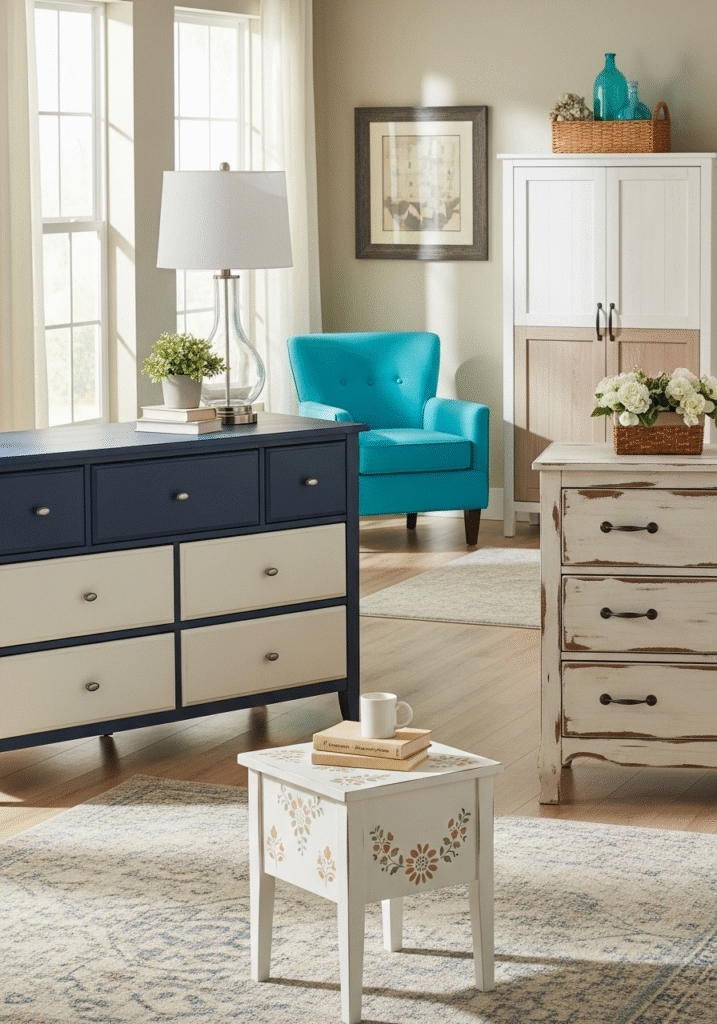
1. Two-Tone Design – Contrast That Pops
A two-tone finish is a stylish and easy way to add depth and contrast to furniture. One of the most popular methods is to paint the drawers, doors, or interior sections of a piece in a color that contrasts or complements the main body. For example, you might paint a dresser white and add navy-blue drawers for a nautical vibe, or pair a matte black body with brass-colored drawer faces for a sleek, modern look.
This technique works well on dressers, nightstands, bookshelves, or cabinets—basically anything with separable sections. You can use painter’s tape to achieve crisp edges between colors and even add metallic finishes for an extra layer of sophistication.
Perfect for: Modern, transitional, and eclectic styles.
2. Distressed Look – Vintage Vibes with Character
The distressed look is ideal for those who love shabby chic, farmhouse, or cottagecore styles. After painting your piece, you lightly sand edges, corners, and raised areas to reveal the original wood or a base color underneath. This mimics the natural wear-and-tear of vintage furniture and adds a cozy, well-loved charm.
To enhance the effect, consider layering two different paint colors—such as cream over gray—and then distressing the top layer to allow the undercoat to peek through. You can also use crackle medium for a weathered, antique texture.
Perfect for: Rustic decor, French country, vintage lovers.
3. Stencil Patterns – Add a Touch of Art
Stencils are a fantastic way to personalize your furniture with floral, botanical, mandala, or geometric designs. You can apply patterns to drawer fronts, tabletops, cabinet doors, or even the sides of furniture. All you need is a stencil, painter’s tape, and a stencil brush or foam roller.
Choose a subtle tone-on-tone design for a classy texture, or go bold with bright contrasts to create a focal point. For best results, wait until the base paint is fully dry before applying the stencil pattern. This is a great option if you want your furniture to feel custom and artistic.
Perfect for: Bohemian styles, kids’ rooms, statement pieces.
4. Bold Colors – Make a Statement
Don’t be afraid to go bold. Vibrant hues like teal, coral, mustard yellow, emerald green, or deep plum can transform even the simplest furniture into a showstopping centerpiece. Bright colors are particularly effective for accent pieces—such as a colorful coffee table in a neutral room or a bold dresser in an otherwise minimalist bedroom.
Pair bold furniture with complementary accessories or use it as a standalone pop of color to energize the space. Just make sure the paint finish is smooth and even—bright colors are less forgiving of imperfections, so extra prep and clean application are key.
Perfect for: Modern interiors, eclectic designs, and creative personalities.
5. Neutral Elegance – Timeless and Minimalist
For those who prefer a clean, timeless look, neutral tones like white, gray, beige, taupe, and soft greige offer endless appeal. These colors are perfect for creating a calm, minimalist aesthetic that fits into almost any interior design style. Neutrals also serve as the perfect backdrop for decorative knobs, metallic handles, or patterned hardware.
You can elevate a neutral-painted piece with a satin or semi-gloss finish, subtle stenciling, or even a tinted wax topcoat to give it a vintage wash. Neutrals are also great for layering textures—think soft linen throws, wicker baskets, or ceramic decor styled alongside your painted furniture.
Perfect for: Scandinavian, minimalist, modern farmhouse, and classic interiors.
Bonus Tip: Mix and Match Styles
You don’t have to stick to just one idea. Combine a bold color with stenciled accents or distress a two-tone piece for a vintage-modern hybrid look. The beauty of DIY furniture painting is the creative freedom it offers—you can experiment with styles until you find the perfect match for your space and taste.
Add functional charm to your walls by following our step-by-step guide on How to Build a Wooden Shelf at Home.
Common Mistakes to Avoid
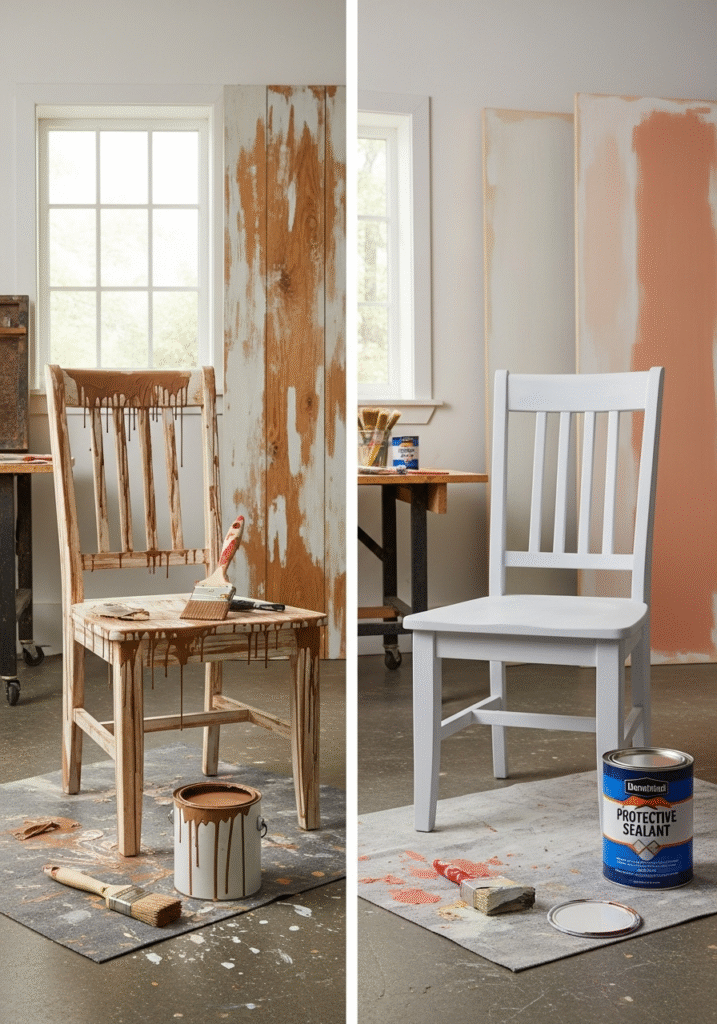
Painting old furniture is an enjoyable and rewarding DIY project—but it’s also easy to make mistakes that can affect the final look and durability of your work. Even small errors in preparation or technique can lead to bubbling, peeling, or uneven results that won’t stand the test of time. To help you avoid the most common pitfalls, here’s a detailed breakdown of the top furniture painting mistakes and how to prevent them.
1. Skipping the Sanding Step – Poor Paint Adhesion
One of the biggest and most common mistakes is skipping sanding altogether. While it might be tempting to save time, sanding is crucial for removing existing finishes and creating a textured surface that the new paint can cling to. This is especially true for glossy or varnished furniture, where paint can easily chip or slide off if the surface isn’t properly prepared.
Even if you’re using chalk or milk paint—which often claim to require minimal prep—lightly sanding the piece first will always improve paint adherence and lead to a longer-lasting finish.
Solution: Always sand your furniture before painting. Start with medium-grit (120–150) and finish with fine-grit (220) for a smooth surface.
2. Not Using Primer – Uneven Finish and Stains
Another critical mistake is skipping the primer. Primer not only helps paint stick better but also seals porous surfaces, prevents bleed-through from wood tannins, and creates a more even base for the color to shine. Painting over bare or dark-stained wood without priming can result in blotchy patches, discoloration, and uneven texture.
Using primer is particularly important when:
- Painting light colors over dark furniture
- Working with old, stained, or knotty wood
- Painting laminate or slick surfaces
Solution: Apply at least one coat of primer appropriate for your paint type. Allow it to dry completely before painting.
3. Applying Thick Coats of Paint – Drips and Uneven Texture
Thick layers of paint might seem like a shortcut, but they often result in drips, streaks, bubbles, or a rough texture. Additionally, thick coats take much longer to dry and are more prone to cracking or peeling over time.
Solution: Always apply thin, even layers of paint. It’s better to do 2–3 light coats than one heavy one. Let each coat dry completely before adding the next for a professional-looking finish.
4. Not Allowing Paint to Dry Between Coats – Sticky or Damaged Finish
Impatience is a common problem in DIY projects. Painting over a layer that hasn’t fully dried can lead to tacky surfaces, brush marks, and smudging. It can also interfere with proper curing, which means your paint might not harden correctly—and that can lead to damage or chipping later on.
Solution: Follow the paint manufacturer’s recommended drying time between coats. Most paints need 2–4 hours between coats, but factors like temperature and humidity can affect drying time. When in doubt, wait longer before applying another coat.
5. Ignoring the Finish/Protective Seal – Shorter Lifespan
Many beginners stop after the final coat of paint, thinking the job is done. But without a protective topcoat, your freshly painted furniture is vulnerable to scratches, stains, water damage, and general wear and tear—especially on high-use items like tables or dressers.
A finish like polyurethane, polycrylic, or furniture wax helps seal the paint, adds shine or matte effects, and ensures your work stays beautiful for years.
Solution: Always apply a topcoat once your final paint layer is fully dry and cured. Choose a finish based on your furniture type and desired look (e.g., glossy for a modern vibe, matte wax for vintage charm).
Final Tip: Rushing the Process Can Ruin the Project
The most important thing to remember is: take your time. Good results come from careful preparation, patience between steps, and attention to detail. Whether you’re painting a small side table or a large cabinet, giving each stage the proper time and care will lead to a durable, professional-quality finish you can be proud of.
Final Thoughts
Painting old furniture is more than just a home improvement task—it’s a creative journey that blends craftsmanship, design, and sustainability. Whether you’re updating a family heirloom, revamping a flea market find, or simply refreshing a tired piece in your home, this DIY process allows you to express your personal style while adding functional beauty to your living space.
With just a bit of preparation, the right tools, and a thoughtful approach, you can completely transform outdated, overlooked, or worn-out furniture into something fresh, modern, and uniquely yours. From choosing the perfect paint type and color scheme to applying a smooth protective finish, each step in the process is an opportunity to learn, experiment, and grow your DIY skills.
This project isn’t just budget-friendly—it’s also deeply rewarding. There’s something truly satisfying about stepping back and seeing a once-forgotten table or dresser turned into a standout piece that enhances your home. And with so many design options available—like two-tone finishes, bold colors, distressed styles, and custom stenciling—you’re only limited by your imagination.
Even if you’re a beginner, don’t let fear hold you back. The techniques shared in this guide are approachable for all skill levels, and the most important ingredients are patience and creativity. You don’t need expensive tools or professional training—just the willingness to try something new and the vision to see potential where others might see junk.
So, the next time you consider tossing out an old piece of furniture, pause and think of the possibilities. That outdated coffee table or chipped cabinet might be just a coat of paint away from becoming your favorite piece in the house.
In the end, painting furniture is more than just a DIY project—it’s a chance to tell a story, preserve memories, and create something truly special with your own two hands.

Pingback: How to Build a Wooden Shelf at Home: A Step-by-Step DIY Guide for Beginners - pademoluxury.com