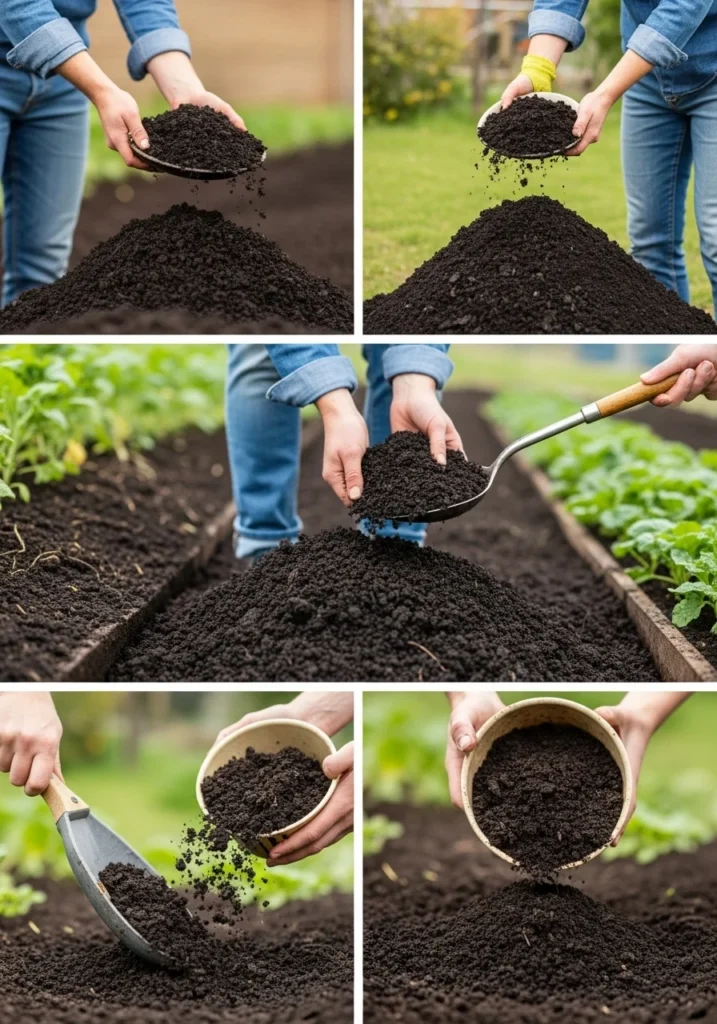
Introduction
In today’s environmentally conscious world, sustainable living practices are more important than ever. One of the most effective and accessible ways to reduce your household waste and contribute positively to the environment is by making your own organic compost at home. Composting not only minimizes the amount of trash sent to landfills, but it also transforms everyday kitchen scraps and garden waste into nutrient-rich soil that can significantly enhance the health and productivity of your garden, plants, or indoor pots.
Home composting is a natural process that breaks down organic materials—such as vegetable peels, fruit scraps, coffee grounds, dry leaves, and even cardboard—into a dark, crumbly substance known as compost or “black gold” due to its immense value to gardeners. This natural fertilizer is packed with nutrients that improve soil structure, support beneficial microbes, and help plants grow stronger without the need for chemical additives.
One of the biggest advantages of composting is its versatility. You don’t need a large garden or outdoor space to get started. Whether you live in a suburban home with a backyard, an urban apartment with a balcony, or even in a high-rise with limited space, there are composting solutions that can work for you—from simple compost bins and tumblers to more compact indoor options like vermicomposting (using worms) or Bokashi systems.
This comprehensive guide is designed to walk you through every step of the composting journey. You’ll learn the fundamentals of composting, the difference between green and brown materials, how to maintain the right moisture and aeration balance, and what items to avoid putting in your compost pile. We’ll also cover various composting methods and provide practical advice for beginners, as well as troubleshooting tips to address common problems like foul odors or slow decomposition.
By the end of this guide, you’ll have all the knowledge and confidence you need to start making your own organic compost at home. Not only will you be reducing your environmental footprint, but you’ll also be creating a valuable resource that enhances plant health, saves money on store-bought fertilizers, and promotes a more sustainable way of living.
Let’s dive in and discover how easy and rewarding it can be to turn your kitchen and garden waste into something truly beneficial for the planet—and for you.
What is Organic Compost?
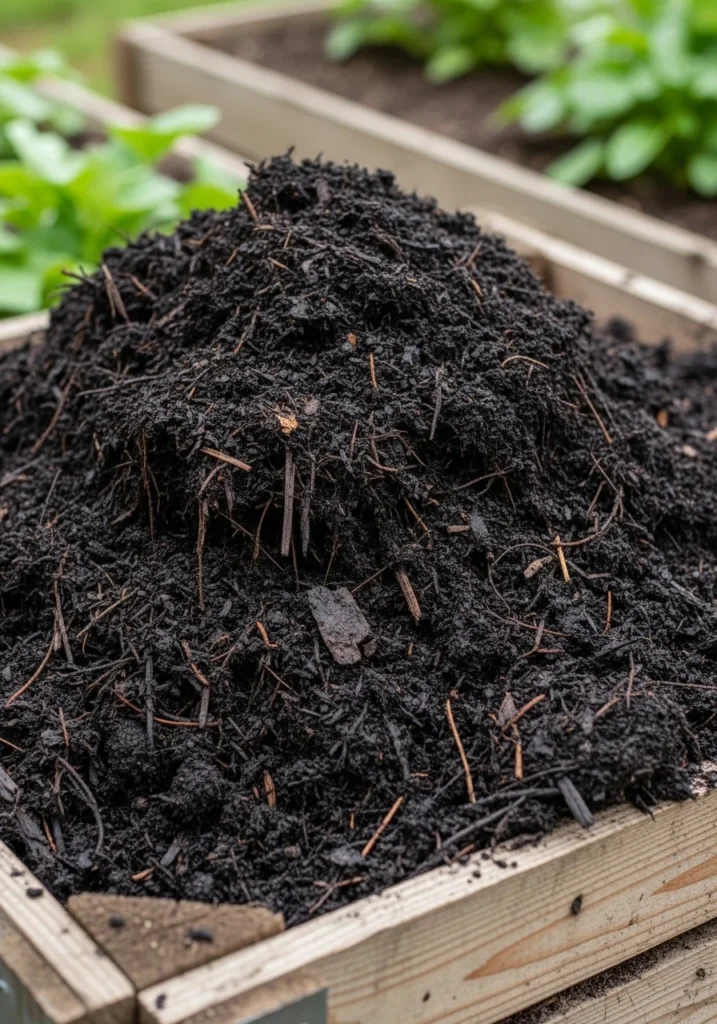
Organic compost is a naturally produced, nutrient-rich, dark, and crumbly material formed through the biological decomposition of organic matter. It is created by recycling everyday biodegradable waste—such as fruit and vegetable peels, coffee grounds, eggshells, grass clippings, dry leaves, small branches, and even paper products—into a valuable soil amendment. This process occurs through the activity of microorganisms, fungi, and sometimes worms, which break down the materials in the presence of oxygen and moisture over time.
At its core, composting mimics the natural life cycle in forests and wild ecosystems, where organic matter continuously falls to the ground and decomposes, returning nutrients to the soil. The end product—known as compost or humus—is rich in essential nutrients like nitrogen, phosphorus, and potassium, as well as beneficial microorganisms that enhance soil structure and promote healthy plant growth.
Organic compost plays a crucial role in sustainable gardening and agriculture. When added to soil, it improves soil aeration, water retention, and drainage, while also balancing pH levels and stimulating root development. Unlike synthetic fertilizers, which can degrade soil over time and cause harmful runoff, compost nourishes the earth in a natural, non-toxic way and helps regenerate degraded soils.
Compost also serves as a natural pest and disease suppressant. The beneficial bacteria and fungi present in mature compost help outcompete harmful pathogens in the soil, reducing the need for chemical pesticides and fungicides. Furthermore, composting reduces the amount of waste sent to landfills, lowering greenhouse gas emissions such as methane, and contributes to a circular, zero-waste lifestyle.
There are various types of composting methods—such as cold composting, hot composting, vermicomposting (using worms), and Bokashi (fermentation-based composting)—each suitable for different living situations and needs. Whether managed in a backyard pile, a compost bin, or a compact kitchen composter, the process remains the same: turning waste into a resource.
In summary, organic compost is far more than just decomposed waste. It’s a powerful, eco-friendly tool for enriching soil, supporting sustainable agriculture, and reducing our environmental footprint. By embracing composting, individuals and communities take a proactive step toward a healthier planet—closing the loop between consumption and regeneration.
Benefits of Making Compost at Home
Composting at home offers a wide range of environmental, economic, and personal benefits that make it one of the most impactful actions individuals and families can take to live more sustainably. By transforming everyday kitchen scraps and garden clippings into rich, organic compost, you’re not only reducing the volume of waste sent to landfills, but you’re also creating a valuable resource that supports healthy soil and plant life.
One of the most immediate benefits of home composting is that it reduces kitchen and garden waste. Food scraps, coffee grounds, eggshells, fruit and vegetable peels, grass clippings, dried leaves, and small twigs—all of these materials that would otherwise contribute to landfill overflow—can be repurposed into compost. This simple habit significantly lowers the amount of household waste you generate, reducing strain on municipal waste systems and helping to minimize methane emissions from landfill decomposition.
In addition to waste reduction, composting improves soil structure and fertility. Organic compost enhances the texture and quality of soil by increasing its porosity, allowing roots to grow more easily and enabling air and nutrients to circulate efficiently. It enriches the soil with essential nutrients like nitrogen, phosphorus, potassium, and beneficial microorganisms, which are critical for healthy plant growth.
Another key benefit is that compost increases water retention in soil. Compost-enriched soil has improved capacity to absorb and retain moisture, meaning plants require less frequent watering. This not only conserves water but also makes your garden or landscape more resilient during periods of drought or dry weather.
Composting also promotes healthy plant growth by providing a steady, natural supply of nutrients and supporting the development of strong root systems. Plants grown in compost-rich soil tend to be more vigorous, produce higher yields, and are more resistant to pests and diseases. This helps reduce the need for chemical interventions that can harm beneficial insects and soil organisms.
Importantly, home composting reduces dependency on chemical fertilizers. Synthetic fertilizers may offer a quick fix for nutrient-deficient soils, but they can cause long-term harm to soil health and pollute local water systems through runoff. Compost offers a safer, more sustainable alternative that feeds the soil rather than simply feeding the plant.
Beyond the garden, composting is environmentally friendly and cost-effective. It reduces your carbon footprint by lowering greenhouse gas emissions, cuts down on waste collection costs, and eliminates the need to purchase commercial soil amendments or fertilizers. It’s a simple, low-cost practice with high environmental return.
Ultimately, by composting at home, you are taking a proactive step toward supporting a healthier planet. You’re closing the loop in your household’s consumption cycle, turning waste into a resource, and fostering a deeper connection to nature. Whether you’re an avid gardener, an apartment dweller with potted plants, or simply someone who cares about the environment, composting is a rewarding habit that benefits both you and the world around you.
Essential Ingredients for Composting
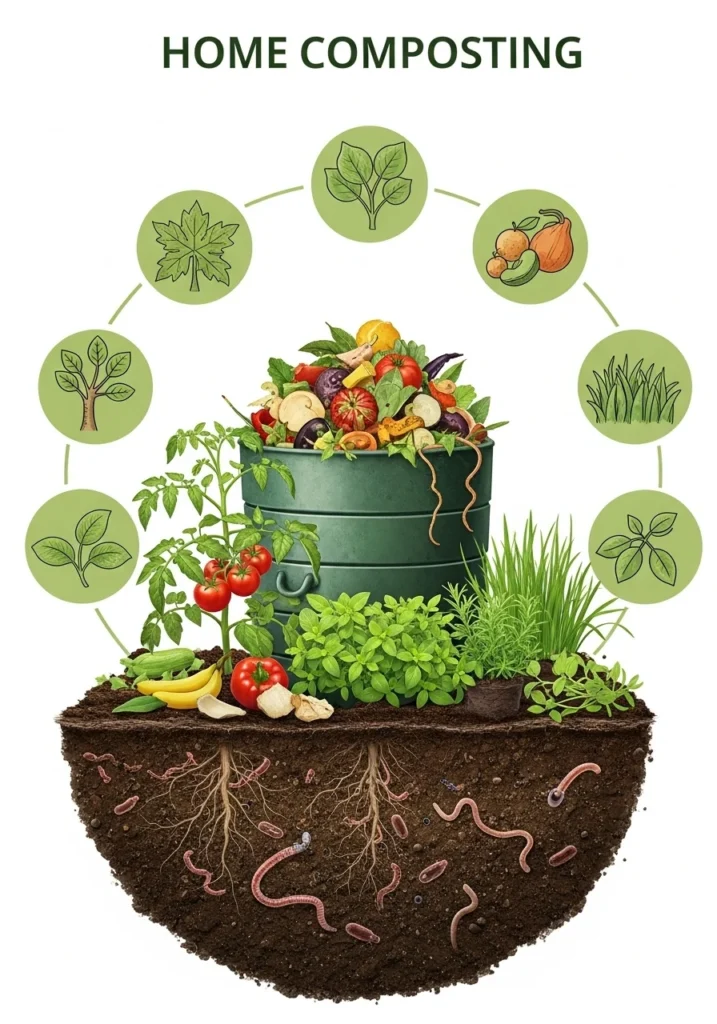
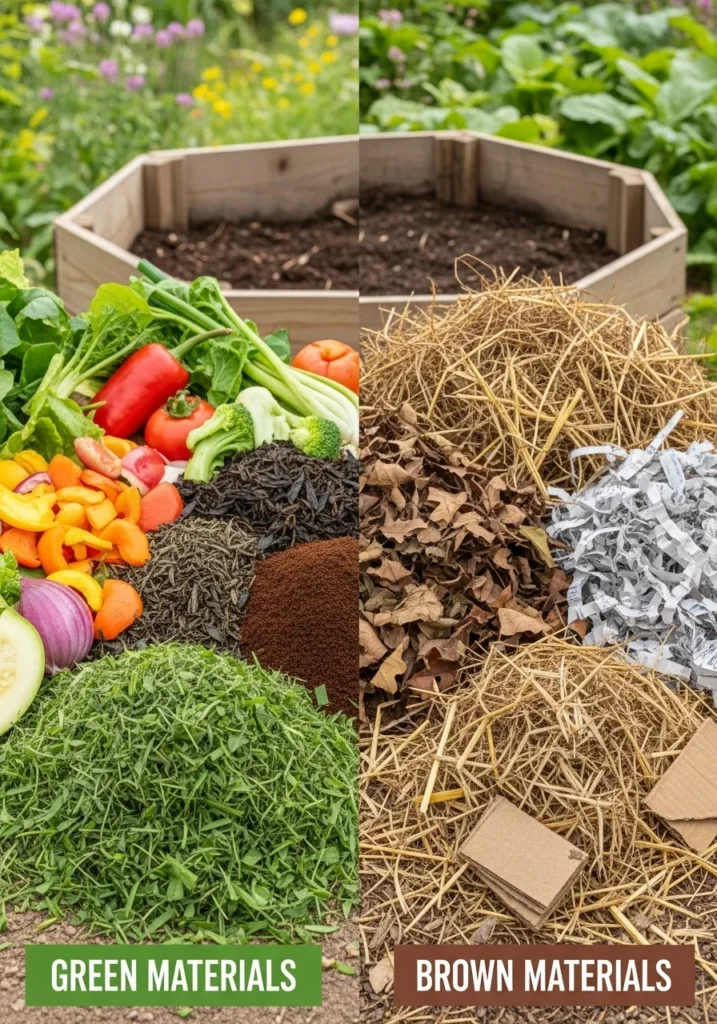
To create effective and healthy compost at home, it’s essential to understand the balance between two key types of organic materials: green (nitrogen-rich) and brown (carbon-rich). These materials play distinct but complementary roles in the composting process. Getting the ratio right between them ensures that decomposition occurs efficiently, without unpleasant odors or slow breakdown.
Green Materials (Nitrogen-rich):
Green materials are moist, soft, and rich in nitrogen. They serve as the protein source for the microbes that break down organic matter and help generate the heat needed to accelerate the composting process. These materials also provide moisture, which is essential for microbial activity.
Common green materials include:
- Fruit and vegetable peels – Ideal kitchen scraps that break down quickly and add valuable nutrients.
- Coffee grounds and tea leaves – Not only nitrogen-rich but also help improve the texture of the compost.
- Grass clippings – Freshly cut grass is high in nitrogen and decomposes quickly; however, use in moderation to avoid matting.
- Fresh leaves – Still green or moist, they add both nitrogen and moisture.
- Food scraps (excluding meat and dairy) – Cooked vegetables, bread, pasta, and rice can be composted in small amounts, but avoid animal products to prevent odor and pests.
Brown Materials (Carbon-rich):
Brown materials are dry, fibrous, and high in carbon, serving as the energy source for composting organisms. They help absorb excess moisture from green materials and improve air circulation within the compost pile, preventing it from becoming soggy or compacted.
Common brown materials include:
- Dry leaves – One of the most abundant and effective brown materials available seasonally.
- Cardboard – Uncoated cardboard or paperboard (like toilet paper rolls) adds bulk and structure.
- Shredded newspaper – Ink used in newspapers is generally non-toxic and safe for compost; be sure to shred it to aid decomposition.
- Sawdust (untreated) – Excellent carbon source, but should be used sparingly and mixed well.
- Egg cartons (non-glossy paper type) – Tear into small pieces for faster breakdown.
The Ideal Composting Ratio:
The ideal ratio for most home composting systems is roughly 2 to 3 parts brown materials to 1 part green materials by volume. This balance creates the optimal environment for microorganisms to thrive and decompose materials efficiently. Too many green materials can make the compost wet and smelly (due to excess nitrogen), while too many browns can slow down decomposition (due to insufficient nitrogen and microbial activity).
Maintaining this balance also helps regulate temperature, moisture, and airflow in your compost pile, all of which are key to successful composting. Turning the pile regularly will further help mix materials and introduce oxygen, speeding up the breakdown process.
In summary, understanding and maintaining the right mix of green and brown materials is the foundation of successful composting. By feeding your compost bin a balanced “diet,” you’re ensuring that microbes can do their job effectively, turning waste into nutrient-rich, garden-ready compost in as little as a few weeks.
Tools and Supplies You Need
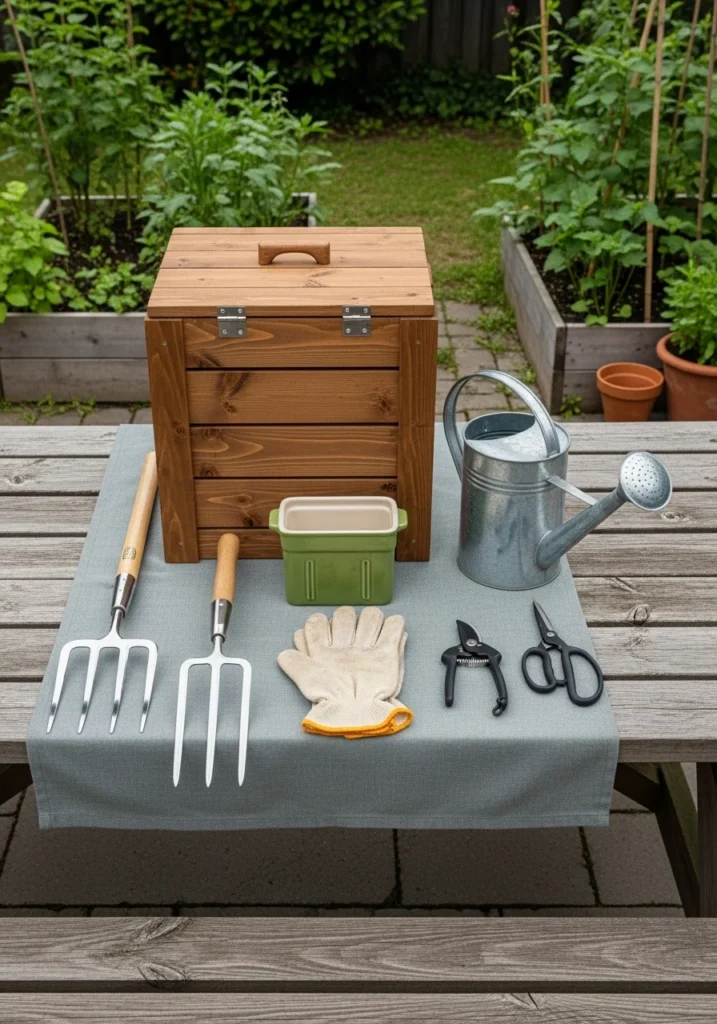
Getting started with composting at home is easy and affordable, especially when you have the right tools and materials on hand. While composting is a natural process that doesn’t require high-tech equipment, having a few basic items will help you set up an efficient, clean, and manageable composting system—whether you’re working with a backyard pile or a small apartment bin.
Here’s a detailed look at the essential items you’ll need to begin your composting journey:
1. Compost Bin or Container
Your composting setup starts with a designated compost bin or container, which can be made from plastic, metal, or wood. There are various options depending on your available space and preference:
- Outdoor compost bins are great for backyards and can range from simple DIY wooden frames to rotating compost tumblers that speed up decomposition.
- Indoor compost bins are compact, odor-controlled containers suitable for balconies, patios, or even under the kitchen sink.
Choose a bin with proper ventilation and drainage to encourage healthy microbial activity and prevent odor or soggy conditions.
2. Kitchen Scrap Container
To make daily composting easy and convenient, use a kitchen scrap container or countertop compost pail. These small containers are used to collect food scraps throughout the day—such as fruit and vegetable peels, coffee grounds, eggshells, and more—before transferring them to your main compost pile or bin. Many containers come with charcoal filters to neutralize odor and are designed to be easily washable.
3. Garden Fork or Compost Aerator
Proper aeration is key to healthy composting. A garden fork, pitchfork, or a specialized compost aerator helps you regularly turn and mix your compost pile, ensuring that oxygen reaches all parts of the bin. Aerating the compost promotes faster decomposition, reduces the risk of foul odors, and maintains a balanced environment for microbes to thrive.
4. Gloves (Optional)
While not absolutely necessary, gardening gloves are helpful when handling organic waste, especially if you’re turning piles, adding garden debris, or managing compost with your hands. Gloves protect against dirt, sharp twigs, or pests and make the composting process cleaner and more comfortable.
5. Water Source
Compost needs moisture to break down properly—not too dry, not too wet. A watering can, garden hose, or spray bottle is useful for maintaining the right moisture level in your compost. The goal is to keep your pile feeling like a damp sponge. Dry compost slows down microbial activity, while overly wet compost can become compacted and smelly.
6. Shredder or Scissors
To help speed up the composting process, it’s beneficial to cut or shred larger items before adding them to the pile. A simple pair of scissors works well for soft kitchen scraps, while a paper shredder can be used for newspapers, cardboard, or egg cartons. Smaller pieces decompose more quickly and evenly, creating a finer finished compost.
Step-by-Step Guide to Making Organic Compost at Home
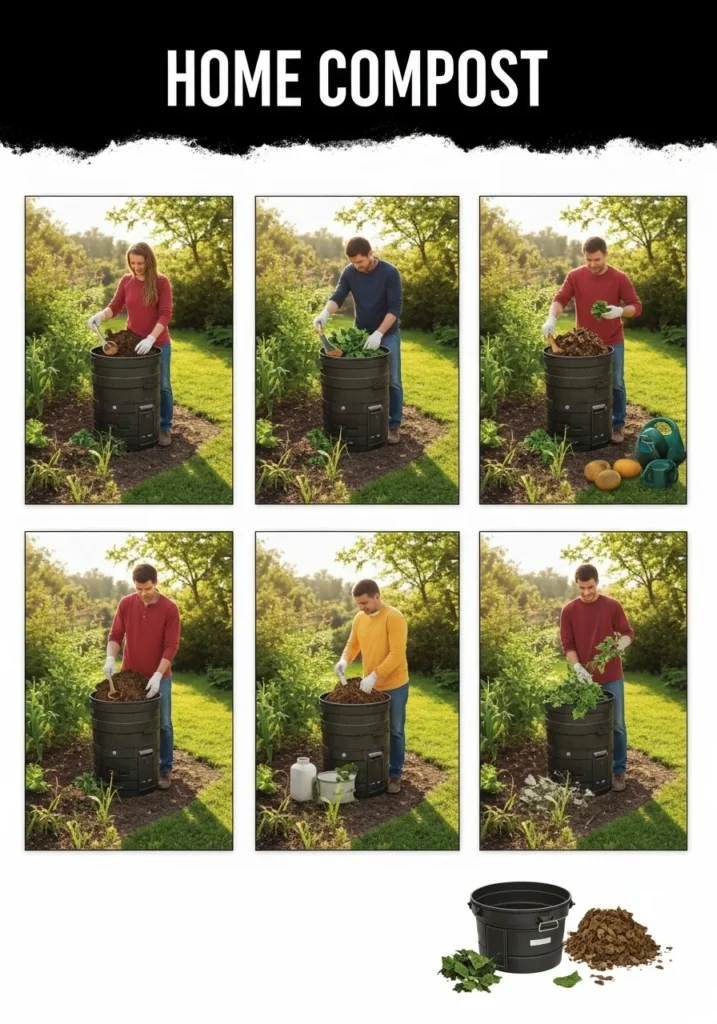
Composting is a simple yet powerful practice that transforms your everyday kitchen and garden waste into rich, fertile compost—a natural soil enhancer that promotes plant health and supports a more sustainable lifestyle. Here’s a detailed, step-by-step guide to help you start composting effectively at home, whether you’re working in a backyard, on a balcony, or in a small urban space.
Step 1: Choose a Compost Bin or Pile
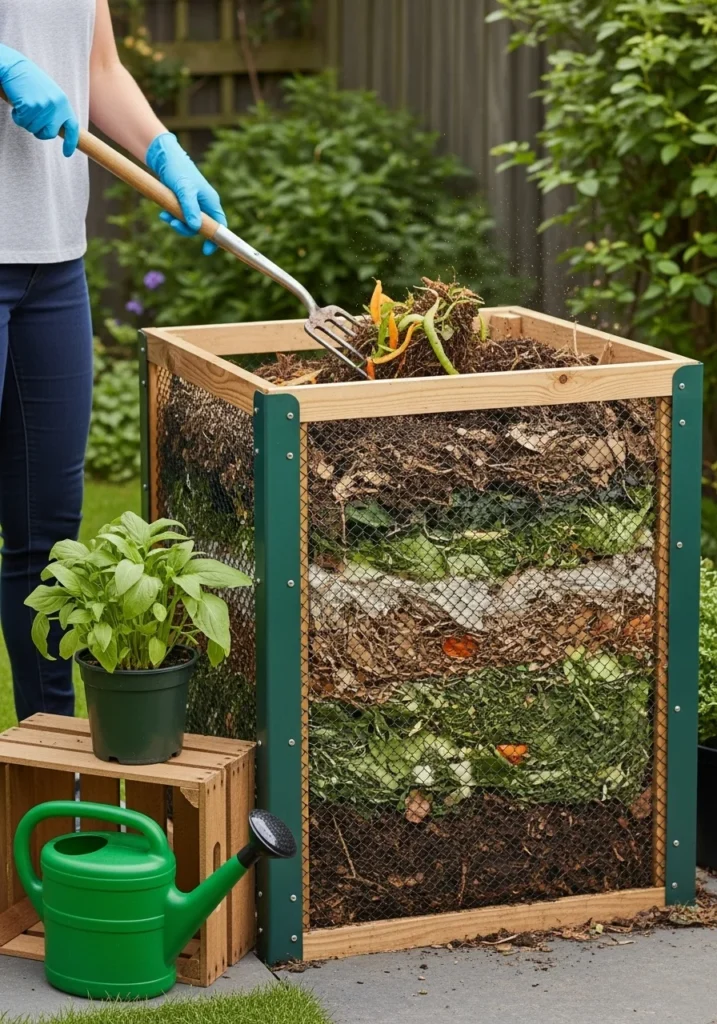
To begin, decide where and how you want to compost. You can either purchase a ready-made compost bin—available in various sizes and materials—or build your own using items like a plastic drum, wooden crate, or wire mesh enclosure. If you have ample space, a simple compost pile directly on the ground can work just as well.
Tip: Ensure your compost bin has adequate air holes or slits for ventilation and drainage. Good airflow helps speed up decomposition and prevents anaerobic (smelly) conditions. Bins with removable lids or access doors make it easier to turn the compost and harvest the finished product.
Step 2: Select the Right Location
Location plays a key role in the effectiveness of your composting system. Place your compost bin or pile in a shaded or partially sunny area that receives good air circulation but is protected from strong winds. Avoid placing it in low-lying spots where water tends to collect, as excess moisture can hinder decomposition and create foul odors.
A flat, well-drained surface such as bare soil is ideal, as it allows beneficial microbes, insects, and worms from the ground to enter the pile and aid in the composting process.
Step 3: Add Green and Brown Materials
Start by adding a layer of brown materials (carbon-rich), such as dry leaves, shredded newspaper, or cardboard. These materials improve airflow and create a good base. Then, add a layer of green materials (nitrogen-rich), such as fruit peels, vegetable scraps, coffee grounds, or grass clippings.
Continue alternating layers of green and brown materials as you add more waste. A good rule of thumb is to aim for a 2:1 ratio of browns to greens. This balance provides both the energy and moisture needed for microorganisms to efficiently break down the materials.
Avoid adding:
- Meat, dairy, or oily foods (attract pests and cause odor)
- Pet waste (can contain harmful pathogens)
- Treated wood or glossy paper (contains chemicals)
Step 4: Maintain Proper Moisture
Composting requires the right level of moisture to support microbial activity. The ideal moisture level is similar to that of a wrung-out sponge—damp but not dripping. If your compost pile becomes too dry, decomposition slows down. Add a little water or more green materials to moisten it.
If the pile becomes too wet or soggy, it may begin to smell. In that case, mix in more dry brown materials such as shredded cardboard, newspaper, or straw to absorb the excess moisture and restore balance.
Step 5: Turn the Pile Regularly
To keep your compost healthy and active, it’s important to aerate it every 7 to 10 days. Use a garden fork, shovel, or compost aerator to turn the materials from the outside toward the center and vice versa. This process introduces oxygen, which is vital for aerobic decomposition and helps prevent foul odors caused by anaerobic conditions.
Turning also redistributes moisture and heat, allowing for more even and faster decomposition of all materials within the pile.
Step 6: Wait and Harvest
Depending on your climate, material mix, and how often you turn the pile, your compost will typically be ready in 6 to 12 weeks. Finished compost is dark brown or black, crumbly, and smells like fresh earth. It should be free from recognizable food scraps or yard waste.
Before using it, sift or screen your compost to remove large or partially decomposed pieces. These can be returned to the pile for further breakdown. Store the finished compost in a cool, dry place or apply it directly to your garden beds, potted plants, or lawn as a natural fertilizer.
What You Can and Can’t Compost
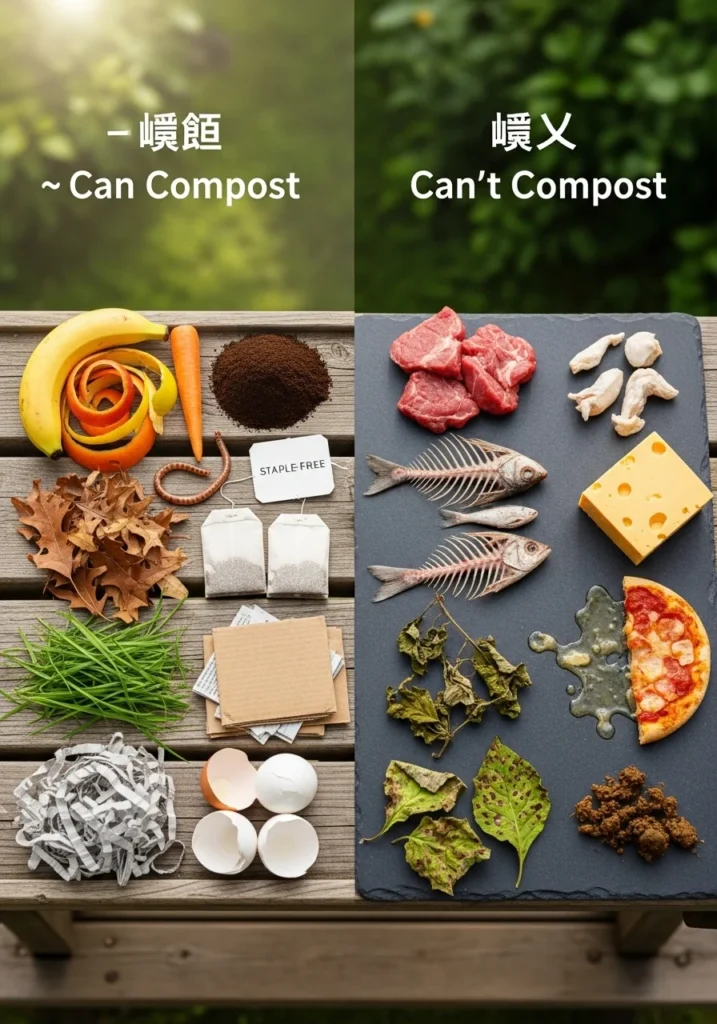
When starting a home composting system, knowing what you can and can’t compost is essential for success. Composting works best when the right organic materials are combined in a balanced way to support microbial activity, speed up decomposition, and prevent problems like foul odors, pests, or harmful pathogens.
Here’s a detailed breakdown of materials that are safe to compost and those that should be kept out of your compost bin, along with the reasons why.
What You Can Compost
These materials are ideal for composting and help create nutrient-rich compost that’s safe and effective for your garden or plants:
1. Fruit and Vegetable Peels
These are among the most common and beneficial green materials. Banana peels, apple cores, carrot tops, and other raw food scraps decompose quickly and add nitrogen and moisture to your pile.
2. Coffee Grounds and Tea Bags (without Staples)
Used coffee grounds are rich in nitrogen and also slightly acidic, making them a valuable addition to most compost piles. Tea bags are compostable too, but be sure to remove any plastic staples or synthetic materials first.
3. Dry Leaves and Grass Clippings
These are excellent carbon (brown) and nitrogen (green) sources. Dry leaves add bulk and improve airflow, while fresh grass clippings add moisture and nitrogen. Use grass clippings in moderation to prevent matting.
4. Shredded Paper and Cardboard
Plain newspaper, paper towels, paper bags, and cardboard (non-glossy, uncoated) are great brown materials that provide carbon and absorb excess moisture. Always shred these items before adding them to your pile for faster breakdown.
5. Crushed Eggshells
While not a major nutrient source, eggshells add calcium to compost and help balance pH levels. Crushing them into smaller pieces speeds up decomposition.
What You Should Not Compost
Some materials can disrupt the composting process, attract pests, or introduce harmful bacteria. Avoid adding the following:
1. Meat, Bones, and Fish Scraps
These items decompose very slowly and tend to attract rodents, flies, and maggots. They also produce strong odors, which can make your compost pile unpleasant and difficult to manage.
2. Dairy Products (Milk, Cheese, Yogurt)
Like meat, dairy items spoil quickly and cause foul smells. They can also disrupt the microbial balance in your pile and invite unwanted pests.
3. Oily or Greasy Food Waste
Cooking oils, butter, salad dressings, and greasy leftovers can coat other materials, reducing oxygen flow and slowing decomposition. Fats also attract animals and may create anaerobic (smelly) conditions.
4. Diseased or Pest-Infested Plants
Composting sick plants can introduce fungal spores, bacteria, or insects into your finished compost, which could then spread to your garden. If you’re not hot composting (which reaches high enough temperatures to kill pathogens), avoid adding these materials.
5. Pet Waste (Dogs, Cats, etc.)
Pet waste may contain harmful parasites, bacteria (like E. coli), or viruses that are not always eliminated through standard composting. It also produces strong odors and poses health risks if compost is used on edible plants.
Final Tips:
- When in doubt, stick to raw, plant-based materials that are free from oils, chemicals, or preservatives.
- Avoid adding synthetic items, including plastic-lined tea bags, coated paper, glossy magazines, or chemically treated wood.
- Always chop or shred materials into smaller pieces to speed up the composting process.
- Regularly turn your pile and maintain a healthy moisture balance to keep decomposition active and odor-free.
Common Composting Problems and How to Fix Them
While composting is a relatively simple and natural process, it can occasionally run into problems—especially for beginners. Issues such as foul smells, pest infestations, or slow decomposition are usually signs that your compost pile is out of balance. Fortunately, most of these problems are easy to fix once you understand their root causes.
Here’s a detailed guide to help you identify and solve the most common composting issues:
Problem: Foul Smell (Rotten or Sour Odor)
Cause:
A foul or rotten smell typically indicates that your compost pile has too much green or wet material (nitrogen-rich components) and not enough brown material (carbon-rich components). This imbalance leads to a lack of oxygen and the development of anaerobic conditions, which produce bad odors.
Solution:
To fix this, add more brown materials such as shredded newspaper, dry leaves, cardboard, or sawdust. These materials absorb excess moisture and restore the carbon-to-nitrogen ratio. Additionally, turn the pile thoroughly to introduce oxygen and restart aerobic decomposition. Regular aeration prevents odor buildup.
Problem: Compost Pile Not Heating Up
Cause:
If your compost pile remains cool and isn’t breaking down efficiently, it may be due to a lack of nitrogen-rich (green) materials or insufficient moisture. Microbial activity generates the heat needed for decomposition, and without the right conditions, this process slows down or stalls entirely.
Solution:
To activate your compost pile, add more nitrogen-rich materials like vegetable scraps, coffee grounds, or grass clippings. These feed the microbes that generate heat. Also check the moisture level—if the pile is dry, sprinkle some water to help kickstart microbial activity. Ensure the pile is large enough to retain heat (at least 3×3 feet is ideal for hot composting) and turn it regularly to distribute materials evenly.
Problem: Compost Is Too Dry
Cause:
Dry compost results from too many brown materials and not enough moisture or green materials. A lack of moisture slows or stops the composting process altogether, as microbes need a damp environment to function properly.
Solution:
If your compost pile feels dusty or crumbly, lightly sprinkle water over the pile while turning it to ensure the moisture distributes evenly. The pile should be as moist as a wrung-out sponge. You can also add more moist green materials like fruit and vegetable scraps or coffee grounds to increase moisture content naturally.
Problem: Flies or Pests (Rodents, Ants, etc.)
Cause:
Insects and small animals are often attracted to compost piles where food scraps are left exposed on the surface. Strong-smelling items like fruit peels or cooked food may attract flies, and exposed materials can become a buffet for rodents if not managed correctly.
Solution:
Always bury fresh food scraps beneath a layer of brown materials like dry leaves or shredded newspaper. This helps mask odors and discourages pests. Keep your bin properly closed or covered, and avoid adding meat, dairy, or greasy foods that are known to attract animals. Turning the pile regularly also helps deter pests by disrupting their habitat.
Final Tip:
Regularly monitoring your compost’s texture, moisture, temperature, and smell can help you catch small issues before they become big problems. Composting is a learning process, and occasional hiccups are normal. With a bit of observation and adjustment, you’ll be producing healthy, high-quality compost in no time.
Tips to Speed Up the Composting Process
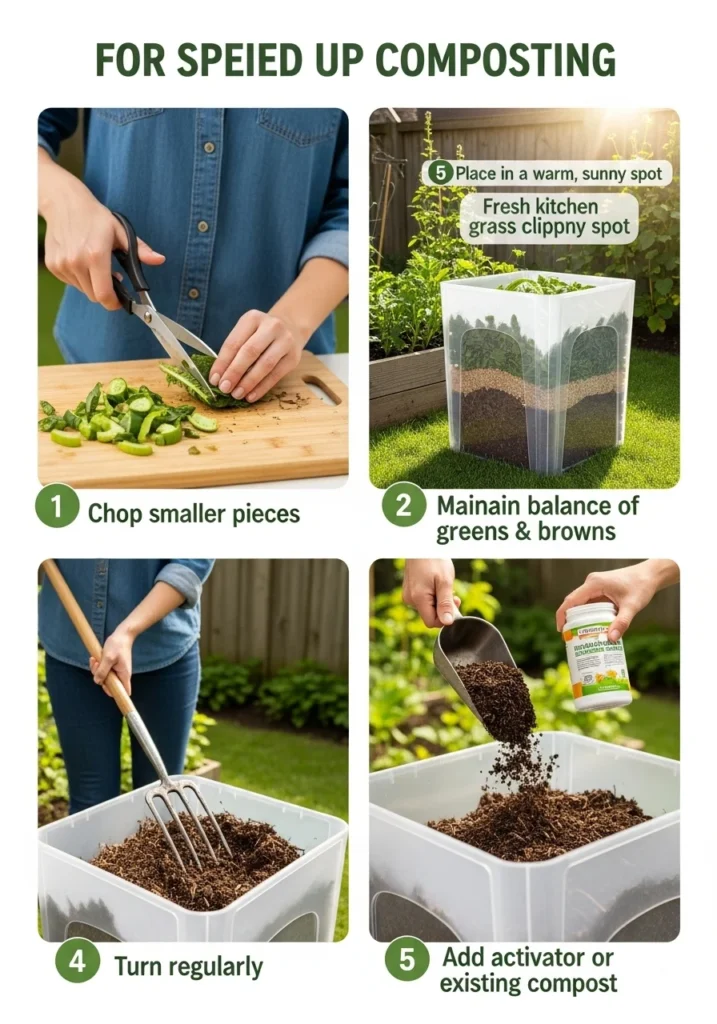
Composting is a natural process, but there are several simple strategies you can use to help your organic waste decompose more quickly and efficiently. Whether you’re looking to speed things up for garden use or want to avoid lingering piles of food scraps, these proven tips will help you accelerate the breakdown process and produce rich, finished compost in less time.
1. Cut Materials into Small Pieces for Faster Breakdown
One of the easiest and most effective ways to speed up composting is to chop or shred materials before adding them to your pile. Large chunks of fruit peels, branches, or whole cardboard boxes take much longer to decompose because microorganisms can only break down the surface layer at a time.
By cutting food scraps, dry leaves, paper, or cardboard into smaller pieces, you increase their surface area, giving microbes more access to the material and significantly reducing the time needed for full decomposition. A basic kitchen knife, scissors, or a garden shredder can make this step quick and easy.
2. Maintain a Balanced Green-to-Brown Ratio
Composting depends on a proper balance of green materials (rich in nitrogen) and brown materials (rich in carbon). A well-balanced mix ensures that microorganisms have the nutrients they need to thrive and work efficiently.
The ideal ratio is about 2 to 3 parts brown to 1 part green by volume. Too much green (e.g., food scraps, grass clippings) can lead to a soggy, smelly pile, while too much brown (e.g., dry leaves, paper) can slow decomposition due to lack of nitrogen.
Maintaining this balance keeps your compost pile hot, active, and healthy, speeding up the breakdown of organic matter.
3. Keep the Pile Warm by Placing It in the Sun
Composting microbes are most active in warm environments. To encourage faster decomposition, place your compost bin or pile in a sunny location where it can absorb and retain heat. The core of an active compost pile can reach temperatures of 130–160°F (55–70°C), which not only speeds up breakdown but also helps kill weed seeds and pathogens.
If outdoor temperatures are cooler, insulate the pile with extra browns like straw or cardboard to retain warmth. Turning the pile regularly also helps keep the internal temperature stable and active.
4. Turn the Pile More Frequently
Oxygen is essential for aerobic decomposition. By turning your compost pile every 7–10 days, you introduce fresh air into the pile, stimulate microbial activity, and prevent the pile from becoming compacted or anaerobic (which can slow down the process and create bad smells).
Turning also redistributes moisture and materials throughout the pile, ensuring even decomposition. A garden fork or compost aerator makes this job quick and easy. The more frequently you turn the pile, the faster you can expect finished compost—sometimes in as little as 4–6 weeks under optimal conditions.
5. Use Compost Accelerators or Old Compost to Introduce Microbes
To jump-start the decomposition process, consider adding compost activators or inoculants. These products often contain concentrated microbes, fungi, or nitrogen sources that stimulate faster microbial growth. However, you don’t need to buy anything fancy—a handful of finished compost from a previous batch or healthy garden soil can do the trick just as well.
These natural sources already contain active microbial communities that will help colonize and energize your new compost pile, getting the breakdown process going faster and more efficiently.
Using Your Finished Compost
Once your compost has fully broken down into a dark, crumbly, earthy-smelling substance, it’s ready to use—and the benefits are plentiful. Finished compost is a powerhouse of organic nutrients, beneficial microbes, and soil-enhancing properties that can dramatically improve the health and productivity of your plants and garden.
Here are several effective and rewarding ways to make the most of your homemade compost:
1. Mix Into Garden Soil for Healthier Plants
One of the most common and impactful uses of compost is integrating it directly into garden soil. Whether you’re planting flowers, vegetables, or shrubs, mixing compost into the soil improves its structure, nutrient content, and water retention. Compost-rich soil becomes looser and more aerated, helping roots grow more easily while holding onto just the right amount of moisture.
How to use:
- Spread 1 to 3 inches of compost over your garden beds.
- Mix it into the top 6–8 inches of soil before planting.
- For existing plants, apply compost around the base and gently work it into the surface.
2. Add to Potted Plants and Containers
Potted plants often suffer from nutrient depletion over time because their soil is confined and frequently watered. Adding compost to your indoor or outdoor containers gives them a natural nutrient boost without the need for chemical fertilizers. It also helps improve drainage and reduce compaction in pots.
How to use:
- Mix compost with potting soil at a ratio of about 1 part compost to 2 parts soil.
- For an easy top-dress, spread a ½-inch layer of compost on top of the soil and water it in.
3. Use as Mulch Around Trees and Shrubs
Compost makes an excellent natural mulch, especially around perennials, shrubs, and trees. As mulch, compost helps to suppress weeds, retain soil moisture, and regulate soil temperature, all while slowly releasing nutrients as it continues to decompose.
How to use:
- Spread a 2–3 inch layer of compost around the base of trees and shrubs.
- Keep the compost a few inches away from the trunk to prevent rot and pest issues.
- Reapply as needed during the growing season to maintain soil health.
4. Make Compost Tea for Liquid Fertilizer
Compost tea is a nutrient-rich liquid made by steeping finished compost in water. It’s a great way to deliver a quick boost of nutrients to plants through both watering and foliar feeding. The tea is rich in beneficial microbes and nutrients that improve plant vigor and soil biology.
How to make compost tea:
- Place 1 part compost in a cloth bag or mesh strainer.
- Steep it in 5–10 parts of water (preferably non-chlorinated) for 24 to 48 hours.
- Stir occasionally to aerate the mixture.
- Strain and use the liquid to water your plants or spray onto leaves.
Tip: Use compost tea within a few hours of preparation for best results.
