Introduction
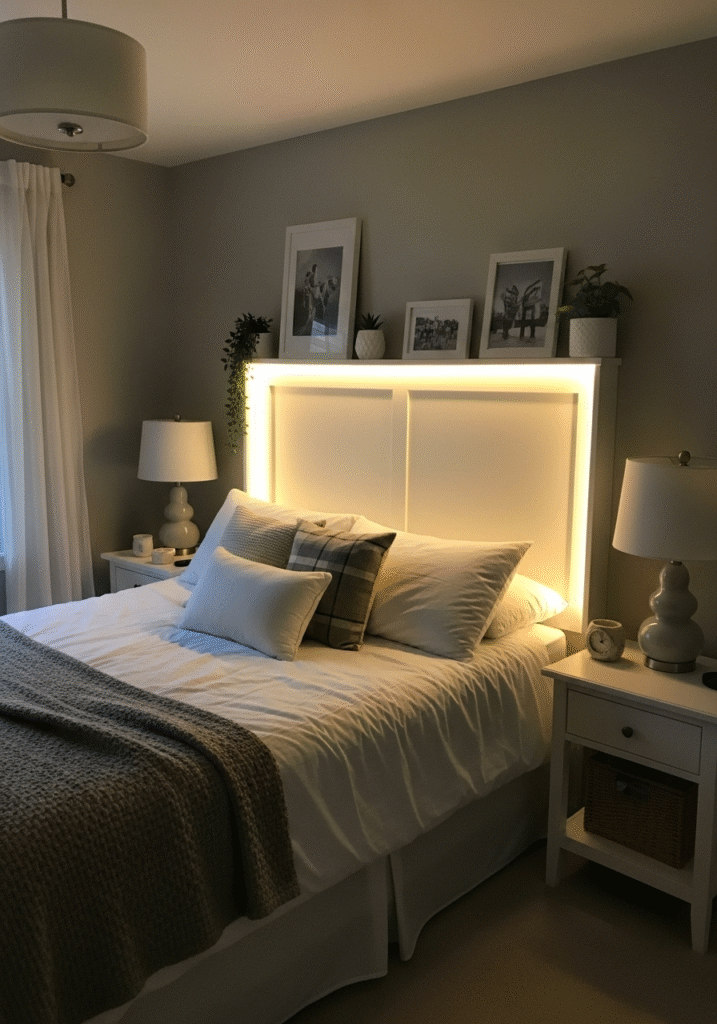
Your bedroom should be more than just a space to sleep—it’s your private retreat, your sanctuary, and a reflection of your personal style. If you’re looking to upgrade your room without spending a fortune, creating a DIY bed headboard with lights is one of the most effective and rewarding ways to do so. This budget-friendly project not only elevates the aesthetic appeal of your space but also introduces a soft, ambient glow that enhances the mood, making your bedroom more inviting, cozy, and relaxing.
Whether you want a modern minimalist look, a rustic wooden touch, or a soft upholstered headboard with fairy lights, there’s a design out there that can suit your taste and budget. In this detailed guide, you’ll discover everything you need to know to create your own illuminated headboard—from selecting materials and tools to step-by-step construction instructions, styling tips, safety considerations, and budget planning.
This blog post is perfect for both beginners and experienced DIY enthusiasts. No matter your skill level, you’ll find practical advice and inspiration to create a stunning bedroom feature that combines function, beauty, and comfort.
Why Create a DIY Headboard with Lights?
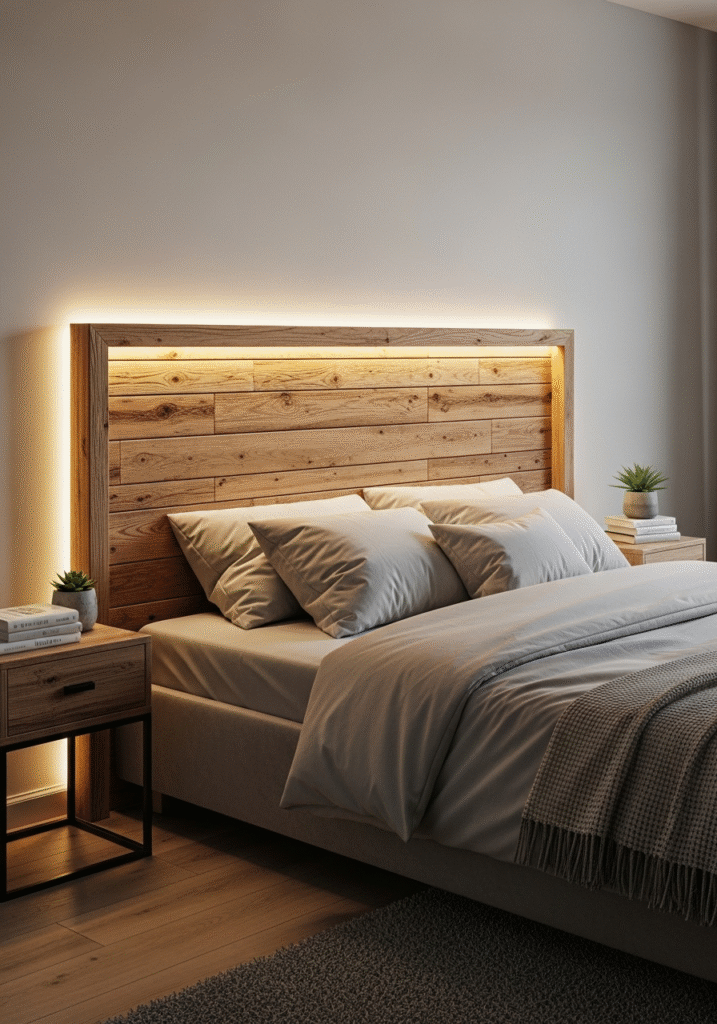
Creating a DIY headboard with built-in lights is more than just a fun weekend project—it’s a smart, stylish, and functional way to upgrade your bedroom without breaking the bank. Whether you’re a seasoned DIY enthusiast or just starting out, building your own lighted headboard offers a wide range of benefits that make it well worth your time and effort.
1. Cost-Effective Upgrade
Designer headboards with integrated lighting can be quite expensive when purchased from furniture stores or online marketplaces. Prices often climb into the hundreds of dollars, especially for modern or custom-made models. By building your own, you can replicate the same upscale look and functionality for a fraction of the cost. All you need are some basic tools, affordable materials like plywood or MDF, and a set of LED strip lights or fairy lights. The total cost can often be kept under $100, making this an ideal project for budget-conscious decorators.
2. Complete Design Freedom and Personalization
One of the biggest advantages of going the DIY route is the ability to tailor every detail to your liking. From the size and shape of the headboard to the type of lighting and fabric, the design possibilities are endless. You can match it with your existing décor—whether that’s rustic, minimalist, boho, or glam—or create something entirely new and unique. Choose colors that complement your bedding and wall paint, opt for dimmable lights for added comfort, or incorporate creative shapes and patterns. This level of customization simply isn’t possible with most pre-made headboards.
3. Enhances Room Ambience
Lighting plays a key role in setting the mood of any room, and a headboard with integrated lights can transform your bedroom into a calming retreat. The soft, warm glow of LED lights adds a cozy and relaxing atmosphere that’s perfect for winding down at night. You can go for white lights for a clean and modern look, or choose multicolor or color-changing LEDs for a fun, dynamic feel. Some even use smart lighting with remote or app control, allowing you to change brightness and colors with ease. The ambient light not only looks beautiful but also reduces the need for harsh overhead lighting.
4. Functional and Practical Lighting Solution
Besides looking great, a lighted headboard is highly practical. If you enjoy reading in bed, watching TV, or working on your laptop before sleep, built-in lighting offers just the right amount of illumination without disturbing your partner or straining your eyes. It’s also an excellent alternative to bedside lamps in smaller rooms, saving valuable space on nightstands. Many people also appreciate having a soft night light, especially if they tend to wake up during the night or have children who sleep in the same room.
5. Boosts Aesthetic and Home Appeal
Whether you rent or own your home, adding custom design elements like a DIY headboard can greatly enhance the overall look and feel of your space. A well-crafted lighted headboard can become the focal point of your bedroom, adding character and charm that elevates even the simplest room. For renters, this is a non-permanent way to personalize your space without damaging walls or furniture. And for homeowners, it’s an excellent way to increase interior appeal—which is a bonus if you’re planning to sell or showcase your home.
6. A Creative and Rewarding Experience
Lastly, don’t underestimate the personal satisfaction that comes with creating something with your own hands. DIY projects like this allow you to express your creativity, learn new skills, and enjoy the process of building something meaningful. It’s also a great bonding activity if done with a partner or family member. And once completed, you’ll have a functional piece of décor that you can proudly say you made yourself.
Materials You’ll Need
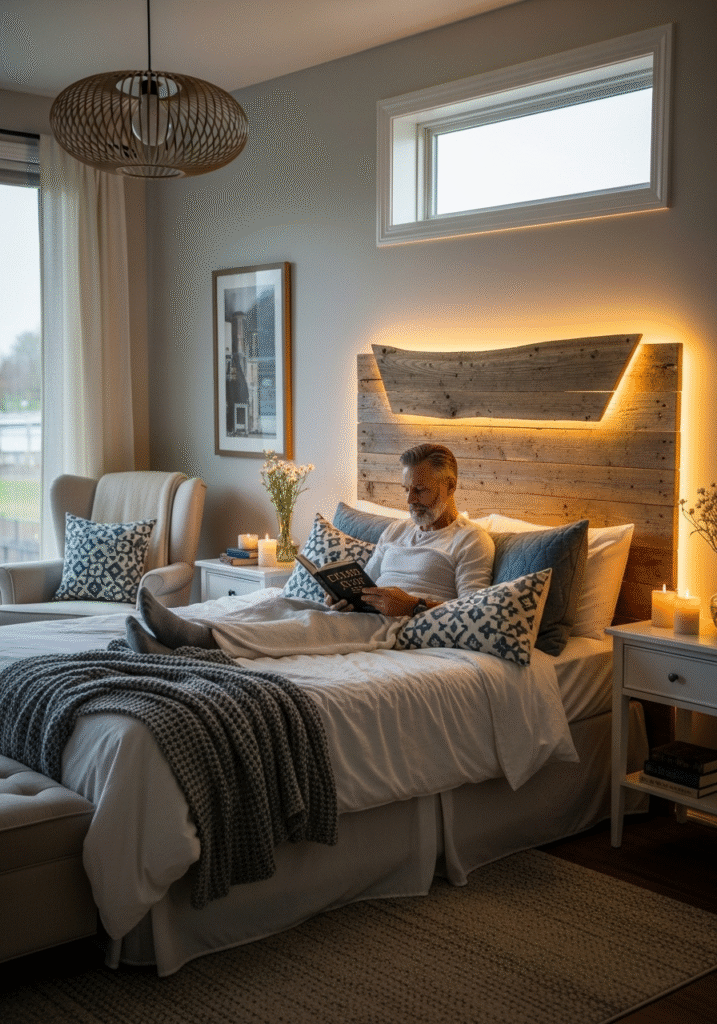
Before you dive into building your DIY headboard with lights, it’s important to gather all the necessary tools and materials. Planning ahead will make the process smoother, more enjoyable, and help you avoid last-minute trips to the hardware store. The materials you choose can be adjusted based on your preferred design—whether you’re going for a sleek, minimalist look or a soft, upholstered finish. Here’s a comprehensive list of what you’ll typically need for this project:
Tools
Having the right tools makes the job easier, more accurate, and safer. If you’re a regular DIYer, you may already have most of these tools at home.
- Power Drill
A must-have for drilling holes and attaching screws. It speeds up the process and ensures sturdy assembly. - Measuring Tape
Precision is key when designing a headboard that fits perfectly behind your bed. Use a measuring tape to take accurate measurements of your bed width, height, and placement on the wall. - Staple Gun
If you’re upholstering the headboard with fabric, a staple gun is essential for attaching the fabric securely to the wood or foam. - Scissors
You’ll need a sharp pair of scissors for cutting fabric, trimming foam, or adjusting LED strip lengths (if they’re customizable). - Screwdriver
A standard or electric screwdriver will help in tightening screws and assembling brackets or light fixtures. - Wood Saw (if cutting wood yourself)
In case you’re custom-sizing plywood or wooden planks, a wood saw allows you to cut your materials to exact specifications. You can also get cuts done at your local hardware store.
Materials
These materials form the backbone of your DIY lighted headboard. Depending on your design preferences—like whether you want an upholstered headboard or a simple wooden style—you can pick and choose what suits your needs best.
- Plywood or MDF Board (Size Based on Bed)
This will serve as the main structure of your headboard. Choose a high-quality, smooth board for a clean finish. The standard width should match your bed (e.g., queen or king), and the height can be adjusted based on personal style. - Wooden Planks for Frame (Optional)
If you want extra support or a box-style frame, wooden planks can be used to reinforce the back or edges of the headboard. This is especially useful for larger headboards or if you’re going for a framed look. - Foam Padding (Optional, for Comfort)
For a plush, upholstered headboard, a layer of foam adds softness and comfort. It’s ideal if you plan to lean against the headboard while reading or watching TV. - Upholstery Fabric (Optional)
Available in a wide range of colors and textures, upholstery fabric can turn a plain wood board into a luxurious statement piece. Choose a fabric that complements your bedroom décor—such as velvet for elegance, linen for a casual vibe, or faux leather for a modern finish. - LED Strip Lights or String Lights
These are the stars of the project. LED strip lights are easy to attach and come in various colors and brightness levels. You can use remote-controlled or smart lights for added convenience. String lights work well for a more whimsical or cozy feel. - Extension Cord or Battery Pack
Depending on the type of lighting you choose, you’ll need a power source. An extension cord is ideal for plug-in lights, while battery packs are great for a cordless setup—especially in rented spaces. - Screws and Nails
Essential for securing the frame, lights, and mounting brackets. Make sure to use the right size and type for your materials. - Mounting Brackets (If Wall-Mounted)
If you’re attaching the headboard directly to the wall, sturdy mounting brackets ensure safety and stability. Be sure to find brackets that support the weight of your headboard and work with your wall type (drywall, concrete, etc.). - Command Hooks or Adhesive Strips (Optional)
For lightweight headboards or temporary setups (especially in rentals), command hooks or heavy-duty adhesive strips can be a damage-free way to mount your headboard or secure the lights.
Choosing the Right Lighting
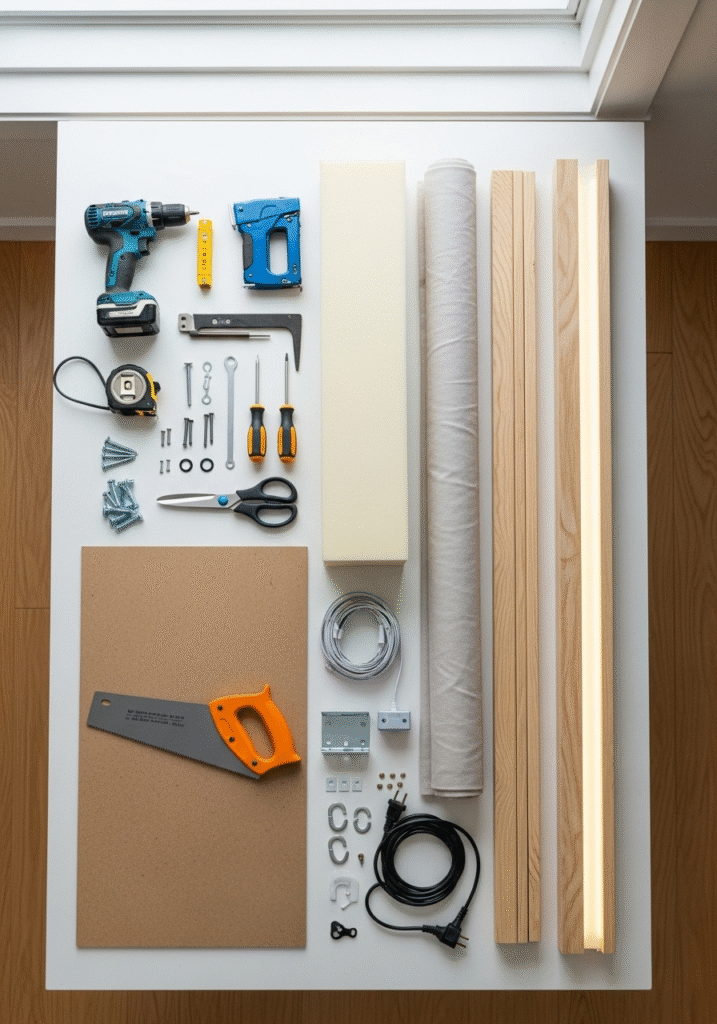
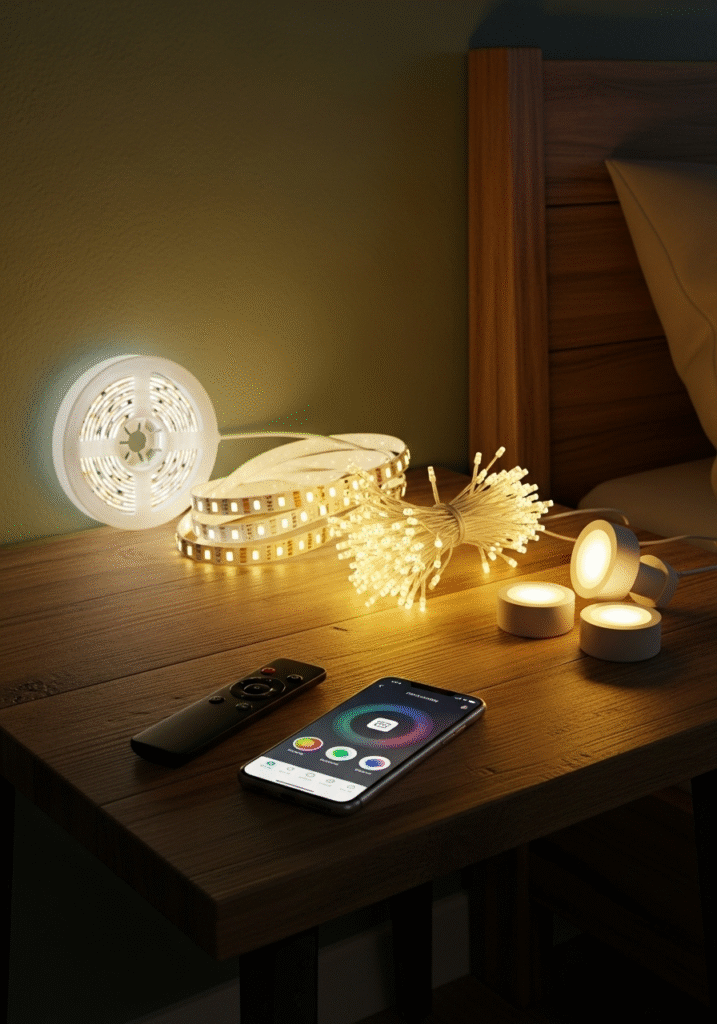
When it comes to creating a DIY headboard with lights, selecting the right type of lighting is just as important as the design itself. The lighting you choose will directly influence the mood, safety, and functionality of your bedroom space. From warm and ambient glows to bright, focused beams perfect for reading, there are several options to explore. Each type of lighting comes with its own unique benefits, and your final choice should align with your aesthetic goals, lifestyle needs, and skill level in DIY installation.
Let’s explore the most popular lighting choices for DIY headboards and how they can enhance your bedroom environment.
1. LED Strip Lights
LED strip lights are by far the most popular option for DIY headboards—and for good reason. These versatile, user-friendly lights are affordable, easy to install, and available in a wide range of colors and features.
- Energy-Efficient and Safe
LED lights consume significantly less power than traditional bulbs, making them an eco-friendly and cost-effective lighting solution. They also emit very little heat, reducing the risk of burns or fire hazards, which is especially important when lights are installed near fabric, foam, or wood. - Customizable Colors and Effects
Available in warm white, cool white, or multi-color (RGB), LED strip lights allow you to completely transform the look and feel of your bedroom. You can go with a soft warm tone for a cozy, inviting space, or choose color-changing strips for a dynamic and playful vibe. Some LED strips even allow you to customize lighting effects like fading, flashing, or pulsing to music. - Smart and Remote-Control Options
Many LED strip lights now come with remote control or app functionality. This gives you the convenience of adjusting brightness, changing colors, or turning the lights on and off without ever leaving your bed. For tech-savvy users, smart LED lights compatible with Alexa or Google Home can take the experience to the next level. - Easy Installation
Most LED strips come with self-adhesive backing that allows for easy placement on wood, metal, or even fabric. Simply measure, cut (if needed), peel, and stick. Some also include corner connectors and clips for more complex shapes.
Overall, LED strip lights offer a perfect balance of beauty, functionality, and ease of use—making them the best choice for most DIYers.
2. Fairy or String Lights
If you’re aiming for a softer, more decorative effect, fairy lights or string lights might be the perfect option. These delicate light strands are widely loved for their whimsical, romantic charm.
- Soft and Decorative Lighting
Unlike LEDs that provide brighter, more consistent light, fairy lights give off a gentle glow that’s ideal for setting a peaceful and dreamy atmosphere. They’re especially popular in bohemian or shabby-chic décor styles, and work wonderfully in kids’ rooms, guest bedrooms, or cozy reading nooks. - Easy to Work With
Fairy lights are incredibly lightweight and can be arranged in almost any pattern. You can drape them around the edges of your headboard, weave them through tufted sections, or wrap them around a wooden frame. Their flexibility allows for creative freedom without requiring complex installation tools. - Battery or Plug-In Options
Fairy lights are often available with battery packs, making them a cordless and renter-friendly solution. Plug-in options are also available for longer-lasting use.
While not as bright or practical for tasks like reading, fairy lights make up for it in charm and simplicity.
3. Built-in Puck Lights
For those who want targeted, functional lighting, built-in puck lights offer a sleek and modern option. These small, circular lights are typically recessed or surface-mounted into the headboard for a high-end finish.
- Focused Illumination
Puck lights are ideal for task lighting. If you enjoy reading in bed or need a light that’s bright enough for nighttime activities, this type of lighting provides direct, focused beams without illuminating the entire room. - Custom Placement
You can install puck lights exactly where you need them—above shoulder height for reading, behind pillows for mood lighting, or symmetrically across the headboard for visual balance. - Slightly More Complex Installation
Unlike LED strips or fairy lights, puck lights often require drilling, wiring, and sometimes even access to a nearby outlet or light switch. If you’re comfortable with basic electrical work or willing to follow tutorials, the result can be very rewarding. However, they may not be the best choice for first-time DIYers or those seeking a quick project.
Best Lighting Choice for Most DIYers
While all three options have their strengths, LED strip lights stand out as the best overall choice for most DIY headboard projects. They are affordable, easy to use, energy-efficient, and highly customizable. Whether you’re creating a bold modern statement or a calming retreat, LED strips give you the flexibility to achieve your vision without complex wiring or technical installation.
Design Ideas for Lighted Headboards
Creating a DIY headboard with lights is not just about adding functionality—it’s also a creative opportunity to design a piece that enhances the look of your entire bedroom. Whether your style is modern and sleek, rustic and cozy, or elegant and luxurious, there are countless ways to personalize your project and make your headboard the focal point of the room. Below are some popular and visually stunning design ideas to inspire your own lighted headboard masterpiece.
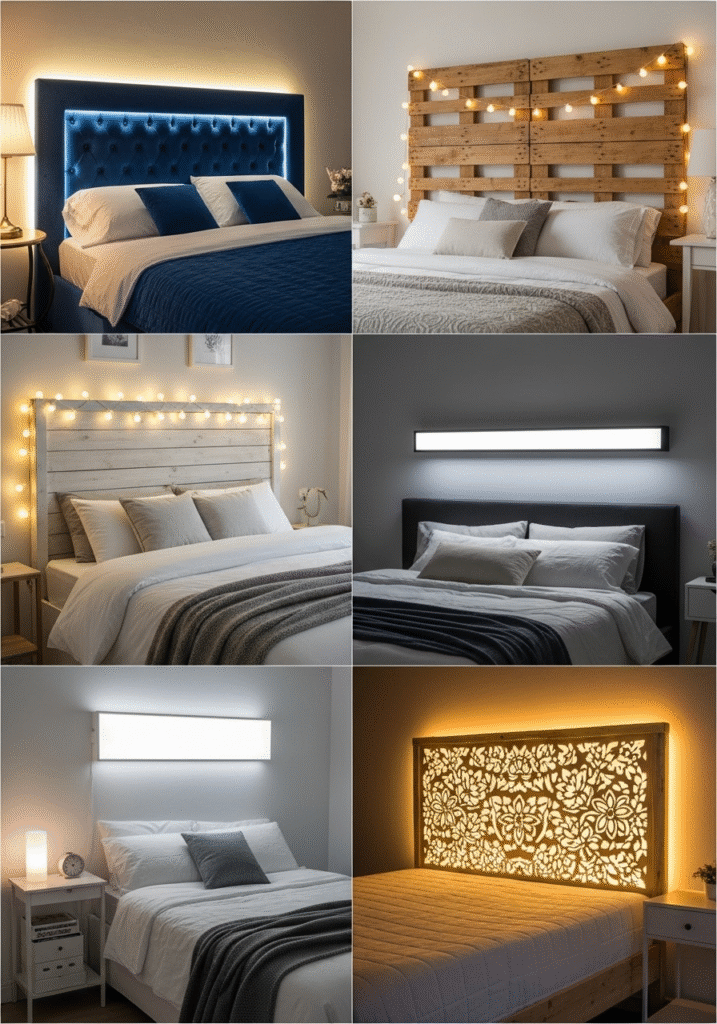
1. Upholstered Headboard with Backlit Glow
If you love the plush, high-end feel of a luxury hotel room, an upholstered headboard with a soft backlight is a perfect choice. This design combines comfort and elegance, giving your bedroom a refined, cozy vibe.
- Look and Feel: The upholstered surface—covered in velvet, linen, or faux leather—adds texture and warmth, while the ambient LED lighting behind the headboard creates a soft halo effect that’s both romantic and relaxing.
- Ideal For: Modern or glam bedroom styles, master bedrooms, or anyone who enjoys reading or relaxing in bed with ambient lighting.
- Pro Tip: Use warm white or dimmable LED strip lights along the edges or back of the board to achieve a smooth, glowing effect. Mount the headboard slightly away from the wall for better light diffusion.
2. Wooden Pallet Headboard with String Lights
For a rustic, farmhouse-style bedroom, a headboard made from reclaimed wooden pallets paired with string lights is charming, budget-friendly, and full of character.
- Look and Feel: Natural wood textures bring in a cozy, earthy element, while string lights draped around or woven between the slats offer a soft, whimsical touch. You can also customize the wood with stain or paint to match your decor.
- Ideal For: Rustic, boho, cottage, or farmhouse-themed bedrooms. Great for guest rooms or DIY beginners.
- Pro Tip: Sand the pallet wood to remove splinters, and use battery-operated fairy lights for a cordless, renter-friendly setup.
3. Framed Light Panel Headboard
If you prefer clean lines and a minimalist look, a framed headboard with built-in lighting panels provides a contemporary, sophisticated solution.
- Look and Feel: The lighting is typically built into or around a rectangular frame, offering a soft, even illumination. The design is sleek and simple, often paired with monochrome color palettes for a modern touch.
- Ideal For: Minimalist or modern interiors, especially for those who want a clean and clutter-free bedroom design.
- Pro Tip: Consider using diffused LED panels or frosted acrylic over strip lights to create an even lighting effect without visible hot spots.
4. Wall-Mounted Light Box
For small bedrooms or apartments where space is limited, a wall-mounted light box headboard is an excellent solution that looks stylish without taking up floor space.
- Look and Feel: This design features a lightweight box or panel mounted directly to the wall, often with internal LED strips that emit a soft glow. Some designs include floating shelves or hidden compartments for extra functionality.
- Ideal For: Small rooms, rental apartments, or urban spaces where space-saving furniture is a priority.
- Pro Tip: Use command strips or lightweight mounting hardware for a damage-free installation. Smart LED strips can also offer added convenience in tight spaces.
5. Patterned Cutout with Backlight
For an artistic, eye-catching headboard, consider incorporating a patterned cutout design. Whether it’s geometric shapes, floral motifs, or even your initials, placing LED lights behind the cutouts creates a stunning silhouette effect.
- Look and Feel: This style offers a more decorative and personalized element. When the backlight shines through the cutouts, it adds depth and visual intrigue, especially when paired with contrasting wall colors.
- Ideal For: Artistic or eclectic bedroom themes, kids’ rooms, or anyone looking to make a bold design statement.
- Pro Tip: Use a jigsaw to create custom cutouts in MDF or plywood. Cover the back with a frosted plastic sheet to diffuse the light evenly.
Step-by-Step Guide to Making a DIY Headboard with Lights
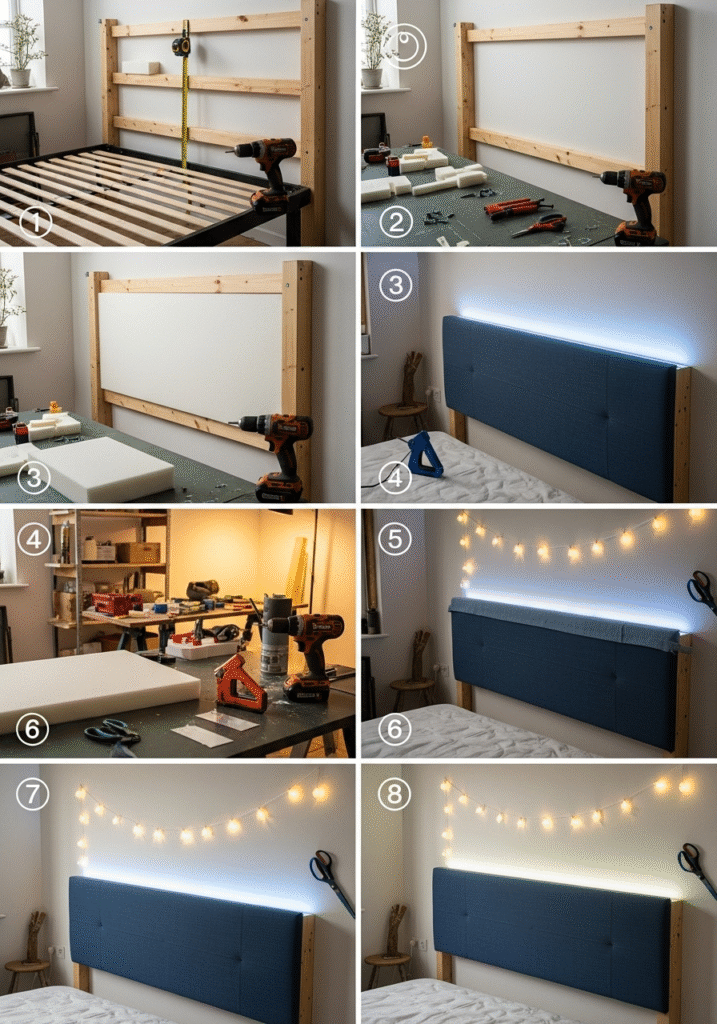
Creating your own DIY headboard with lights might sound complex, but it’s actually a straightforward project that you can complete in a weekend with basic tools and a bit of creativity. Whether you want to add elegance to your master bedroom or create a cozy vibe in a guest room, a lighted headboard is a practical and stylish upgrade. This step-by-step guide walks you through the entire process—from planning and preparation to lighting installation and final setup.
Step 1: Planning and Measuring
Every successful DIY project begins with proper planning. Start by determining the exact dimensions of your headboard based on your bed size and room layout.
- Measure Your Bed Width:
Your headboard should be slightly wider than the bed frame for a balanced, designer-inspired look. Here are general width guidelines:- Twin Bed: 38–41 inches
- Full Bed: 54–57 inches
- Queen Bed: 60–65 inches
- King Bed: 76–80 inches
- Choose the Height:
The ideal headboard height depends on your room size, ceiling height, and personal taste. Most headboards range between 36 to 60 inches tall. Taller headboards make a dramatic visual impact, while shorter ones keep the room feeling open and airy. - Sketch Your Design:
Whether you’re going for a rectangular board, a curved silhouette, or a framed structure, sketch out your vision. Decide whether you want an upholstered finish, wood texture, or a cutout pattern.
Step 2: Building the Frame
Now it’s time to construct the base of your headboard. You have two primary options:
- Single Plywood or MDF Board:
For a simple, flat design, one solid piece of plywood or MDF can serve as the entire headboard. It’s lightweight, easy to work with, and perfect for minimalist or upholstered looks. - Custom Wooden Frame:
Build a frame using 1×4 or 2×4 wooden planks if you want more structure, especially if you’re planning on mounting lights inside the frame or creating a recessed look. - Optional Upholstery Prep:
If you’re planning an upholstered headboard, prepare to attach foam and fabric. Foam padding makes the headboard more comfortable and luxurious. Be sure to cut your foam and fabric slightly larger than the board to allow for wrapping.
Step 3: Attaching Foam and Fabric (Optional)
For a soft and elegant look, adding foam and upholstery fabric is a great choice.
- Cut Foam to Size:
Lay your plywood on a flat surface and cut the foam to fit its dimensions. Spray adhesive or hot glue can be used to attach the foam securely to the board. - Wrap the Fabric:
Place your chosen upholstery fabric over the foam, making sure it’s centered and smooth. Pull it tightly around the edges and staple it to the backside of the board using a staple gun. Work from the center out to avoid wrinkles. - Finishing Touches:
Trim off excess fabric, and reinforce corners by folding them neatly before stapling. Choose a fabric that complements your bedroom decor—neutral tones work well for versatility, while bold colors or patterns add personality.
Step 4: Installing the Lights
Lighting is the centerpiece of this DIY project. Depending on your chosen light type, installation will vary.
- LED Strip Lights:
These are ideal for creating a soft, glowing “halo” effect behind the headboard. Run the LED strip along the back perimeter of the board. Most LED strips come with adhesive backing, but you can use additional mounting clips or double-sided tape for extra hold.- Choose warm white for a cozy look, or RGB (multi-color) strips for mood lighting.
- Consider remote-controlled or app-controlled lights for convenience.
- String or Fairy Lights:
If you’re using a pallet or slatted wood design, weave string lights through the slats or drape them around the frame in a symmetrical pattern. You can also tuck them behind sheer fabric panels for a soft glow. - Power Options:
- Plug-in Lights: Use a nearby outlet with an extension cord, and consider routing the cord behind furniture for a clean look.
- Battery-Operated Lights: Great for renters or areas without outlets. Make sure batteries are easily accessible for replacement.
- Smart Features (Optional):
Add smart plugs or integrate with Google Home or Alexa to control your headboard lighting with voice commands or schedules. - Safety Tip:
Keep all wires neat and secure. Use cable clips or adhesive channels to prevent dangling cords, especially in homes with children or pets.
Step 5: Mounting the Headboard
Once your headboard is built and lit, it’s time to install it in your bedroom. There are several ways to mount it, depending on your room layout and whether you rent or own your space.
- Wall-Mounted:
- Use L-brackets, French cleats, or a picture-hanging system to securely attach the headboard to the wall.
- Make sure to locate wall studs using a stud finder for safe and stable mounting.
- Bed Frame-Mounted:
- Many bed frames include brackets or holes for attaching headboards directly.
- Use bolts or screws to secure the headboard into the frame’s support posts.
- Freestanding:
- If you prefer not to drill into the wall or frame, simply lean the headboard against the wall behind your bed.
- Secure it in place using furniture anchors or non-slip pads to prevent movement. This option is quick and renter-friendly.
Safety Tips for Installing Lights
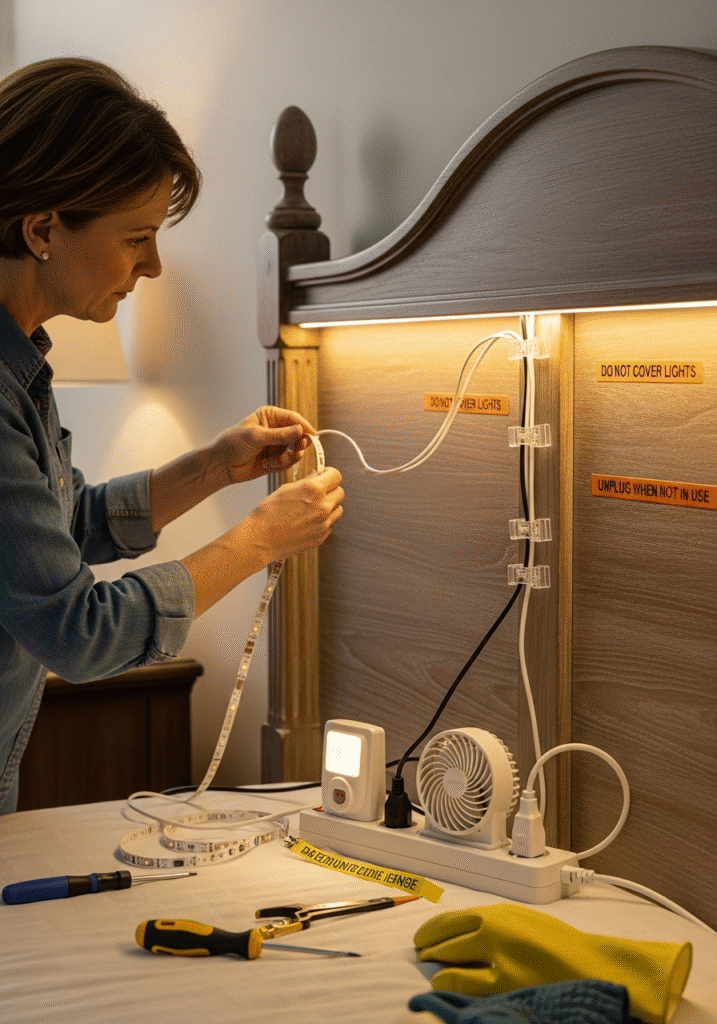
While adding lights to your DIY headboard is a fantastic way to elevate your bedroom’s aesthetics and functionality, it’s absolutely essential to prioritize safety throughout the process. Whether you’re using LED strip lights, string lights, or puck lights, improper installation or use can lead to electrical hazards or even fire risks. To ensure your beautifully lit headboard remains both stylish and safe, here are some detailed safety tips to follow during and after installation:
1. Use Low-Voltage Lights Only
When choosing lighting for your headboard, always opt for low-voltage options such as LED strip lights or battery-operated string lights. These types of lights are specifically designed for safe indoor use and emit minimal heat, significantly reducing the risk of burns or fire.
- Why it matters: High-voltage or industrial-grade lights are not suitable for close-range use in bedroom furniture and can become hazardous if improperly managed.
- Best options: Look for lights labeled 12V or battery-powered. LED lights are energy-efficient, long-lasting, and the safest option for DIY furniture projects.
2. Avoid Overloading Electrical Sockets
If your lighting setup requires plugging into a wall outlet, be cautious not to overload the socket with multiple devices. Overloaded outlets are one of the most common causes of household electrical fires.
- Use surge protectors: These provide added protection by absorbing voltage spikes and preventing circuit overload.
- Plug wisely: Avoid plugging your headboard lights into the same outlet as high-energy appliances like heaters, AC units, or TVs.
- Extension cords: If needed, use a high-quality, grounded extension cord rated for indoor use.
3. Do Not Cover Lights with Flammable Materials
It might be tempting to soften the light glow by placing fabric or decorative covers directly over the lights—but this is a serious fire hazard.
- Keep lights exposed or diffused properly: If you want a softer look, use materials that are specifically designed for heat resistance, such as LED light diffusers or frosted acrylic panels.
- Avoid layering foam, cotton, paper, or fabric directly over the light source, especially with string or puck lights, which may generate more heat than LED strips.
4. Secure All Wiring Properly
Loose or tangled wires are not only unsightly but also unsafe, especially in a bedroom where people and pets may come into contact with them.
- Use cable clips, adhesive cable channels, or zip ties to secure wires neatly along the back of the headboard or behind furniture.
- Keep wires out of high-traffic areas to prevent tripping hazards or accidental unplugging.
- Check connections regularly to make sure nothing has come loose over time.
If children sleep in or use the room, it’s especially important to hide wires and keep battery packs or plugs out of reach.
5. Unplug the Lights When Not in Use (Unless Smart-Controlled)
Even low-voltage lights can pose a risk if left running constantly, especially overnight or when you’re not home.
- Manual lights: If your lighting is controlled by a standard plug or switch, get into the habit of unplugging it when not in use.
- Smart lighting: For convenience and safety, consider using smart plugs or Wi-Fi-enabled lights. These can be set on timers, turned off remotely, or scheduled to power down automatically.
This not only helps reduce energy consumption but also protects your home in case of electrical malfunctions.
Budget Breakdown
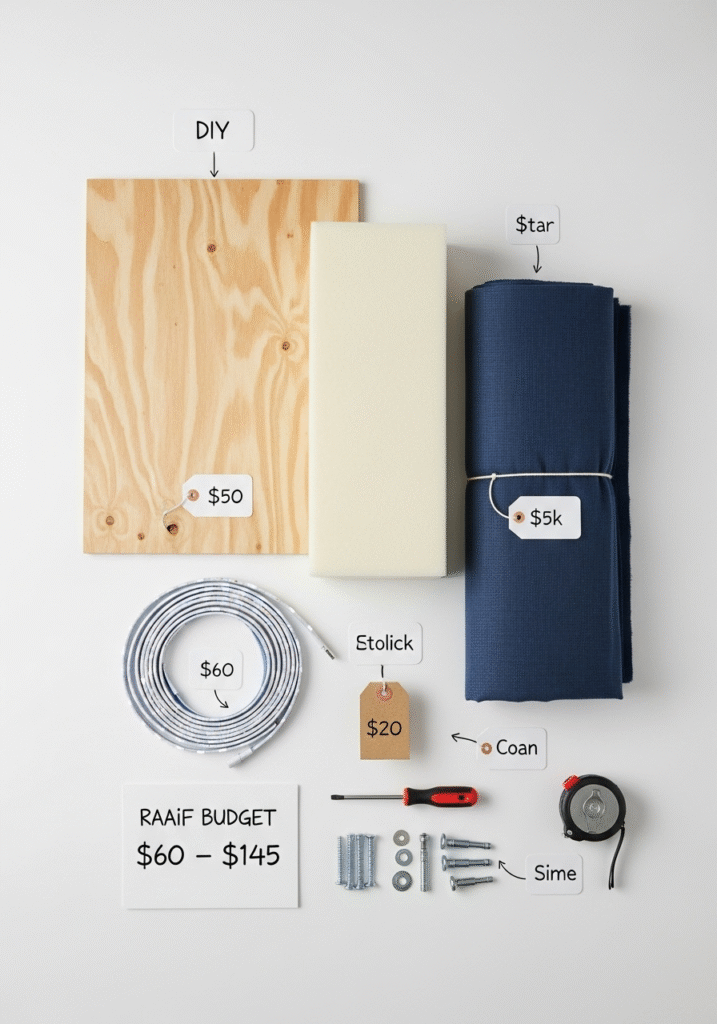
One of the biggest advantages of building a DIY headboard with lights is how budget-friendly it can be compared to buying a store-bought version. While a pre-made lighted headboard can cost anywhere from $200 to $800 or more, you can achieve a similar—if not better—look for a fraction of the cost. The total price of your DIY project will depend on your design choices, materials used, and whether you already own some tools. Below is a detailed cost breakdown to help you estimate your budget and plan accordingly.
Rough Cost Estimate by Item
| Item | Approx. Cost (USD) |
|---|---|
| Plywood board | $20 – $40 |
| Foam padding (optional) | $10 – $25 |
| Upholstery fabric (optional) | $10 – $30 |
| LED strip lights | $10 – $25 |
| Screws and basic tools | $5 – $15 |
| Mounting hardware | $5 – $10 |
| Total Estimate | $60 – $145 |
1. Plywood or MDF Board ($20 – $40)
This is the main structure of your headboard. The cost depends on the size and thickness of the sheet. A basic plywood board is usually sufficient and can be found at local hardware stores or home improvement centers. You may also be able to have it cut to size at the store, often for free.
2. Foam Padding (Optional – $10 – $25)
If you plan to upholster your headboard, adding foam padding will enhance both comfort and aesthetics. You can purchase foam from craft or upholstery supply stores, or use mattress toppers as a budget alternative. Prices vary based on thickness and density.
3. Upholstery Fabric (Optional – $10 – $30)
Fabric gives your headboard a polished, stylish look. Depending on the material—cotton, linen, velvet, faux leather—the cost will vary. Look for sales or discounted fabric at local stores or online shops to save money. You typically need 1–2 yards of fabric for a standard-sized headboard.
4. LED Strip Lights ($10 – $25)
LED lighting is essential for this project. The cost depends on the length, color options, and features (e.g., remote control, smart app compatibility). RGB (color-changing) strips may cost slightly more than warm white strips. Battery-powered versions are also available for a cordless setup.
5. Screws and Tools ($5 – $15)
You’ll need basic supplies like wood screws, staples (if upholstering), adhesive for foam, and possibly nails. If you already have tools like a staple gun, drill, screwdriver, and scissors, this cost can be reduced significantly.
6. Mounting Hardware ($5 – $10)
To attach the headboard to your wall or bed frame, you may need mounting brackets, L-brackets, or French cleats. Wall anchors may also be necessary depending on your wall type. Some mounting hardware comes in kits designed for headboards or mirrors and is easy to install.
Tip: Reduce Costs with Creative Solutions
You can keep your budget even lower by:
- Repurposing old furniture or reclaimed wood for your headboard base.
- Using leftover fabric or foam from previous DIY projects.
- Buying supplies in bundles or kits that include lights and accessories.
- Checking local classifieds or donation centers for free or discounted materials.
Even with a modest investment, you can achieve a high-end look that rivals expensive, store-bought furniture—plus, you’ll have the satisfaction of having created it yourself.
Maintenance and Care Tips
Once you’ve completed your DIY headboard with lights, it’s important to maintain it properly so it continues to look great and function safely for years to come. Like any piece of furniture, your headboard can collect dust, experience wear and tear, or encounter minor electrical issues over time. Thankfully, maintaining it doesn’t require much effort—just a few simple practices can help preserve both its appearance and performance.
Below are essential maintenance and care tips to help keep your headboard in top condition:
1. Dust Regularly with a Soft Cloth or Vacuum
Over time, dust and debris can accumulate on your headboard—especially if it’s upholstered or made from textured materials like wood or fabric.
- For Upholstered Headboards:
Use a handheld vacuum with an upholstery attachment to gently remove dust and lint. Be sure to vacuum the corners, seams, and edges where dust tends to collect the most. - For Wooden or Painted Surfaces:
A dry or slightly damp microfiber cloth is ideal for wiping down the surface. Avoid using harsh chemicals that can damage finishes or discolor paint. - Frequency:
Aim to clean your headboard every 1–2 weeks, or more often if you live in a dusty environment or have pets.
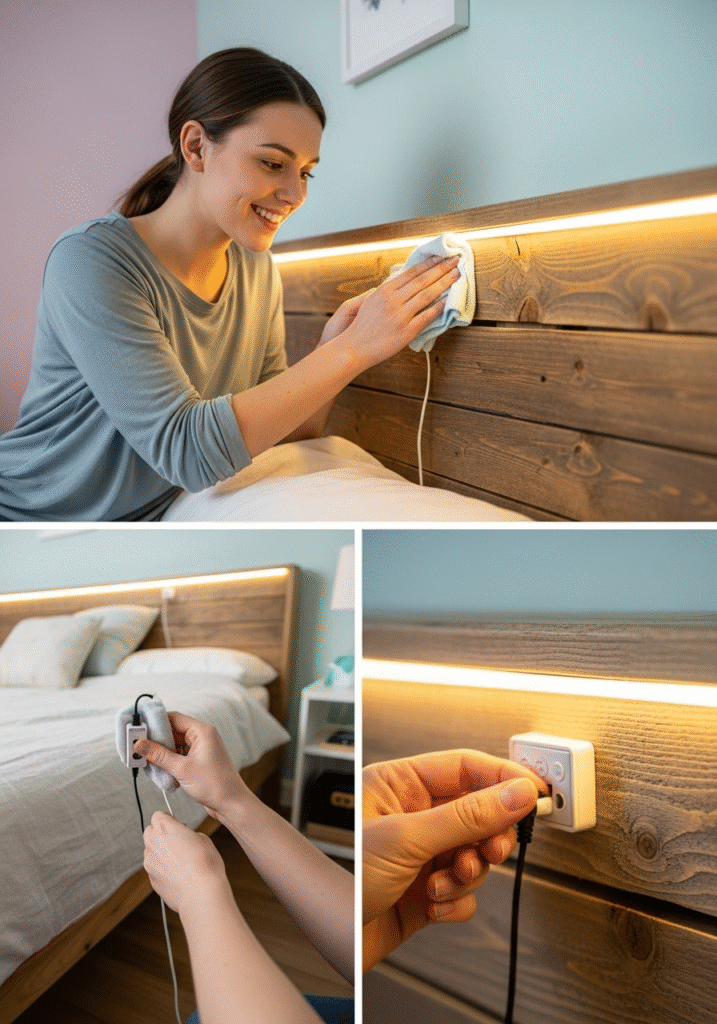
2. Clean the LED Lights Gently
Lights can attract dust too, and over time this buildup may reduce their brightness and clarity. Keeping them clean helps maintain their glow and extends their lifespan.
- How to Clean:
Turn the lights off and allow them to cool if they’ve been on. Then, use a dry microfiber cloth to gently wipe the surface of the light strips or bulbs. Avoid using water or cleaning sprays, which could damage electrical components or adhesives. - Important Tip:
Never tug on the lights or wiring while cleaning, as this can loosen connections or damage adhesive backing.
3. Check Electrical Connections Monthly
Routine inspection of your lighting setup ensures safety and functionality, especially if the headboard is used daily.
- What to Look For:
Examine wires, plugs, battery packs, and connectors to ensure everything is secure and undamaged. If you notice flickering lights, loose connections, or exposed wiring, address it immediately. - Cord Management:
Make sure all cords are neatly tucked away and not tangled or pinched between the headboard and wall or bed frame. - Fire Safety:
Damaged wires or overheating lights can pose a fire risk, so prompt maintenance is essential.
4. Replace Weak Batteries or Faulty Lights
If your lighted headboard uses battery-powered LED strips or string lights, be proactive about changing batteries as needed.
- When to Replace:
Dim lighting, flickering, or non-responsive remote functions are signs the batteries need replacing. Using fresh, high-quality batteries ensures consistent performance. - Light Replacement:
LED lights last a long time, but they can occasionally fail. If a section of your light strip goes dark or malfunctions, you can usually replace just that part instead of the entire setup. - Pro Tip:
Keep extra batteries or a spare LED strip on hand so you can quickly resolve issues without disrupting the headboard’s appearance or function.
Final Thoughts – Transform Your Bedroom on a Budget
In today’s world of expensive furniture showrooms and high-end décor, it’s easy to assume that a stylish, well-designed bedroom is out of reach for the average budget. But the truth is, with a bit of creativity, some basic tools, and an eye for design, you can completely transform your bedroom with a DIY project that’s both affordable and rewarding. One of the best ways to achieve this transformation is by creating your own DIY headboard with lights.
This budget-friendly upgrade doesn’t just save you money—it also offers something you can’t buy in a store: personalization. From choosing the perfect materials and colors to deciding on the lighting type and style, this project puts you in full control of how your bedroom looks and feels. Whether you’re working with a rustic theme, a modern aesthetic, or something uniquely you, a lighted headboard becomes the centerpiece of your space and reflects your personality.
A Stylish Statement Without the Hefty Price Tag
Store-bought designer headboards, especially those with integrated lighting, often come with a steep price—sometimes ranging from $300 to $1000 or more. But with your own two hands and a budget of just $60 to $145, you can replicate and even surpass the look and functionality of luxury furniture.
Plus, by repurposing materials, shopping local for supplies, and using smart lighting solutions like LED strips or battery-powered fairy lights, you can cut costs even further. It’s a project that rewards creativity and resourcefulness—not just your wallet.
A Project That’s Both Practical and Beautiful
Beyond aesthetics, this DIY headboard is also practical. The built-in lights provide soft, ambient illumination that’s perfect for reading, relaxing, or winding down before bed. Whether you go for smart LED strips controlled by an app or a more whimsical string light arrangement, the added lighting functionality enhances your everyday comfort.
Moreover, the headboard itself offers support, comfort, and structure to your sleeping area. Upholstered designs with foam padding add a plush, inviting look, while wooden pallet versions bring warmth and charm to rustic or farmhouse-inspired interiors.
A Canvas for Your Creativity
Another standout benefit of this DIY project is the creative freedom it offers. You’re not limited to what’s available in stores or bound by standard styles. Want a backlit geometric cutout design? You can do that. Prefer a velvet-covered panel with smart lighting? You can do that too.
From wall-mounted panels to freestanding builds, your options are endless. This is your chance to explore, experiment, and build something truly one-of-a-kind. And because it’s DIY, you can always modify or upgrade it later with new fabric, colors, or lighting styles.
Create a Luxurious Vibe at a Low Cost
A lighted headboard instantly elevates your bedroom’s atmosphere. The soft glow from LED strips or fairy lights adds warmth, intimacy, and sophistication—without being harsh or overpowering. It’s the type of addition that makes your bedroom feel like a boutique hotel suite or a carefully styled Pinterest board.
And yet, this transformation is entirely achievable on a small budget, with materials available from local hardware stores, online retailers, or even your garage or attic.
In Summary
Building your own DIY headboard with lights is more than just a fun weekend project—it’s a creative journey that leads to a more personalized, stylish, and functional bedroom. Whether you’re decorating a master suite, guest room, or apartment space, this simple upgrade can redefine the entire look and feel of your sleeping area.
You don’t need expensive furniture or professional designers. All you need is a plan, a few materials, some lighting, and the willingness to bring your vision to life. In just a short time, you’ll have a custom-made headboard that looks like it came straight from a luxury catalog—without the luxury price tag.
