Introduction
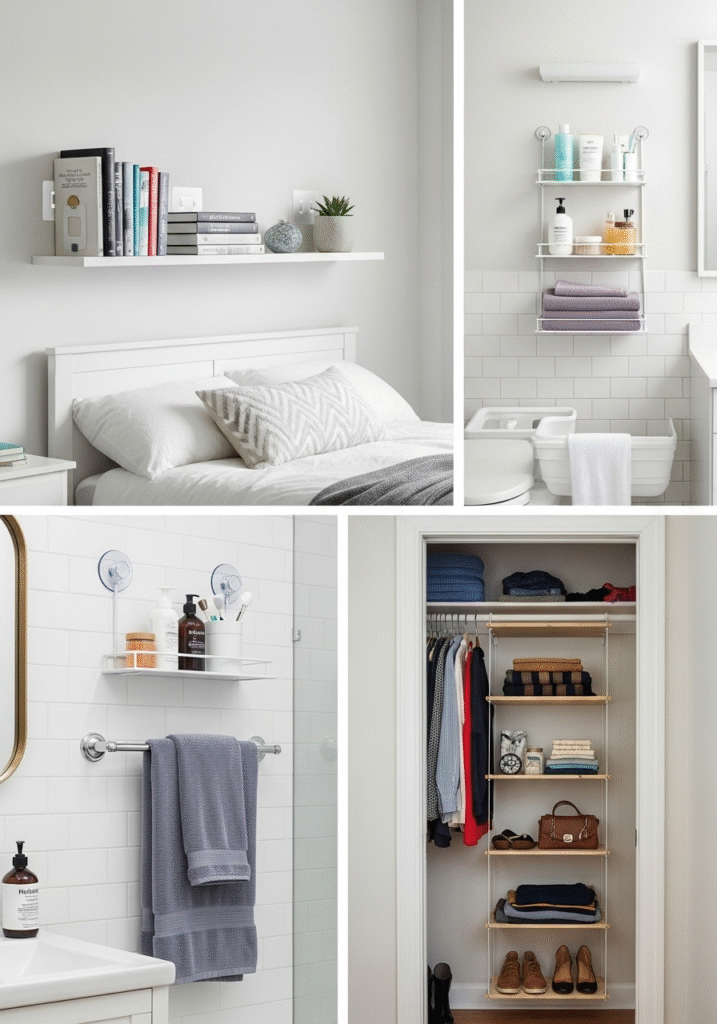
Looking for a way to install floating shelves without damaging your walls? Whether you’re living in a rented apartment, college dorm, or just want a hassle-free setup, this comprehensive guide is designed for you. Drilling isn’t always a practical option—especially when dealing with concrete walls, landlord restrictions, or the fear of unsightly holes. But that doesn’t mean you have to give up on stylish storage or décor options.
In this blog, we’ll show you how to securely install floating shelves without using a drill. From modern adhesive solutions and tension rod shelving to no-drill brackets and smart wall strips, you’ll discover innovative techniques that are sturdy, renter-friendly, and surprisingly easy to apply. We’ll also cover the pros and cons of each method, the best materials for no-drill shelf installation, weight limits, and key safety tips to ensure your shelves stay up and your walls stay intact.
Whether you want to display books, plants, kitchen items, or artwork, this step-by-step guide will empower you to upgrade your space with floating shelves—without breaking out the toolbox. Ideal for small apartments, temporary setups, or DIY enthusiasts seeking damage-free decorating hacks. Start transforming your walls today with smart, no-drill shelf ideas that blend function and style effortlessly!
Why Choose No-Drill Floating Shelves
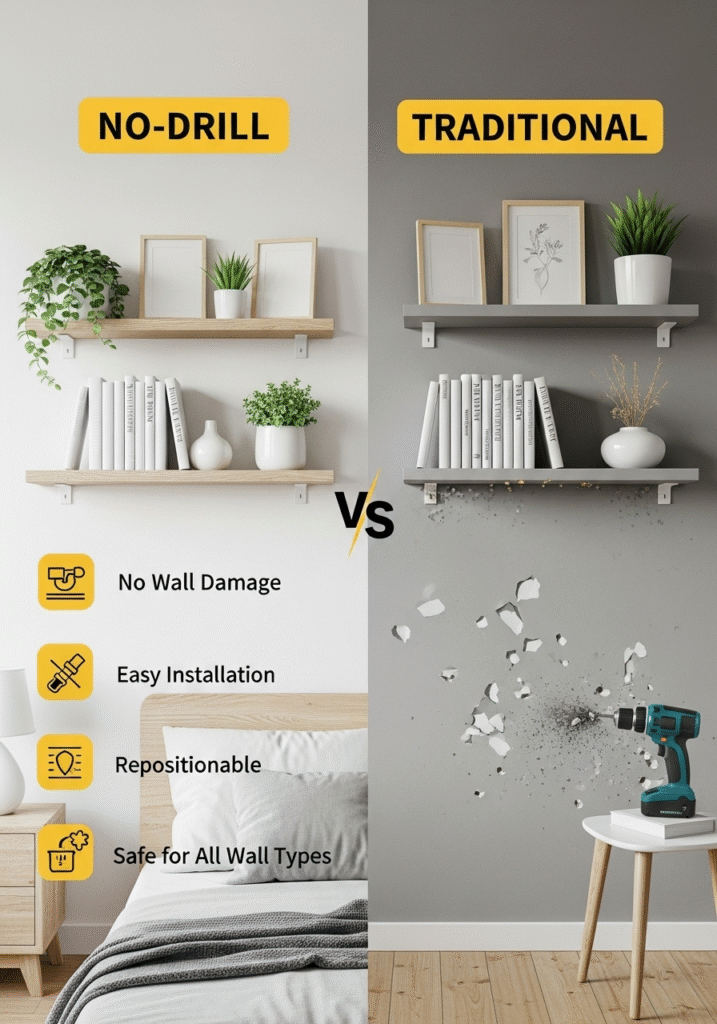
Floating shelves are a popular interior design trend that combines both aesthetics and function. But traditional installations often involve drilling into walls—something that not everyone is comfortable with. Whether you’re a renter with strict lease agreements or a homeowner who prefers non-invasive solutions, no-drill floating shelves offer a smart and stylish alternative. Let’s explore why more and more people are opting for these drill-free shelving systems:
No Wall Damage
One of the biggest advantages of no-drill shelves is that they don’t leave any permanent marks on your walls. This is especially important for renters who could lose a security deposit for drilling holes into walls, or for homeowners who want to maintain the structural integrity and appearance of their interiors. No-drill options often use strong adhesives, suction cups, or tension systems that can be removed cleanly—leaving behind no holes, cracks, or damage.
Quick & Easy Installation
Not everyone owns power tools—or knows how to use them. No-drill shelves eliminate the need for drills, wall anchors, screwdrivers, and the mess that comes with traditional installations. These shelves can often be installed within minutes, making them perfect for busy lifestyles. You won’t need to measure stud distances or worry about hitting electrical wiring behind the wall. It’s DIY-friendly, even for beginners.
Repositionable & Reusable
One major downside of drilled shelving is permanence—once it’s in, it’s in. With no-drill floating shelves, repositioning is simple. If you change your mind about where the shelf looks best or decide to move to a new home, you can remove the shelf and install it somewhere else without any issues. This flexibility is perfect for seasonal decorators, frequent movers, and anyone who loves to update their interior regularly.
Works on a Variety of Wall Types
Traditional drilled shelves may not be suitable for certain surfaces like tiled backsplashes, glass panels, metal dividers, or delicate plaster walls. No-drill solutions, however, are often designed with versatility in mind. Strong adhesives and suction systems can be applied to smooth, hard surfaces like tile, glass, metal, and even mirrors—making them a great fit for bathrooms, kitchens, and other tricky areas.
Stylish & Functional
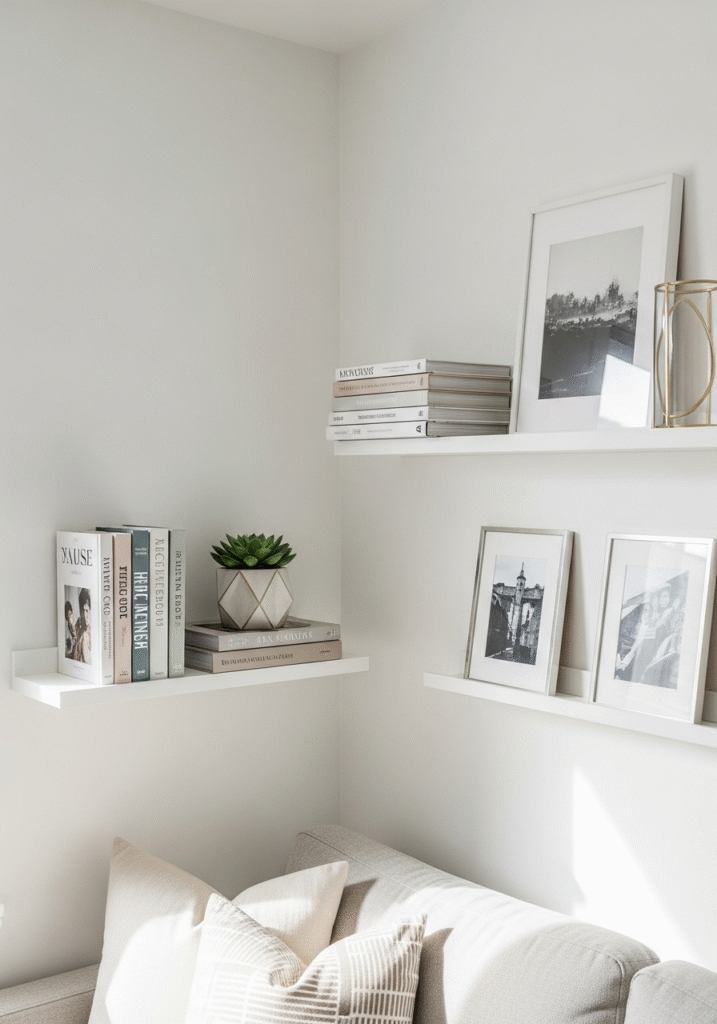
Even though no-drill shelves offer convenience, they don’t compromise on style. Available in modern, rustic, or minimalistic designs, they can be just as attractive and sturdy as their drilled counterparts. You can use them to display plants, books, candles, picture frames, or even small kitchen items—enhancing the functionality and aesthetic appeal of any room.
In Summary:
No-drill floating shelves are the ideal solution for modern living. Whether you’re limited by rental agreements or just prefer a non-permanent approach, these shelves offer an easy, damage-free way to organize and beautify your space. With benefits like quick installation, removability, and compatibility with various wall types, it’s no surprise they’ve become a go-to choice for homeowners and renters alike.
Tools & Materials You’ll Need
Installing floating shelves without drilling might sound like a simple task—and it is—but having the right tools and materials will ensure that your setup is both safe and long-lasting. Whether you’re planning to install shelves for storage, decoration, or both, taking a few minutes to gather the proper items will save you time and prevent future headaches.
Below is a detailed list of essential tools and materials you’ll need for a smooth no-drill shelf installation, along with tips on choosing the right versions based on your needs and wall type.
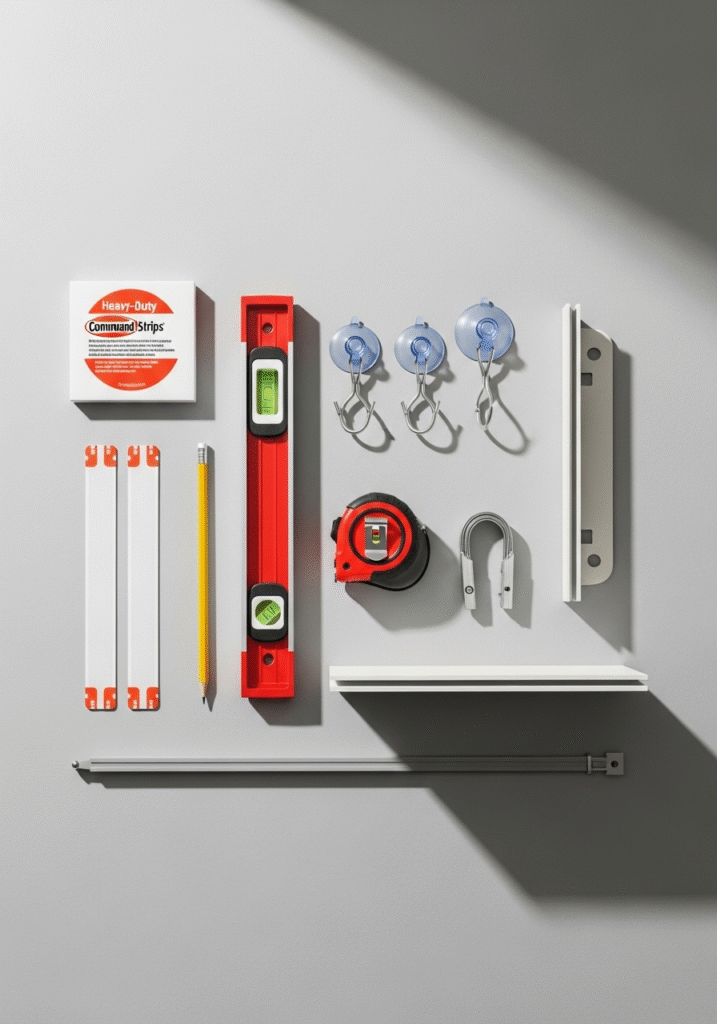
Heavy-Duty Adhesive Strips
These are the stars of no-drill shelf installations. Brands like Command™ and 3M Velcro™ offer damage-free adhesive solutions specifically designed to hold weight on a variety of surfaces. They come in several weight classes, so it’s important to check how much weight your shelf—and its contents—will add up to. Look for heavy-duty or industrial-strength strips for shelves that will hold books, frames, or plants.
- Tip: Always read the product’s weight rating and surface compatibility. For example, some adhesives may not adhere well to textured walls or wallpaper.
Level and Measuring Tape
Precision is key when mounting any shelf. A measuring tape helps you determine the exact placement and spacing of your shelf, especially if you’re installing more than one. A level ensures your shelf isn’t crooked, which is not only aesthetically important but also crucial for weight distribution.
- Pro Tip: Use a smartphone with a built-in level app if you don’t have a physical one on hand.
Pencil for Marking Placement
Don’t eyeball it! Use a pencil to lightly mark your measurements and adhesive placement before applying anything to the wall. These temporary marks can be easily erased later, but they’re crucial for accuracy during setup. This step helps you avoid having to reposition your shelf multiple times, which could reduce adhesive strength.
Shelf or Bracket with a Flat Backing
Choose a floating shelf or bracket that has a flush, flat surface on the back. This allows the adhesive to make full contact with both the shelf and the wall, which increases holding power. Avoid designs with uneven or hollow backs unless they are specifically engineered for adhesive mounting.
- Material Matters: Lightweight materials like MDF, plastic, or thin wood are ideal for no-drill methods. Heavy solid wood or metal shelves may exceed adhesive limits.
Optional: Suction Hooks or Tension Rods
Depending on the method you choose, you may want to explore additional support tools:
- Suction Hooks: Great for smooth surfaces like tile, mirrors, or glass. These can be used to hang baskets or small wire-frame shelves in bathrooms and kitchens.
- Tension Rods: These are perfect for closet spaces or inside cabinets. They use physical tension to stay in place and can hold lightweight shelving or hanging organizers.
- Bonus Idea: Combine tension rods with hanging baskets or trays to create tiered shelf systems without touching the walls.
Important Reminder: Always Check Weight Limits
Before buying any materials, calculate how much total weight the shelf will carry—including the shelf itself and whatever you plan to place on it. Adhesive strips, suction devices, and tension rods all have strict weight limits that must be followed for safety and shelf longevity.
- Example: A set of large Command Strips might hold up to 16 pounds (7 kg), but that includes the shelf’s weight. Overloading the system could result in shelf failure or wall damage—even without drilling.
Best No-Drill Methods to Install Floating Shelves
Installing floating shelves without drilling might seem tricky at first, but thanks to advancements in adhesive and tension technology, it’s easier and more accessible than ever. Whether you’re a renter who wants to avoid wall damage, or a DIY enthusiast looking for quick solutions, there are several effective no-drill methods that deliver both function and style.
Each method has its own strengths and ideal use cases. Below, we’ll explore the most popular techniques, what they’re best suited for, and what to avoid—so you can confidently choose the best option for your space and shelving needs.
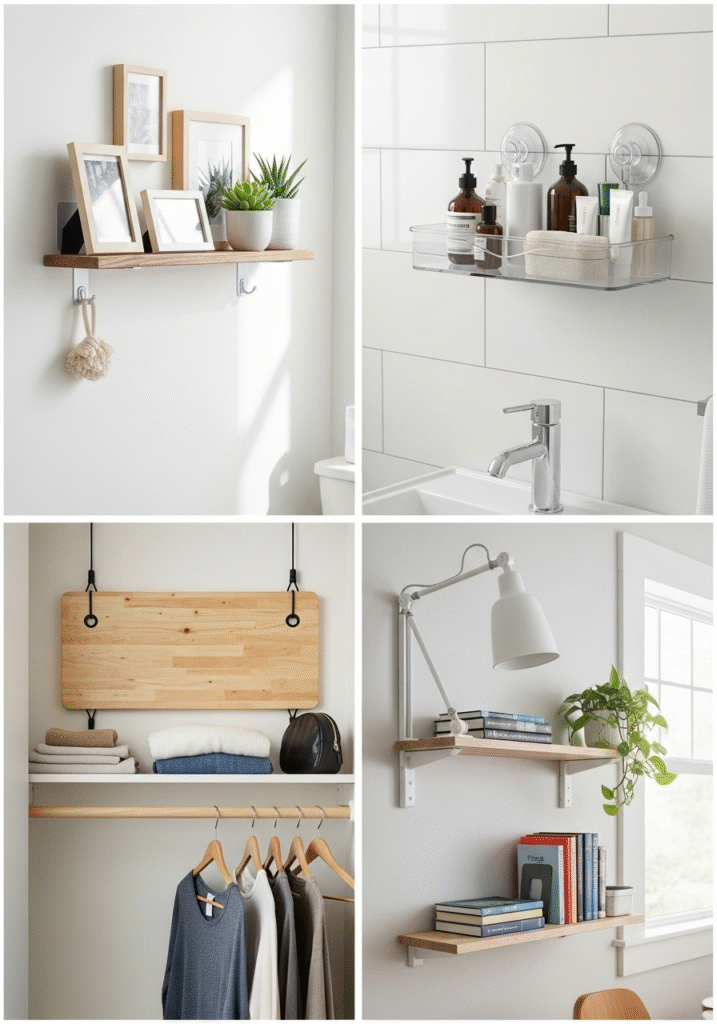
a. Adhesive Strips & Hooks
One of the most widely used no-drill methods, adhesive strips and hooks are a favorite for lightweight shelving. These strips use high-strength bonding agents to securely attach your shelf brackets or directly mount the shelf to the wall. Brands like Command™, 3M, and VELCRO® Brand offer specialized products designed for picture ledges, wall organizers, and small shelving units.
How it Works:
You simply clean the wall surface, apply the adhesive strip to the bracket or shelf back, press it firmly onto the wall, and wait for the adhesive to set (usually 1–2 hours or as recommended by the manufacturer).
Best For:
- Small picture frames
- Potted succulents or air plants
- Decorative items (candles, figurines, art pieces)
- Lightweight books or collectibles
Avoid For:
- Heavier items like full book collections or ceramic décor
- Glass shelves or solid wood pieces
- Humid environments unless rated for moisture
Pro Tip: For maximum hold, always follow the product’s instructions carefully, especially the weight limits and surface prep steps.
b. Suction Cup Shelves
Suction cup shelves are a fantastic option for wet or smooth surfaces like bathroom tiles, kitchen backsplashes, glass walls, or mirrors. These shelves use a vacuum-sealed suction mechanism to lock into place, offering solid support without a single hole drilled.
How it Works:
After cleaning the surface, you position the suction cups against the wall and press firmly. Many high-quality versions feature a twist-lock system for added strength. Some come with adjustable height or modular tray systems for extra customization.
Best For:
- Bathrooms (shampoo, soap, razors)
- Kitchens (spice jars, utensils, hand towels)
- Shower stalls or glass partitions
Avoid For:
- Painted drywall or textured surfaces
- Any porous surface where suction can fail
- Heavy ceramic containers or glass items
Pro Tip: Only use on completely smooth, non-porous surfaces like ceramic tile, stainless steel, or glass. Avoid grout lines.
c. Tension Rod Shelving
If you’re looking for a truly creative DIY option, tension rod shelving is a smart and stylish way to install shelves without a drill. This method involves placing two or more adjustable tension rods between two vertical surfaces (like closet walls or cabinet interiors), and then placing a board or tray on top to act as the shelf.
How it Works:
Measure the width between the two surfaces, extend the rods to fit snugly, and secure them tightly in place. Then add a lightweight shelf on top. Some users even stack multiple rods to increase strength or add curtain clips for hanging storage.
Best For:
- Closet organization
- Dorm rooms or rented apartments
- Under-sink storage or pantry shelving
- Small alcoves or nooks
Avoid For:
- Open spaces where there’s no wall-to-wall support
- Heavy or unbalanced items
- Fragile shelving boards
Pro Tip: Use rods with rubber grips to prevent slippage, and select lightweight shelving boards like MDF or plastic for best results.
d. Command Floating Shelf Brackets
For a more refined no-drill solution, Command™ Floating Shelf Brackets are specially designed to mount mini shelves directly to the wall using high-strength adhesives. These brackets are sleek, discreet, and surprisingly strong when used within their weight capacity.
How it Works:
The brackets come with adhesive pads and easy instructions. After applying the pads to the bracket, you press it against a clean wall and allow it to set. The shelf then slides or rests on the bracket supports, creating a “floating” look.
Best For:
- Bedrooms (small décor or alarm clocks)
- Offices (notebooks, desk supplies, pen holders)
- Hallways or entryways (keys, phones, plants)
Avoid For:
- Large shelving units
- Kitchens with heat and moisture
- Heavier electronic gadgets or large books
Pro Tip: Stick to the brand’s guidelines regarding shelf size and load. These brackets are ideal for shelves around 16–20 inches wide and loads under 5–10 pounds, depending on model.
Final Thoughts on No-Drill Methods
Each of these methods offers a safe, stylish, and damage-free way to enjoy floating shelves in your home—without picking up a drill. The best choice depends on the surface type, intended use, and weight of the items you want to store or display. For light-duty applications, adhesive strips or suction cup shelves are perfect. If you’re organizing a closet or working with vertical supports, tension rods offer a surprisingly strong solution.
By using one of these methods, you can decorate confidently—knowing you won’t harm your walls or violate your lease. With the right planning and materials, no-drill floating shelves can be just as effective and visually appealing as traditional ones.
Step-by-Step Guide: Install with Adhesive Strips
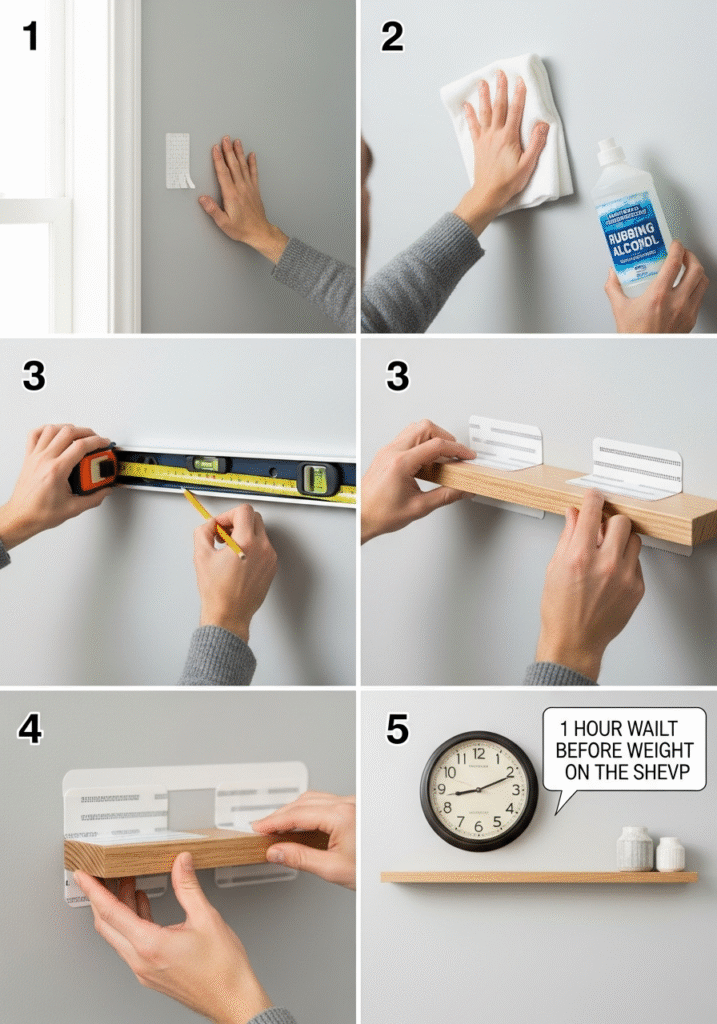
Among all the no-drill methods, using heavy-duty adhesive strips is one of the easiest and most renter-friendly ways to install floating shelves. This method is clean, quick, and requires no power tools—just a little planning and care. Whether you’re hanging a decorative shelf for plants and photo frames or a small utility shelf for keys and gadgets, adhesive strips offer a solid solution for lightweight shelving.
Below is a detailed, step-by-step guide to help you install your floating shelf securely using adhesive strips, such as Command™ Strips or 3M Velcro™. Follow these instructions closely to get the best results and avoid common mistakes.
Step 1: Choose the Right Wall Surface
Before you start sticking anything to the wall, it’s essential to select the right type of surface. Adhesive strips work best on:
- Painted drywall (smooth, not textured)
- Varnished wood or finished wood panels
- Tile and glass (smooth and clean)
- Metal surfaces like fridge sides or stainless steel panels
Avoid: Rough, uneven, or porous surfaces such as brick, cement, stucco, heavily textured wallpaper, or raw wood. These reduce adhesive contact and increase the risk of the shelf falling off.
Pro Tip: If you’re unsure about a surface, test a small adhesive strip in an inconspicuous corner first.
Step 2: Clean the Area Thoroughly
Dust, oil, or even small moisture particles can weaken the grip of adhesive strips. Cleaning the wall is a small but crucial step.
- Use a soft cloth or cotton pad with rubbing alcohol (isopropyl alcohol) to wipe down the area where the adhesive will be applied.
- Do not use household cleaners or soaps—they often leave behind a residue that interferes with the bonding process.
- Allow the surface to dry completely before moving to the next step.
Bonus Tip: Wipe down the back of the shelf or bracket too—especially if it’s been in storage or handled frequently.
Step 3: Measure and Mark Shelf Placement
Precision matters when it comes to floating shelves. A crooked shelf not only looks bad but may also cause items to slide off.
- Use a measuring tape to determine the ideal height and position on the wall.
- Place a level across the spot to ensure your markings are even and straight.
- Lightly mark the corners or bracket points with a pencil. These marks will guide your adhesive placement.
Helpful Hint: If you’re installing multiple shelves, leave at least 10–12 inches of space vertically between them for balanced visuals and usability.
Step 4: Apply the Adhesive Strips to the Shelf or Brackets
Now it’s time to attach the adhesive strips. Follow the brand’s instructions carefully—some may recommend applying strips to the shelf first, while others may want one side on the wall first.
- Stick the adhesive strips to the back of the shelf or onto the bracket arms. Make sure they’re positioned evenly to distribute weight.
- Remove the protective liner from the other side of the strip, then press the shelf firmly against the wall.
- Apply consistent pressure for at least 30 seconds to form a strong initial bond. For large shelves, you may need an extra set of hands to hold things in place.
Note: Some brands offer Velcro-style strips that let you remove and reposition the shelf after attaching, while others are one-time use only. Check your product type.
Step 5: Wait Before Adding Items
One of the most common mistakes people make is loading their shelf too early. Adhesive products require a curing time to reach full strength.
- Let the adhesive strips bond to the wall for at least 1 hour before placing anything on the shelf.
- For best results, wait up to 24 hours—especially if you live in a humid environment or if the shelf will hold delicate items.
- Start by placing lighter objects first to test the shelf’s stability, then gradually add heavier items within the product’s weight limit.
Safety Reminder: Never exceed the weight capacity listed by the adhesive strip manufacturer. Even if the shelf feels secure initially, overloading it could lead to a sudden fall later.
Extra Tips for Long-Lasting Results
- Temperature Matters: Install at room temperature (ideally between 60°F and 85°F or 15°C to 29°C). Cold or hot environments may weaken the adhesive.
- Regular Checks: Inspect the shelf periodically to make sure the adhesive hasn’t loosened—especially in high-traffic or humid areas.
- Removal: When it’s time to take down the shelf, follow the brand’s instructions to safely remove the strips without damaging your wall. Usually, you can pull the strip straight down, stretching it slowly to release the adhesive.
Tips for Ensuring a Secure, Long-Lasting Hold
Installing floating shelves without drilling is a convenient and renter-friendly option, but ensuring that your no-drill shelf stays secure over time takes a bit of planning and care. While adhesive strips, suction cups, and tension systems are designed for ease of use, they all have their limits. The key to success lies in understanding these limits and using best practices to maintain shelf strength and safety.
Below are expert-backed tips to help you make sure your no-drill floating shelf remains firmly attached—and safe to use—for months or even years to come.
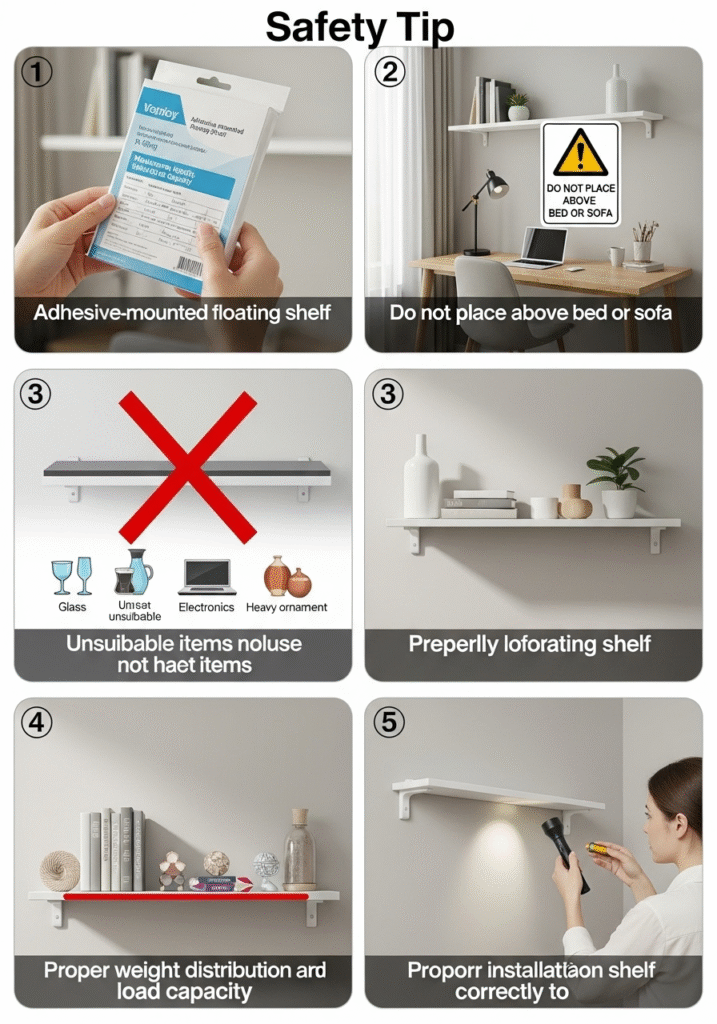
1. Always Follow Weight Limits
Every no-drill shelf installation product—whether it’s an adhesive strip, suction cup, or bracket—comes with a maximum weight rating. This rating tells you the total load the product can safely hold, including the weight of the shelf itself.
- Why it matters: Exceeding the weight limit can lead to the adhesive or suction mechanism failing unexpectedly, causing your shelf—and everything on it—to crash to the floor.
- Check the label: Look on the product packaging or manufacturer’s website to find the specific weight capacity (e.g., “Holds up to 5 lbs”).
- Plan accordingly: If you’re displaying heavier items, consider dividing them across multiple shelves or using alternative support like tension rods.
Pro Tip: When in doubt, always underestimate the weight your shelf will carry. It’s better to stay well below the limit than to risk overloading.
2. Avoid Installing Shelves Above Beds, Sofas, or Seating Areas
While no-drill shelves can be quite sturdy when installed properly, it’s best to play it safe by avoiding installations directly above sleeping or sitting areas.
- Why: Even well-installed adhesive or suction-mounted shelves can occasionally come loose due to temperature changes, humidity, or long-term wear.
- Safe design: Keep floating shelves away from headboards, cribs, sofas, and reading nooks—especially if you plan to place anything remotely heavy on them.
Alternative Idea: If you want wall storage in these areas, consider lightweight wall décor (like foam signs or fabric organizers) that won’t pose a hazard if they fall.
3. Don’t Place Glass, Electronics, or Heavy Ceramics
As tempting as it may be to showcase your favorite gadgets or fragile heirlooms on a floating shelf, it’s important to limit shelf contents to non-fragile, lightweight items.
- Avoid items like:
- Laptops or smart speakers
- Vases made of glass or porcelain
- Candles in glass jars
- Expensive framed photos or art pieces
- Safer alternatives: Use your no-drill shelves for things like faux plants, small books, lightweight storage baskets, or decorative figurines made of plastic, resin, or light wood.
Safety Reminder: Always remember that adhesive-mounted shelves are not a replacement for heavy-duty wall-mounted shelving systems.
4. Distribute Weight Evenly
Even within the allowed weight range, how you distribute the items on the shelf can affect its durability and safety.
- Best practice: Place heavier items in the center of the shelf and lighter ones toward the edges. This prevents uneven pressure that can weaken the adhesive or cause the shelf to tilt.
- Balance matters: If using two adhesive brackets, make sure the weight on both sides is roughly equal. Lopsided weight can loosen one side faster and lead to shelf sagging.
Pro Tip: Use items of similar size and weight when decorating for better balance and a more cohesive look.
5. Periodically Check Adhesive or Suction Stability
No-drill shelf solutions aren’t permanent—and that’s part of their appeal. But it also means they require routine checks to ensure continued safety.
- Every few weeks: Gently press on the shelf to check for looseness, wiggling, or signs of weakening adhesive.
- High humidity zones: If your shelf is installed in a bathroom or kitchen, moisture in the air can break down adhesives over time. More frequent checks are recommended.
- Look for wear: Pay attention to peeling, sagging, or any cracking sounds when pressure is applied.
Maintenance Tip: If you notice the adhesive is losing grip, replace the strips before they fail. Don’t wait for a shelf to fall—preventive care is key.
Final Thoughts: Durability Meets Smart Design
No-drill floating shelves are a wonderful solution for modern renters, students, and anyone looking for damage-free decorating. But like all clever DIY hacks, they work best when you respect the materials and follow smart practices. By keeping weight limits in mind, placing your shelves thoughtfully, and checking them regularly, you’ll extend their life and enjoy both safety and style.
A well-installed, properly maintained no-drill shelf can last for years—and give you the freedom to refresh your space without ever picking up a power tool.
Styling Ideas for Floating Shelves
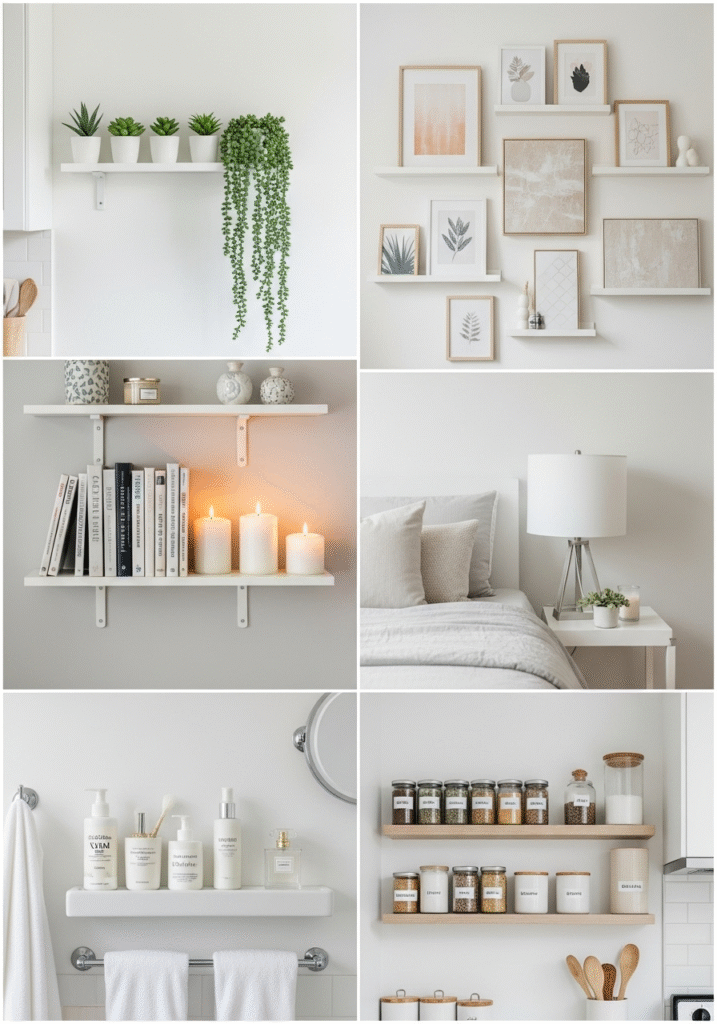
Once your no-drill floating shelves are installed securely, it’s time to have some fun with styling. Floating shelves offer more than just storage—they serve as a visual highlight that can define your room’s personality and elevate your home décor. Whether you’re working with a compact apartment or a cozy corner, thoughtful styling turns simple shelves into eye-catching design features.
Here are some creative and functional ideas to help you style your shelves beautifully—without overloading them.
Mini Plant Display
One of the most popular uses for floating shelves is to create a mini indoor garden. Adding greenery not only softens the space but also brings life and vibrancy to the walls.
- Use faux plants if you’re concerned about shelf strength or sunlight availability.
- For real plants, choose small, lightweight options like succulents, air plants, or small potted herbs.
- Use matching or coordinated pots to keep the look clean and cohesive.
- Add a few natural textures like wooden coasters, stones, or a woven basket to complete the organic vibe.
Tip: Place plants in plastic or lightweight ceramic pots to avoid adding unnecessary weight.
Art Wall Gallery
Floating shelves offer a unique way to curate a rotating gallery of prints, sketches, or photographs—without putting multiple holes in your walls.
- Choose a few small to medium-sized framed prints or canvas art pieces that reflect your personal style.
- Layer art pieces by leaning one against the wall and placing a smaller one in front to create depth.
- Add visual variety by mixing textures—like wood frames, metal accents, or canvas wraps.
- Include small sculptures or decorative objects between frames to break up repetition.
Style Note: Stick to a unified color palette for a sleek, gallery-like appearance that doesn’t overwhelm the shelf.
Books & Candles for a Cozy Nook
Floating shelves can transform a dull corner into a warm and welcoming reading nook or bedroom accent wall.
- Arrange lightweight paperback books vertically and horizontally to create visual contrast.
- Add decorative bookends, a few pillar candles, or a ceramic mug for a personal touch.
- Throw in a cozy element like a mini lantern, a string of fairy lights, or a small fabric item like a folded napkin or linen pouch.
Safety Reminder: Avoid real burning candles on adhesive-mounted shelves. Instead, use LED flameless candles for ambiance without risk.
Bathroom Organizer with Style
Maximize small bathroom spaces with a floating shelf that doubles as a functional beauty station.
- Organize your skincare products, perfumes, or essential oils neatly in trays or small bins.
- Roll or fold a few hand towels for a spa-inspired look.
- Add a scented candle or reed diffuser to bring in fragrance and charm.
- Choose acrylic or lightweight containers to keep shelf weight low and aesthetics modern.
Storage Tip: Group products by category (e.g., face care, hair products) to maintain a clutter-free appearance.
Kitchen Spice Rack or Coffee Station
Floating shelves can be incredibly useful in kitchens—especially in small spaces where every inch counts.
- Use them to organize spice jars, tea canisters, or labeled containers.
- Opt for uniform containers with clear labels for a professional, clean look.
- Add a tiny potted plant, chalkboard label, or vintage utensil for charm.
- If you have a coffee setup, include mugs, a sugar bowl, or a small container for pods or grounds.
Important: Keep the shelf above the counter and away from heat or steam to preserve both the shelf and its adhesive strength.
General Styling Tips for No-Drill Floating Shelves
- Keep it light: Remember, these shelves aren’t bolted into the wall. Prioritize lightweight items and avoid dense, heavy decorations.
- Balance your layout: Group items in odd numbers (like 3 or 5) and mix tall and short objects for visual interest.
- Negative space is good: Avoid overloading your shelf. Empty space allows your décor to breathe and reduces visual clutter.
- Color coordination: Choose 2–3 dominant colors and stick to them across your shelf items for a harmonious look.
Maintenance & Safety Considerations
Installing floating shelves without drilling is a simple and stylish DIY solution—but just like any home improvement project, proper maintenance and safety practices are essential to keep everything functioning as intended. Since no-drill shelves rely on adhesives, suction, or tension rather than permanent hardware, they require a bit more care and attention over time to remain both secure and visually appealing.
Below are key tips and best practices to help you maintain the integrity of your no-drill shelves and ensure a safe environment for you, your family, and your belongings.
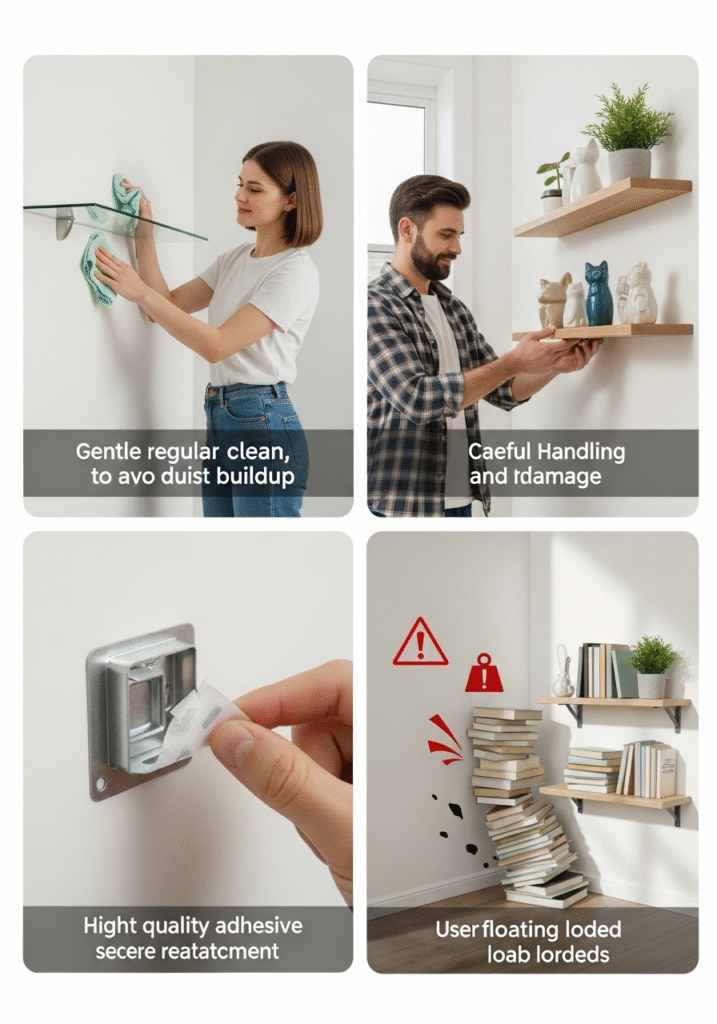
1. Clean Your Shelves Regularly
Dust and grime may seem harmless, but over time they can affect the appearance and even the stability of your shelving setup—especially if buildup interferes with the shelf’s adhesive or structural balance.
- Use a microfiber cloth or soft duster to wipe down your shelves weekly or bi-weekly.
- Avoid heavy cleaning sprays or abrasive products, especially near adhesive areas, as chemicals can weaken bonding.
- If your shelf is in a kitchen or bathroom, pay extra attention to grease or moisture buildup, which can cause slippage or reduce adhesion.
Pro Tip: If you’re using decorative storage items (like baskets or bins), clean underneath them occasionally to prevent scratching or weight imbalances.
2. Always Remove Items Before Repositioning or Adjusting Shelves
One common mistake is trying to move or adjust a no-drill shelf while it’s still holding weight. This can strain the adhesive, warp the structure, or even lead to breakage.
- Before you reposition or remove the shelf, take everything off it—including decorations, containers, and even lightweight items.
- Gently remove the shelf by following the manufacturer’s instructions. Most adhesive strips are designed to be pulled straight down, stretching slowly to release cleanly from the wall.
Reminder: Never yank or twist the shelf, as this can damage both the adhesive and your wall surface.
3. Replace Adhesive Strips if They Show Signs of Wear
Even high-quality adhesive products are not meant to last forever. Over time, temperature changes, humidity, and age can weaken their grip. If you notice any of the following, it’s time to replace the adhesive:
- The strip is peeling at the edges or curling
- The shelf feels slightly loose or shifts when touched
- There’s visible dirt or damage around the adhesive area
To fix this:
- Remove the shelf carefully, following proper removal instructions.
- Clean the surface thoroughly with rubbing alcohol.
- Apply new adhesive strips, ensuring full contact with the wall and the shelf backing.
- Let the adhesive cure for the recommended time before loading the shelf again.
Helpful Tip: Keep extra adhesive strips on hand so you’re always prepared for maintenance.
4. Do Not Exceed Weight Recommendations
Just because your shelf seems sturdy doesn’t mean it can hold more than what’s advised. Adhesive- and suction-based shelving systems are engineered with specific weight limits, and pushing those limits can lead to shelf failure—often without warning.
- Always check the manufacturer’s guidelines for maximum load capacity.
- Keep in mind that the total weight includes the shelf itself plus all the items you place on it.
- Over time, even slightly exceeding the weight limit can put constant pressure on the adhesive, causing it to fail gradually.
Tip: It’s better to underload than overload. Even if the shelf feels secure, play it safe to prevent accidents.
Final Thoughts on Maintenance & Safety
No-drill floating shelves are designed for simplicity and convenience—but like any part of your home décor, they benefit from regular upkeep and thoughtful usage. By following simple maintenance steps and being mindful of the product’s limitations, you can enjoy stylish and secure shelving for months or even years without the hassle of repairs or wall damage.
Whether you’re organizing a compact bathroom, creating a cozy reading nook, or styling a functional entryway, a well-maintained no-drill shelf offers the best of both worlds: design flexibility and peace of mind.
Common Mistakes to Avoid
Floating shelves that don’t require drilling are a brilliant solution for renters, students, and DIY decorators. However, despite the ease of installation, many people unknowingly make critical mistakes that compromise the shelf’s stability, safety, or lifespan. If you’re planning to install shelves using adhesive strips, suction mounts, or tension rods, avoiding these pitfalls is essential for long-lasting success.
Below are some of the most common mistakes to watch out for, along with actionable tips to help you avoid them and get the best results from your no-drill shelf installation.
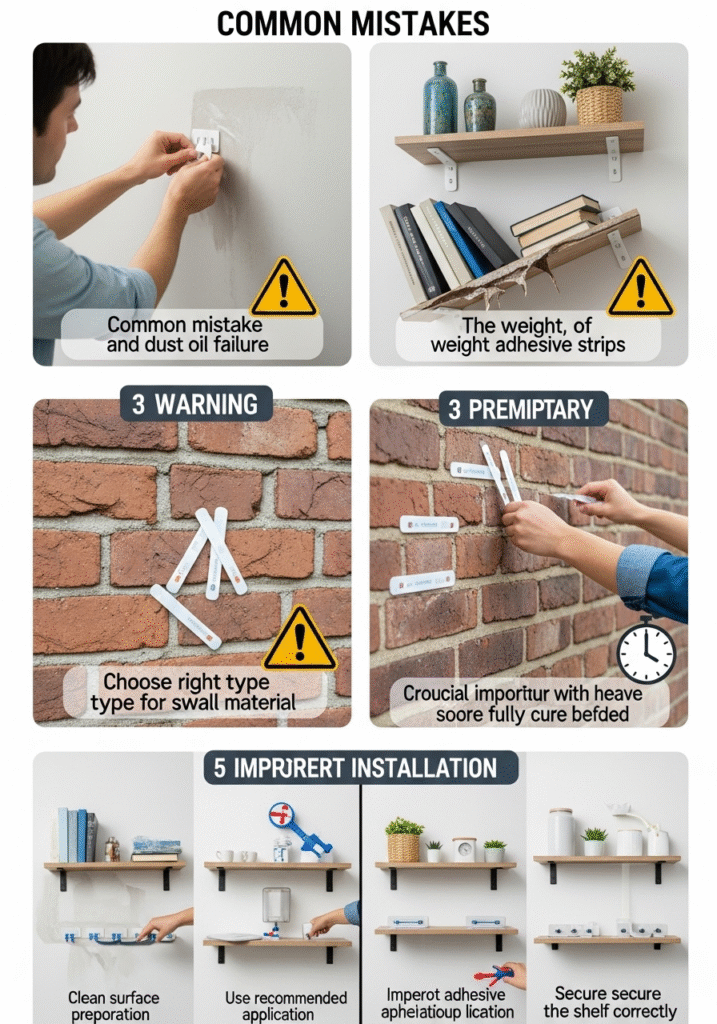
1. Skipping Proper Wall Preparation
This is by far the most frequent mistake people make. Even the strongest adhesive or suction cup won’t hold properly if the wall surface is dirty, oily, or dusty.
- Why it matters: Oils, dust, and residues act as barriers between the adhesive and the wall, significantly reducing bonding strength.
- Fix: Always clean the wall with rubbing alcohol, not general-purpose cleaners or water. Alcohol removes oils and dries quickly, leaving a clean surface for bonding.
- Also clean: Don’t forget to clean the back of the shelf or bracket before applying adhesive.
Pro Tip: Let the wall dry completely before applying any adhesive strips. Even slight moisture can compromise adhesion.
2. Ignoring Weight Limits
Another critical error is overloading the shelf, either because it “feels stable” or simply by underestimating the weight of items.
- What happens: When a shelf is burdened with more weight than it’s rated to hold, it can suddenly detach, damaging your belongings and possibly the wall.
- Reality check: Even if your shelf stays up initially, adhesive fatigue can build up over time and lead to failure days or weeks later.
- Solution: Always check the manufacturer’s specified weight limit and add up the total weight of the shelf and the items you plan to place on it.
Tip: Stick to lightweight décor like books, plants, or personal items and distribute weight evenly for extra stability.
3. Installing on Textured or Uneven Surfaces
Adhesive strips and suction mechanisms require flat, smooth surfaces to maintain proper grip. Mounting them on rough, porous, or uneven walls is a recipe for failure.
- Problem surfaces include: Textured plaster, brick, stucco, concrete, or any wall with uneven paint or bumps.
- Why it fails: Adhesive strips cannot make full contact with rough textures, and suction cups lose their vacuum seal on porous or gritty surfaces.
- Solution: Only use no-drill shelves on surfaces like painted drywall, tile, glass, finished wood, or metal.
Tip: If you only have textured walls available, consider using tension rod shelving or freestanding storage alternatives instead.
4. Not Allowing the Adhesive to Cure Properly
Adhesive strips need time to form a strong bond with the wall. Placing items on the shelf too soon after installation can weaken the grip and shorten the shelf’s lifespan.
- Common error: Users apply the shelf and immediately start loading it with décor or supplies.
- What to do instead: Follow the specific cure time provided in the product instructions. Most recommend at least 1 hour, but some may require up to 24 hours for full bonding.
- Why it matters: This initial cure time allows the adhesive to settle into the surface, maximizing holding power and reducing the risk of failure later.
Pro Tip: Install your shelves at night or when you don’t need to use them right away—this gives the adhesive ample time to set.
5. Not Following Manufacturer Instructions Precisely
Every adhesive product is slightly different, and not reading the directions can lead to improper installation and weakened performance.
- Issues caused by this include:
- Incorrect adhesive orientation
- Poor spacing or strip placement
- Incomplete application pressure
- Skipping cleaning or prep steps
- What to do: Always take a few extra minutes to read the installation instructions carefully. Even small oversights can lead to poor performance or shelf collapse.
Tip: Many adhesive strip brands also offer short video tutorials online—watching a visual guide can help you avoid errors.
Final Word on Avoiding Mistakes
Installing no-drill floating shelves is meant to be easy and efficient—but that doesn’t mean you should rush the process. Taking shortcuts, ignoring instructions, or applying strips on unsuitable surfaces are all mistakes that can turn your quick DIY into a costly mess.
By avoiding these common errors—especially around cleaning, weight management, and surface compatibility—you’ll enjoy a safer, cleaner, and longer-lasting shelf. With just a bit of extra care, your no-drill installation will look great and stay firmly in place for months or even years.
Final Thoughts: Stylish Shelves Without the Holes
In today’s world of flexible living—whether you’re renting an apartment, residing in a dorm, or simply avoiding permanent changes to your home—no-drill floating shelves provide a smart, modern alternative to traditional wall-mounted shelving. These innovative solutions allow you to enjoy the look and functionality of floating shelves without needing power tools, screws, nails, or wall anchors.
Thanks to products like heavy-duty adhesive strips, suction cup systems, and adjustable tension rods, anyone can create a functional and beautiful storage solution in just a few simple steps. What was once a weekend project involving wall damage and drywall repair can now be done in minutes—with zero commitment and full flexibility.
A Stylish Solution for Every Space
No-drill floating shelves have proven especially popular in:
- Rental properties where lease agreements prohibit drilling
- Dorm rooms where permanent fixtures are not allowed
- Offices or home workspaces that require a quick setup
- Minimalist or modern interiors that favor clean, hole-free designs
- Small homes and apartments where space-saving solutions are key
Whether you’re displaying art, organizing everyday essentials, or adding greenery to your walls, these shelves offer a sleek and seamless way to bring personality and order to your home.
Budget-Friendly & Beginner-Proof
One of the most appealing aspects of no-drill shelves is their affordability and simplicity. You don’t need to invest in expensive power tools, hire a handyman, or worry about patching holes later on. These shelves are:
- Easy to install with basic tools like a level and tape measure
- Affordable, especially when compared to wall-mounted alternatives
- Damage-free, preserving your walls and your security deposit
- Removable and reusable, making them ideal for frequent movers
Even if you’re new to DIY, the step-by-step methods shared in this guide make it easy to complete your shelf installation safely and successfully.
Flexible, Functional, and Fully Customizable
Beyond ease of installation, no-drill shelves also offer the benefit of flexibility. Need to move the shelf to another wall? Want to change your décor theme? No problem. These shelves are designed to be:
- Repositionable: Move them around without damaging the wall surface
- Adaptable: Use different shelf types or adhesives based on your space
- Customizable: Style them with plants, books, art, or storage bins to suit your taste
This level of customization makes them ideal for seasonal decorating, evolving tastes, or multi-use spaces like studio apartments.
Final Verdict: No-Drill Floating Shelves Are Worth It
No-drill floating shelves are more than a temporary solution—they’re a smart, stylish, and practical way to make the most of your wall space without compromising the structure or appearance of your home. From bathrooms and kitchens to bedrooms and entryways, these shelves can be tailored to suit virtually any room.
By choosing the right tools, following best practices, and avoiding common mistakes, you can enjoy beautiful and durable shelving—without a single hole in the wall.
Whether you’re a renter, a college student, a design-conscious minimalist, or someone just looking for a fast and effective home upgrade, no-drill shelves deliver on both form and function. Embrace this modern storage hack, and start transforming your space—the smart, simple, and screw-free way.
