Introduction
ingle leak can waste between 3,000 to 4,000 gallons of water annually, contributing to unnecessarily high water bills and even long-term structural damage due to moisture buildup. The constant dripping sound can also be irritating and disruptive, especially in quiet spaces.
What many homeowners don’t realize is that most faucet leaks are caused by simple, easily fixable issues—such as worn-out washers, damaged seals, or loose components. These problems don’t require expensive tools or professional plumbing services. In fact, with just a few basic tools and a little guidance, you can repair most faucet types on your own in under two hours.
This comprehensive guide is designed to walk you through each step of the repair process, regardless of what type of faucet you have. Whether you’re dealing with a cartridge faucet, a compression faucet, a ball faucet, or a ceramic-disk faucet, we’ll help you identify the problem, understand how your specific faucet works, and provide clear instructions to get it working properly again.
Drawing from reliable sources like Reddit DIY communities, repair platforms like iFixit, and expert plumbing advice, this guide compiles practical, user-tested tips for beginners and experienced DIYers alike. Fixing a dripping faucet not only saves water and money, but also empowers you to take control of home maintenance with confidence.
Why Fix a Leaky Faucet
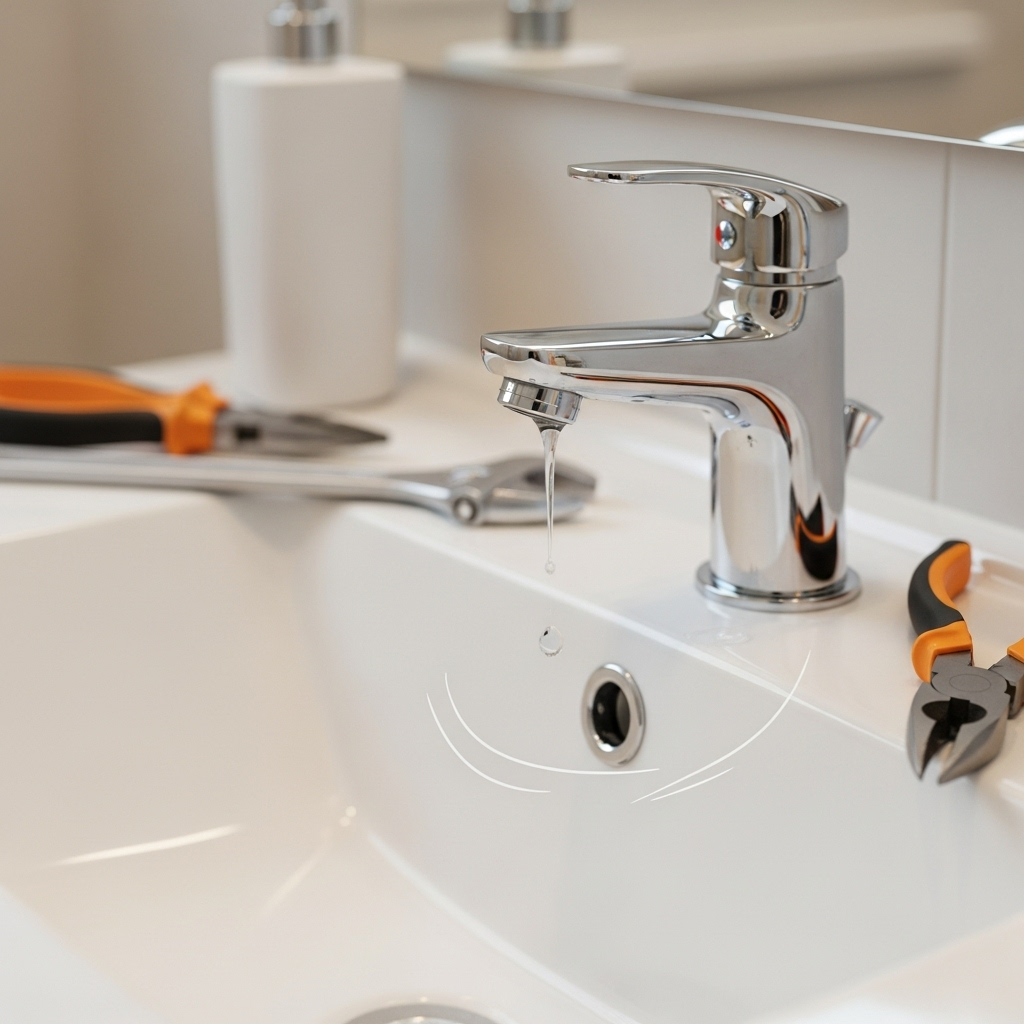
Fixing a leaky faucet might not seem urgent, but it offers several compelling benefits that go far beyond just stopping that irritating drip. Addressing a leak promptly is one of the easiest and most cost-effective ways to maintain your home and practice environmental responsibility. Here’s why taking the time to fix a dripping faucet is well worth the effort:
1. Save Money:
Even a slow, steady drip can add up to a significant amount of wasted water—often more than 3,000 gallons per year. That’s water you’re paying for without even using. Over time, this waste leads to unnecessarily high utility bills. Fixing the leak not only stops the waste but can also result in noticeable monthly savings, especially in households with multiple faucets.
2. Conserve Water:
Water is a precious resource, especially in drought-prone or dry regions where conservation efforts are critical. A leaking faucet may seem minor, but on a large scale, leaks across homes and communities contribute to millions of gallons of wasted water each year. By fixing your faucet, you’re contributing to broader efforts to reduce water consumption and protect local water supplies.
3. Prevent Property Damage:
Persistent leaks can cause moisture to accumulate in areas where it doesn’t belong—under sinks, inside cabinets, behind walls, or on countertops. Over time, this excess moisture can lead to rusted fixtures, warped wood, peeling paint, mold growth, and even structural damage. What starts as a small leak can eventually result in costly repairs if left unaddressed.
4. Enjoy DIY Satisfaction:
There’s something deeply rewarding about fixing things yourself. Learning to repair a leaky faucet not only teaches you a practical, hands-on skill—it also empowers you to take charge of home maintenance and build confidence for future DIY projects. Plus, it feels good to solve a problem without needing to rely on professional services.
In short, fixing a leaky faucet is a simple step with big payoffs: lower bills, a greener home, improved longevity for your fixtures and cabinets, and the personal satisfaction of doing it yourself. It’s a small job that makes a big difference.
Types of Faucets
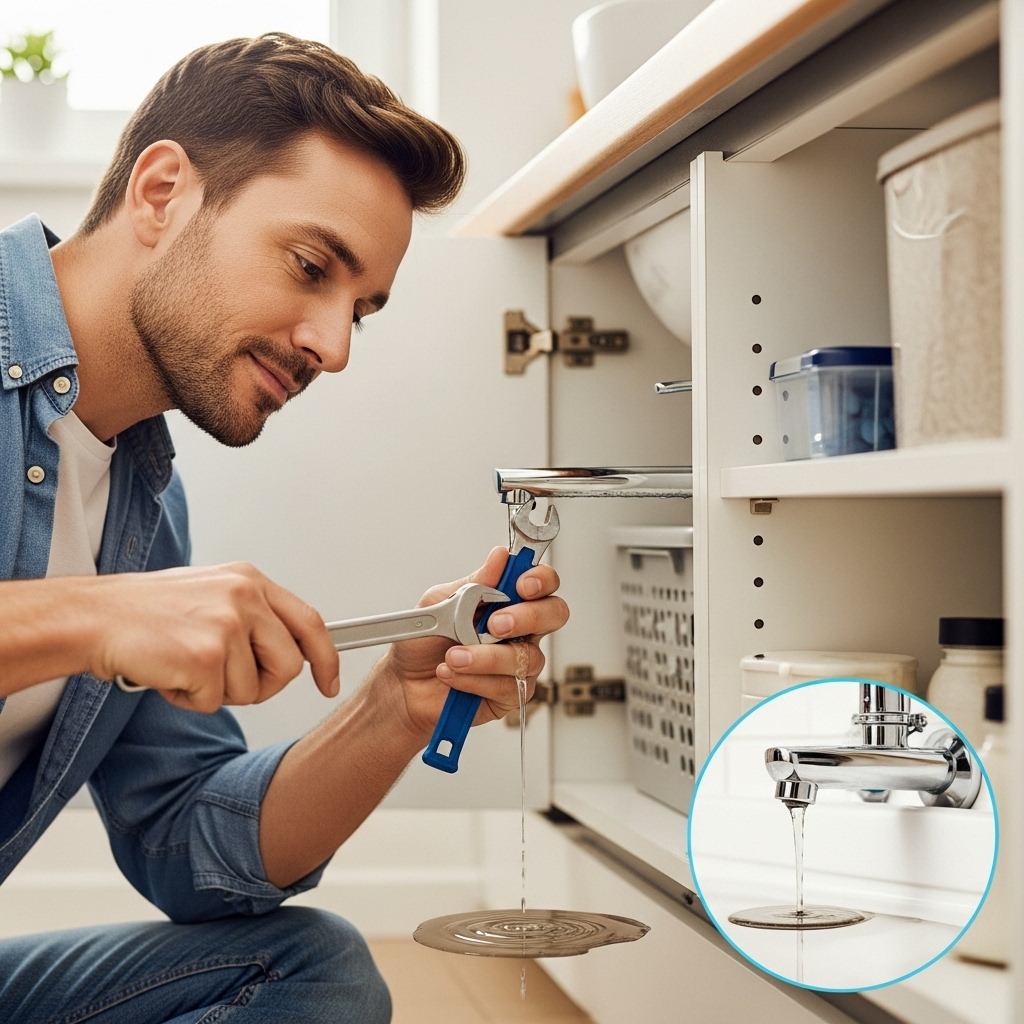
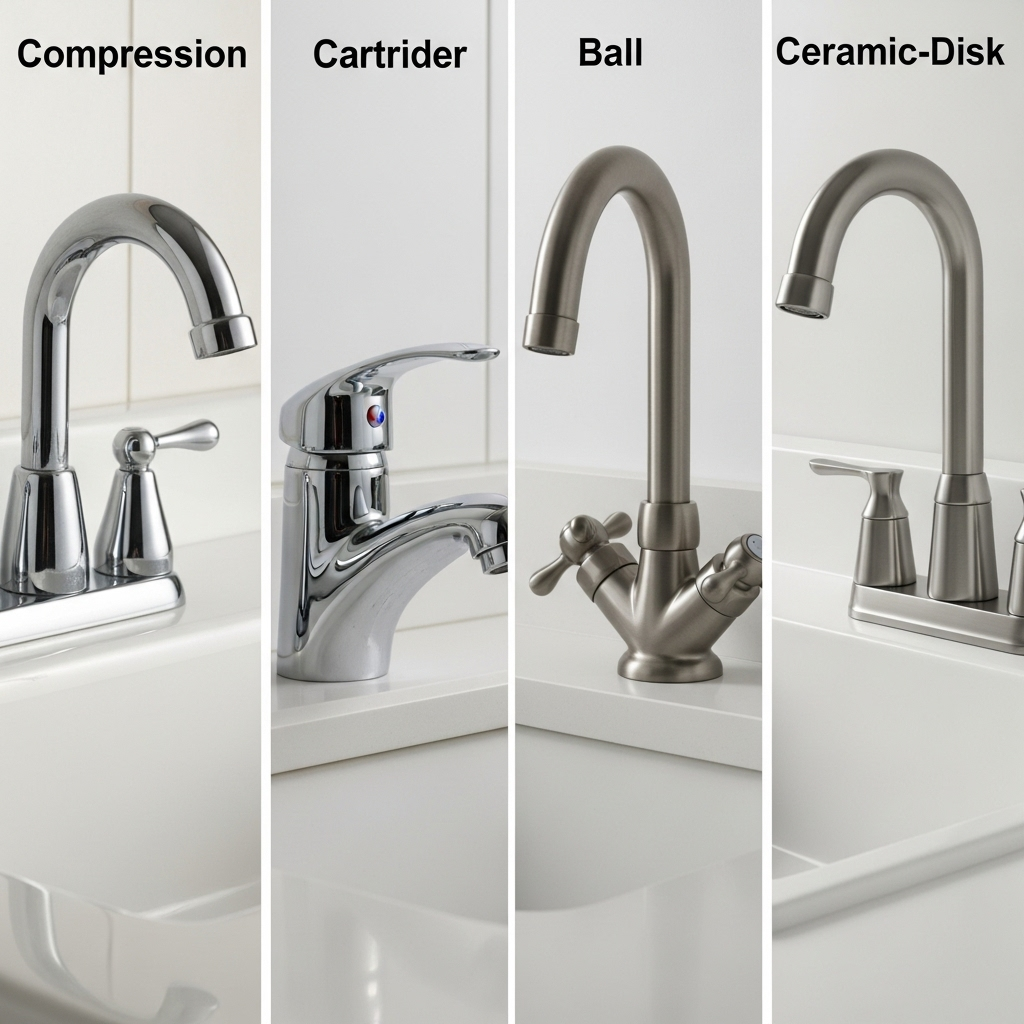
Before you can fix a leaky faucet, it’s crucial to understand what kind of faucet you’re dealing with. Each faucet type has its own internal mechanisms and requires different repair approaches. Identifying your faucet style will help you locate the leak’s source and purchase the correct replacement parts. There are four main types of faucets commonly found in homes: compression, cartridge, ball, and ceramic-disk. Let’s take a closer look at each.
1. Compression Faucet
Common in older homes, compression faucets are one of the most traditional types. They have two separate handles—one for hot and one for cold water—and work by compressing a rubber washer against a valve seat to stop the flow of water.
- How it works: Turning the handle tightens or loosens a washer that seals the water flow.
- Common issue: Leaks are often caused by worn-out rubber washers or O-rings, which can become brittle over time.
- Repair tip: Replacing the washer or O-ring usually resolves the issue.
2. Cartridge Faucet
Popular in modern bathrooms and kitchens, cartridge faucets can have one or two handles. They contain a movable cartridge that controls water flow and temperature with a simple up/down and left/right motion.
- How it works: The cartridge slides or rotates inside the faucet body, opening and closing water passages.
- Common issue: Leaks are usually caused by damaged or worn cartridges or seals.
- Repair tip: Swapping out the old cartridge with a matching replacement typically fixes the problem.
3. Ball Faucet
Common in older kitchen sinks, ball faucets are single-handle faucets with a round, ball-shaped valve that controls both temperature and flow rate.
- How it works: The ball mechanism interacts with rubber seats and springs to regulate water.
- Common issue: Leaks may stem from worn-out seats, springs, or the ball itself.
- Repair tip: A ball faucet repair kit often contains all the parts you need to reseal the faucet.
4. Ceramic-Disk Faucet
Known for durability and longevity, ceramic-disk faucets are usually single-handle models with a wide, cylindrical body. They feature two polished ceramic disks that slide against each other to control water flow.
- How it works: When the handle is moved, the ceramic disks rotate to align or block water flow paths.
- Common issue: Leaks may occur due to debris between the disks or worn seals, though they’re less common than with other types.
- Repair tip: Cleaning or replacing the ceramic cartridge typically resolves leaks.
Tools & Materials You’ll Need
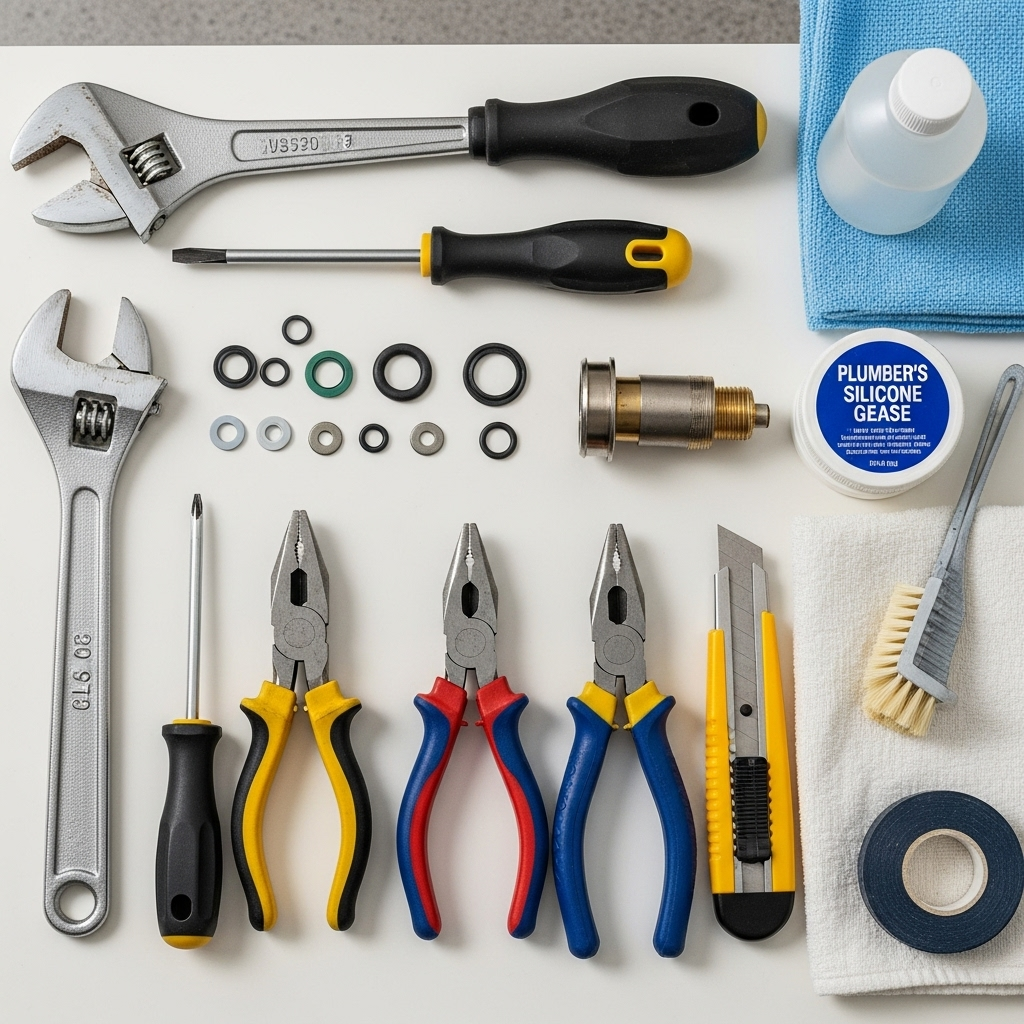
Before you begin repairing or replacing your faucet, it’s important to gather the right tools and materials. Having these essentials on hand will save time and help you complete the job efficiently. Each item plays a specific role in disassembling, cleaning, and reassembling the faucet, ensuring a leak-free and long-lasting fix.
Essential Tools & Their Purpose:
- Adjustable Wrench
Used for loosening or tightening nuts, bolts, and faucet cartridges of various sizes. A must-have for removing old hardware without damaging the faucet body. - Screwdrivers (Flat & Philips Head)
Required to remove handle screws or trim plates. Be sure to use the correct head to avoid stripping the screws. - Needle-Nose Pliers
Perfect for gripping and pulling out small internal parts like O-rings and valve springs. Their narrow design helps in reaching tight spaces. - Utility Knife & Clean Rags
A utility knife helps in carefully cutting away old seals or stubborn grime, while clean rags are useful for wiping down components and cleaning up messes. - White Vinegar & Brush
Soak faucet parts in white vinegar and scrub with a brush to remove mineral deposits and limescale buildup—especially helpful if you have hard water. - Plumber’s Silicone Grease
Use this to lubricate rubber seals, O-rings, and washers. This prevents leaks and extends the lifespan of moving parts. - Replacement Washers, O-Rings, & Cartridges
Always replace worn-out components with parts that match your faucet’s model. Check manufacturer instructions or bring old parts to the hardware store for a match. - Teflon (Plumber’s) Tape
Wrap this tape around threaded connections to ensure a watertight seal and prevent leaks after reassembly. - Basin Wrench or Handle Puller
Especially useful in tight spaces under the sink. A basin wrench allows you to reach and loosen mounting nuts, while a handle puller helps remove stubborn faucet handles without damage. (Tip: Highly recommended by users on Reddit.)
Recommended Resources:
Many homeowners and DIYers rely on expert advice from reputable sources like:
- iFixit – Known for detailed repair guides.
- Reddit – Great for real-life user tips and troubleshooting.
- Jolly Plumbing, Benjamin Franklin Plumbing, and Loco Plumber – Trusted professional plumbing services.
- Zameen, mysuperhub.com, and jabrasanitary.com – Excellent for finding local hardware and sanitary suppliers.
- learn.diywithhelp.com – A useful platform for step-by-step home improvement tutorials.
Step-by-Step Repair Guide
Repairing a leaky or malfunctioning faucet may seem intimidating, but with the right tools and a step-by-step approach, it’s a highly achievable DIY task. Whether you’re dealing with a dripping faucet, stiff handles, or inconsistent water flow, this guide will walk you through the complete repair process safely and efficiently. Follow each step carefully to ensure long-lasting results and avoid costly plumber visits.
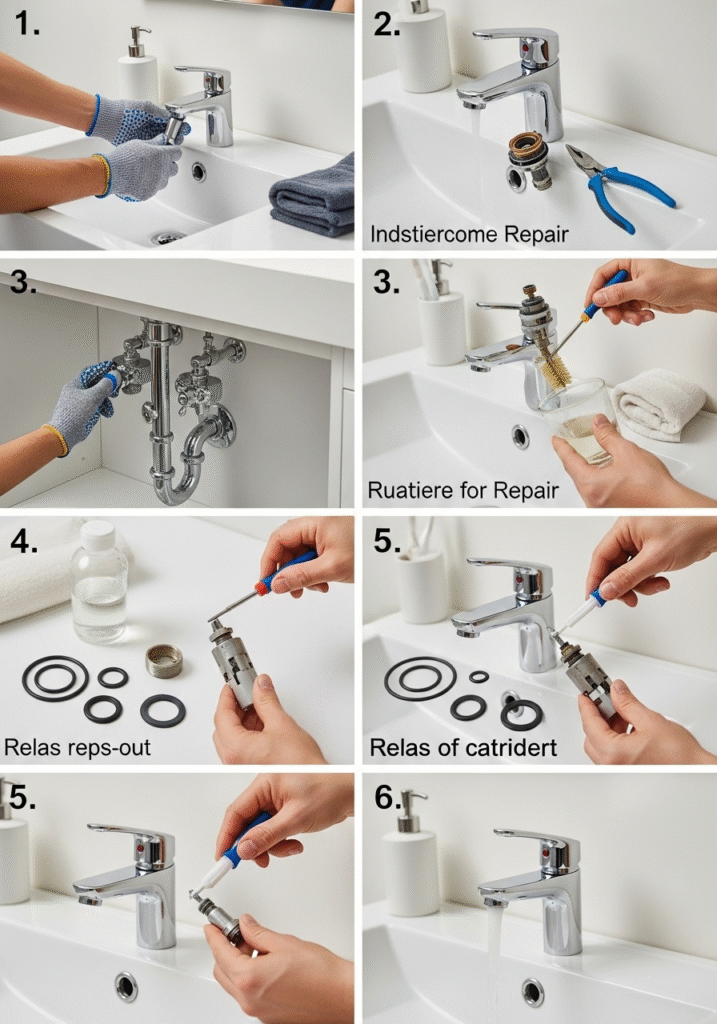
5.1 Shut Off Water & Prepare the Area
The very first step in any plumbing repair is shutting off the water supply to prevent flooding or unwanted messes.
- Locate the shutoff valves under your sink (usually two—one for hot, one for cold). Turn them clockwise to close.
- If your sink doesn’t have shutoff valves, shut off the main water supply to your home.
- Open the faucet to release any built-up pressure inside the pipes.
- Block the drain using a stopper or a rag. This prevents small screws or O-rings from falling down the drain and getting lost during disassembly.
💡 Pro Tip from Reddit users: Keep a small tray or magnetic parts holder nearby to store tiny components safely.
5.2 Identify Your Faucet Type
Understanding your faucet’s internal mechanism is crucial because the repair steps and replacement parts differ depending on the type.
There are four main faucet types:
- Compression Faucet: Has two handles and uses rubber washers that wear out over time.
- Cartridge Faucet: Common in both single and double handle designs. Uses a cartridge that controls water flow.
- Ball Faucet: Usually a single handle; contains a ball bearing mechanism.
- Ceramic-Disk Faucet: Durable and modern; uses a pair of ceramic disks inside a cylinder.
Check online guides or refer to your faucet’s manual. Some great sources include iFixit, Reddit plumbing communities, and home improvement platforms like Zameen and mysuperhub.com.
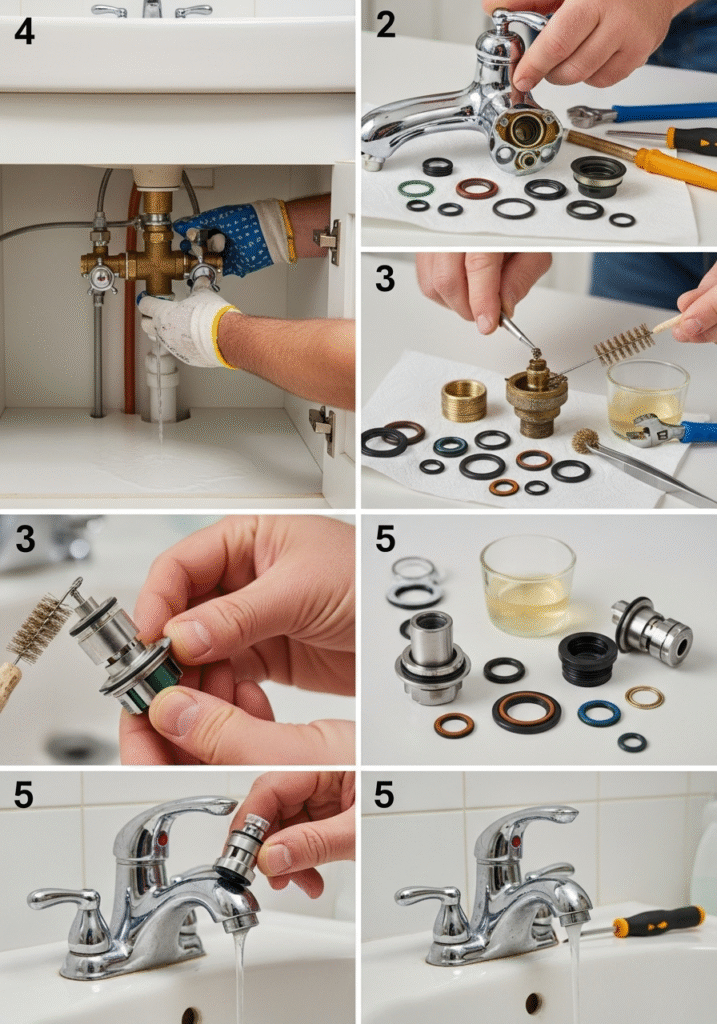
5.3 Disassemble Handle & Internal Mechanism
Once you’ve identified the faucet type, begin the disassembly process. The steps vary slightly based on the faucet mechanism:
For Compression Faucets:
- Pry off the decorative cap on the handle.
- Use a screwdriver to remove the handle screw.
- Unscrew and remove the packing nut to expose the stem.
- Pull out the stem and set it aside.
For Cartridge Faucets:
- Remove the handle by unscrewing the top cap or set screw.
- Pull off the handle.
- Use pliers to remove the retaining clip or nut.
- Carefully pull out the cartridge.
For Ball & Ceramic-Disk Faucets:
- Remove the cap and cam assembly.
- Take out the disk or ball mechanism.
- Extract the seats, springs, and O-rings gently.
Note: Take photos during each step for easy reference during reassembly.
5.4 Clean & Inspect Components
Once disassembled, your next task is to clean and inspect each component thoroughly.
- Soak parts in white vinegar to dissolve mineral buildup caused by hard water.
- Use a soft brush (like an old toothbrush) to scrub debris off metal and rubber parts.
- Inspect washers and O-rings for signs of wear—look for cracks, stiffness, or thinning.
- Check valve seats (in compression and ball faucets) for corrosion or pitting. If damaged, resurface with a valve seat tool or replace entirely.
Tip from Loco Plumber: Dry each component with a clean rag and lay them out in the order you removed them.
5.5 Replace Worn or Damaged Parts
Now comes the actual repair. This step depends on your faucet type:
- Compression Faucet: Replace the rubber washer and O-ring. These are usually the cause of drips.
- Cartridge Faucet: Replace the entire cartridge, especially if the old one is stuck or leaking. Also install new O-rings or seals.
- Ball Faucet: Replace the seats, springs, and O-rings. Many hardware stores sell ball faucet repair kits.
- Ceramic-Disk Faucet: Swap out rubber seals. If the ceramic disk is cracked, you’ll need a new cartridge assembly.
🛠 Important: Bring the old parts to the hardware store to match the exact size and shape. Using incorrect replacements can cause leaks or improper function.
5.6 Reassemble & Test the Faucet
With clean and new parts ready, you’re now set to reassemble everything.
- Lubricate all moving parts (washers, O-rings, threads) with plumber’s silicone grease. This ensures smooth operation and leak resistance.
- Reassemble the faucet in reverse order—starting with the internal mechanism and ending with the handle and cap.
- Do not overtighten any screws or nuts, especially on ceramic or plastic parts. It can cause cracking or misalignment.
- Turn the water back on slowly using the shutoff valves or main supply.
- Let the faucet run for a few seconds to flush out any trapped air or debris.
- Check for leaks around the base, handle, and spout.
Your Attractive Heading
Even after following all the right steps, faucet repairs don’t always go perfectly on the first try. Minor problems can still arise—such as persistent drips, stiff handles, or trouble reassembling parts. Don’t worry—these are common issues and usually easy to resolve with a few adjustments or simple tricks. Below are some frequent problems homeowners encounter during or after faucet repair, along with effective solutions.
Drip Persists After Repair
Problem: You’ve replaced washers or cartridges, yet the faucet continues to drip.
Possible Causes & Solutions:
- Misaligned or incorrectly seated components: Double-check that O-rings, washers, and cartridges are installed in the correct orientation and are sitting flat in their housings.
- Worn or corroded valve seat: Even with new parts, a damaged valve seat may not allow a proper seal. Use a valve seat grinding tool (also called a reseating tool) to smooth the surface, or replace the seat if needed.
- Loose fittings: Inspect all nuts and packing components to ensure they’re snug but not overtightened.
Handle Feels Stiff or Hard to Turn
Problem: After reassembling, the faucet handle feels tight or squeaky.
Possible Causes & Solutions:
- Mineral buildup: Hard water can leave calcium or lime deposits around the handle stem or cartridge, making it difficult to move.
- Solution: Disassemble again and clean affected parts with white vinegar. Scrub gently using a soft-bristled brush.
- Lack of lubrication: O-rings or moving components may need proper greasing.
- Solution: Apply plumber’s silicone grease to all rubber seals and moving parts before reassembling.
According to Benjamin Franklin Plumbing and jabrasanitary.com, keeping faucet internals clean and lubricated not only ensures smooth function but also extends the life of components.
Replacement Parts Don’t Match
Problem: The new cartridge or washer doesn’t fit correctly or fails to stop the leak.
Possible Causes & Solutions:
- Wrong size or model: There are dozens of faucet types, and even small variations can make replacement parts incompatible.
- Solution: Always take the old part to the hardware store for comparison. Most big retailers like Home Depot carry a wide variety of brand-specific components.
- If unsure of your faucet brand, take a photo or bring the entire stem/cartridge assembly to the store for assistance.
Faucet Handle Won’t Come Off
Problem: The handle is stuck and refuses to budge during disassembly.
Possible Causes & Solutions:
- Corrosion or hard water buildup: Mineral deposits can act like glue, especially around older metal handles.
- Solution: Spray penetrating oil like WD-40 at the base of the handle and let it sit for 10–15 minutes.
- Tight threading or rust: Use a gentle tapping motion with a rubber mallet to loosen the bond.
- Still stuck? Try a handle puller tool—specially designed to remove faucet handles without damage. Available at hardware stores and online.
DIYers strongly recommend having a handle puller on hand if you’re working with older or corroded faucets, as it can prevent accidental breakage.
Final Advice
Troubleshooting faucet issues requires a bit of patience and close attention to detail. Always:
- Work in a well-lit space
- Keep parts organized during disassembly
- Take photos at each step for easy reassembly
- Don’t force any part—gentle persistence is more effective than brute strength
Most importantly, if you feel stuck or unsure at any stage, consult reliable resources like Reddit Home Improvement, Loco Plumber, mysuperhub.com, or ask your local hardware expert for help.
Preventative Maintenance
Once you’ve successfully repaired your faucet, it’s important to keep it in good condition to avoid future leaks, drips, or handle stiffness. Preventative maintenance is a simple yet highly effective way to extend the life of your faucet, reduce the frequency of repairs, and maintain smooth water flow. These habits take only a few minutes a month but can save you time, money, and frustration down the road.
Clean Faucets Weekly
Routine cleaning prevents mineral buildup, which is a common cause of stiff handles and clogged aerators—especially in homes with hard water.
- Use mild soap and a soft cloth to clean the faucet’s surface once a week.
- Avoid abrasive scrubbers or harsh chemicals, which can damage the finish or wear down seals.
- Pay special attention to the base of the faucet and around handles, where grime tends to accumulate.
Soak Aerators and Internal Parts Monthly
Over time, aerators (the mesh screen at the tip of the faucet) can collect calcium deposits and debris that reduce water pressure or cause erratic spray patterns.
- Remove the aerator once a month and soak it in white vinegar for 15–30 minutes.
- Scrub gently with an old toothbrush to remove buildup, then rinse and reinstall.
- If you notice uneven flow or splashing, it’s usually due to a clogged aerator.
You can also apply this vinegar soak method to small removable parts like cartridges, disks, or ball components as needed.
Lubricate Moving Parts Every Few Months
Rubber seals, O-rings, and threaded areas tend to dry out over time, especially in hot or dry climates.
- Every 3–4 months, disassemble the handle (if possible) and apply plumber’s silicone grease to the O-rings, threads, and internal parts.
- This prevents friction, cracking, and premature wear—and helps the faucet handle turn smoothly.
Use the Faucet Gently
Daily use habits can impact how long your faucet lasts:
- Don’t overtighten the handle when turning off water—gentle closure is sufficient to stop flow and avoids straining internal parts.
- Encourage children or guests to avoid yanking or forcing the handle if it sticks.
- If the faucet starts to drip or feel tight, address it early before it causes more serious damage.
Small changes in usage can significantly reduce wear on washers, cartridges, and stems.
Replace Washers and O-Rings at First Sign of Wear
Don’t wait for a full-blown leak to perform maintenance. Check your faucet’s internal components during seasonal cleanings or anytime it feels different.
- Look for flattened, brittle, or cracked washers and O-rings—these are signs it’s time to replace them.
- If your water pressure suddenly drops or you notice squeaking while turning the handle, check internal parts right away.

When to Call a Professional
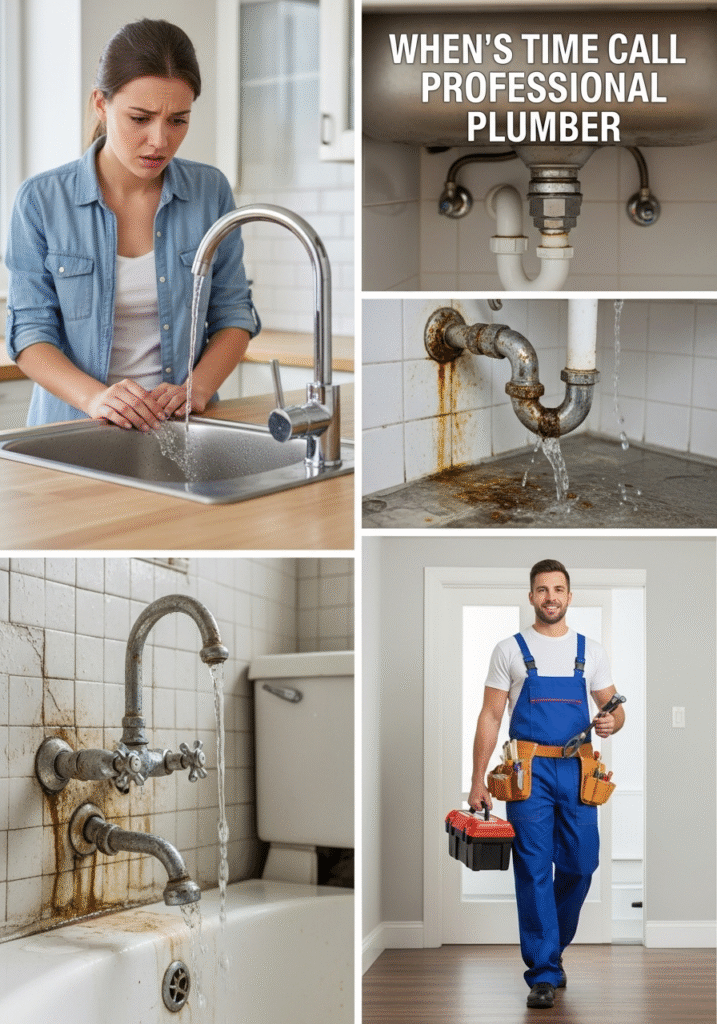
While many faucet issues can be solved with DIY methods, there are times when calling a licensed plumber is the safest and most cost-effective option. If your repair attempts haven’t resolved the issue, or if you discover deeper plumbing problems, professional help can prevent further damage and ensure long-term reliability.
Here are the most common scenarios where it’s wise to bring in a professional:
1. The Leak Persists After Replacing Seals or Cartridges
If you’ve followed all the repair steps—replacing O-rings, washers, or even the entire cartridge—but the faucet still leaks, it may point to a more serious issue inside the faucet body or plumbing system.
Possible causes include:
- A cracked faucet body or internal housing
- Damaged or misaligned valve seat
- Improper installation of replacement parts
In such cases, professional plumbers like those from Jolly Plumbing or Loco Plumber can accurately diagnose the issue using specialized tools and expertise.
2. Corroded Valve Seats or Malfunctioning Shutoff Valves
Over time, mineral-rich water can corrode valve seats, which prevents a proper seal and causes continuous dripping—even with new washers or cartridges. Similarly, shutoff valves under the sink can wear out or seize, making it difficult or impossible to stop water flow.
Signs of deeper corrosion issues:
- Green, blue, or white discoloration around the faucet base or fittings
- Water pooling around shutoff valves
- Difficulty turning water on or off completely
3. The Faucet is Old, Outdated, or Beyond Repair
Sometimes, the best solution isn’t repair—it’s replacement.
If your faucet is:
- Over 10–15 years old
- Constantly needing repairs
- Made of outdated parts that are hard to find
- Visibly cracked, pitted, or leaking from multiple points
…it may be more practical (and cost-effective) to install a new, water-efficient faucet.
Modern faucets come with ceramic-disk technology, better water-saving features, and durable designs that minimize the need for maintenance. A professional can help you choose the right replacement and install it quickly, often in under an hour.
4. You’re Uncomfortable with Plumbing Repairs
DIY plumbing has its limits. If you feel unsure, overwhelmed, or if you lack the tools needed for safe disassembly—especially in tight spaces or when working with old fixtures—it’s always safer to get expert help.
Hiring a plumber ensures:
- Proper installation and leak-proof sealing
- Compliance with plumbing codes and safety standards
- No risk of damaging surrounding cabinetry or countertops
And most importantly, peace of mind that the job is done right the first time.
Conclusion
A dripping faucet might seem like a small issue, but it can lead to significant water waste, higher utility bills, and even long-term plumbing damage if ignored. The good news? Most faucet leaks can be repaired with a few tools, some patience, and the right guidance. Taking the time to fix it yourself is not only empowering but also a cost-effective and environmentally responsible step.
Whether your faucet uses a cartridge, compression, ball, or ceramic-disk mechanism, identifying the correct type and replacing worn components like washers, O-rings, or cartridges can resolve most leaks. As we’ve outlined in this guide, breaking the process down into manageable steps—shutting off the water, disassembling the faucet, cleaning internal parts, and replacing damaged components—makes the task feel much less intimidating.
🛠 With the right tools, a clean workspace, and proper instructions, even beginners can successfully repair a leaky faucet in a few hours. It’s a practical weekend project that adds value to your home and helps conserve precious water.
Why It Matters:
- A single dripping faucet can waste hundreds of gallons of water per year.
- Leaky fixtures can cause water stains, mold, and fixture corrosion.
- DIY faucet repair saves you the cost of a professional service call, which can range from $75 to $200 or more.
Ongoing Maintenance is Key
Remember, preventative maintenance goes a long way. By cleaning your faucet weekly, soaking aerators monthly, and lubricating moving parts seasonally, you can avoid many common issues like stiff handles, poor water flow, or repeat leaks. Replacing washers and seals at the first sign of wear ensures your faucet continues to operate like new.
Know Your Limits
If, despite your best efforts, the leak continues, the faucet body is corroded, or the internal parts are obsolete, don’t hesitate to call a licensed plumber. Sometimes, professional intervention is necessary—and it’s better to invest in expert help than risk further damage.
Enjoy the Benefits of DIY Plumbing
By tackling a faucet repair yourself, you’re not only saving money—you’re also gaining valuable skills and confidence in maintaining your home. Most importantly, you’re contributing to sustainable water use, which benefits both your wallet and the planet.
Say goodbye to that annoying drip.
Enjoy smooth, efficient water flow.
Take pride in your DIY success!

