Building your own wooden shelf at home is an achievable DIY project that adds both function and style to your living space. This detailed guide will walk you step-by-step through the entire process — from selecting the best type of wood and gathering essential tools to measuring, cutting, assembling, sanding, and finishing your shelf for a polished look. Whether you need extra storage in your bedroom, a custom display for your books and plants in the living room, or an organized solution for your kitchen or garage, this project is budget-friendly and customizable to fit any space or décor. You’ll also learn how to safely mount your shelf to different types of walls, avoid common mistakes, and maintain your wooden shelf so it stays sturdy and beautiful for years to come. With clear instructions, practical safety tips, creative design ideas, and inspiration for beginners and seasoned DIYers alike, you’ll feel confident tackling this rewarding woodworking project. By the end of this guide, you’ll not only have a handcrafted shelf that meets your unique needs but also new skills and the satisfaction of building something with your own hands. Get ready to transform your home with a simple yet impactful project that anyone can do — no professional carpentry experience required!
Why Build Your Own Wooden Shelf?
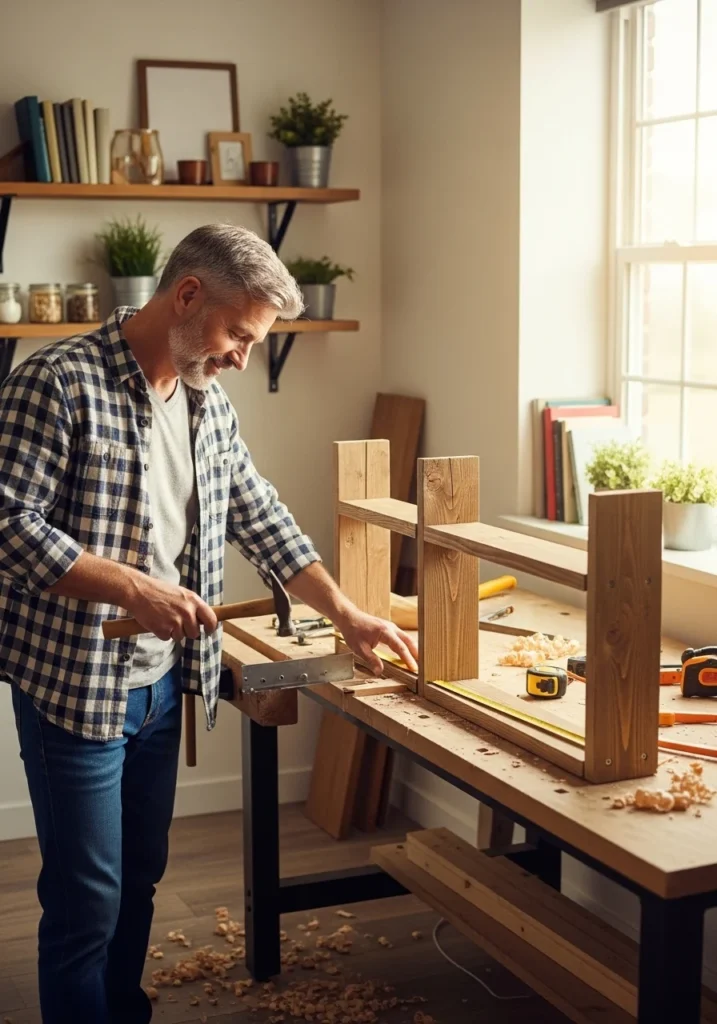
Before you pick up your tools, it’s worth understanding why building a wooden shelf yourself is one of the best DIY projects you can tackle. First and foremost, it’s an incredibly cost-effective way to upgrade your home. Ready-made shelves from furniture stores can be surprisingly expensive, especially if you’re looking for solid wood or custom dimensions. By building your own, you can create a beautiful, sturdy shelf for a fraction of the price, using affordable or even reclaimed wood.
Another big advantage is customization. When you make your own shelf, you’re not limited by standard sizes or designs. You can build it exactly to fit your space — whether it’s a narrow nook in your hallway, an empty wall in your living room, or above your desk for extra storage. You choose the wood type, color, length, depth, and finish to match your décor and style perfectly.
Building your own furniture is also a sustainable choice. Instead of buying new, mass-produced items, you can reuse or upcycle old wood, pallets, or leftover materials from other projects. This reduces waste, saves trees, and helps lower your environmental footprint — a win for your home and the planet.
One of the biggest reasons many people love DIY woodworking is that it’s a great way to learn new skills. If you’re a beginner, building a simple shelf is the perfect project to practice measuring, cutting, sanding, and assembling. These basic carpentry skills can give you the confidence to tackle more advanced DIY furniture projects in the future.
Finally, there’s the satisfaction factor. Few things feel as rewarding as creating something useful with your own two hands. Every time you see or use your handmade shelf, you’ll feel a sense of pride and accomplishment that you simply don’t get from store-bought furniture. Plus, it’s a fun weekend project that you can complete alone or with family and friends, adding a personal story to your home décor.
In short, building your own wooden shelf is practical, affordable, eco-friendly, educational, and deeply satisfying — making it one of the best DIY projects for beginners and seasoned DIY enthusiasts alike.
Tools & Materials You’ll Need
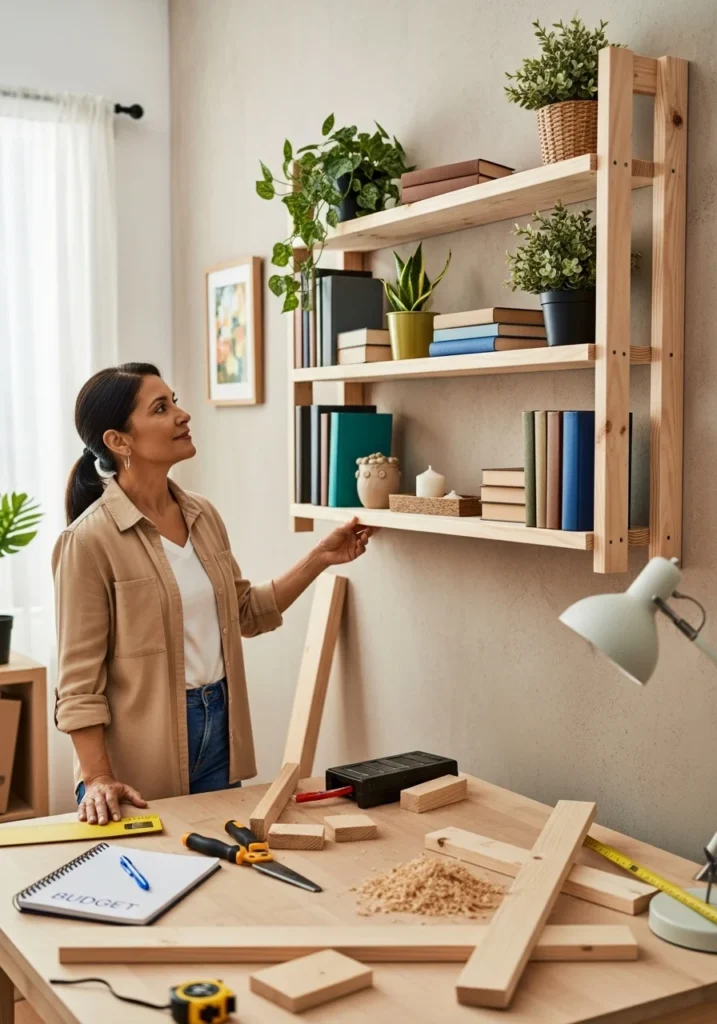
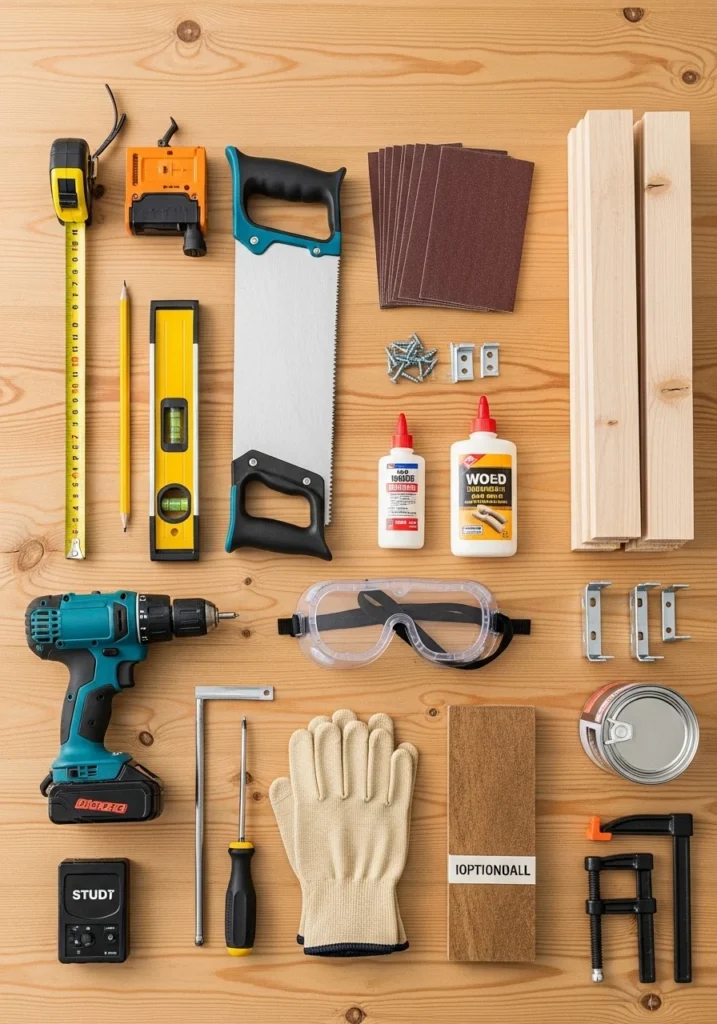
Before you get started with building your wooden shelf, it’s important to gather all the necessary tools and materials to make the process smooth and safe. Having the right equipment not only saves you time and frustration but also helps ensure your finished shelf is sturdy, level, and looks great. Here’s a detailed breakdown of what you’ll need for this beginner-friendly DIY woodworking project:
Basic Tools:
- Measuring Tape: Essential for taking accurate measurements of your wall space and cutting your wood to the correct length and width.
- Carpenter’s Pencil: Use this to mark your cutting lines and drill points clearly on the wood.
- Spirit Level: Helps you make sure your shelf is perfectly straight and level during installation.
- Hand Saw or Electric Saw: A hand saw works well for small projects, but an electric saw (like a circular saw or jigsaw) can speed up the job and make cleaner cuts, especially if you’re cutting thicker boards.
- Electric Drill: Needed for drilling pilot holes and driving screws. A cordless drill is convenient and easy to handle.
- Screwdriver: For tightening screws securely if you prefer more control or need to adjust fittings.
- Sandpaper (Medium and Fine Grit): Smooth out rough edges and surfaces. Start with medium grit to remove splinters, then finish with fine grit for a polished, professional look.
- Safety Goggles and Gloves: Always protect your eyes and hands when cutting, drilling, or sanding wood to prevent accidents and injuries.
🪵 Materials:
- Wooden Board(s): Pine or plywood is ideal for beginners because it’s affordable, easy to cut, and widely available. Make sure the wood is straight and free from large knots or cracks.
- Wood Screws or Nails: Screws are generally more secure than nails, especially for supporting weight. Choose screws of appropriate length to go through your shelf into the wall brackets.
- Wood Glue (Optional): Adds extra strength to joints and edges, though screws alone are usually enough for a simple shelf.
- Wall Brackets or Shelf Supports: These hold your shelf securely to the wall. Choose brackets that can handle the weight of your shelf and anything you plan to store on it.
- Wood Stain, Paint, or Clear Varnish (Optional): Finish your shelf with a protective coating or a pop of color that matches your room décor. This step also helps protect the wood from moisture and wear over time.
Optional Tools:
- Stud Finder: Makes it easy to locate wall studs for mounting your shelf safely and securely. Attaching brackets directly to studs ensures your shelf can handle more weight without pulling out of drywall.
- Clamps: Handy for holding pieces of wood together tightly while the glue dries, giving you a strong bond and a neater result.
By having all these tools and materials ready before you begin, you’ll make the entire building process more efficient and enjoyable. Plus, with good preparation, you’ll feel confident knowing you have everything you need to build a beautiful, durable wooden shelf that you’ll be proud to display in your home.
Step 1: Plan Your Shelf Design
Every successful DIY project starts with a clear plan, and building your own wooden shelf is no different. Good planning saves you time, money, and frustration by ensuring you choose the right size, materials, and supports before you make your first cut. Here’s how to plan your shelf the right way:
1: Measure the Space
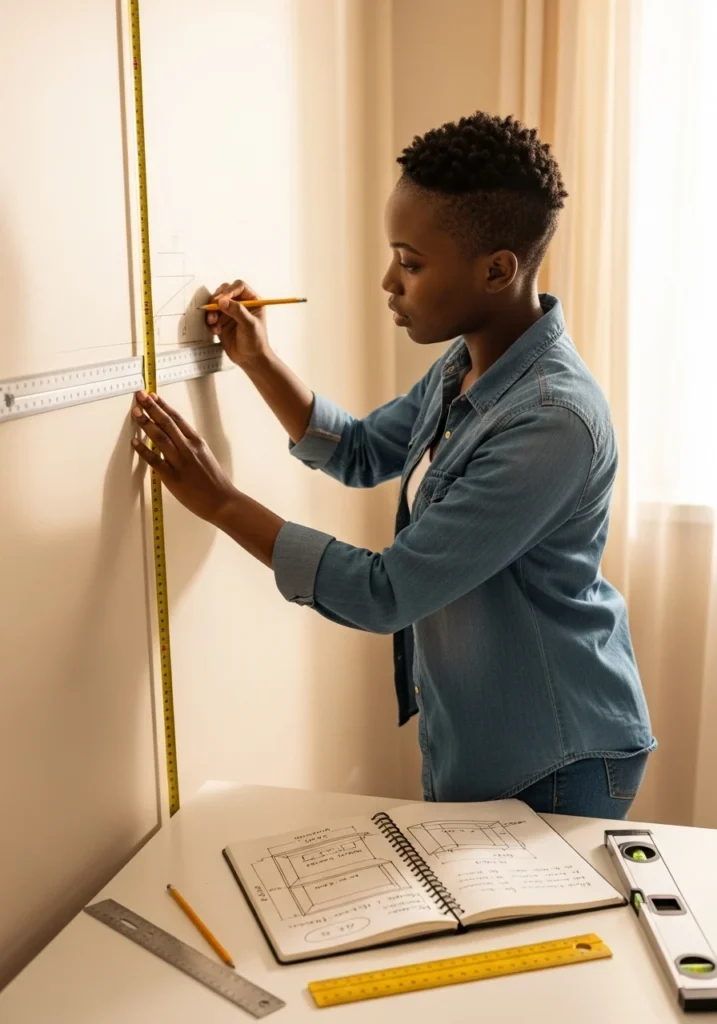
First, decide exactly where you want to install your new shelf. Do you want it above a desk for extra office storage? In the living room to display books and décor? Or maybe in the kitchen for easy-to-reach spices and jars? Once you know the location, grab your measuring tape and measure the maximum length, depth, and height for your shelf. Make sure to note any obstacles like light switches, power outlets, or door frames that could get in the way. Accurate measurements help you buy the right size wood and hardware and avoid awkward surprises during installation.
2: Decide the Purpose
Next, think about what your shelf will hold. This affects everything from the type and thickness of wood you’ll choose to how many brackets you’ll need. For example:
- A shelf for light décor items or small houseplants can be made from thinner boards and need fewer supports.
- A bookshelf or storage shelf for heavier items needs thicker, sturdier wood like solid pine or hardwood and strong, well-spaced brackets to prevent sagging.
- For kitchen storage, consider the weight of dishes, jars, or appliances — plan for extra support if needed.
Knowing the purpose also helps you decide on a finish — do you want to stain the wood for a rustic look, paint it to match your walls, or leave it natural for a minimalist vibe?
3: Sketch Your Design
Once you have your measurements and purpose clear, draw a simple sketch of your shelf design. Don’t worry — it doesn’t have to be fancy or artistic! A basic drawing with labeled measurements is enough. Mark the shelf length, depth, and where the brackets will go. A good rule of thumb is to use one bracket every 2 feet (60 cm) of shelf length for even weight distribution. For a longer shelf, you may need three or more brackets to prevent bowing or tipping.
A clear sketch makes cutting and assembly easier and helps you double-check that you have all the necessary tools and hardware. Plus, it’s a handy reference while you shop for wood, screws, and brackets at your local hardware store.
Take Your Time
Planning might feel like an extra step, but it’s worth it. By taking the time to measure, decide the purpose, and sketch out your shelf design, you’ll feel more confident and prepared when you start building. This simple preparation helps ensure your finished shelf not only fits perfectly in your space but also stays strong and safe for years to come.
Step 2: Choose and Cut Your Wood
Now that you’ve carefully planned your design and have precise measurements, it’s time to choose your wood and cut it to size. This step is where your shelf truly starts to take shape — so a bit of care and patience goes a long way!
🪵 Pick the Right Wood
Head to your local hardware store or lumber yard with your measurements and sketch in hand. For beginners, pine is one of the best choices — it’s affordable, lightweight, easy to cut, and takes paint or stain well. If you want something a bit stronger or with a smoother surface, consider plywood, which is sturdy and resists warping if properly finished. For a rustic look, reclaimed wood or pallet wood can add character and save money while being eco-friendly too.
When choosing your wood, check each board for straightness by looking down its length — avoid any boards that are warped, cracked, or have large knots, as these can weaken your shelf or make installation tricky.
Mark Your Measurements
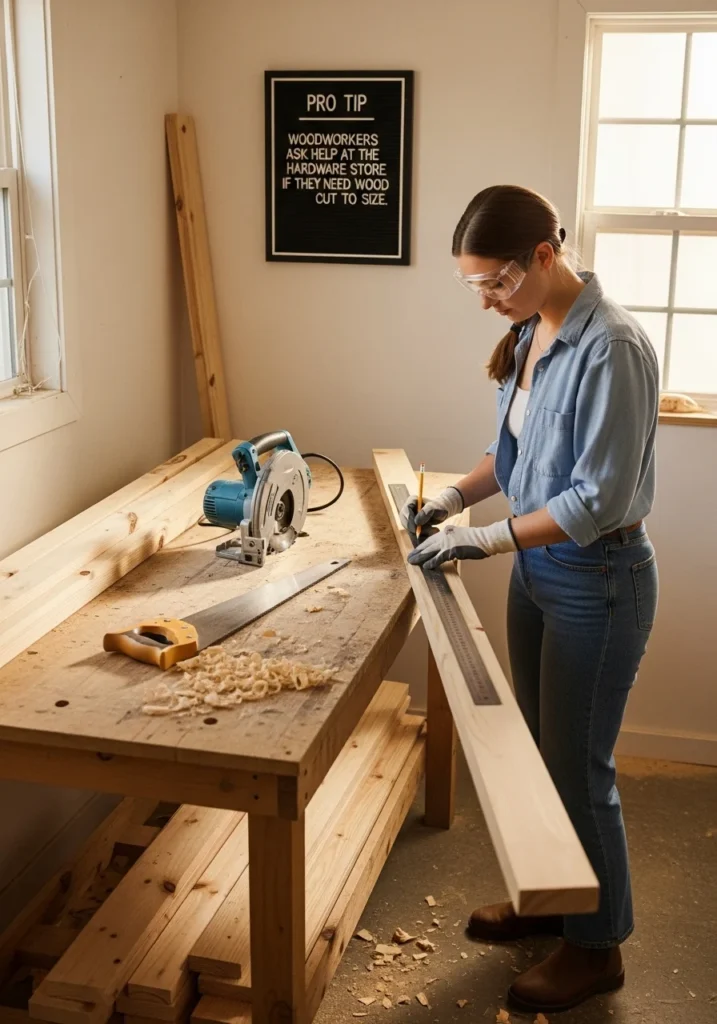
Once you have your wood, lay it flat on a stable surface. Use your measuring tape and carpenter’s pencil to mark the exact length and width according to your plan. It’s always smart to double-check your measurements before making any cuts — measure twice, cut once! Use a straight edge or a ruler to draw clear, straight cutting lines.
🪚 Make the Cut
Next, it’s time to cut the wood to size. For beginners, a hand saw works perfectly for smaller boards and simple cuts. If you’re comfortable using power tools, an electric saw like a circular saw or jigsaw can make the job quicker and help you get cleaner, straighter cuts — just be sure to follow the manufacturer’s instructions.
Safety first: Always wear safety goggles to protect your eyes from sawdust and debris, and work gloves to protect your hands. If you’re using an electric saw, make sure the wood is clamped securely to a workbench or sturdy surface to prevent slipping. Take your time — slow, steady cuts help prevent mistakes and give you a smoother edge.
Pro Tip: Not comfortable cutting at home? No problem! Many hardware stores offer wood cutting services — just bring your measurements and ask an associate for help. This is especially useful if you don’t own a saw or want perfectly straight cuts done quickly and safely.
Once your boards are cut, lightly sand the edges to remove any rough spots or splinters. This makes the next steps — assembling, finishing, and installing — much easier and gives your shelf a clean, professional look.
By carefully choosing quality wood and cutting it to the correct size, you’ll set yourself up for success in the next steps of your DIY shelf project. Take your time here — a precise cut means your shelf will fit perfectly, hold weight safely, and look fantastic when finished!
Step 3: Smooth the Edges
Once your wood is cut to size, it’s time to prepare it for finishing and installation by smoothing all the edges and surfaces. Many beginners skip or rush this step, but proper sanding makes a huge difference in the final look, feel, and safety of your shelf. Well-sanded wood looks cleaner, feels better to the touch, and reduces the risk of rough spots or splinters — especially important if your shelf will be within reach of children or pets.
🪵 Start with Medium-Grit Sandpaper
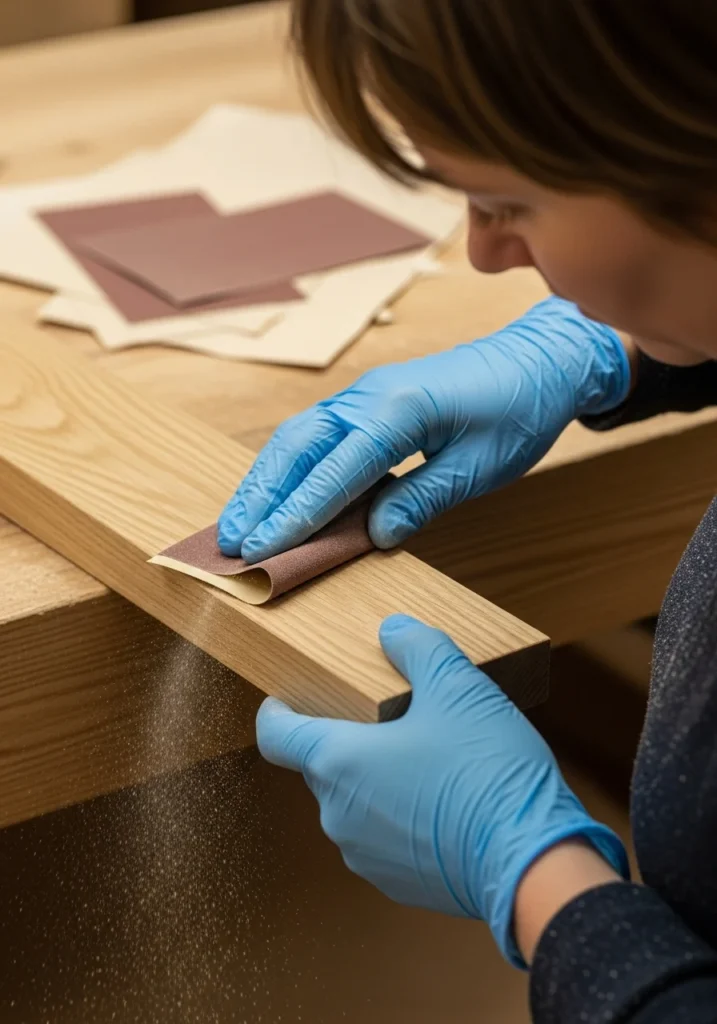
Begin by using medium-grit sandpaper (around 80–120 grit is ideal) to smooth the edges and faces of your wood. Always sand along the wood grain, not against it — this helps prevent scratches or uneven marks on the surface. Pay extra attention to the cut edges, corners, and any areas with small splinters or rough patches.
A sanding block can help you apply even pressure, but you can also wrap the sandpaper around a scrap piece of wood for better control. If you have an electric sander, this step will go faster, but hand sanding works perfectly fine for a small shelf project too.
Finish with Fine-Grit Sandpaper
After the initial sanding, switch to fine-grit sandpaper (around 180–220 grit) to create a smooth, polished surface that’s ready for painting, staining, or varnishing. This extra pass removes any remaining scratches left by the medium grit and leaves your wood feeling silky and splinter-free.
Use a soft cloth or a brush to wipe away any sawdust between grits and after you finish sanding. Keeping the surface dust-free ensures that your finish (whether it’s stain, paint, or clear varnish) will go on smoothly and adhere properly.
Safety First
When sanding, it’s smart to wear a dust mask or respirator, especially if you’re working indoors, to avoid breathing in fine wood particles. Safety goggles help protect your eyes from flying dust, and gloves can keep your hands comfortable if you’re sanding for an extended time.
Why This Step Matters
Taking the time to sand your shelf properly will make your finished project look more professional and feel much nicer to touch. Smooth edges and corners not only look better but also reduce the chance of accidental scratches or splinters when you brush against the shelf or place items on it.
This simple step also prepares the wood for the next stage — applying paint, wood stain, or varnish — which will adhere better to a smooth, clean surface and result in an even, beautiful finish that lasts longer.
By carefully sanding your wood, you’re ensuring that your DIY shelf is not just functional but also safe, attractive, and durable — a piece you’ll be proud to display in your home for years to come.
Give your space a fresh look by learning how to Paint Your Old Furniture Like New with simple DIY techniques.
Step 4: Finish Your Wood (Optional)
Once your shelf is cut and sanded smooth, you have the perfect opportunity to give it a beautiful, personalized finish. While leaving the wood raw can look charming for a rustic or minimalist vibe, applying a finish not only enhances its appearance but also helps protect the wood from moisture, stains, and everyday wear and tear.
There are several ways to finish your wooden shelf depending on your style and the look you want to achieve:
Paint: Add a Pop of Color
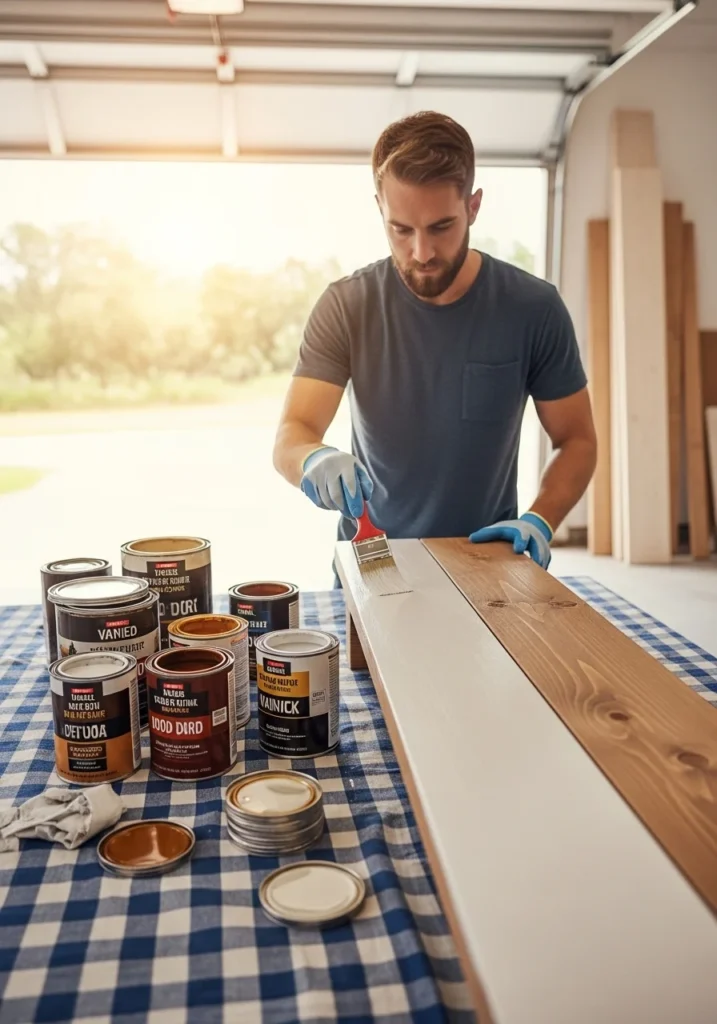
Painting your shelf is a great way to add a bold splash of color that ties in with your room décor. Whether you choose a bright, playful hue for a kids’ room, a soft pastel for a cozy reading nook, or a modern matte black or white for a minimalist vibe, paint gives you endless options to match your personal taste. Use a good quality wood primer before painting to ensure the color adheres smoothly and lasts longer without chipping. Apply at least two coats for an even, vibrant finish, letting each coat dry fully before adding the next.
Stain: Showcase the Natural Grain
If you love the natural look of wood, staining is an excellent option. A wood stain penetrates deep into the surface, highlighting the wood’s unique grain and natural texture. This is perfect for achieving a warm, rustic, or farmhouse-style feel. Stains come in a variety of shades, from light oak to rich walnut — choose one that complements your furniture and the overall look of your space. Wipe off any excess stain with a cloth to avoid blotches and allow the wood’s natural beauty to shine through.
Varnish: Add Protection & Subtle Shine
Whether you paint or stain your shelf, finishing it with a clear varnish or polyurethane topcoat helps seal and protect the wood from scratches, moisture, and daily wear. Varnish also gives the surface a subtle sheen, making your shelf look polished and professional. You can choose from finishes ranging from matte to high gloss depending on your preference. For the best results, apply thin, even coats with a brush or foam applicator and lightly sand between coats for a smooth, durable finish.
Finishing Tips & Safety
- Always apply paint, stain, or varnish in a well-ventilated area — ideally outdoors or in a workshop with open windows and doors — to avoid breathing in fumes.
- Use protective gloves and wear old clothes, as finishes can be messy.
- Read and follow the drying times and instructions on your product label carefully. Rushing this step can lead to sticky surfaces or uneven finishes.
- Allow your shelf to dry completely before moving on to installation — this prevents smudges, fingerprints, or damage to your freshly finished surface.
Adding a finish is an extra step, but it’s well worth the effort. A thoughtfully finished shelf not only looks great but also lasts longer and withstands everyday use. Whether you go for a vibrant painted look, a warm stained finish, or a simple protective clear coat, you’ll add a professional touch that makes your DIY project stand out.
Step 5: Mark and Install Brackets
Now that your shelf is cut, sanded, and beautifully finished, it’s time for one of the most important parts of the project: installing it securely. Properly marking and attaching your brackets ensures your shelf can safely hold the weight of your books, décor, or kitchen supplies without sagging or pulling away from the wall. This step may take a little extra care, but it’s worth it for a sturdy, long-lasting result.
1: Find Studs for Maximum Strength
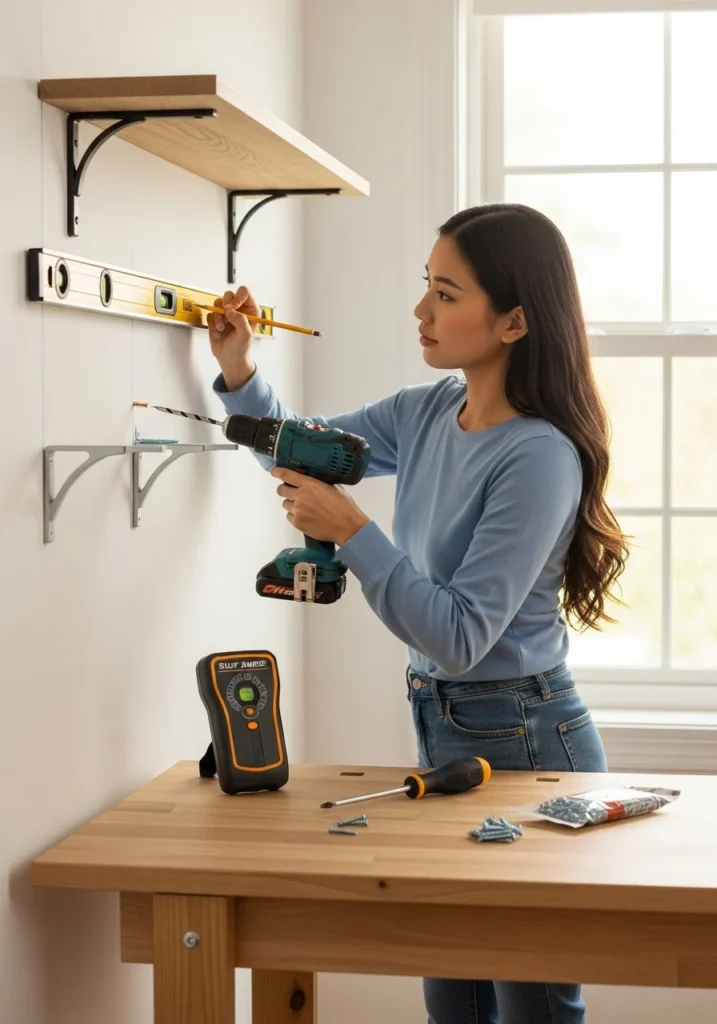
Whenever possible, attach your brackets directly into wall studs — the vertical wooden beams behind your drywall. Studs provide the strongest support for your shelf, especially if you plan to store heavy items like books or kitchenware. Use a stud finder to locate the studs along your chosen wall. Slowly slide the stud finder across the wall — it will beep or light up when it detects solid wood behind the surface.
No stud finder? Tap gently on the wall and listen: a hollow sound means there’s empty space, while a solid, dull sound likely means you’ve found a stud. If you absolutely must install brackets where there’s no stud, be sure to use wall anchors to help support the weight.
2: Mark Bracket Placement
Once you’ve found your studs, hold the brackets up to the wall where you want your shelf to sit. Use a pencil to mark the screw holes for each bracket. Use your measuring tape and a spirit level to double-check that the brackets are evenly spaced and perfectly level — an unlevel shelf can look awkward and cause items to slide off.
A good rule of thumb is to position a bracket every 2 feet (60 cm) of shelf length for even weight support. If you have a longer or thicker shelf, you might need three or more brackets for added stability.
3: Drill Pilot Holes
Next, use your electric drill to drill pilot holes where you marked the screw positions. Pilot holes make it much easier to insert screws and help prevent the wood or drywall from splitting or cracking. Use a drill bit that’s slightly smaller than your screws to get a snug, secure fit.
4: Attach the Brackets
Line up your brackets with the pilot holes and attach them to the wall using screws. You can do this with a screwdriver or your electric drill. Make sure each bracket is tight and flush against the wall. Give each bracket a gentle wiggle to check that it’s firmly attached — they shouldn’t move at all.
Once your brackets are secure, place your shelf board on top to check the fit. Adjust the positioning if needed, then attach the shelf to the brackets according to the bracket type. Some brackets have screw holes to fix the shelf from underneath for extra security — use small wood screws to hold it in place.
Pro Tip: If your shelf will hold heavier items, check that your screws are long enough to reach deep into the stud — this will greatly increase the shelf’s strength and durability.
Safety Reminder: Always wear safety goggles when drilling, and keep fingers clear of screw points and drill bits.
By taking your time to measure, mark, drill, and secure your brackets correctly, you’ll have a shelf that’s not only stylish but also strong enough to safely hold all your favorite things for years to come.
Step 6: Mount the Shelf
This final step is where all your careful planning, measuring, cutting, sanding, and finishing come together — it’s time to mount your shelf! Installing your shelf board onto the brackets securely ensures that it stays level, strong, and ready to display or store whatever you have in mind.
Place the Shelf Board
Start by carefully placing your finished wooden board onto the mounted brackets. Gently slide the shelf board back and forth until it’s perfectly centered and evenly positioned along the brackets. Use your spirit level one last time to double-check that the shelf sits flat and level — this step is important to prevent items from sliding off or tipping over once your shelf is in use.
Secure the Shelf to the Brackets
Depending on the type of brackets you chose, you may have small screw holes underneath to attach the shelf board directly to the brackets. If so, use short wood screws to secure the shelf from underneath. This extra step adds stability and prevents the shelf from shifting if it gets bumped or if you’re placing heavier items on top. Be careful not to use screws that are too long — they should hold the board tightly without poking through the top of the shelf.
If your brackets don’t have screw holes or you prefer not to screw into the board, you can also use heavy-duty double-sided mounting tape or a small bead of wood glue (only if the brackets are designed for a more permanent installation). Just make sure the shelf is aligned exactly where you want it before securing it, as adjusting it later can be tricky once adhesive or glue is set.
Congratulations — You Did It!
Stand back and admire your work — you’ve just built and installed your very own custom wooden shelf! This simple project shows how even basic DIY skills can transform your space, add useful storage, and make your home more organized and personalized.
Whether you’re displaying books, plants, photos, or everyday essentials, your handmade shelf is something to be proud of — every time you look at it, you’ll know you built it with your own hands. Plus, you’ve gained valuable woodworking and DIY skills that you can apply to bigger projects down the road.
Final Tip: Take a few moments to wipe down your new shelf with a clean, dry cloth to remove any dust or fingerprints. If you used paint or varnish, let it cure fully (check your product’s instructions) before putting heavy items on it.
And that’s it — your weekend project is complete!

Safety Tips for DIY Woodworking
No matter how simple or small your woodworking project is, safety should always come first. Taking a few extra precautions not only helps you avoid accidents but also makes your DIY experience more enjoyable and stress-free. Here are some essential safety tips every beginner (and seasoned DIYer) should follow when building a wooden shelf or working with tools at home:
Always Wear Safety Goggles and Gloves
When cutting, drilling, or sanding wood, tiny particles, splinters, or debris can easily fly into your eyes or irritate your skin. Always wear safety goggles to protect your eyes and work gloves to protect your hands from sharp tools, rough edges, and splinters. If you’re working with paints, stains, or varnishes, gloves also protect your skin from harsh chemicals.
Keep Tools Out of Reach of Children
DIY projects are a fun way to learn new skills, but tools can be dangerous if left unattended, especially around kids or pets. Keep all saws, drills, screws, and sharp objects out of reach when you’re not using them. If you take breaks, unplug power tools and store them in a safe spot.
Work in a Clean, Well-Lit Area
Choose a clean, clutter-free workspace with plenty of light so you can clearly see what you’re doing. A tidy work area helps prevent tripping over tools or materials and makes it easier to measure, cut, and assemble accurately. Good ventilation is also important — especially when sanding or using products like wood stain, paint, or varnish — to avoid breathing in dust or fumes.
🪚 Secure Your Wood Before Cutting
Always clamp or secure your wood to a stable workbench or sturdy surface before using a saw or drill. This keeps the wood from shifting unexpectedly, which could lead to uneven cuts or accidental slips. Taking a moment to position and secure your materials can save you from injuries and costly mistakes.
Follow Product Instructions for Finishes
When using wood stains, paints, or varnishes, always read and follow the manufacturer’s instructions on the label. Wear a mask if needed, work in a well-ventilated space, and keep rags or brushes away from open flames — many finishing products are flammable. Allow finishes to dry completely and dispose of used materials according to local safety guidelines.
Bonus Tip: Take Your Time
Rushing through any woodworking project increases the chance of mistakes and accidents. Work slowly and carefully, especially when measuring, cutting, or installing brackets. If you’re unsure how to use a tool, take a moment to look up instructions or ask an expert at your local hardware store.
By following these simple but important safety tips, you’ll protect yourself and your workspace — and enjoy the satisfaction of a smooth, successful DIY project. After all, creating something with your own hands should be fun, rewarding, and safe from start to finish!

Design Ideas to Inspire You
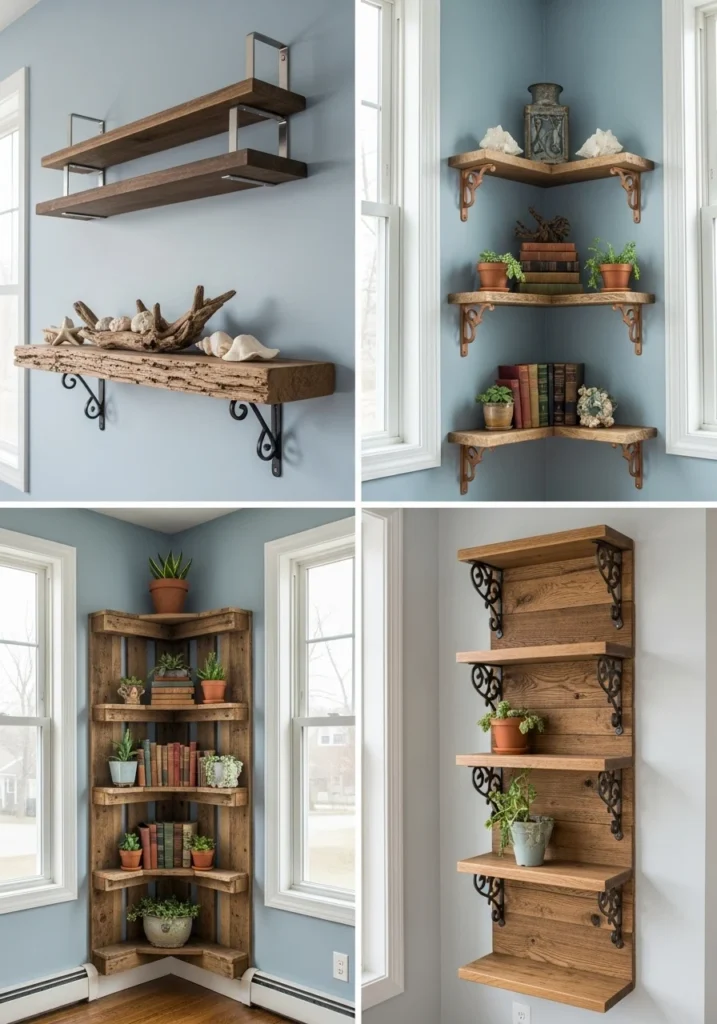
Once you’ve mastered the basics of building a simple wooden shelf, why stop there? One of the best parts about DIY furniture is the freedom to get creative and customize your project to perfectly match your style, space, and personality. Whether you want a sleek, modern look or a cozy, rustic feel, here are some inspiring ideas to help you take your DIY shelf to the next level:
Floating Shelf — Clean & Modern
For a minimalist, contemporary style, consider turning your basic shelf into a floating shelf. This design uses hidden brackets or concealed mounting hardware that make the shelf appear to “float” on the wall with no visible supports. Floating shelves are perfect for displaying décor, plants, or photos while keeping your space feeling airy and uncluttered. They work beautifully in living rooms, bedrooms, kitchens, and even bathrooms.
Rustic Charm — Reclaimed Wood & Pallets
If you love the warm, cozy vibe of farmhouse or cottage décor, try building your shelf with reclaimed wood or old pallets. Using weathered or distressed boards instantly adds character and tells a story through natural imperfections, knots, and grain patterns. Pair your rustic shelf with simple metal or wrought-iron brackets for an authentic vintage touch. This is also a sustainable choice, giving old wood a beautiful new purpose.
Corner Shelves — Make the Most of Small Spaces
Got an awkward empty corner? A corner shelf is a smart and stylish way to make use of otherwise wasted space. L-shaped or triangular corner shelves fit snugly into corners, creating extra storage or display space without taking up valuable floor area. Install one in a bedroom corner for books and plants, or add a few in the kitchen for spices and mugs.
Multi-Tier Shelving — Go Vertical
If you need more storage, don’t limit yourself to just one shelf. Multi-tier shelves or stacked shelving units let you take advantage of vertical wall space to store or display even more. You can evenly space two or three shelves above each other or create an asymmetrical arrangement for a more dynamic, modern look. This is a practical solution for small rooms, apartments, or home offices where every inch counts.
Decorative Brackets — Add Style & Personality
Brackets don’t have to be boring! Upgrade your shelf with decorative brackets that feature interesting shapes, scrollwork, or unique colors. From sleek matte black industrial brackets to ornate vintage-style iron supports, the right bracket design can become a statement piece all on its own. You can even paint plain brackets in a bold color to add a playful pop that ties in with your room’s theme.
Combine Ideas for a Custom Look
The beauty of DIY is that you don’t have to stick to just one idea. Combine elements that you love — for example, pair a reclaimed wood board with hidden brackets for a rustic floating shelf, or mix corner shelves with decorative brackets for a one-of-a-kind accent piece.
No matter which design you choose, your custom shelf will add both style and function to your space — and every time you look at it, you’ll feel proud knowing you built it yourself. So get creative, think outside the box, and make your wooden shelf truly your own!
How to Care for Your Wooden Shelf
Congratulations — you’ve built and installed your own beautiful wooden shelf! Now that it’s up and doing its job, you’ll want to make sure it stays sturdy, clean, and looking its best for years to come. With just a few simple maintenance steps, you can keep your handcrafted shelf in top condition, so it stays both functional and stylish through everyday use.
Dust Regularly
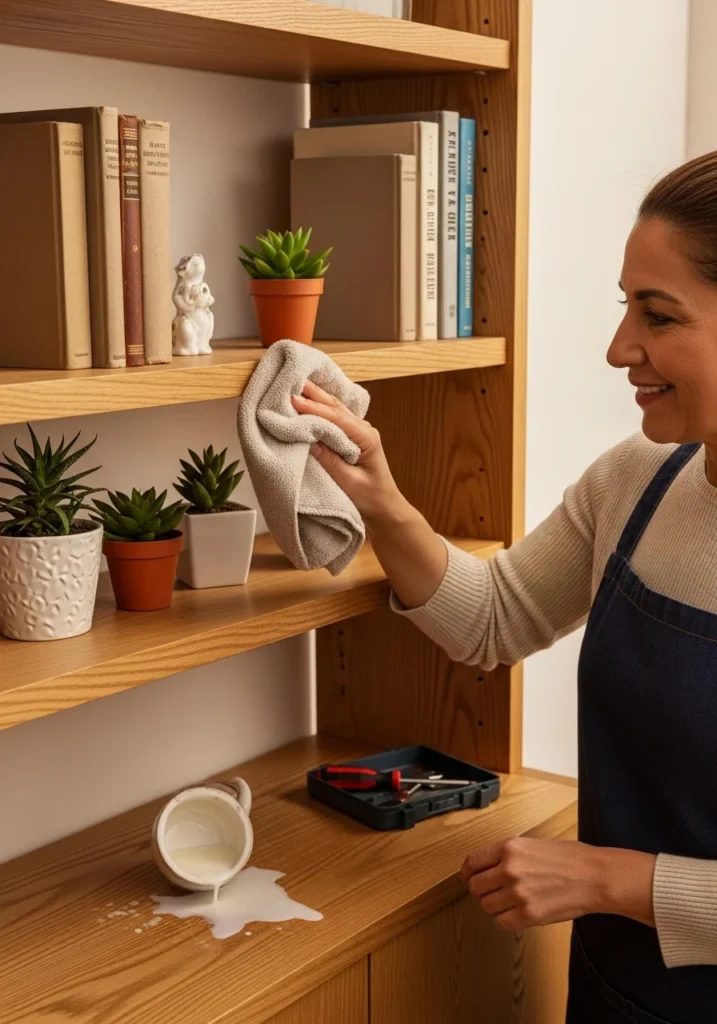
Like any piece of furniture, your wooden shelf will collect dust over time. To keep it looking fresh and prevent dust buildup, wipe it down regularly with a dry, soft cloth or a microfiber duster. Avoid using harsh chemical cleaners, as these can damage the wood’s finish or leave unwanted residue. For tougher spots, a slightly damp cloth will do — just be sure to dry the surface afterward.
Don’t Overload It
Your DIY shelf is strong, but it does have limits — especially if it’s not mounted directly into studs or reinforced for heavy loads. Be mindful of what you place on it. For lighter shelves, display smaller décor items, picture frames, or small potted plants. If you plan to store heavier objects, make sure the brackets and wall anchors can safely support the weight. Adding too much can cause the shelf to bow or the brackets to pull away from the wall over time.
Wipe Spills Immediately
Accidents happen — whether it’s a spilled drink, water from a plant, or condensation from a vase, moisture can damage your wood if left sitting for too long. Wipe up any spills immediately with a dry cloth to prevent water stains, warping, or swelling. If your shelf is in a kitchen or bathroom where humidity is higher, consider applying an extra coat of clear varnish every couple of years to protect the surface.
Tighten Screws Periodically
As your shelf settles and bears weight, screws and brackets can sometimes loosen slightly over time. Make it a habit to check your shelf every few months. Gently tighten any loose screws on the brackets or supports with a screwdriver or drill. This simple checkup helps keep your shelf sturdy and safe for everyday use.
Bonus Tip: Refresh the Finish if Needed
If your shelf starts to look worn or dull after a few years, give it a quick refresh. Lightly sand the surface with fine-grit sandpaper and apply a fresh coat of stain, paint, or clear varnish. This easy touch-up can make your DIY shelf look brand new again and extend its lifespan.
By taking just a few minutes every now and then to care for your shelf, you’ll protect the time, effort, and creativity you put into building it. A well-maintained wooden shelf can last for many years, adding charm, storage, and personality to your home for a long time to come.
When to Call a Professional
Building a simple wooden shelf at home is one of the most beginner-friendly DIY projects you can tackle. With basic tools, a little planning, and some patience, most people can measure, cut, and install a lightweight shelf without any problems. However, there are situations where it’s smarter — and safer — to ask for help from a qualified carpenter, handyman, or contractor.
For Heavy-Duty Shelving
If you plan to build a heavy-duty shelving system — such as a large bookshelf, wall-mounted pantry shelves, or garage storage for heavy tools and equipment — it’s best to consult a professional. Heavier loads require more robust materials, extra supports, and precise anchoring into studs or masonry. A professional can make sure your shelf is engineered to safely handle the weight without sagging or pulling away from the wall over time.
Working With Delicate Walls
Older homes or apartments often have more fragile wall materials like drywall, plaster, or lath and plaster — all of which can be tricky to work with if you’re not experienced. Drilling into these walls without the right tools or anchors can cause cracks, holes, or other costly damage. A pro will know how to properly locate studs or add reinforcements to make sure your shelf is secure and your walls stay intact.
Difficulty Finding Studs
A secure shelf relies on being mounted into solid wall studs, not just drywall alone. If you’re struggling to find studs or aren’t confident using a stud finder, it’s worth getting help. A handyman can accurately locate the best mounting points and install the brackets so your shelf stays level and secure, no matter what you store on it.
Hidden Wires & Pipes
If you’re installing shelves in areas where there might be hidden wiring or plumbing — like a kitchen, bathroom, or near an exterior wall — a professional can help you avoid drilling into pipes or electrical lines. This can prevent dangerous or expensive accidents that could easily turn a simple DIY into a major repair job.
Peace of Mind
Sometimes it’s not about skill — it’s about peace of mind. If you feel uncomfortable with power tools, lack the right equipment, or simply want your shelf installed quickly and perfectly the first time, hiring a pro is a smart investment. Many handymen and carpenters offer small-job services at reasonable rates and can even give you tips for your next DIY project.
Remember, part of being a smart DIYer is knowing when to tackle a project yourself and when to call in an expert. By getting help when needed, you’ll ensure your shelves are safe, sturdy, and ready to enjoy for years to come — with no unexpected surprises along the way!


Pingback: How to Paint Your Old Furniture Like New: A Complete DIY Guide - pademoluxury.com