Introduction
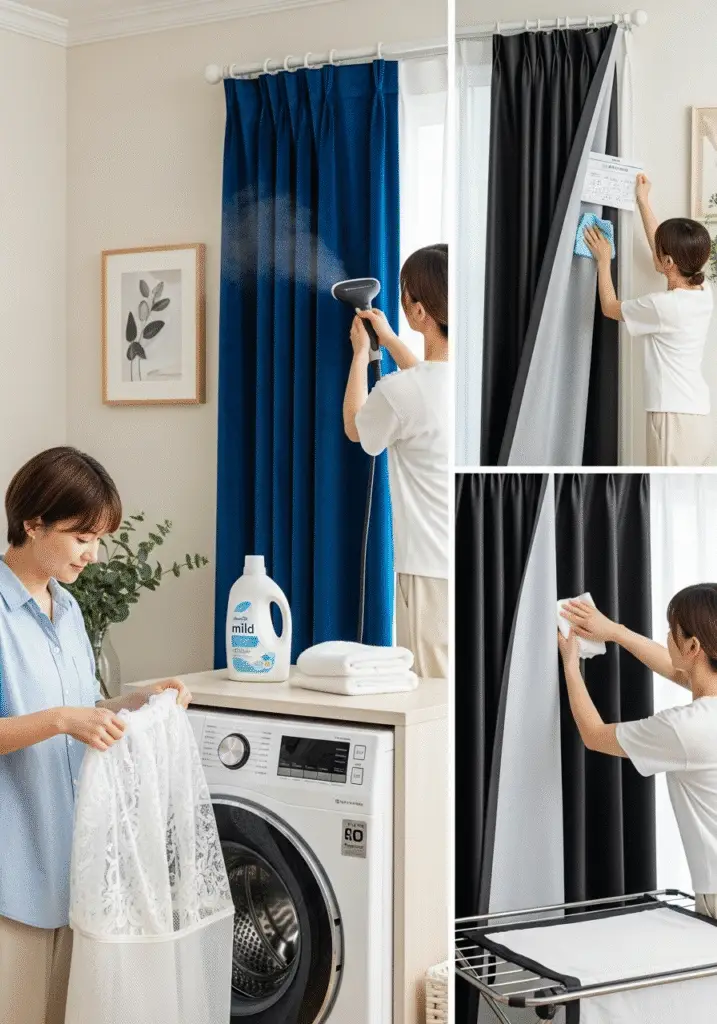
Keeping your home fresh and clean involves more than just vacuuming floors and wiping down surfaces — and one of the most overlooked areas in any household is the curtains. These fabric barriers do more than add style to your rooms; they also act as filters, quietly collecting dust, dirt, pet hair, and airborne allergens every day. Over time, dirty curtains can contribute to poor indoor air quality and make your entire space feel dull and musty. But here’s the good news: You don’t have to hire a professional or spend a fortune to get them clean.
In this comprehensive DIY curtain cleaning and rehanging guide, we take you step-by-step through the entire process — from safely removing your curtains to selecting the best washing method based on fabric type (like cotton, linen, polyester, sheers, or blackout panels), drying them properly, and rehanging them so they look crisp and wrinkle-free. We’ll also share some important tips on reading care labels, avoiding shrinkage, and choosing between machine washing, hand washing, or dry cleaning based on your curtain’s material and condition.
Whether you’re deep cleaning for allergy season, refreshing your space for a new season, or doing a general home maintenance routine, this guide will help you restore your curtains to their original beauty and keep your indoor environment cleaner and healthier. Best of all, it’s entirely beginner-friendly — no special tools or expert knowledge required. With just a little time and effort, you can make your curtains look brand new again and breathe fresh life into your home’s interior.
Let’s get started and give those dusty drapes the makeover they deserve!

Why Clean Curtains Matter
Curtains are much more than decorative fabric panels—they serve as silent protectors of your home’s environment. Acting like passive air filters, curtains absorb and trap everyday pollutants including dust, pet dander, smoke particles, pollen, mold spores, and even lingering odors from cooking or candles. Over time, these contaminants accumulate and turn your beautiful curtains into breeding grounds for allergens, bacteria, and unpleasant smells.
Without regular cleaning, the fabric fibers become weighed down with grime, which can eventually lead to discoloration, fading, and material breakdown. This not only shortens the lifespan of your curtains but also affects the overall look and feel of your living space. Dusty or stained drapes can make a clean room appear unkempt and dingy, no matter how tidy everything else is.
By washing your curtains regularly, you’ll enjoy several benefits:
- Improved Indoor Air Quality: Removing trapped allergens and pollutants helps reduce respiratory issues and allergy flare-ups, especially for children, elderly family members, or those with asthma.
- A Fresher-Smelling Home: Clean curtains eliminate odors that cling to fabric, making rooms feel lighter and more pleasant.
- Prevention of Long-Term Fabric Damage: Dust acts as a slow abrasive that can weaken fibers over time. Regular cleaning extends the life of your curtains by keeping them in top condition.
- Enhanced Aesthetic Appeal: Fresh, wrinkle-free curtains instantly brighten up your interiors and contribute to a polished, well-maintained home.
In essence, clean curtains are crucial for maintaining a healthy, fresh, and visually appealing living environment. Taking the time to wash them every few months is a small step that makes a big impact on your home’s cleanliness and your family’s well-being.
How Often Should You Wash Curtains?
When it comes to curtain maintenance, one of the most common questions homeowners ask is: “How often should I wash my curtains?” The answer depends on several factors including your living environment, the type of fabric, and the presence of pets, smokers, or allergies in the household.
In general, a deep curtain wash is recommended every 3 to 12 months—but this can vary:
- Every 3 to 6 months: If you live in a high-dust area, have indoor pets, or someone in the home smokes, your curtains will collect pollutants more quickly. Regular exposure to smoke particles, dander, and airborne dust can make fabrics dingy and increase the risk of allergy flare-ups. In these homes, a deep clean every 3–6 months is ideal to maintain freshness and hygiene.
- Every 6 to 12 months: For the average household without pets or smokers, and where windows remain closed most of the time, washing your curtains once or twice a year is usually sufficient. However, seasonal cleaning—such as during spring or fall—is a great way to incorporate curtain care into your regular home maintenance routine.
- Monthly upkeep: No matter how often you wash them, monthly dusting or vacuuming is essential to prevent buildup in between deep cleans. Use a soft brush attachment on your vacuum to gently remove surface dust without damaging the fabric.
Additionally, the type of curtain fabric also plays a role:
- Sheer curtains made from light, delicate materials tend to trap more dust and require more frequent cleaning, possibly every 2–3 months.
- Heavy drapes or blackout curtains are more durable and less prone to visible dirt, so they can often go longer—up to 12 months—between washes if maintained with regular dusting or spot cleaning.
By tailoring your curtain cleaning schedule to your lifestyle and environment, you can extend the life of your window treatments, enhance indoor air quality, and keep your home looking fresh and inviting all year long.

Tools & Materials You’ll Need
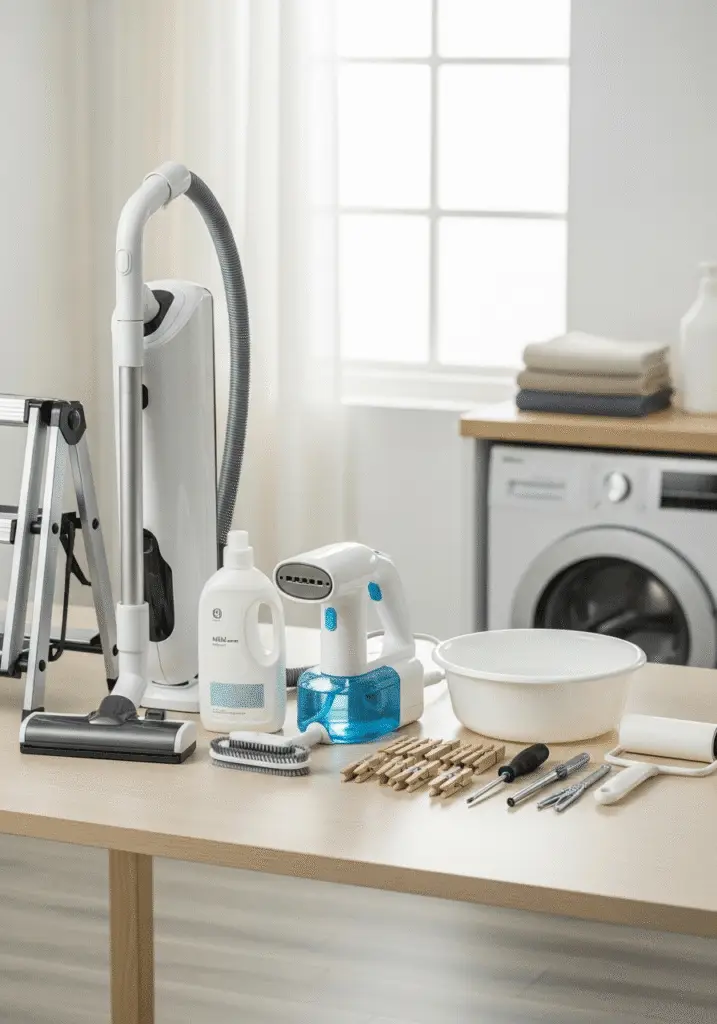
Before diving into the curtain cleaning process, it’s important to gather the right tools and materials. Having everything ready beforehand not only makes the task easier but also ensures that your curtains are cleaned and rehung properly without any delays or damage. Whether you plan to machine wash, hand wash, or simply freshen up your curtains with a vacuum and steamer, the following items will help you get the job done efficiently.
Essential Tools and Materials:
- Step Ladder: Curtains often hang high above windows, and a sturdy step ladder is crucial for safely reaching curtain rods without straining or risking injury. It allows you to easily remove and later rehang the curtains without damaging walls or hardware.
- Vacuum Cleaner with Brush Attachment: This is perfect for removing surface dust, dirt, and pet hair before washing. The brush head is gentle on fabrics and helps prevent excessive buildup during washing.
- Mild Detergent: Always opt for a gentle, fragrance-free detergent—especially for delicate fabrics like sheer, linen, or blackout curtains. Harsh chemicals or bleach can weaken fibers, cause discoloration, or leave behind residue.
- Washing Machine (Optional): For machine-washable curtains, a front-loading washing machine on a delicate or cold cycle works well. Be sure to check the care label first to avoid shrinking or damaging the fabric.
- Large Tub or Basin: If your curtains are not machine-safe or made of delicate materials, hand washing in a large tub is the best alternative. It gives you more control over the wash process and reduces the risk of fabric damage.
- Iron or Handheld Steamer: After washing and drying, curtains often develop wrinkles. A handheld steamer is ideal for refreshing them while they hang, while an iron (on the appropriate setting) can give a crisp, polished finish—especially for cotton or linen fabrics.
- Clothespins or Hangers: These help during the air-drying phase. Hang your curtains on a rod, laundry line, or shower rod to prevent wrinkles and allow for even drying.
- Screwdriver: If your curtain rod brackets need to be removed for a full clean or if you’re changing hardware, a screwdriver will be necessary. Make sure it matches the screw type used in your curtain rod setup.
- Lint Roller (Optional): Particularly useful if you have pets, a lint roller can help remove stubborn pet hair or lint that may still cling to your curtains after vacuuming.
Having these tools and supplies ready in advance ensures a smoother and more effective cleaning process. Whether you’re giving your curtains a light refresh or doing a full wash and rehang, proper preparation makes all the difference in protecting your fabrics and achieving professional-quality results—right from the comfort of your home.
Step-by-Step Guide: How to Wash Curtains at Home
Cleaning your curtains at home might seem like a big task, but with the right steps and techniques, it’s easier and safer than you think. Whether you’re dealing with light sheers, heavy blackout panels, or luxurious velvet drapes, this step-by-step guide will help you clean your curtains thoroughly while protecting the integrity of the fabric. Let’s walk through the full DIY process—from removing the curtains to drying them the right way.
Step 1: Take Down the Curtains Carefully
Start by gently removing your curtains from the curtain rods. Use a stable step ladder to avoid stretching or pulling on the fabric while reaching overhead. As you remove them, place the curtains directly into a laundry basket or clean surface to prevent them from touching dusty floors.
Before washing, make sure to remove any curtain rings, metal hooks, tiebacks, or decorative hardware. These accessories can damage your washing machine or snag the fabric if left attached.
Step 2: Read the Curtain Care Label
Always begin by checking the fabric care label, typically located on the inside hem of the curtain panel. This small tag contains vital instructions about water temperature, fabric sensitivity, and whether machine washing is safe.
Here’s a quick fabric-specific breakdown:
- Machine Washable Fabrics: Cotton, polyester, linen
- Dry-Clean Only: Velvet, suede, silk, and some blackout curtains
- Hand-Wash Only: Lace, sheers, embroidered or embellished curtains
Tip: If there’s no visible care label, err on the side of caution. Choose hand washing or consult the manufacturer if possible.
Step 3: Remove Dust and Loose Debris
Before any water touches your curtains, it’s essential to remove surface dust, dirt, and hair. Use a vacuum cleaner with a soft brush attachment to gently run over the panels—top to bottom. This step reduces the amount of dirt going into your washing machine and protects delicate fabrics.
If you have pets, use a lint roller or fabric brush to lift stubborn pet hair or lint that clings to the fabric surface. This not only improves the final wash results but also helps reduce allergens.
Step 4: Choose the Right Washing Method
Your washing method depends on the fabric type and the condition of your curtains:
A. Machine Washing Curtains
Machine washing is convenient and effective for many standard fabrics like cotton, polyester, and some blends.
How to do it:
- Use cold or lukewarm water to prevent shrinkage
- Select the “delicate” or “gentle” cycle
- Add a mild, bleach-free detergent
- Don’t overload the machine; wash in small batches
- Group similar materials and colors together
Pro Tip: Place delicate or sheer curtains inside a mesh laundry bag or pillowcase to protect them from tangling.
B. Hand Washing Curtains
Delicate curtains—like lace, embroidered, or sheer fabrics—should always be hand-washed to avoid stretching, snagging, or damage.
How to do it:
- Fill a large tub or basin with lukewarm water
- Mix in a small amount of gentle detergent
- Submerge the curtains and soak for 10–15 minutes
- Gently swirl them around without harsh scrubbing
- Rinse thoroughly with clean, cool water
- Squeeze out excess water by pressing, not wringing
C. Steam Cleaning Curtains (for heavy, dry-clean-only fabrics)
If your curtains are too bulky to remove or labeled as “dry clean only,” steam cleaning offers a safe alternative.
How to do it:
- Use a handheld steamer
- Start at the top and work your way down
- Keep the steamer a few inches away from the fabric
- Avoid soaking the fabric; a light pass is enough to kill bacteria and refresh fibers
This method is especially useful for thick velvet or suede curtains where full immersion in water could ruin the texture or lining.
Step 5: Drying Curtains the Right Way
Proper drying is just as important as washing—doing it wrong can undo all your hard work.
Best Practices:
- Air drying is always recommended for delicate or lined curtains. Hang them on a drying rack or sturdy indoor clothesline.
- Avoid direct sunlight when drying colored curtains, as it can cause fading or discoloration over time.
- If machine drying is allowed (based on the care label), use the lowest heat setting and remove them while slightly damp to avoid shrinkage.
- Shake out wrinkles before drying to reduce ironing time later.
- Never hang curtains back while damp unless you’re intentionally using gravity to help straighten wrinkles—a technique best used with heavier fabrics and careful monitoring.
Ironing and Steaming Tips
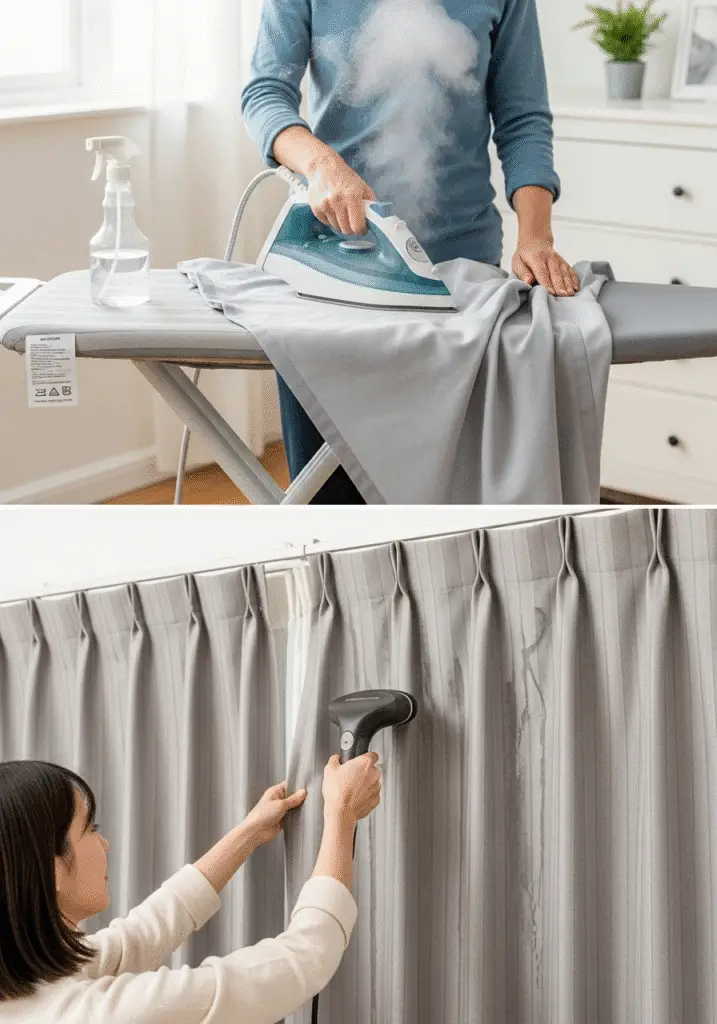
While ironing or steaming your curtains after washing is technically optional, it can significantly enhance the overall appearance of your space. Freshly cleaned curtains with visible wrinkles or creases can still make a room look unkempt. Taking just a few extra minutes to smooth out the fabric helps your curtains drape better, look more polished, and return your home to a clean, organized aesthetic.
Here are some practical, fabric-safe tips for ironing and steaming curtains effectively:
Ironing Curtains: What You Need to Know
Ironing is ideal for fabrics like cotton, linen, or poly-cotton blends. However, improper heat settings or poor technique can lead to scorched spots or even permanent creasing, so it’s important to iron with care.
Tips for safe and effective ironing:
- Iron on the reverse side of the curtain—especially for darker colors or printed patterns. This protects the visible surface from shiny patches or heat damage.
- Use low heat settings for synthetic materials such as polyester or nylon, which can melt or warp under high temperatures.
- Always check the care label for recommended ironing temperatures.
- Use a pressing cloth (like a clean cotton towel or pillowcase) between the iron and the curtain for added protection, especially with delicate or vintage fabrics.
- For large panels, iron in sections on a wide surface, and avoid stretching the fabric as you go.
Steaming Curtains: A Safe and Convenient Option
If you want to avoid the hassle of ironing—or if your fabric is labeled as “do not iron”—steaming is the best alternative. It’s gentle, fast, and doesn’t require removing the curtains again if you’ve already re-hung them.
How to steam your curtains properly:
- Use a handheld garment steamer for vertical steaming. These tools are designed to release gentle, continuous steam that relaxes wrinkles without contact.
- Work from top to bottom, moving slowly across the fabric to avoid oversaturation.
- Hold the steamer a few inches away from the curtain to prevent water droplets or heat marks.
- For very wrinkled curtains, go over the surface more than once, allowing the steam to penetrate the fabric.
- If you don’t own a steamer, you can hang your curtains in the bathroom during a hot shower—the steam will help reduce light wrinkles naturally (though results may vary).
Rehanging Curtains: The Right Way
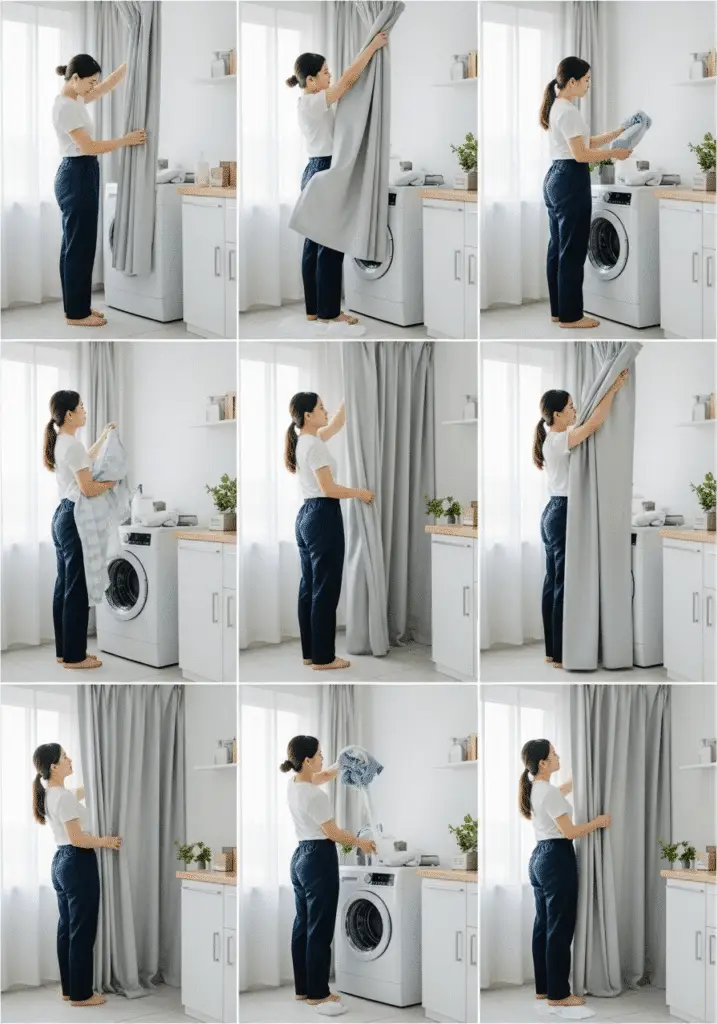
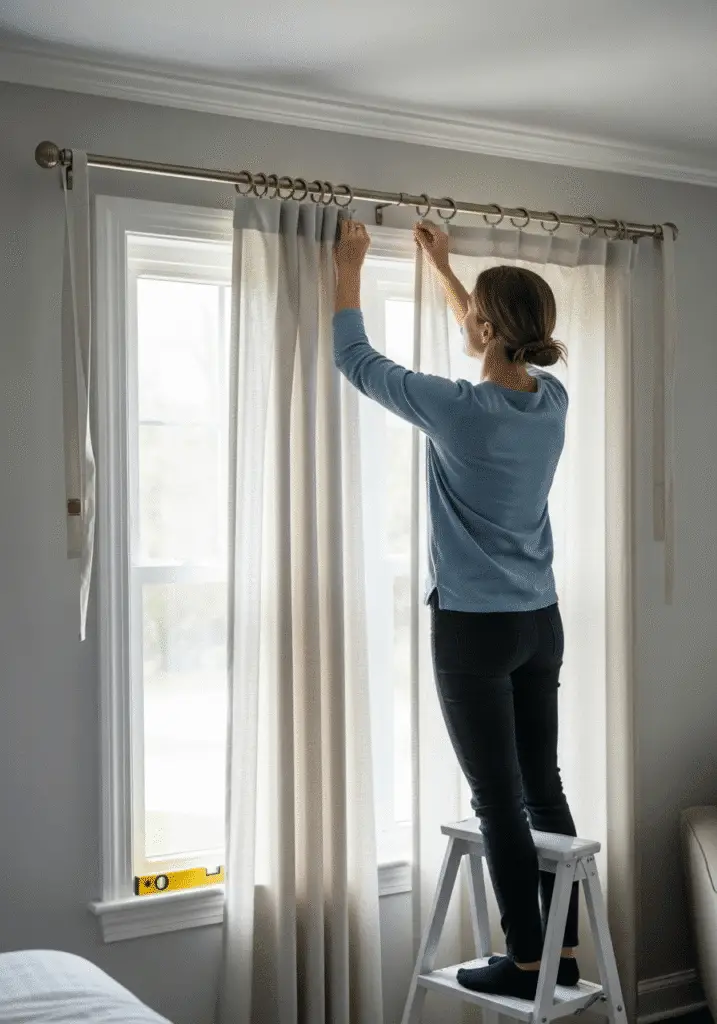
After your curtains have been thoroughly cleaned, dried, and de-wrinkled, the final step is to rehang them properly. While it may seem straightforward, this step plays a key role in how your curtains look and function. A rushed or uneven rehang can result in droopy panels, uneven folds, or even fabric damage over time.
To restore a fresh, tailored look to your windows, follow this step-by-step guide to rehanging your curtains the right way:
1. Clean the Curtain Rod and Surrounding Area
Before putting your freshly washed curtains back up, take a few minutes to wipe down the curtain rod, brackets, and the wall area around the window. Dust, cobwebs, or grime from the rod can easily transfer to your clean fabric, undoing all your hard work. A damp microfiber cloth or gentle all-purpose cleaner will do the trick.
This is also a good time to inspect for loose brackets, screws, or sagging hardware and tighten or replace them as needed.
2. Replace Hooks, Rings, or Grommets
If your curtains were previously attached with hooks, clip rings, or grommets, now’s the time to reinstall them. Make sure each hook or ring is evenly spaced—this ensures uniform pleating and prevents awkward bunching once the curtains are hung.
Double-check that the hooks are securely inserted into the fabric and aligned properly along the top hem.
3. Use a Level to Check Rod Alignment
If you removed the curtain rod during cleaning or repairs, use a spirit level or laser level to ensure that the rod is perfectly horizontal before hanging your panels. A slightly crooked curtain rod can make your entire window treatment look off balance and unprofessional.
This small step helps achieve a clean, symmetrical finish that enhances the overall appearance of your space.
4. Hang Each Panel with Care
Begin hanging your curtain panels one at a time, gently draping them over the rod or attaching them with hooks or rings—depending on your curtain style. Handle the fabric carefully to avoid introducing new wrinkles or pulling the material unevenly.
Once all panels are up, take a step back and check for even spacing, height alignment, and proper drop. The curtains should gently skim the floor or hang just above it (depending on your desired look) without pooling awkwardly.
5. Adjust the Pleats or Folds
After hanging, take time to arrange the pleats or folds by hand so the fabric falls naturally and evenly across the window. This is especially important for pinch pleat, pencil pleat, or tab-top styles, which depend on consistent spacing for visual appeal.
By gently shaping the folds and smoothing out the fabric with your hands, you can create a polished, hotel-quality finish that instantly upgrades the look of your room.
Common Mistakes to Avoid
Washing your curtains at home is a fantastic way to refresh your space and maintain a healthy indoor environment—but even a small mistake can result in damage that’s difficult (or impossible) to reverse. From fabric shrinkage to stretched seams and faded colors, many common errors stem from skipping key steps in the cleaning process.
To help you avoid setbacks and protect your curtains, here are some of the most frequent curtain-cleaning mistakes homeowners make—along with tips on how to avoid them:
1. Skipping the Care Label
Mistake: Tossing curtains into the washer without checking the care instructions.
Why It Matters: Different fabrics require different handling. Cotton or polyester may be safe for machine washing, but materials like silk, velvet, and suede often require dry cleaning or gentle hand washing. Ignoring these details can result in shrinkage, discoloration, or complete fabric breakdown.
Solution: Always check the care label before washing. If it’s missing or unreadable, err on the side of caution and choose hand washing or steam cleaning.
2. Using Hot Water
Mistake: Using hot water to “deep clean” curtains.
Why It Matters: While hot water may sound like a good idea for sanitizing, it can cause delicate fabrics to shrink, fade, or warp, especially those with synthetic fibers or linings.
Solution: Use cold or lukewarm water unless the label specifically permits warm washing. Cold water is usually sufficient to remove dirt while protecting color and structure.
3. Overloading the Washing Machine
Mistake: Washing multiple curtain panels or heavy drapes in a single load.
Why It Matters: Overcrowding your washing machine can lead to tangled fabric, uneven washing, and mechanical strain. It also reduces the effectiveness of the rinse cycle, leaving behind soap residue.
Solution: Wash curtains in small batches, especially if the panels are thick or oversized. Always give fabrics enough room to move freely in the drum.
4. Wringing Wet Curtains
Mistake: Twisting or wringing wet curtains to remove excess water.
Why It Matters: Wringing stretches the fibers and seams, leading to misshaped, distorted panels and uneven hems.
Solution: Instead of wringing, gently press or squeeze out water. Lay curtains flat on a towel and roll them up to absorb moisture. Then hang them to air dry.
5. Ignoring Drying Instructions
Mistake: Tossing curtains in the dryer on high heat.
Why It Matters: High temperatures can weaken fabric fibers, cause shrinkage, and melt or damage thermal or blackout linings. In some cases, even medium heat can be too harsh for certain materials.
Solution: Always refer to the care label. When in doubt, opt for air drying or machine drying on the lowest possible setting. Hang while slightly damp to reduce wrinkles and maintain the curtain’s shape.

Special Tips for Delicate or Heavy Fabrics
Not all curtains are created equal—some require extra care due to their delicate weave, special coatings, or heavyweight materials. When washing or refreshing fabrics like lace, velvet, or blackout curtains, it’s important to follow specialized techniques to avoid damage and preserve the quality of these often expensive window treatments.
Below are cleaning tips tailored specifically to sheer, lace, velvet, heavy drapes, and blackout curtains, so you can treat each fabric with the care it deserves:
Sheer or Lace Curtains
Lightweight and fragile, sheer and lace curtains are especially prone to snagging, tearing, or stretching during washing. These fabrics look beautiful in the home but require gentle handling during cleaning.
Best Practices:
- Use a Mesh Laundry Bag or Pillowcase: Place the panels inside a mesh bag or clean pillowcase before machine washing. This reduces friction and prevents the fabric from tangling or getting caught in the drum.
- Minimal Detergent: A small amount of mild, fragrance-free detergent is all you need. Avoid bleach or harsh chemicals.
- Gentle Cycle Only: Select the delicate or hand-wash setting on your washing machine with cold water.
- Never Wring or Twist: After washing, gently press the water out. Wringing can cause stretching and deformities in the delicate weave.
- Air Dry Flat or Hang Carefully: Lay the panels flat on a clean towel or hang them using clothespins to avoid overstretching.
Velvet Curtains or Heavy Drapes
Velvet and heavy lined drapes add luxury and insulation to a space but are notoriously sensitive to water and mechanical agitation. These fabrics can lose their pile or shape if washed incorrectly.
Best Practices:
- Avoid Machine Washing: Machine agitation can crush the velvet pile, distort shape, and damage internal linings.
- Steam Cleaning is Ideal: Use a handheld steamer to lift dust, freshen fabric, and remove light wrinkles without submerging the curtain.
- Dry Cleaning Preferred: For authentic velvet or lined drapes, professional dry cleaning is the safest option.
- Gentle Hand Washing (If Safe): If the care label allows, hand wash with cold water and mild detergent in a large tub. Support the full weight of the curtain while lifting to avoid stretching the seams.
- Dry with Support: Avoid hanging heavy curtains while wet. Instead, lay them flat on a drying rack or over towels to allow even drying without distorting the shape.
Blackout Curtains
Blackout curtains often feature a rubber, acrylic, or foam thermal backing, making them sensitive to heat, water, and aggressive agitation. Mishandling these curtains can lead to peeling, cracking, or the lining separating from the fabric.
Best Practices:
- Check the Label First: Many blackout curtains are not machine washable. The backing may degrade when exposed to water or high temperatures.
- Spot Clean When in Doubt: Use a damp microfiber cloth with a mild soap solution to spot clean the surface, especially the lining.
- Avoid Harsh Detergents or Scrubbing: These can break down the thermal or light-blocking coating.
- Air Dry Only: Never use a dryer. Hang the curtains in a well-ventilated space and keep them out of direct sunlight to prevent fading or material breakdown.
- Steam from a Distance: If needed, you can gently steam the front-facing fabric side (not the lining) from a few inches away to reduce wrinkles.
