Introduction
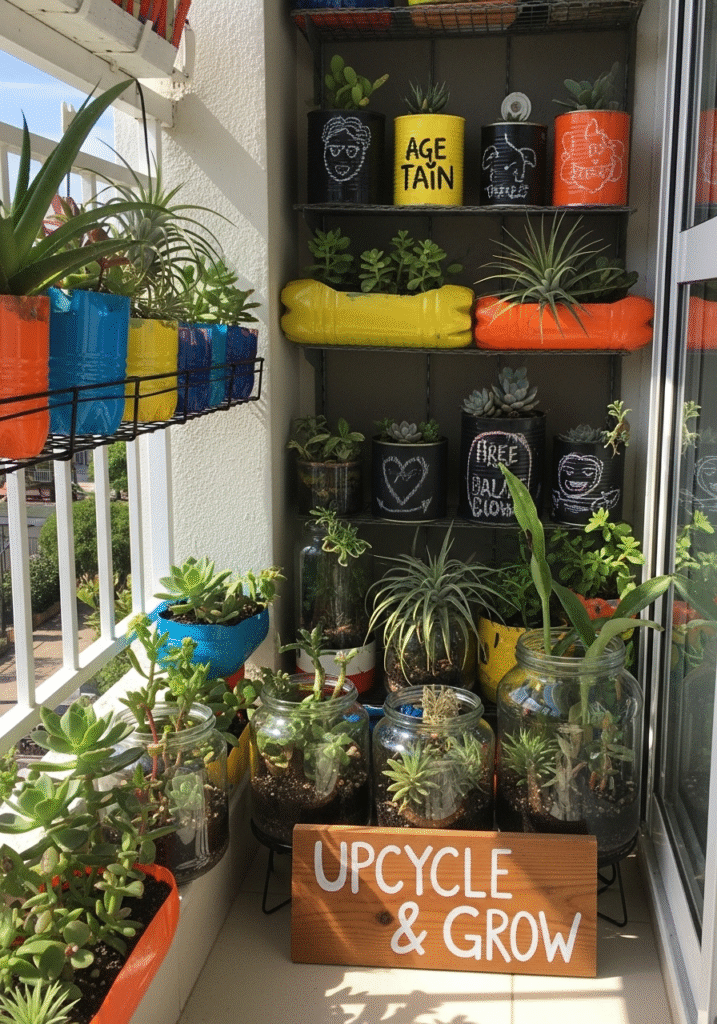
Are you passionate about gardening and want to contribute to a cleaner, greener planet? Discover how you can turn waste into wonder with our comprehensive guide on DIY plant pots made from everyday waste materials. This eco-friendly gardening blog is designed for both beginners and seasoned plant lovers looking to reduce their environmental footprint while unleashing their creativity.
In today’s age of sustainability, reusing and recycling have become more important than ever. Instead of throwing away old plastic bottles, tin cans, glass jars, or even broken kitchenware, you can repurpose them into beautiful, budget-friendly plant pots that add charm and character to your space. From simple plastic container makeovers to artistic cement crafts using household waste, we’ll walk you through a variety of innovative ideas that are easy to try at home.
This blog offers step-by-step instructions, materials lists, design tips, and maintenance advice to help you create long-lasting, eco-conscious pots. Not only will you save money, but you’ll also reduce landfill waste and make a positive environmental impact—one plant at a time.
Perfect for small balconies, indoor gardens, or large outdoor spaces, these DIY ideas will inspire you to grow green while thinking green. Let’s start turning trash into treasure—your plants will thank you!
Benefits of Making DIY Plant Pots from Waste
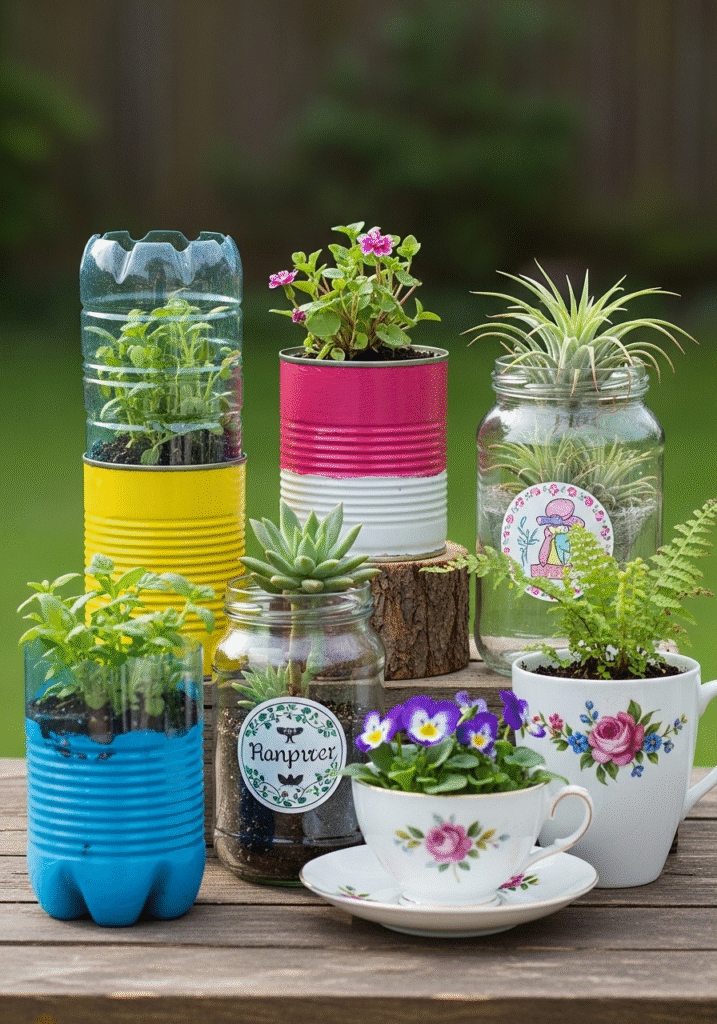
Creating your own plant pots from discarded household items isn’t just a crafty hobby—it’s a meaningful step toward sustainable living. Here’s a closer look at the many benefits of upcycling waste materials into beautiful, functional plant containers:
1. Eco-Friendly Solution
One of the most impactful reasons to reuse waste for DIY pots is environmental conservation. Every plastic bottle, tin can, or glass jar you repurpose keeps that item out of landfills, reducing pollution and carbon emissions. By choosing upcycled materials, you’re actively contributing to a cleaner planet and promoting a circular economy where nothing goes to waste.
2. Budget-Friendly Gardening
Gardening can become expensive, especially when buying decorative pots or planters. Making your own pots from household waste is a cost-effective alternative that helps you save money. Instead of spending on store-bought containers, you can turn common items like old buckets, broken teapots, or used food containers into unique plant homes at no extra cost.
3. A Canvas for Creative Expression
DIY plant pots allow you to personalize your garden in ways store-bought products can’t. Whether you love painting, crafting, or designing, this is your chance to show off your artistic side. You can decorate your pots with colors, textures, and themes that reflect your personality, adding a distinctive touch to your indoor or outdoor garden.
4. A Fun & Educational Activity
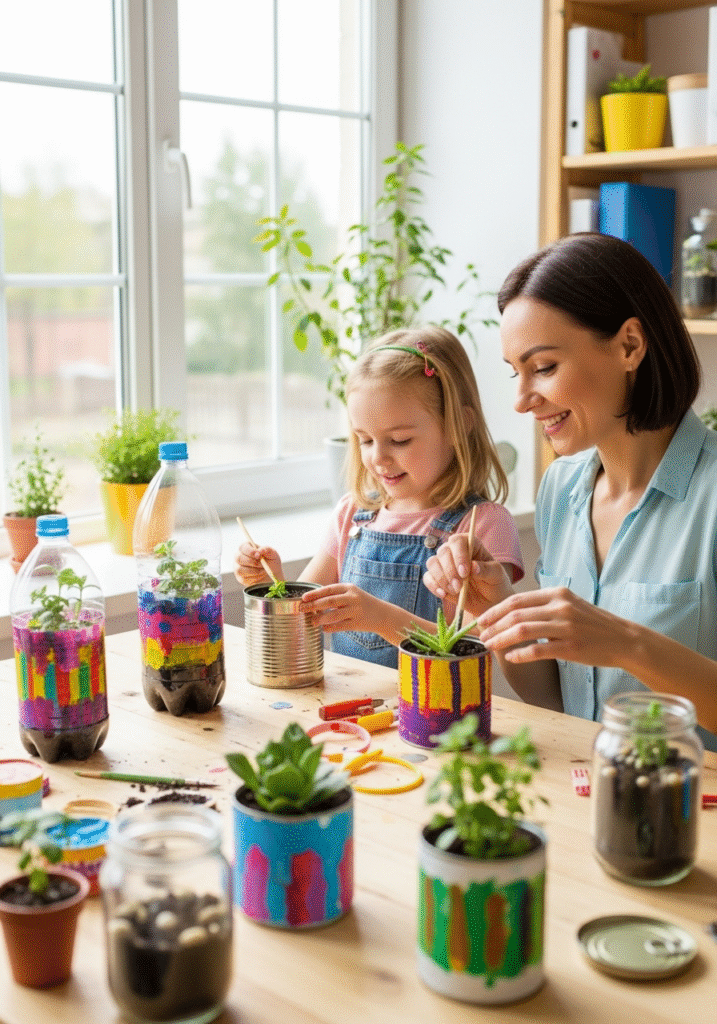
Making plant pots from waste is a fantastic educational activity for children and adults alike. It teaches valuable lessons about recycling, sustainability, and environmental responsibility. It also encourages problem-solving, motor skills, and creativity—making it a perfect project for families, classrooms, or community workshops.
5. Fully Customizable to Fit Your Space
When you make your own plant pots, you’re not limited by commercial sizes or designs. Want a tiny pot for succulents or a large one for a tomato plant? No problem. Need it to match your room’s color scheme or garden’s rustic vibe? You can design it exactly how you want. This customization ensures your garden not only looks great but also fits your available space and functional needs.
Essential Tools and Materials
Before you start crafting your own eco-friendly plant pots, it’s important to prepare your workspace and gather the right tools and materials. Having everything on hand not only makes the process smoother but also ensures your final creations are durable, functional, and visually appealing.
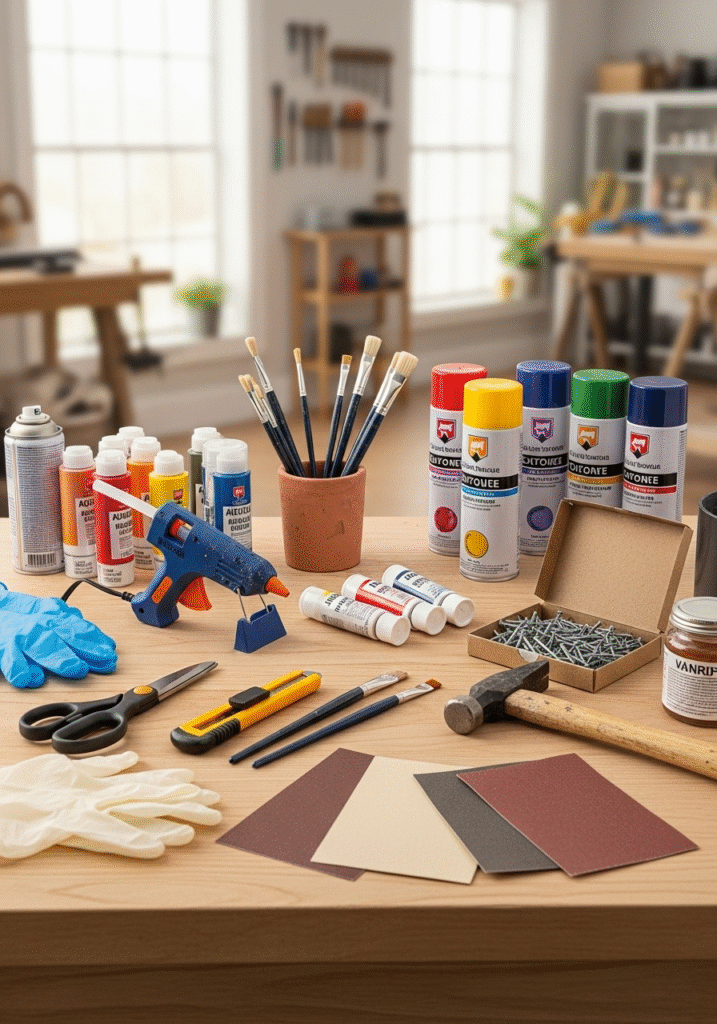
Below is a detailed guide to the essential tools and materials you’ll need to turn household waste into stunning, upcycled plant containers:
1. Scissors or a Box Cutter
A sharp pair of scissors or a sturdy box cutter is crucial for cutting through plastic bottles, cardboard, old containers, or fabric. Choose heavy-duty versions if you’re working with tougher materials like thick plastic or metal. Always use caution and work on a safe surface to avoid injury.
2. Hot Glue Gun or Strong Adhesive
To assemble pieces or attach decorative elements, you’ll need a reliable adhesive. A hot glue gun is ideal for most projects because it dries quickly and holds firmly. However, for heavier materials like metal or ceramic, consider using industrial-strength glue or epoxy for a more secure bond.
3. Acrylic or Spray Paints
Painting your DIY pots is a great way to add color, texture, and personality. Acrylic paints work well on most surfaces like plastic, terracotta, and wood, while spray paints are better for smooth, even coverage on metal or glass. Make sure the paint is non-toxic and suitable for outdoor use if your pots will be exposed to the elements.
4. Paintbrushes
A variety of paintbrush sizes allows you to add both broad strokes and fine details to your designs. Foam brushes are great for applying base coats, while thinner brushes help with intricate patterns, lettering, or decorative flourishes.
5. Nails and Hammer (for Drainage Holes)
Proper drainage is essential to prevent root rot and keep your plants healthy. Use a nail and hammer—or a drill, if available—to poke holes in the bottom of your pots. This is especially important when using non-traditional containers like tin cans, plastic tubs, or old mugs.
6. Sandpaper
To ensure your pot surfaces are smooth and safe, sandpaper is essential. It helps remove sharp edges, rough spots, or peeling labels from repurposed items. A light sanding also helps paint adhere better to slippery surfaces like plastic or glass.
7. Varnish or Sealant (Optional)
For added durability and weather resistance, especially for outdoor pots, consider applying a clear varnish or waterproof sealant. This finishing touch not only protects your paint job from fading but also shields your pot from moisture and UV damage.
Safety Tip:
While DIY projects are fun and rewarding, safety should always come first. Wear protective gloves when handling sharp tools or chemical-based products. If children are involved, supervise them closely and assign age-appropriate tasks like painting or decorating rather than cutting or gluing.
10 Creative DIY Plant Pot Ideas Using Waste Materials
Material Needed: Used plastic water or soda bottles (any size)
Ideal For: Small indoor plants, herbs, succulents, or hanging planters
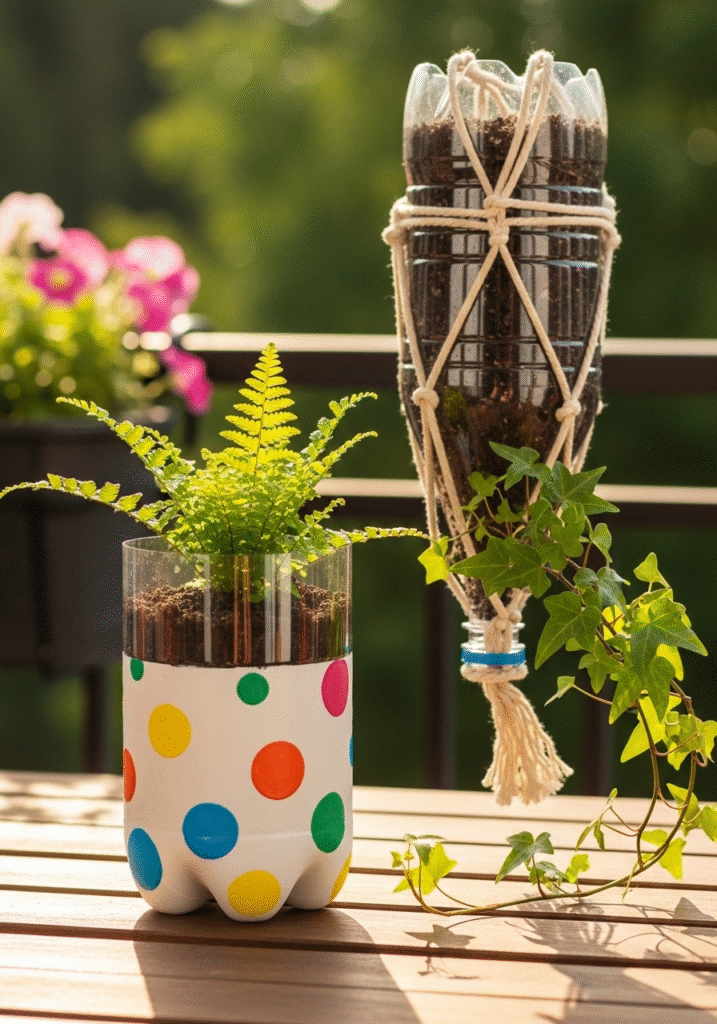
Plastic bottles are one of the most commonly discarded items in households, but they also offer one of the easiest and most versatile materials for making DIY plant pots. Instead of throwing them into the trash or recycling bin, you can transform them into beautiful, functional planters in just a few simple steps.
Step-by-Step Instructions:
Step 1: Cut the Bottle
Choose a clean, dry plastic bottle. Using scissors or a box cutter, carefully cut the bottle in half or at your desired height. The bottom portion will act as your plant pot. If you want to make a hanging planter, keep the bottle’s neck and cut an opening on the side instead.
Step 2: Smooth the Edges
Use sandpaper to gently smooth out any rough or sharp edges. This will make the pot safer to handle and more visually polished.
Step 3: Decorate the Pot
Now comes the fun part! Use acrylic paint, spray paint, washi tape, or fabric to decorate the outside of the bottle. You can go minimalist with solid colors or get creative with patterns, polka dots, stripes, or even hand-painted illustrations. Let your imagination run wild.
Step 4: Create Drainage Holes
Using a nail, drill, or a heated needle, poke a few small holes at the bottom of the bottle to allow excess water to escape. This step is crucial for plant health, as it prevents overwatering and root rot.
Step 5: Add Soil and Plant
Fill your new pot with a lightweight potting mix and plant your favorite indoor or outdoor greenery. Succulents, small herbs like mint or basil, or decorative flowering plants work especially well in these DIY containers.
Bonus Tip: Make Hanging Planters
For an eye-catching vertical garden, turn plastic bottles into hanging planters. Use the top half of the bottle, thread some rope or wire through holes near the opening, and hang them from a wall, balcony railing, or garden fence. They’re perfect for trailing plants like ivy or pothos.
Why It’s Great:
- Eco-friendly: Recycles non-biodegradable plastic.
- Low cost: Uses materials you already have at home.
- Creative flexibility: You can design them to match your décor or seasonal themes.
- Beginner-friendly: Easy enough for kids or first-time DIYers.
Tin Cans
Material Needed: Empty food cans (e.g., beans, soup, tomato paste)
Ideal For: Growing herbs, succulents, and small flowering plants indoors or on windowsills
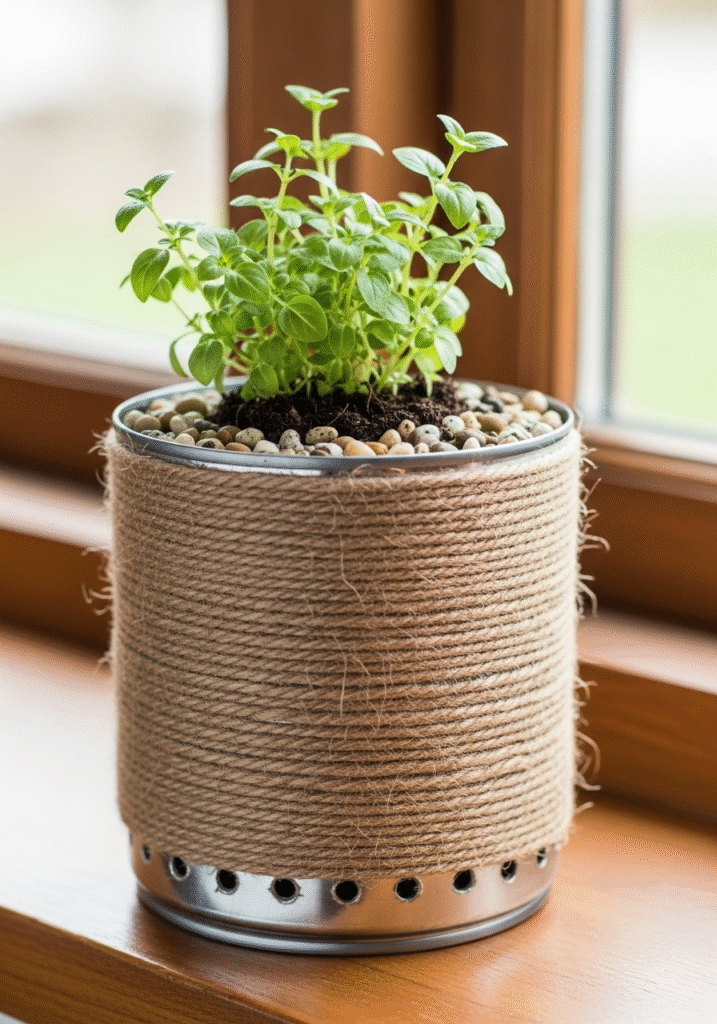
Tin cans are often tossed away after one use, but they’re actually one of the sturdiest and most stylish materials you can repurpose for plant pots. With just a few tools and some creative flair, these metallic containers can be turned into charming, rustic, or modern plant pots that brighten up any corner of your home or garden.
Step-by-Step Instructions:
Step 1: Clean and Prepare the Can
Start by removing any paper labels and adhesive from the outside of the can. Wash the inside thoroughly with soap and water to remove any food residue. Allow the can to dry completely before moving to the next step.
Step 2: Smooth Edges (Optional)
If the edges of your can are sharp or uneven, lightly sand them down or use pliers to bend them inward. This makes your pot safer to handle, especially if children will be around.
Step 3: Add Drainage Holes
Using a hammer and nail or a drill, make two to three small holes at the bottom of the can. Proper drainage is essential for healthy plant roots, preventing water from pooling and causing rot.
Step 4: Decorate the Exterior
Tin cans offer a blank canvas for your creativity. You can:
- Paint them with acrylic or spray paints in solid colors, geometric patterns, or even chalkboard paint for labeling.
- Wrap them in jute rope, twine, or burlap for a rustic farmhouse vibe.
- Use washi tape or decoupage techniques for a more colorful, artistic look.
Seal your design with a layer of clear varnish or mod podge to protect it from moisture and wear.
Step 5: Add Layers and Plant
Start by placing a few small stones or pebbles at the bottom of the can to aid drainage. Then fill it with a good-quality potting mix suitable for your plant of choice. Herbs like basil, thyme, or mint, as well as compact succulents and cacti, thrive in these small containers.
Bonus Ideas:
- Use multiple tin cans of varying heights to create a tiered herb garden.
- Attach cans to a wooden board or wall to build a vertical garden—perfect for small spaces like apartments or balconies.
- Label each can with chalkboard stickers or handmade tags for easy plant identification.
Why Tin Cans Make Great DIY Planters:
- Highly durable and reusable for many growing seasons.
- Customizable with paint, fabric, or natural fibers.
- Perfect for small spaces, window sills, and indoor gardening.
- Great for upcycling, helping reduce metal waste in landfills.
Old Tires
Material Needed: Worn-out car, bike, or truck tires
Ideal For: Outdoor decorative flower beds, vertical gardens, and upcycled landscaping features
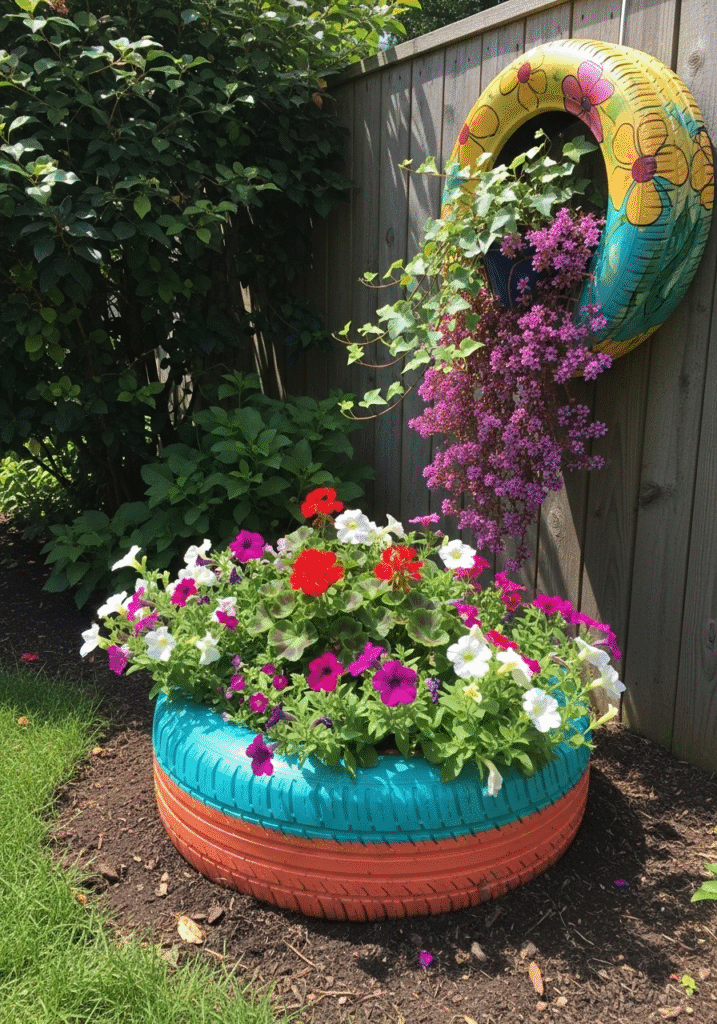
Old tires may seem like junk, but with a little imagination, they can become stunning centerpieces in your garden. These heavy-duty rubber rings are not only durable but also offer ample space for planting flowers, ground cover, or even small shrubs. Repurposing old tires helps reduce environmental waste while allowing you to create unique, eye-catching garden displays.
Step-by-Step Instructions:
Step 1: Clean the Tire Thoroughly
Begin by washing the tire with water and mild soap to remove grease, dust, or debris. Scrub the surface using a stiff brush, and allow it to dry completely. If you’re planning to paint the tire, a clean surface is essential for better paint adhesion.
Step 2: Paint and Decorate
Use outdoor-grade spray paint or acrylic paint to decorate your tire. Choose bold, bright colors for a cheerful garden aesthetic, or go with muted earth tones for a rustic look. You can even stencil in patterns, paint stripes, or personalize with lettering. Apply two coats for long-lasting results and finish with a clear sealant to protect it from the elements.
Step 3: Choose a Placement Style
- Horizontal Flower Bed: Place the tire flat on the ground in your garden or yard. Fill the inner circle with gravel at the bottom for drainage, followed by potting soil. This method is perfect for ground-level flower beds and adds dimension to your landscaping.
- Hanging Wall Planter: If you’re short on space, hang the painted tire vertically on a fence or wall using sturdy hooks or chains. Add a wooden backing or mesh netting at the bottom to hold the soil, then plant trailing flowers or vines for a cascading effect.
Step 4: Plant and Style
Once the tire is positioned and filled with soil, add your plants. Old tires are ideal for colorful flowering plants like petunias, marigolds, or portulaca. You can also use them for ground cover plants such as creeping thyme or sweet alyssum. Water thoroughly and place in a sunny location for best results.
Creative Tips:
- Stack multiple tires to build raised flower beds or vertical planters.
- Create a tire totem by placing smaller tires on top of larger ones, each painted in a different color for a layered, vibrant look.
- Use tires to build a themed garden—such as a butterfly or bee garden—by decorating each tire with relevant motifs.
Why Old Tires Make Excellent DIY Planters:
- Eco-friendly reuse of non-biodegradable rubber waste
- Highly durable and weather-resistant—perfect for outdoor use
- Visually bold and customizable to match any garden style
- Large planting area, ideal for creating impact in large or small gardens
Coconut Shells
Material Needed: Empty, cleaned coconut shells
Ideal For: Air plants, succulents, small bonsai trees, and hanging planters
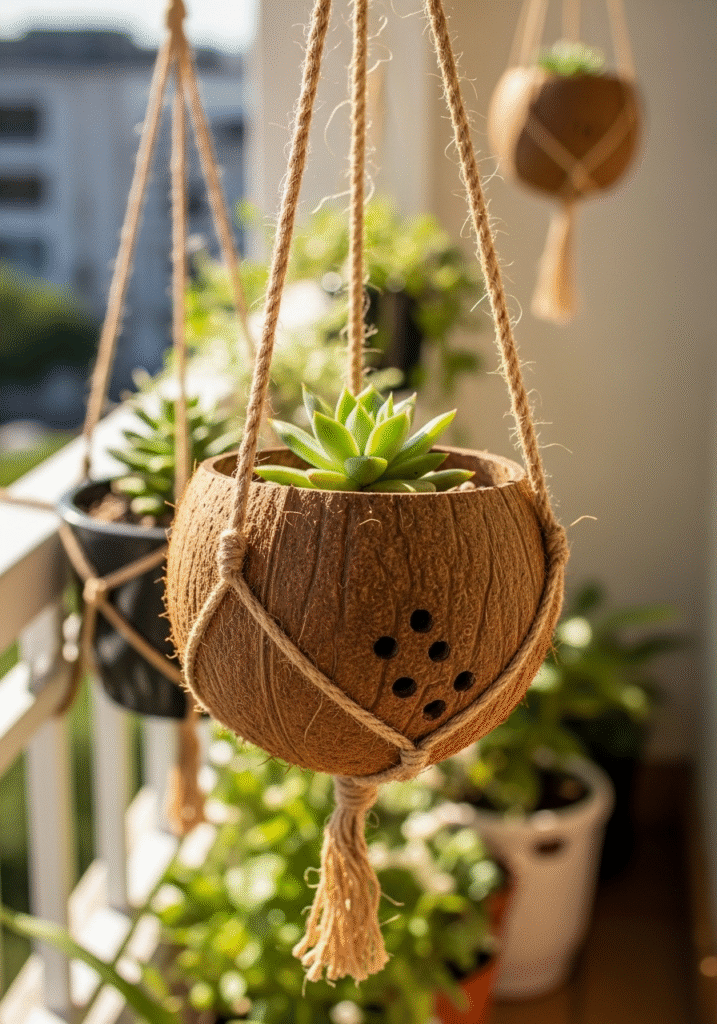
Coconut shells are not just biodegradable and natural—they’re also beautiful in their raw form. When repurposed as plant pots, they offer a tropical, earthy vibe that’s perfect for both indoor and outdoor garden spaces. Lightweight yet durable, coconut shells make fantastic planters for minimalistic or boho-themed décor and are especially suited for small plants that require little soil.
Step-by-Step Instructions:
Step 1: Prepare the Coconut Shell
Start with a dried, used coconut. Carefully cut it in half using a saw or a heavy-duty knife, depending on the thickness. Remove any leftover coconut flesh and fibrous husk from inside the shell. Rinse the shell thoroughly and let it dry completely.
Step 2: Smooth and Polish the Surface
For a more refined look, sand the outer surface and rim of the shell using medium-grit sandpaper. This step removes any rough edges and brings out the shell’s natural texture and sheen. Optionally, apply coconut oil or wood polish to enhance the shine or preserve the shell’s surface.
Step 3: Drill Drainage Holes
Using a small drill bit, make two to three small holes at the bottom of the shell to allow excess water to escape. This prevents overwatering, especially for moisture-sensitive plants like succulents and air plants.
Step 4: Paint or Decorate (Optional)
You can keep the shell natural for a rustic look or decorate it with acrylic paints, beads, or tribal patterns. Earth tones and nature-inspired designs complement the shell’s organic shape beautifully. If painting, use a clear varnish afterward to protect your design from moisture.
Step 5: Add Hanging Rope (Optional)
For hanging planters, drill two small holes near the top edge on opposite sides. Thread jute rope or twine through the holes and tie securely. You can hang your coconut shell pots indoors near windows or outdoors from tree branches, pergolas, or balcony railings.
Step 6: Add Soil and Plants
Fill the shell with a small amount of well-draining potting mix. Coconut shells are shallow, so they work best with compact plants like:
- Air plants (Tillandsia) that need minimal soil
- Succulents such as Haworthia or Echeveria
- Miniature bonsai or ferns that thrive in small containers
Creative Tips:
- Group several hanging coconut pots together to create a floating mini garden.
- Use coconut halves as table centerpieces, placing one or two elegant succulents in each.
- Add a layer of moss or pebbles on top of the soil for a finished, decorative look.
Why Coconut Shells Make Great DIY Plant Pots:
- 100% biodegradable and natural, making them an eco-conscious choice
- Compact and stylish, ideal for apartments and small spaces
- Visually unique, offering a tropical and organic aesthetic
- Affordable and accessible, especially in regions where coconuts are common
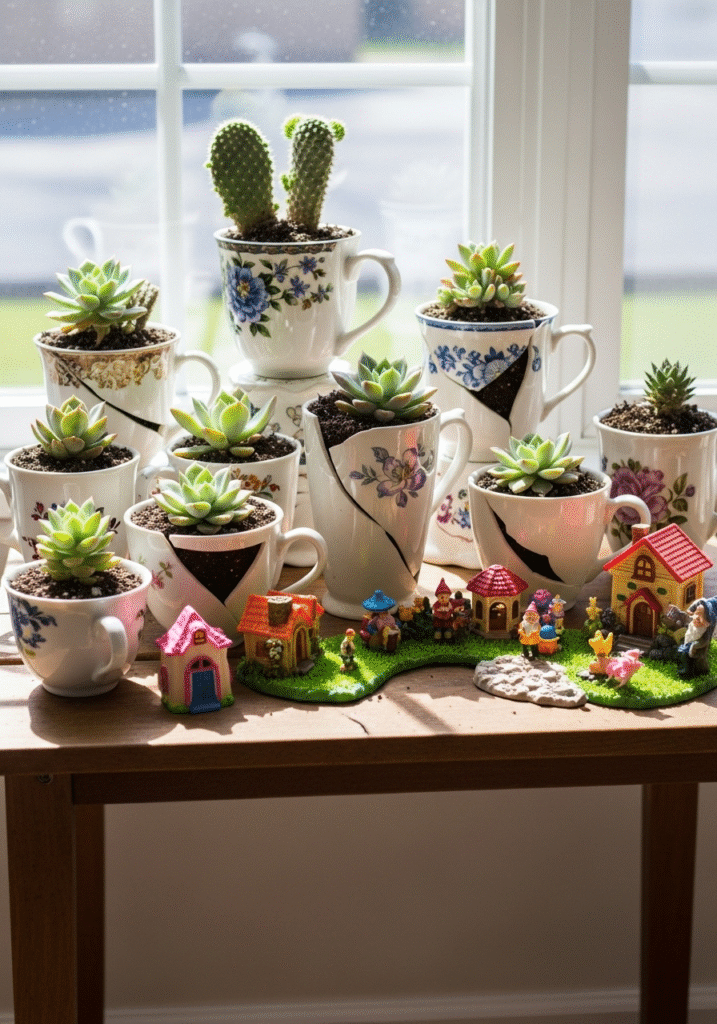
Broken Crockery
Material Needed: Chipped or cracked cups, mugs, bowls, or saucers
Ideal For: Succulents, cacti, fairy gardens, and tabletop décor
Don’t throw away those cracked teacups, chipped mugs, or broken bowls just yet! What may seem like damaged or unusable crockery can be transformed into charming, whimsical mini planters. These small, repurposed items are perfect for housing tiny plants like succulents and cacti, making them excellent additions to your indoor garden, kitchen shelf, or office desk.
Using broken crockery not only prevents waste from going to the landfill but also adds a creative, vintage touch to your home décor.
Step-by-Step Instructions:
Step 1: Select and Clean Your Crockery
Gather any old or broken crockery you have at home—think chipped mugs, cracked bowls, or even single saucers missing their cups. Wash them thoroughly with soap and water to remove any dust, grime, or leftover food stains. Let them dry fully before planting.
Step 2: Optional — Drill Drainage Holes
If you’re comfortable working with tools, use a ceramic drill bit to make a small drainage hole in the base of your container. If not, don’t worry—just add a layer of pebbles or charcoal at the bottom to help absorb excess moisture.
Step 3: Fill with Soil
Add cactus or succulent potting mix, which offers good drainage and aeration. These types of soil are ideal for small plants that thrive in dry conditions, such as succulents or air plants.
Step 4: Plant Your Greenery
Place your selected plant gently into the soil. Succulents like Echeveria, Haworthia, or small cacti varieties work best for these compact planters. Press the soil down lightly and add decorative stones or moss on top for a finished look.
Step 5: Place and Display
Position your crockery planter on a windowsill, bookshelf, or coffee table. These tiny pots are great conversation starters and can easily be rotated around the house to freshen up different spaces.
Fun Idea: Create a Mini Fairy Garden
Use larger broken bowls or deep dishes to create enchanting miniature fairy gardens. Add a few small plants, tiny figurines, moss, and decorative pebbles to build a magical, storybook-inspired garden scene. It’s a fun craft project for both kids and adults—and perfect for gifting!
Why Broken Crockery Makes Perfect DIY Planters:
- Eco-friendly reuse of items that would otherwise be discarded
- Cost-effective since you’re repurposing existing household items
- Aesthetic and unique, bringing vintage charm to any room
- Great for small spaces, making them ideal for apartments, dorm rooms, or desktops
- Beginner-friendly and kid-safe DIY project (no cutting or heavy tools needed)
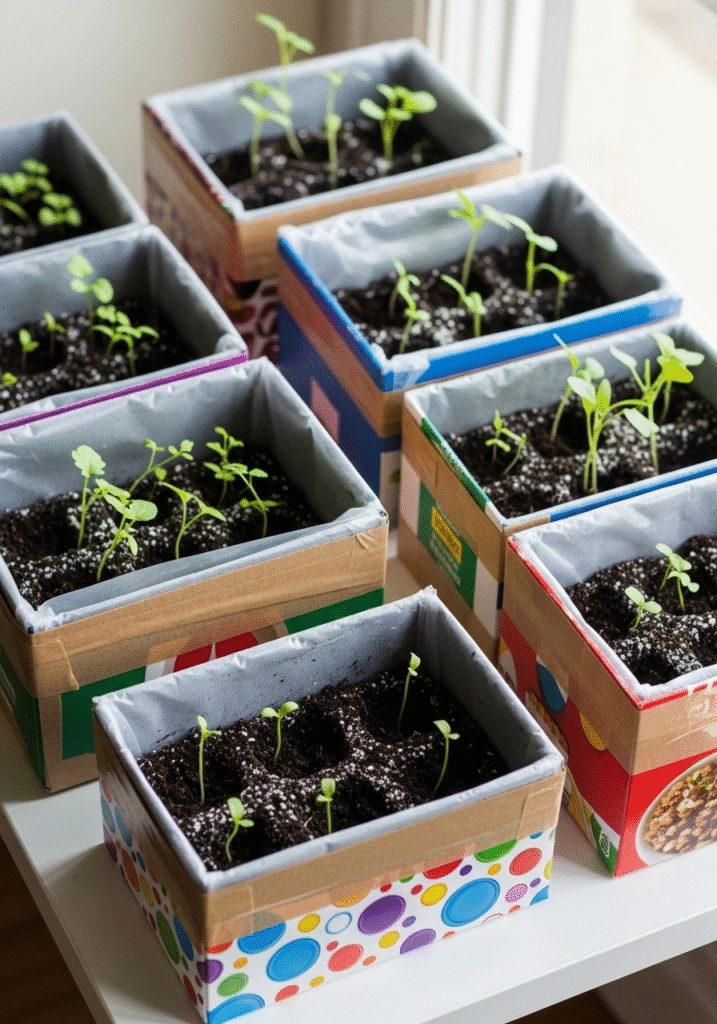
Cardboard Boxes
Material Needed: Empty shoe boxes, cereal boxes, or other small cardboard containers
Ideal For: Starting seeds, temporary indoor planters, and children’s gardening projects
Cardboard boxes are one of the most abundant and easily recyclable materials found in nearly every home. Instead of tossing them out, why not transform them into temporary DIY plant pots? These eco-conscious containers are excellent for starting seedlings or growing short-term indoor plants, especially if you’re gardening on a budget or teaching kids about sustainable living.
While not suited for long-term outdoor use due to moisture sensitivity, cardboard planters are perfect for giving your seeds a strong start indoors—and they can be composted afterward!
Step-by-Step Instructions:
Step 1: Choose and Prepare the Box
Select a clean, sturdy cardboard box—shoe boxes, cereal boxes, or packaging boxes work great. Ensure there are no food residues or oily stains. Trim the box to your desired height if necessary, especially for smaller seedlings.
Step 2: Line with Plastic for Water Resistance
Because cardboard absorbs moisture, it needs to be lined to avoid softening and collapsing. Line the interior of the box with a plastic bag, old shopping bag, or waterproof sheet. Cut the plastic to size and tape it neatly along the edges to prevent leaks. You can also poke a few holes in the plastic (but not the box) to allow some drainage.
Step 3: Reinforce the Structure
Use strong tape—such as duct tape or packing tape—to reinforce the edges, corners, and base of the box. This adds extra durability and prevents the box from bending when filled with soil and water.
Step 4: Decorate the Exterior
Make your planter visually appealing by covering it with wrapping paper, newspaper clippings, fabric scraps, or colorful paint. This is especially fun for kids and can be themed based on holidays, seasons, or plant types. Let any paint or glue dry completely before planting.
Step 5: Add Soil and Start Planting
Fill the lined and reinforced box with a lightweight seed-starting mix. Sow your seeds according to packet instructions and keep the box in a warm, sunny spot indoors. Cardboard planters retain warmth well, making them ideal for seed germination.
Perfect For:
- Starting seedlings indoors before transferring them to larger pots or garden beds
- Classroom or home-school projects to teach kids about plant growth and recycling
- Short-term herb gardens on windowsills or kitchen counters
- Eco-friendly gift planters with a handmade touch
Why Cardboard Boxes Are Useful for DIY Gardening:
- Widely available and cost-free—most households have them
- Biodegradable and recyclable, minimizing environmental impact
- Lightweight and easy to handle, even for children or elderly gardeners
- Customizable in size, shape, and decoration
Important Note:
Since cardboard is sensitive to water, these planters are best suited for indoor use or seed-starting purposes. Once the seedlings are mature enough, they can be transplanted into more durable pots or garden beds. Alternatively, you can plant the entire cardboard box directly into the soil if it’s fully biodegradable and free from plastic or heavy inks.
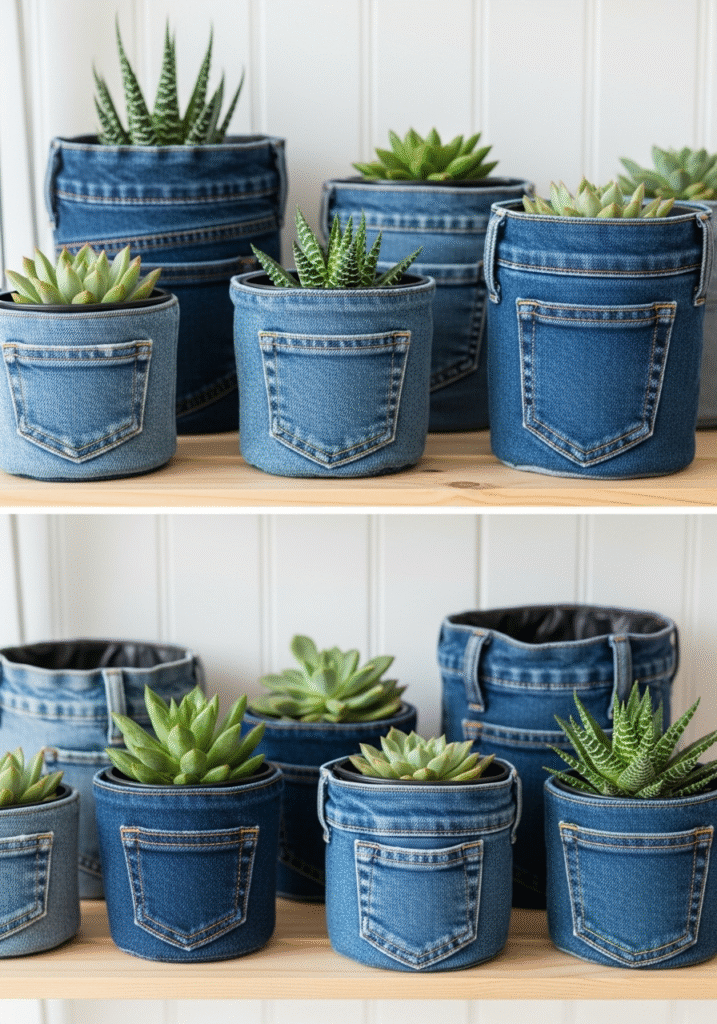
Old Jeans or Fabric
Material Needed: Worn-out jeans, denim pieces, old clothes, or fabric scraps
Ideal For: Indoor potted plants, creative décor, and quirky tabletop arrangements
Got a pair of old jeans or faded t-shirts lying around? Instead of tossing them in the trash, turn those fabric remnants into unique and trendy DIY plant pots! Repurposing denim and other textiles into plant containers not only adds a soft, rustic, and boho aesthetic to your space but also supports sustainable, low-waste living.
Whether you’re going for a farmhouse vibe or a colorful, eclectic look, fabric-based plant pots are lightweight, stylish, and surprisingly easy to make.
Step-by-Step Instructions:
Step 1: Choose and Prepare Your Fabric
Pick durable fabrics like denim from old jeans, canvas bags, or upholstery scraps. You can also use cotton t-shirts or curtains for a softer look. Wash the fabric to remove dirt or chemicals and cut it to the desired size.
Step 2: Create the Pot Structure
You have two main options:
- Sewing Method: Stitch the fabric into a cylindrical or square pot shape. Reinforce the seams to support the soil’s weight.
- No-Sew Method: Use a hot glue gun or strong fabric glue to hold the shape together, ideal for beginners or quick projects.
To make your planter more durable and leak-proof, line the inside with a plastic bag or waterproof material, such as an old plastic folder, kitchen liner, or even bubble wrap.
Step 3: Add a Base and Insert Support
Place a small plastic or terracotta pot inside the fabric planter to hold the soil and plant. Alternatively, glue a stiff, waterproof base (like thick cardboard wrapped in plastic) to the bottom. This ensures the pot can stand upright and hold moisture without leaking.
Step 4: Decorate and Personalize
Get creative with your design! Some fun and trendy ideas include:
- Using jean pockets to create mini wall planters—just hang them and insert tiny succulents!
- Adding buttons, lace, or embroidery for a handcrafted look.
- Creating patchwork planters by combining different fabrics for a colorful effect.
Step 5: Add Soil and Plant
Once your fabric pot is ready, fill it with a well-draining potting mix. These containers are great for indoor plants like pothos, peace lilies, spider plants, or herbs like mint and basil. Avoid overwatering, especially if you’re using a soft fabric without a plastic liner.
Creative Tips:
- Reuse kids’ jeans or overalls for tiny tabletop planters.
- Hang fabric pouches on a garden wall or balcony railing to create a soft, vertical garden.
- Match fabric planters with interior décor themes for a cohesive, handmade touch.
Why Fabric and Old Jeans Make Unique DIY Planters:
- Sustainable and zero-waste, repurposing clothing that would otherwise end up in landfills
- Soft and flexible, allowing for creative shapes and storage when not in use
- Customizable and fashionable, easily decorated to match home or garden styles
- Lightweight and safe, especially for indoor and balcony gardening
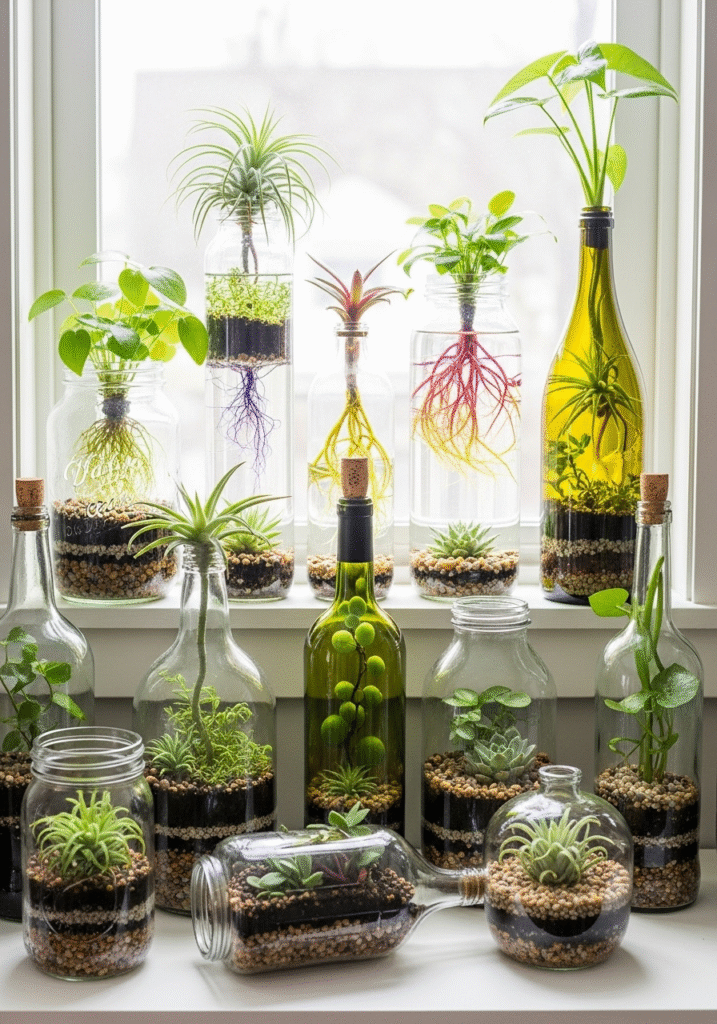
Glass Jars and Bottles
Material Needed: Empty glass containers such as mason jars, pickle jars, jam jars, or wine bottles
Ideal For: Indoor plants, terrariums, hydroponic setups, and stylish home décor
Glass jars and bottles are some of the most elegant and readily available waste items in any kitchen. Instead of sending them to the recycling bin, why not upcycle them into chic and transparent plant pots? These glass containers add a clean, modern look to your indoor garden while making it easy to monitor water levels and root growth.
Whether you’re creating a self-sustaining terrarium, a minimalist hydroponic display, or a cozy herb planter, glass is a versatile and visually appealing medium that suits nearly any space.
Step-by-Step Instructions:
Step 1: Clean and Remove Labels
Begin by thoroughly washing your jars or bottles with soap and warm water. Soak them if needed to remove sticky labels or residue. For stubborn glue, use a paste made of baking soda and oil or a gentle adhesive remover.
Step 2: Cut Bottles (Optional)
If you’re using wine bottles or other long-necked containers, you may want to cut the top off to create an open planter. Use a glass cutter tool and follow safety precautions, including wearing gloves and protective glasses. After cutting, sand the edges carefully to avoid sharp surfaces.
Step 3: Add a Drainage Layer
Since glass doesn’t have drainage holes, it’s important to create a drainage layer. Add a base layer of small pebbles, stones, or activated charcoal. This helps prevent water from stagnating at the roots, which is crucial for healthy plant growth.
Step 4: Fill with Soil or Water
- For soil-based planting, add potting mix suitable for your chosen plant and insert the plant carefully.
- For hydroponics or water-rooting, fill the jar with water and place a cutting (such as pothos, lucky bamboo, or mint) so the roots stay submerged.
Step 5: Style and Place
Arrange your glass planters on sunny windowsills, bookshelves, kitchen counters, or office desks. Group several together for a cohesive aesthetic, or place single jars as standalone pieces.
Stylish Uses:
- Terrariums: Glass jars are perfect for building closed or open terrariums with moss, miniature ferns, and decorative stones. They create a tiny, self-contained ecosystem that’s low-maintenance and visually stunning.
- Propagation Stations: Use tall jars or cut bottles for propagating plant cuttings in water. Watching the roots grow adds an educational and relaxing element to your space.
- Miniature Aquatic Gardens: Fill jars with water plants like water lettuce, duckweed, or peace lilies supported in hydroponic pebbles.
Why Glass Jars and Bottles Are Perfect for DIY Planting:
- Stylish and modern—complement any interior aesthetic
- Transparent—lets you monitor root health and moisture
- Versatile—suitable for soil planting, hydroponics, and terrariums
- Eco-friendly—reuses waste and reduces glass disposal
Safety Note:
Always handle glass carefully, especially when cutting. If you’re working with children or want a simpler option, stick to whole jars and bottles without modifications.
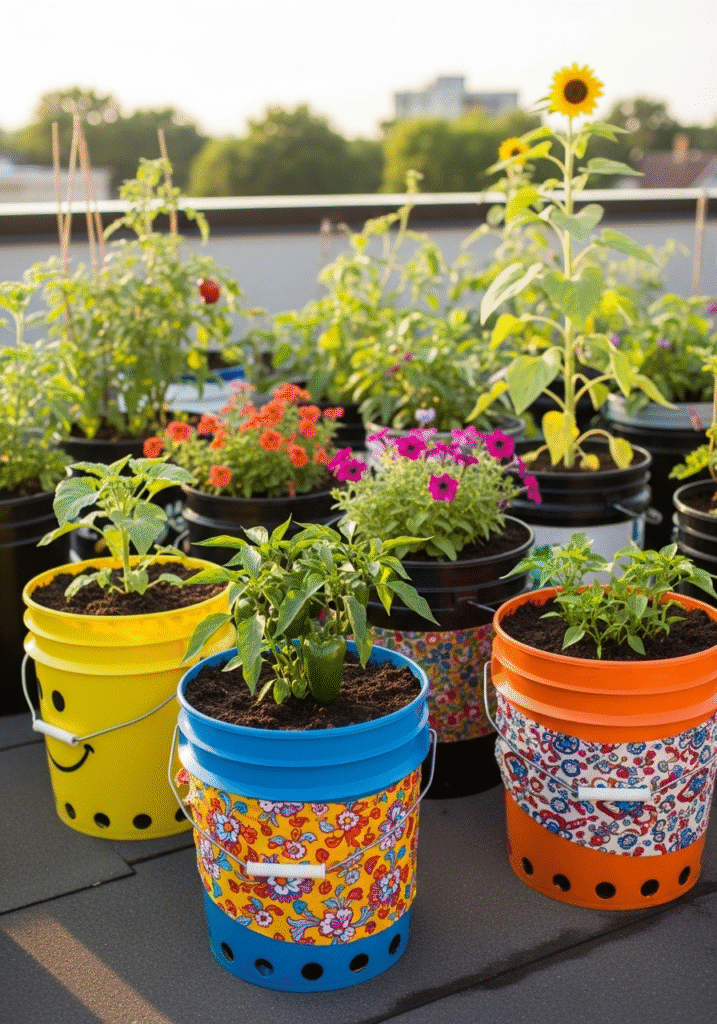
Paint Buckets
Material Needed: Empty plastic paint buckets or large detergent containers
Ideal For: Growing vegetables, flowering plants, herbs, and small shrubs—perfect for balconies, patios, and rooftop gardens
Don’t toss those bulky empty paint or detergent buckets—they’re a hidden gem for urban gardeners! These sturdy, deep containers are ideal for creating large, functional, and affordable DIY plant pots that can hold everything from tomatoes and chili plants to marigolds and mint.
With just a bit of cleaning and creativity, you can turn waste into wealth by transforming these industrial containers into decorative and practical planters. Plus, they’re a sustainable alternative to buying expensive large-sized pots.
Step-by-Step Instructions:
Step 1: Clean Thoroughly
Before using paint or detergent buckets for planting, clean them rigorously to remove all traces of chemicals or paint residue. Scrub the interior with hot water, dish soap, and vinegar or baking soda for extra cleaning power. Rinse multiple times and let it dry completely.
Step 2: Drill Drainage Holes
Use a drill or heated metal tool to create 4–6 holes at the bottom of the bucket for drainage. If you plan to place the bucket indoors or on a surface that shouldn’t get wet, insert a drip tray or saucer underneath.
Step 3: Decorate the Exterior
Transform your bucket into a stylish planter by painting it with outdoor acrylic paint or spray paint in your preferred colors. You can stencil on patterns, write the plant names, or even wrap the bucket in fabric, jute rope, or wallpaper scraps for a rustic or modern look. Add a layer of waterproof sealant for weather resistance if using outdoors.
Step 4: Fill with Soil and Plant
Add a layer of pebbles or gravel for improved drainage, followed by nutrient-rich potting soil. These large containers offer ample space for deep-rooted plants, making them ideal for:
- Vegetables like tomatoes, peppers, eggplants, or carrots
- Herbs such as basil, rosemary, or lemongrass
- Decorative flowering plants like hibiscus, geraniums, or petunias
Step 5: Place Strategically
Position your bucket planters in sunny balcony corners, on rooftops, or along garden paths. You can even mount or hang them using heavy-duty hooks and handles for vertical gardening on walls or fences.
Creative Tips:
- Use buckets of different sizes and heights to create visual interest.
- Label each bucket using chalkboard paint for a fun, farmhouse-style herb garden.
- Add casters or wheels to the bottom of the buckets for easy mobility in small urban spaces.
Why Paint Buckets Make Excellent DIY Plant Pots:
- Large capacity, ideal for growing bigger plants or multiple herbs in one container
- Strong and durable, made to last through weather and weight
- Highly customizable, from painting to wrapping and labeling
- A sustainable solution, reducing plastic waste and promoting reuse
Safety Note:
Always make sure the buckets are free of hazardous residues. Never use containers that held industrial chemicals or toxic paints, especially when growing edible plants.
Shoes and Boots
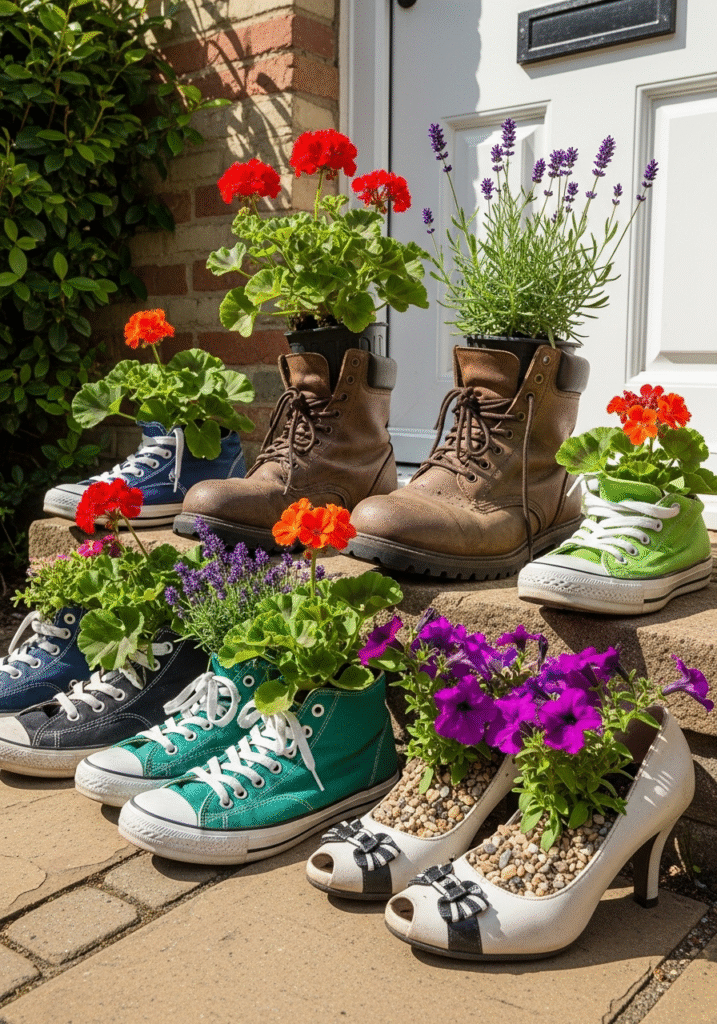
Material Needed: Worn-out sneakers, leather boots, gumboots, high heels, or children’s shoes
Ideal For: Small flowering plants, herbs, and quirky outdoor décor
Old shoes may no longer be suitable for walking, but they can certainly walk into a new life—as whimsical plant pots! Turning used footwear into creative planters is a fantastic way to combine sustainability with quirky charm. Whether it’s a rugged work boot, a dainty high heel, or a colorful sneaker, every shoe can tell a story in your garden.
Perfect for adding a splash of personality to doorsteps, patios, balconies, or walkways, shoe planters offer a lighthearted, rustic, and imaginative twist to traditional pots.
Step-by-Step Instructions:
Step 1: Select and Clean the Footwear
Choose old shoes or boots that are no longer wearable. Remove any insoles and clean the inside and outside thoroughly with soap and water. Use a disinfectant spray to eliminate bacteria or odors, especially if the shoes have been in storage.
Step 2: Drill or Poke Drainage Holes
Use a drill, screwdriver, or a sharp tool to make 1–3 holes in the sole of the shoe to allow excess water to escape. This is crucial to prevent waterlogging and root rot. If using a high heel or narrow shoe, ensure it’s placed at an angle where water can drain easily.
Step 3: Add Drainage Layer
Place a thin layer of gravel, pebbles, or small stones at the bottom of the shoe for extra drainage support. This helps keep your plant’s roots healthy and improves airflow inside the confined space.
Step 4: Fill with Soil and Plant
Fill the shoe with potting mix, pressing it down gently to support your chosen plant. These containers are perfect for small plants such as:
- Herbs like thyme, chives, or parsley
- Flowers like pansies, petunias, or marigolds
- Succulents and small ferns
If you’re working with larger boots like rain boots or work shoes, you can even group two or three plants together in one shoe.
Step 5: Style and Display
Place your shoe planter outside your main door, on your patio, in a flower bed, or on a garden shelf. Get playful by arranging a row of mismatched shoes or forming a garden “parade” of planters. You can even paint or decorate the shoes for seasonal themes—such as Halloween boots or Easter heels!
Whimsical Touches to Try:
- Use kids’ shoes for cute mini succulents or fairy garden setups
- Paint sneakers in bright colors or patterns to liven up outdoor spaces
- Arrange a line of boots with different flowers for a storybook look
- Stuff high heels with cascading vines for a surprising vertical effect
Why Shoes and Boots Make Fun DIY Plant Pots:
- Unique and eye-catching—every pair has its own personality
- Encourages creativity with endless styling possibilities
- Durable, especially leather or rubber footwear like boots and sneakers
- Repurposes non-recyclable waste, reducing landfill contribution
- Great conversation starters, ideal for gardens, cafés, or events
Safety Tip:
Avoid using shoes that had mold, chemical exposure, or fabric deterioration. For planting edibles, choose shoes that are fabric- or rubber-based and thoroughly disinfected.
Decorating Your DIY Pots
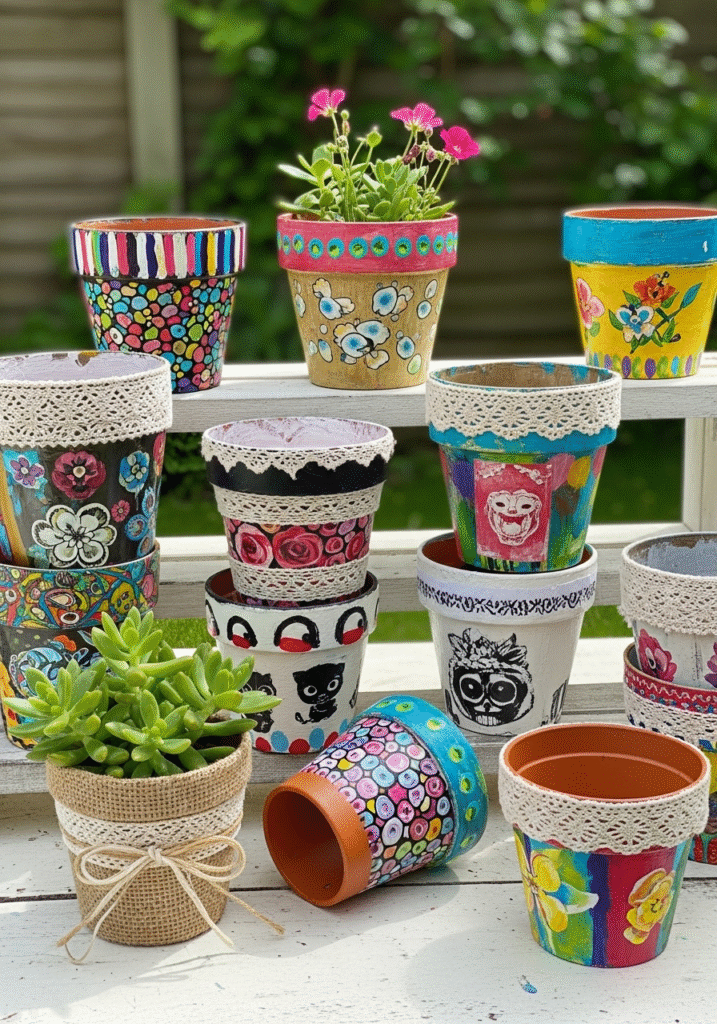
Once you’ve transformed everyday waste into creative DIY plant pots, the fun doesn’t have to stop there—decorating your pots is where you truly bring them to life. From colorful paint finishes to rustic wraps and modern embellishments, the decoration stage allows you to express your personal style while also enhancing the longevity and appeal of your creations.
Whether you’re going for a boho-chic indoor vibe, a rustic garden aesthetic, or a bold, playful color scheme for your balcony, these decorating ideas will help your DIY pots stand out beautifully in any space.
1. Use Non-Toxic Acrylic Paints for Vibrant Colors
Start with a solid coat of non-toxic acrylic or outdoor spray paint. These paints come in a wide range of colors and finishes (matte, glossy, or metallic), allowing you to match your pots with your home décor or garden theme. Choose bright tones for a cheerful touch or muted earth tones for a natural, calming effect. Apply multiple layers if needed, and let each coat dry thoroughly.
Pro Tip: Always choose water-based, non-toxic options if your planters will be used indoors or around children and pets.
2. Add Decals, Stencils, or Stickers for Detail
To make your pots more artistic or themed, use stencils, decals, or waterproof vinyl stickers. You can create patterns like stripes, polka dots, floral motifs, or even inspirational quotes. This technique works well on plastic, metal, and glass surfaces and gives your pots a professionally finished look without needing advanced painting skills.
Ideas to Try:
- Botanical leaf patterns for a natural look
- Mandala or tribal prints for a boho vibe
- Name labels for herbs or vegetables in kitchen planters
3. Wrap with Burlap, Lace, or Twine for a Rustic Touch
For a warm, textured, and farmhouse-style aesthetic, wrap your pots with burlap fabric, lace trims, jute rope, or cotton twine. These materials are not only decorative but also eco-friendly. Secure them with hot glue, and optionally add buttons, bows, or wooden beads for extra flair.
This look is perfect for:
- Tin cans and glass jars
- Small terracotta pots
- Fabric-lined cardboard planters
4. Use Waterproof Varnish to Extend Pot Life
If your DIY pots will be exposed to moisture—especially if they’re made from cardboard, fabric, or painted materials—sealing them with waterproof varnish or Mod Podge is essential. This creates a protective barrier that shields the surface from water damage, sun exposure, and wear and tear.
Use a clear, matte or glossy sealant depending on your desired finish. It will help preserve the paintwork and prevent peeling or fading over time.
5. Explore Themed Designs: Boho, Rustic, Minimalist, or Vibrant
Let your pots reflect your personality or seasonal style by following a specific design theme:
- Boho Style: Earthy tones, hand-painted mandalas, tassels, and feathers
- Rustic Look: Natural fibers, burlap, and muted colors
- Minimalist Design: Solid neutral colors like white, gray, or black with clean lines
- Colorful & Playful: Bright colors, whimsical patterns, or even painted cartoon faces—great for kids’ planters
Bonus Idea: Let children decorate their own planters using stickers, handprints, or doodles—turning it into a fun and educational craft activity.
Why Decoration Matters for DIY Plant Pots:
- Enhances the aesthetic appeal of upcycled materials
- Allows for personal expression and creativity
- Helps blend planters seamlessly into home or garden décor
- Adds protective layers that increase durability
- Makes your planters suitable for gifting or special occasions
Tips for Proper Drainage and Plant Health
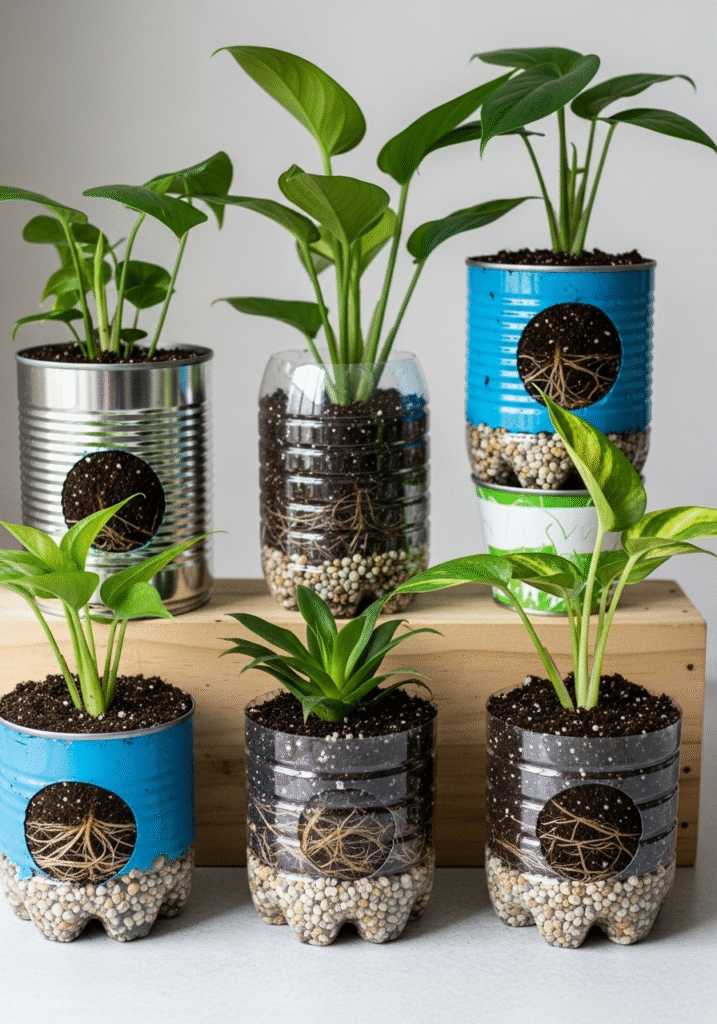
No matter how creative, artistic, or sustainable your DIY plant pot may be, it won’t do your plant much good unless it supports healthy growth. One of the most important elements of container gardening is proper drainage—the unsung hero that ensures your plants thrive instead of wilt. Poor drainage can lead to root rot, mold, fungus, and stunted growth.
To help you build not just beautiful planters but functional and healthy ones, here are essential drainage and plant care tips for every upcycled container you create.
1. Always Create Drainage Holes
This is the golden rule of planter design. Drainage holes at the bottom of your pot allow excess water to escape, preventing water from pooling around the roots. Without proper drainage, roots can suffocate and rot, leading to plant death—even in the best soil conditions.
How to do it:
- Use a drill or nail to punch holes in plastic, metal, or tin containers.
- For ceramic or glass, use a specialized drill bit and go slowly.
- If holes can’t be made (e.g., glass jars), create a layered drainage system (explained below) and avoid overwatering.
2. Add a Pebble or Gravel Base
If your container lacks holes or if you want to ensure better water flow, add a layer of small stones, gravel, or broken pottery at the bottom of your planter before adding soil. This helps excess water drain away from the roots and creates an air pocket that improves root respiration.
Tip: Activated charcoal can be added on top of the pebbles in closed containers or terrariums to prevent bacterial buildup.
3. Use the Right Soil for the Right Plant
Not all soil is created equal. Different plants have different moisture and nutrient needs, so choosing the correct potting mix is crucial.
- Succulents and cacti: Prefer well-draining soil with sand or perlite.
- Herbs and vegetables: Thrive in nutrient-rich organic soil.
- Indoor plants: Prefer lightweight potting soil with good moisture retention.
Avoid using garden soil alone in containers—it can become compacted and may not drain well in enclosed spaces.
4. Avoid Toxic or Contaminated Containers
Reusing waste materials is eco-friendly—but only if it’s safe. Always make sure your container is free from toxic residues, especially if it was originally used for chemicals, paint, detergent, or other hazardous substances.
Safety checks:
- Scrub thoroughly with soap and water.
- Soak in vinegar or baking soda solution to neutralize residues.
- Line the container with plastic or use an insert pot if you’re unsure.
This is especially important when growing edible plants like herbs, mint, or tomatoes.
5. Monitor Watering and Light
Even with perfect drainage, your plants can suffer if overwatered or exposed to incorrect light conditions. Keep an eye on:
- Leaf color and texture: Yellowing often indicates overwatering.
- Soil moisture: Check with your finger before watering again.
- Sunlight needs: Match your plant’s light preference with the placement of your DIY pot.
For instance, succulents in glass jars by a sunny window will thrive, but ferns in a cardboard box on a sunny balcony may wither quickly.
Why Drainage Matters for Healthy Plants:
- Prevents root rot, one of the most common causes of plant death in containers
- Promotes oxygen flow to the roots, which is essential for growth
- Improves nutrient absorption, keeping your plant vibrant and strong
- Reduces risk of fungus, mold, and bacteria in the soil
Environmental Impact and Sustainability
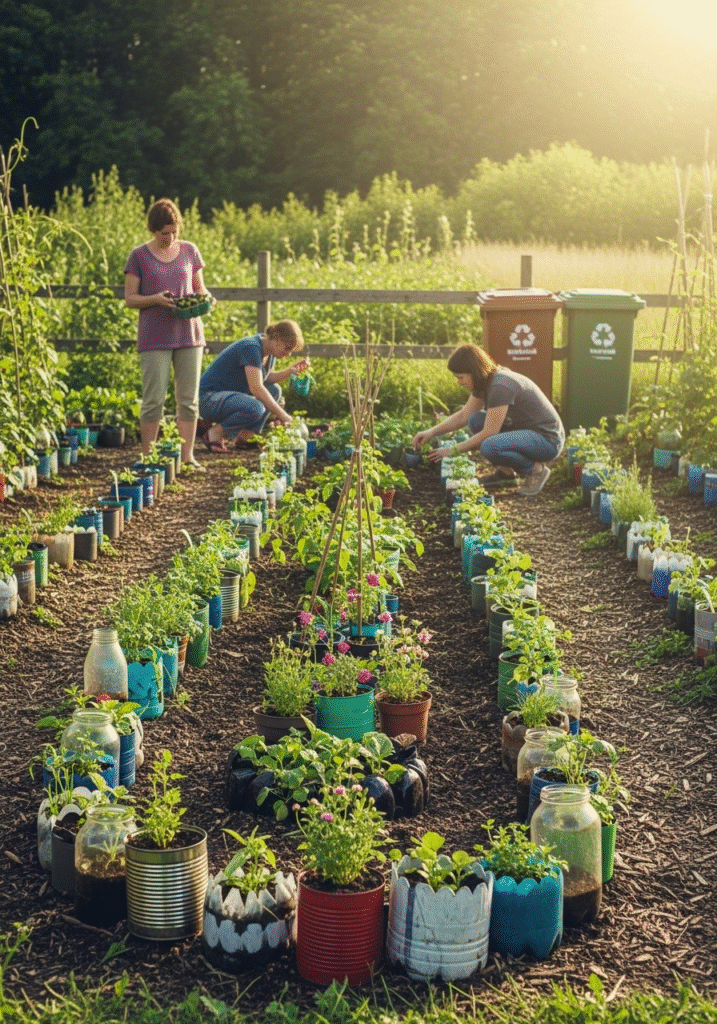
Creating plant pots from waste materials is not only a fun and creative hobby—it’s a meaningful step toward a more sustainable and environmentally responsible lifestyle. While your upcycled planters may seem like small projects, they carry a significant positive impact on the planet by reducing waste, conserving resources, and encouraging mindful living.
When you choose to reuse materials like plastic bottles, tin cans, old shoes, or fabric scraps instead of purchasing new containers, you are actively participating in climate action and circular economy practices—both of which are essential for a healthier planet.
Let’s take a deeper look at the key ways your DIY plant pots contribute to environmental sustainability:
1. Waste Reduction: Giving New Life to Old Materials
Every item you repurpose into a plant pot is one less item ending up in a landfill. Common household items like paint buckets, broken mugs, plastic containers, or worn-out jeans are typically non-biodegradable, meaning they take hundreds of years to decompose. Upcycling these into plant holders not only diverts waste from overflowing landfills but also extends the life cycle of materials that would otherwise go unused.
Example: Turning a plastic bottle into a hanging planter saves both the plastic and the energy needed to manufacture a new container.
2. Climate Action: Reducing Manufacturing and Transportation Footprints
Buying new pots—especially those made from plastic, metal, or ceramic—requires the use of raw materials, manufacturing energy, packaging, and long-distance shipping. All of these processes generate carbon emissions, contributing to environmental degradation and climate change.
By reusing what you already have at home, you’re eliminating the need for new production, reducing your carbon footprint, and minimizing your reliance on resource-intensive supply chains.
Fun Fact: Making one ceramic pot can use over 10 times more energy than it takes to reuse a simple tin can or glass jar already in your kitchen!
3. Promoting a Culture of Sustainability Awareness
DIY projects like upcycled plant pots are visual and practical examples of eco-conscious living. They spark conversations and can inspire family, friends, and neighbors to rethink their own consumption habits. When others see your creative planters made from what would have been trash, it raises awareness about sustainable alternatives in everyday life.
It also serves as a hands-on teaching tool for children and young gardeners. By involving kids in making planters from waste, you’re helping to shape the next generation of environmentally aware citizens.
4. Strengthening the Human-Nature Connection
There’s something deeply fulfilling about planting something green in something reused. The act of taking waste and turning it into life not only beautifies your surroundings but also reinforces your personal relationship with the environment.
When you’re involved in every step—from rescuing waste, to building the pot, to planting the seed—you naturally become more mindful of nature’s cycles and your role in protecting them.
Why It Matters: The Bigger Picture
- Every reused container helps cut down on pollution, deforestation, and energy use.
- Each handmade pot reflects a shift toward self-sufficiency and creative reuse.
- A single DIY habit can lead to broader lifestyle changes, from composting to zero-waste gardening.
Conclusion
Creating DIY plant pots from waste materials is far more than just a crafty weekend project—it’s a meaningful step toward living in harmony with the planet. By repurposing items that would otherwise end up in landfills, you’re not only adding charm and personality to your garden but also actively reducing your environmental impact.
Each upcycled planter is a small act of resistance against consumerism and waste culture. It’s a creative expression of sustainability, showing that beauty and utility don’t have to come at the cost of the Earth. Whether it’s a plastic bottle turned hanging garden, a denim pouch growing basil, or a high-heeled shoe bursting with petunias—every DIY pot tells a story of transformation.
What makes this movement powerful is that it’s accessible to everyone. You don’t need expensive tools or expert skills—just imagination, a few household materials, and a willingness to see potential where others see trash. From city balconies to school classrooms, from backyard gardens to apartment shelves, DIY planters are spreading the message that sustainability can start with something as simple as reusing a jar.
