Introduction
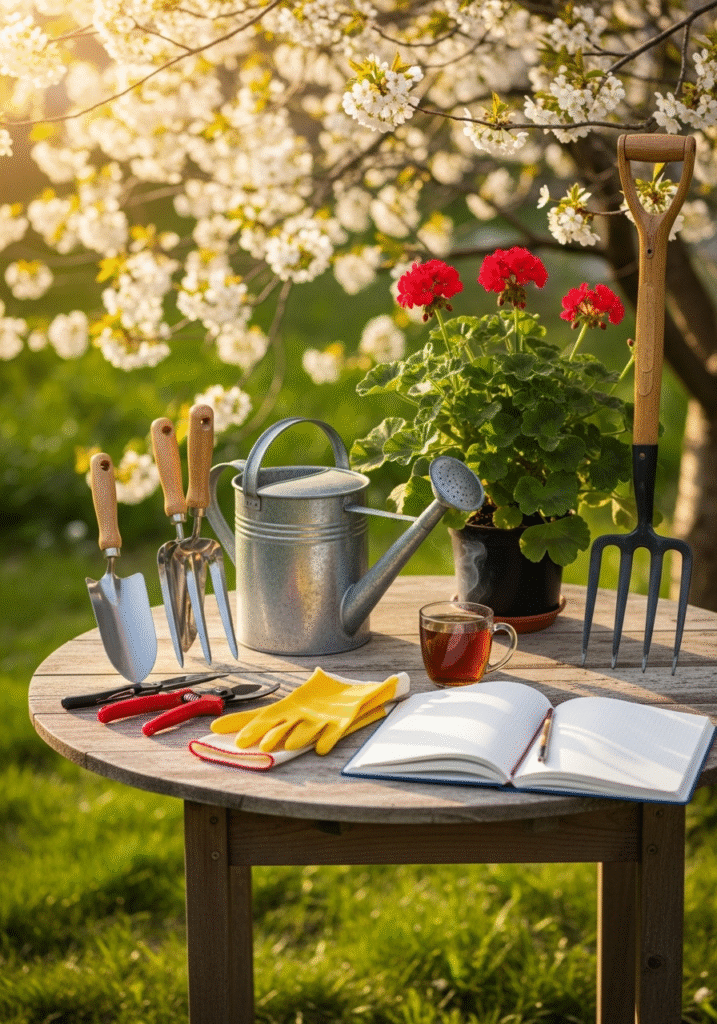
Gardening is one of the most rewarding hobbies and practical activities anyone can enjoy, whether you have a small balcony garden, a backyard vegetable patch, or an elaborate landscape filled with flowers and shrubs. However, while a passion for plants and a bit of patience can take you far, having the right gardening tools is what truly makes the difference between a frustrating experience and a flourishing, enjoyable garden.
The right tools do more than just help you dig holes or trim bushes — they make your work more efficient, comfortable, and precise. A sharp, sturdy pair of pruning shears, for example, will give you clean cuts that keep your plants healthy, while a reliable garden fork will loosen compacted soil with minimal effort. Good tools help you tackle big and small tasks without wasting precious time or straining your back and hands. They are designed to save you energy, prevent injuries, and help you work smarter rather than harder.
Investing in quality gardening tools also means you’ll spend less money in the long run. Cheap, poorly made tools often break or wear out quickly, costing you more to replace them over time. In contrast, well-made tools can last for years — even decades — with proper care, becoming trusted companions that make gardening not just easier but more enjoyable.
In this article, we’ll guide you through the essential gardening tools every home gardener should have. From basic hand tools like trowels and pruners to larger equipment such as wheelbarrows and garden hoses, you’ll learn what each tool does, how to choose the best one, and how to maintain your tools so they stay in great shape for years to come. Whether you’re a beginner gardener setting up your first toolkit or a seasoned green thumb looking to upgrade your gear, this guide will help you make informed decisions that will save you time, effort, and money — and ultimately help your garden thrive.
So grab your gardening gloves and get ready to discover how the right tools can transform your gardening experience, making it more productive, satisfying, and successful than ever before.
Hand Trowel
What is it?
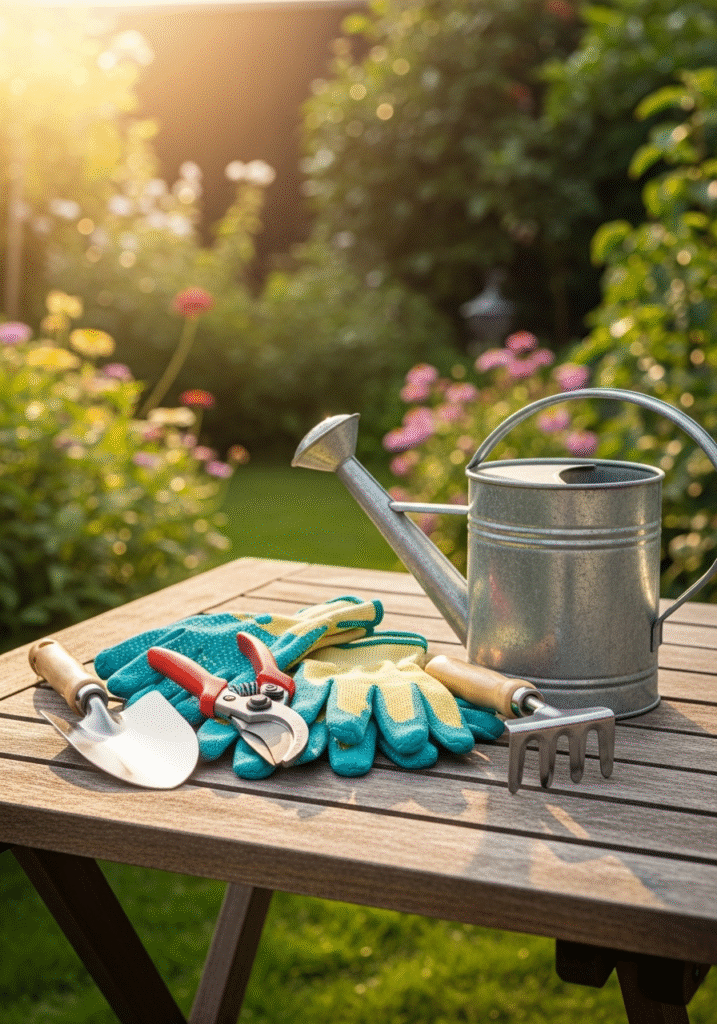
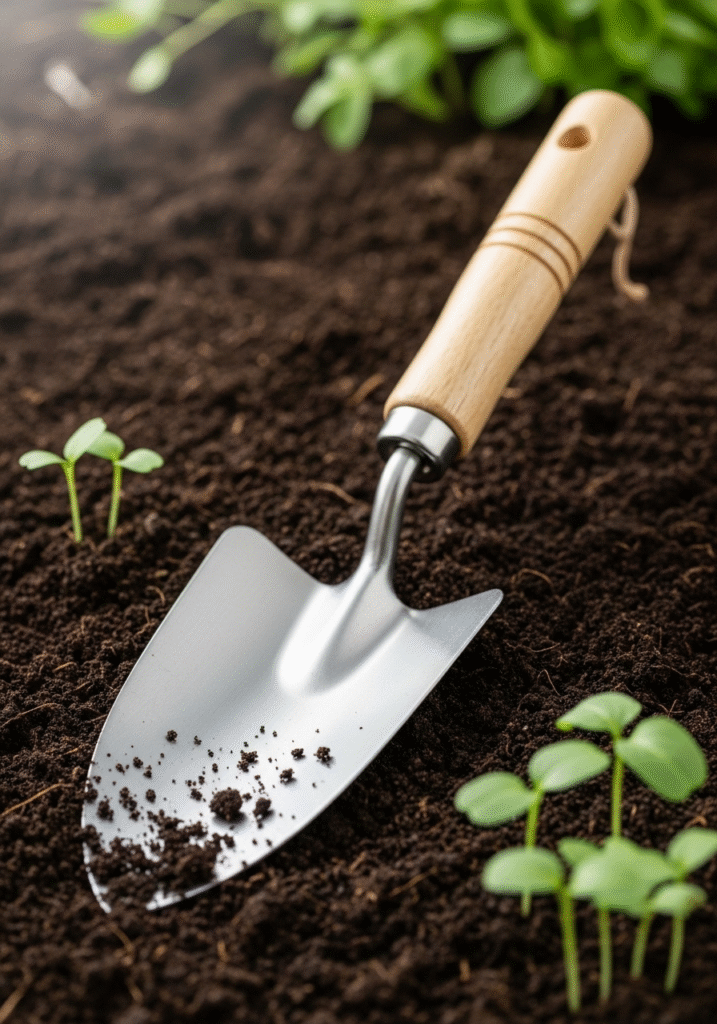
A hand trowel is one of the most basic yet essential tools in any gardener’s collection. It’s a small handheld tool that looks like a miniature shovel, typically with a pointed, scoop-shaped metal blade and a comfortable handle made of wood, plastic, or rubber. Gardeners use trowels for a variety of small-scale digging tasks: planting seeds and seedlings, transplanting young plants, digging out weeds, loosening soil, and even scooping soil or fertilizer from bags into pots or beds. Its size and shape make it ideal for precision work in tight spaces where larger tools can’t reach.
Why you need it
A good hand trowel is truly a workhorse for the home gardener. It saves you time and effort by allowing you to dig precise holes quickly, break up clumps of dirt, and work around delicate roots without damaging them. Whether you’re planting bulbs, dividing perennials, or transferring plants into containers, the hand trowel makes all these tasks faster and less messy. Without a reliable trowel, you’d find yourself improvising with your hands or makeshift scoops, which is not only inefficient but can also harm plants and strain your wrists.
Tips for choosing a durable trowel
When selecting a hand trowel, invest in quality — you’ll thank yourself later. Look for a blade made from strong, rust-resistant materials like stainless steel or tempered carbon steel. These materials are less likely to bend or break when digging in tough soil. The blade should be firmly attached to the handle, with no wobbling or weak spots. A one-piece construction, where the blade and tang (the part that goes into the handle) are forged together, is the strongest option.
The handle should feel comfortable in your hand. Ergonomic, soft-grip handles can help prevent blisters and reduce hand fatigue during long gardening sessions. Wooden handles are classic and durable if well-maintained, while rubberized or plastic handles often provide extra grip, especially when working in damp conditions. Also, consider the blade shape — some trowels have narrow, pointed blades for digging into hard or rocky soil, while wider, scoop-like blades are perfect for moving loose soil or compost. Choose one that matches the type of gardening you do most.
Maintenance tips
A well-made trowel can last for many years if you take care of it properly. After each use, knock off any excess soil and rinse the blade with water to prevent rust and soil build-up. Dry it thoroughly before storing it to avoid moisture damage, especially if the blade is carbon steel. Occasionally sharpen the edge with a sharpening stone or file to keep it slicing cleanly through soil and roots.
Store your trowel in a dry place, like a shed or garage, preferably hanging up or in a toolbox to protect the blade and handle. If your trowel has a wooden handle, rub it with linseed oil once or twice a season to keep the wood conditioned and prevent it from cracking or splintering. Inspect your trowel regularly for loose handles or rust spots — addressing small issues early will help you get many years of reliable service from this humble but indispensable tool.
Pruning Shears (Secateurs)
Use for trimming plants and branches
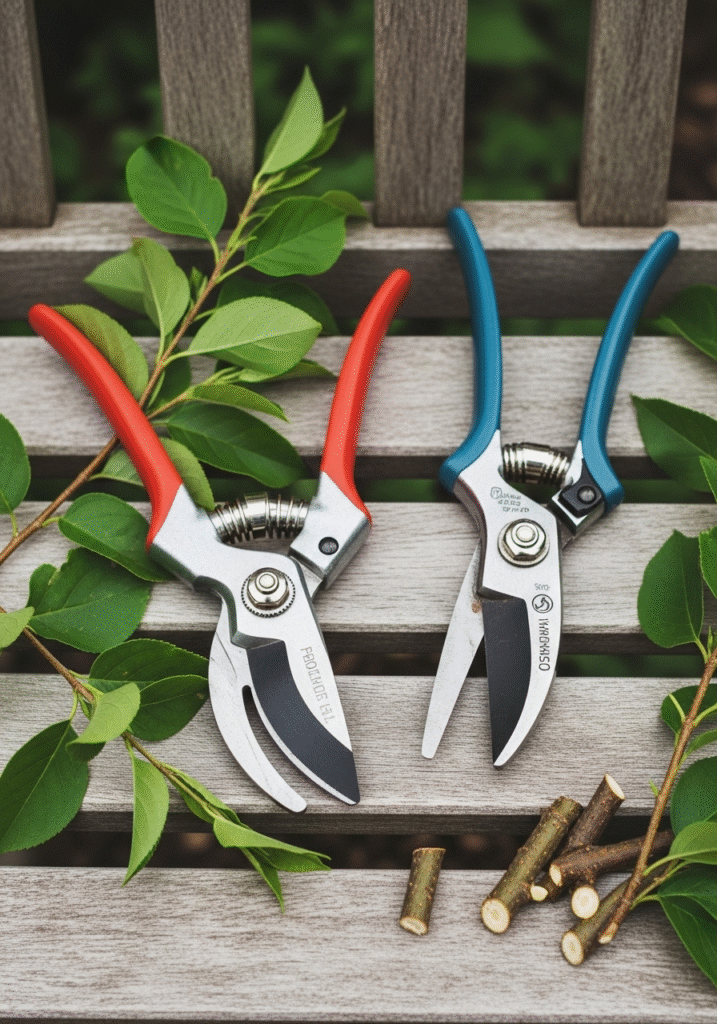
Pruning shears — also known as secateurs — are a must-have tool for any gardener who wants to keep their plants healthy, tidy, and thriving. These sturdy handheld clippers are designed to cut through small branches, stems, and twigs with precision and ease. They’re perfect for tasks like deadheading flowers, shaping shrubs, cutting back perennials, harvesting herbs or vegetables, and removing diseased or damaged growth to encourage healthy new shoots.
Regular pruning with good shears helps plants grow more vigorously by allowing air and light to reach all parts of the plant. It also prevents overgrowth and keeps your garden looking neat and well-maintained. Unlike ordinary scissors or kitchen shears, pruning shears are specially engineered to handle woody stems and tough plant material without crushing them, ensuring a clean cut that heals quickly and reduces the risk of disease.
Types: bypass vs. anvil
When shopping for pruning shears, you’ll come across two main types: bypass and anvil. Understanding the difference will help you choose the right pair for your gardening needs.
- Bypass pruners are the most popular and versatile type. They work like a pair of scissors, with two curved blades that pass by each other to make a clean, precise cut. Bypass pruners are ideal for live, green growth — soft stems, fresh branches, flowers, and tender shoots. The clean cut they make helps plants heal faster and reduces damage to the plant tissue.
- Anvil pruners, on the other hand, have a single straight blade that closes down onto a flat metal surface (the “anvil”), like a knife on a cutting board. Anvil pruners are best for cutting dead or woody branches that are too tough for bypass pruners. However, they can crush or bruise softer stems, so they’re not ideal for live green growth.
Many gardeners keep both types on hand — bypass pruners for day-to-day trimming of healthy plants and anvil pruners for tackling thicker, dry, or dead branches.
Safety tips
Pruning shears are incredibly useful but they’re also sharp tools that demand care and attention when using them. To avoid injury and ensure your pruning work goes smoothly, keep these safety tips in mind:
- Keep blades sharp: Dull blades can slip or crush stems instead of cutting cleanly, which increases your risk of accidental cuts or hand strain. Use a sharpening stone to maintain a keen edge.
- Wear protective gloves: Gardening gloves protect your hands from thorns, sharp twigs, and accidental nicks from the blades. Choose gloves that offer a good grip without sacrificing dexterity.
- Cut away from your body: Always position your hands and fingers away from the cutting blades. Never force the shears through a branch that’s too thick — if you struggle to close the blades, switch to a more suitable tool like loppers or a pruning saw.
- Use the right tool for the job: Trying to cut oversized branches with small pruning shears can damage the tool and cause the blades to slip. Respect the shears’ cutting capacity (usually up to about ¾ inch in diameter) and switch to loppers for thicker limbs.
- Lock them when not in use: Many pruning shears come with a locking mechanism to keep the blades closed when stored. Always engage the lock when carrying or putting them away to avoid accidental cuts.
- Keep them clean: After use, wipe off sap, dirt, or plant debris. Sticky blades can stick together and make you push harder while cutting, increasing the chance of slipping. Disinfect the blades occasionally, especially after pruning diseased plants, to prevent spreading infections in your garden.
With a sturdy, sharp pair of pruning shears and good habits, you’ll find that trimming and shaping your plants becomes a quick, satisfying task that keeps your garden looking its best year-round.
Garden Gloves
Protecting your hands
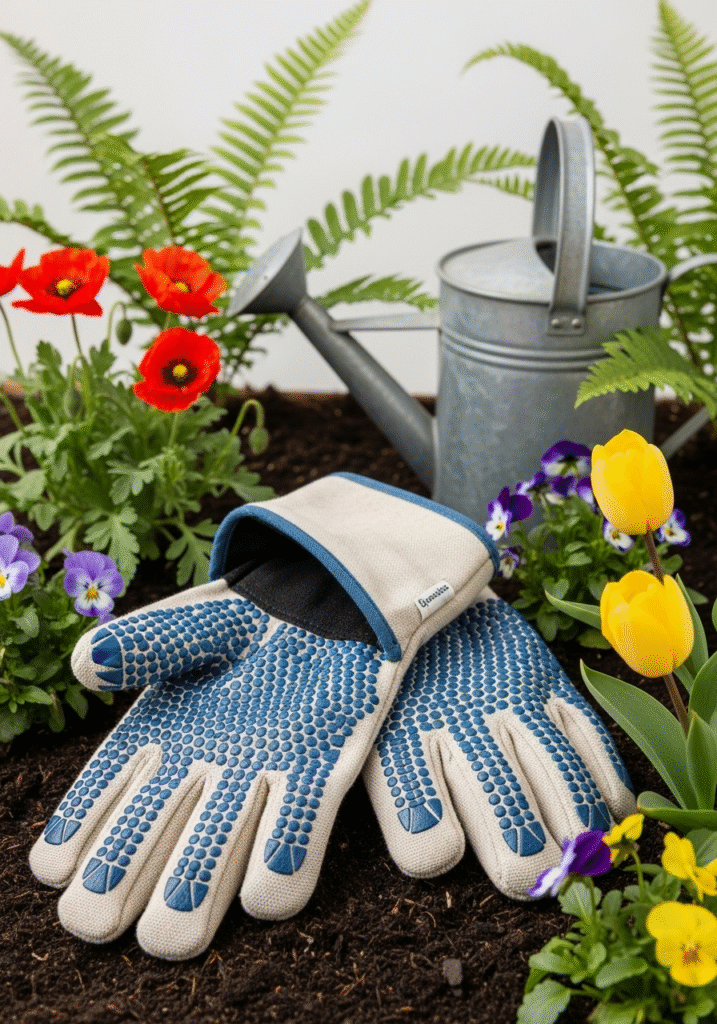
While gardening is often peaceful and rewarding, it can also be tough on your hands. From thorny bushes and prickly weeds to splinters, dirt, and sharp tools, there’s plenty in the garden that can cause cuts, blisters, scrapes, or irritation. That’s why a good pair of garden gloves is an essential part of every gardener’s toolkit — they protect your hands so you can work comfortably and confidently.
Garden gloves create a barrier between your skin and the harsh realities of garden work. They keep your hands clean when digging in the soil, prevent blisters when using tools for extended periods, and shield your fingers from insect bites, nettles, and other hidden hazards. Wearing gloves can even reduce the risk of skin infections by minimizing direct contact with soil-borne bacteria and fungi. Whether you’re planting delicate seedlings, pulling stubborn weeds, or handling thorny branches, a pair of well-fitted gloves makes every gardening task safer and more pleasant.
Features to look for: material, size, grip
Not all garden gloves are created equal — the best pair for you depends on the type of gardening you do and your personal preferences. Here are some key features to consider when choosing garden gloves:
Material:
Garden gloves come in a variety of materials, each with its own strengths:
- Cotton gloves are lightweight, breathable, and great for light tasks like planting or potting. They’re comfortable but offer limited protection against thorns or wet soil.
- Leather gloves (like goatskin or cowhide) are more durable and provide excellent protection from thorns, splinters, and rough branches. They’re ideal for pruning roses, handling brambles, or heavy-duty tasks like moving logs or stones.
- Rubber-coated or nitrile gloves offer good flexibility and water resistance, making them a great choice for working with wet soil, compost, or chemicals like fertilizers. They also provide a good grip on slippery tools.
- Synthetic gloves often combine multiple materials for the best of both worlds — breathability, durability, and water resistance.
Size and fit:
A glove that doesn’t fit properly can be uncomfortable and may even hinder your work. Gloves that are too loose can slip off or make it difficult to handle small plants and tools, while gloves that are too tight can restrict movement and cause hand fatigue. Always choose gloves that fit snugly but still allow your fingers to move freely and grip easily. Many brands offer sizes ranging from small to extra-large — if possible, try them on before buying.
Grip:
Look for gloves with reinforced palms or textured grip surfaces, especially if you’ll be handling tools or pulling up tough weeds. A good grip reduces the risk of dropping tools or slipping while using pruners or shears. Some gloves have extra padding in the palms to protect against blisters during long digging or pruning sessions.
Cleaning and care
To get the most out of your garden gloves, it’s important to clean and care for them properly. After each gardening session, shake off any excess dirt and debris. If your gloves are washable (like cotton or rubber-coated types), rinse or hand wash them in mild soapy water to remove soil, pesticides, or sap. Always check the care label — some gloves can be tossed in the washing machine, while others should be hand-washed and air-dried.
Leather gloves require a bit more care. Brush off dried dirt gently and wipe with a damp cloth if needed. Avoid soaking leather gloves in water, as this can cause the leather to stiffen or crack. Instead, treat them occasionally with a leather conditioner or oil to keep them supple and extend their life.
Always let your gloves dry thoroughly before storing them to prevent mold or unpleasant odors. Hang them up or place them in a dry, ventilated area — avoid leaving them in damp sheds or exposed to direct sunlight for long periods, as this can degrade the materials.
A good pair of garden gloves might seem like a small detail, but they make a big difference in how comfortable and safe you feel while working outdoors. With the right pair, you can spend hours tending to your garden without worrying about sore hands, scratches, or blisters — and focus instead on the joy of growing and nurturing your plants.
Garden Hoe
Use for weeding and cultivating soil
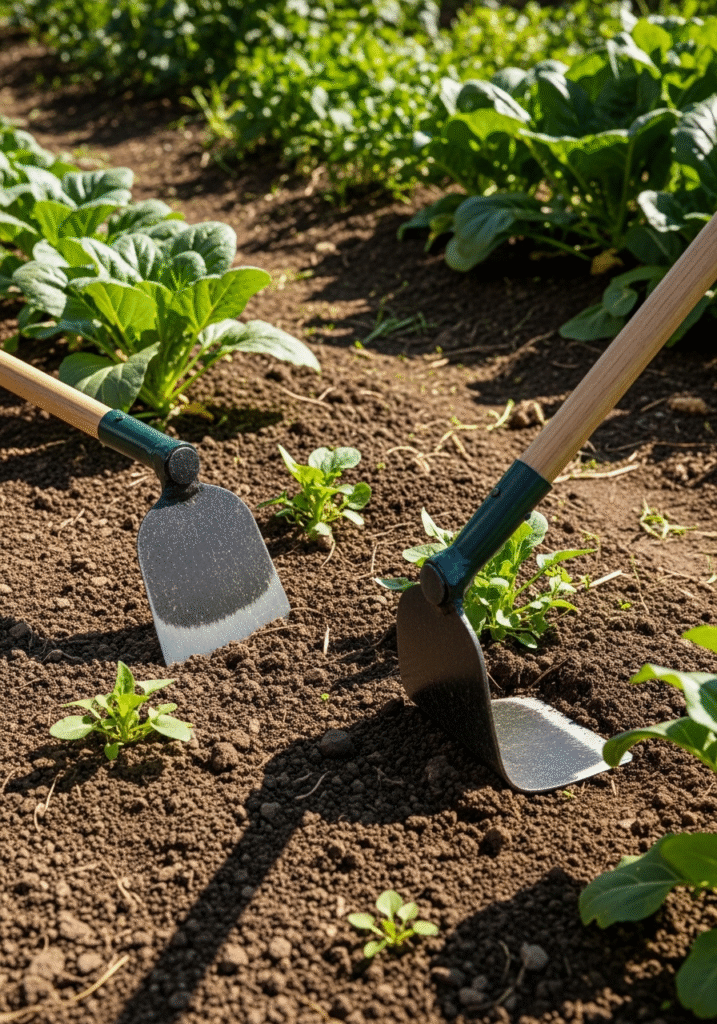
The garden hoe is one of the oldest and most versatile tools in gardening — a time-tested favorite that every gardener, from beginners to seasoned pros, should have in their shed. At its simplest, a hoe is a long-handled tool with a flat blade attached at a right angle. But don’t let its simplicity fool you — a hoe can save you countless hours of backbreaking work when used correctly.
Garden hoes are mainly used for two vital tasks: weeding and cultivating soil. When weeds invade your beds and pathways, a hoe makes it easy to slice them off at the root, stopping them before they spread and compete with your plants for nutrients, sunlight, and space. A hoe is especially effective for dealing with young weeds before they have a chance to establish deep roots.
In addition to weeding, hoes are excellent for loosening and aerating the soil. Breaking up compacted earth improves drainage, helps water and nutrients reach plant roots more easily, and prepares the ground for planting seeds or transplants. Some gardeners also use hoes to make shallow furrows for sowing seeds in neat rows, making it a true multi-purpose tool.
Different types: draw hoe vs. Dutch hoe
While there are many variations of the garden hoe, the two most common types for home gardeners are the draw hoe and the Dutch hoe. Understanding their differences can help you choose the right one for your gardening style and tasks.
- Draw Hoe:
The classic draw hoe has a flat, rectangular or slightly trapezoidal blade that is set at a right angle to the handle. You use it with a pulling motion — you “draw” it toward you to cut into the soil, break up clumps, or uproot weeds. The draw hoe is great for creating furrows for planting and for working heavier soils where you need a bit more force to loosen compacted ground. - Dutch Hoe:
The Dutch hoe, sometimes called a push hoe, has a slightly different design. It typically features a flat blade that is sharpened on the front edge and angled so you can push it forward just under the soil surface. This action slices through weed stems cleanly and efficiently. The Dutch hoe is ideal for weeding large areas quickly and works best in loose or sandy soil. It’s especially handy when dealing with shallow-rooted weeds.
Some gardeners keep both hoes on hand — the draw hoe for heavier digging and shaping, and the Dutch hoe for regular weeding and surface cultivation.
How to use properly
Like any garden tool, using a hoe correctly makes the work easier and helps you get the best results with less strain on your body. Here are some tips for hoeing effectively:
- Use the right stance: Stand upright with your feet shoulder-width apart for good balance. Keep your back straight and bend your knees slightly to avoid back strain. Hold the hoe with both hands — one near the end of the handle for leverage, and the other closer to the blade for control.
- Work with a smooth rhythm: For a draw hoe, pull the blade toward you in short, controlled strokes to chop off weeds at the base or loosen soil. Let the weight of the hoe do some of the work instead of forcing it. For a Dutch hoe, push the blade just below the soil surface to cut weeds off at the roots with a gentle, sweeping motion.
- Hoe when the soil is dry: Weeding with a hoe is most effective when the soil is dry and crumbly. Wet soil can be heavy and sticky, making the task messier and harder on your tools.
- Keep the blade sharp: A dull hoe blade requires more effort and won’t slice cleanly through weeds or soil. Use a sharpening stone or file to keep the edge sharp — it makes a big difference in how easily the hoe glides through the ground.
- Use the right tool for the job: Don’t force a lightweight hoe into very hard or rocky ground — if you’re dealing with compacted soil, loosen it first with a garden fork or spade.
- Maintain good posture: Avoid bending too far forward while hoeing. Keeping your back straight and using your legs and shoulders to guide the tool will help prevent soreness or injury after a long day in the garden.
When used properly, a garden hoe is a simple yet powerful tool that saves you time and effort while keeping your beds weed-free and your soil loose and healthy. With the right technique and regular maintenance, your hoe can last for many years, making this humble tool one of the most valuable additions to your gardening toolkit.
Watering Can or Garden Hose
Choosing between hose and can
Water is life for your garden — and having the right watering tools can mean the difference between healthy, thriving plants and wilted disappointment. Whether you choose a classic watering can or a garden hose (or both) depends on the size of your garden, the type of plants you grow, and your personal preferences.
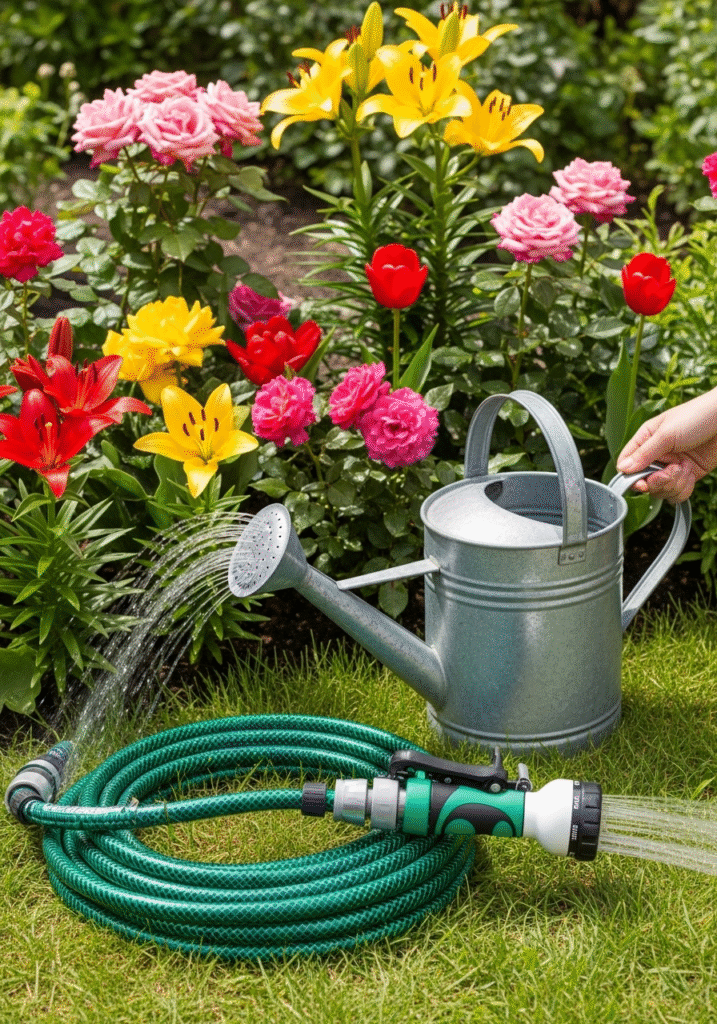
Watering Cans are a timeless choice for smaller gardens, container plants, and delicate seedlings. They give you full control over how much water each plant receives, which is especially important for young or fragile plants that can be damaged by heavy sprays. A good watering can has a balanced design with a comfortable handle and a spout or rose that allows you to direct water exactly where it’s needed.
Watering cans are also convenient if you’re working in spots where a hose won’t reach or where you want to avoid splashing water all over paths, furniture, or walls. They’re perfect for indoor plants, balcony gardens, or raised beds.
Garden Hoses are essential for larger gardens, lawns, and flower beds where carrying a watering can back and forth would be exhausting and time-consuming. A quality hose gives you a steady supply of water that you can adjust using different nozzle attachments for various watering needs. Many hoses come in lightweight, kink-resistant designs that are easy to coil and store when not in use.
In reality, many gardeners find they need both: a watering can for precision work and a hose for covering wide areas efficiently. Choosing the right combination will help you water your plants more easily and responsibly.
Nozzle options for different plants
If you’re using a garden hose, the right nozzle attachment makes all the difference in how effectively — and gently — you water your plants. Here are a few popular options to consider:
- Shower or Rose Nozzle: Mimics gentle rain, making it ideal for delicate flowers, seedlings, and newly planted beds. The soft spray prevents soil from washing away or compacting.
- Soaker or Mist Nozzle: Produces a fine mist for watering fragile plants like ferns, seedlings, or greenhouse plants that need gentle moisture without damaging stems or blooms.
- Jet or Stream Nozzle: Provides a powerful, narrow stream of water — useful for cleaning tools, patios, or directing water to distant spots, but generally too strong for plants.
- Fan Spray Nozzle: Offers a broad, even spray that’s good for watering lawns and larger garden beds quickly.
- Adjustable Nozzle: Many modern nozzles are adjustable, letting you switch between different spray patterns with a simple twist or lever. This is handy if you have a mix of plants with different watering needs.
A good nozzle should feel comfortable in your hand and have a trigger or flow control that lets you adjust water pressure easily. Look for sturdy materials like metal or heavy-duty plastic that won’t crack or leak easily.
Water conservation tips
Using a watering can or hose responsibly is crucial for saving water — and money — while keeping your plants healthy. Here are some smart water-wise tips to follow:
- Water early or late: Watering in the early morning or late evening reduces evaporation, so more water reaches your plants’ roots instead of being lost to the midday sun.
- Water at the base: Direct water at the soil around the base of the plant rather than spraying the leaves. This helps prevent fungal diseases and ensures the roots get the moisture they need.
- Use mulch: Apply mulch around plants to help retain soil moisture, keep roots cool, and reduce how often you need to water.
- Check soil moisture first: Stick your finger into the soil a few inches deep. If it still feels moist, you can wait a bit longer before watering again — overwatering can be just as harmful as underwatering.
- Use a watering can for precision: For pots and small beds, a watering can lets you measure exactly how much water you’re using, preventing waste.
- Install a soaker hose or drip system: For larger gardens, a soaker hose or drip irrigation system delivers water slowly and directly to the roots, minimizing runoff and evaporation.
- Fix leaks: If you’re using a hose, check for leaks and fix them promptly — even a small leak can waste gallons of water over time.
By choosing the right watering tool, using the best nozzles for your plants, and adopting mindful watering habits, you can keep your garden lush and green while using water responsibly — a win for your plants, your wallet, and the environment.
Wheelbarrow or Garden Cart
Moving soil, compost, plants easily
When it comes to moving heavy or bulky materials around the garden, nothing beats the practicality of a sturdy wheelbarrow or garden cart. Whether you’re hauling bags of soil, moving compost, transporting potted plants, clearing away garden debris, or collecting weeds and prunings, these trusty tools help you do the heavy lifting while saving your back and energy.
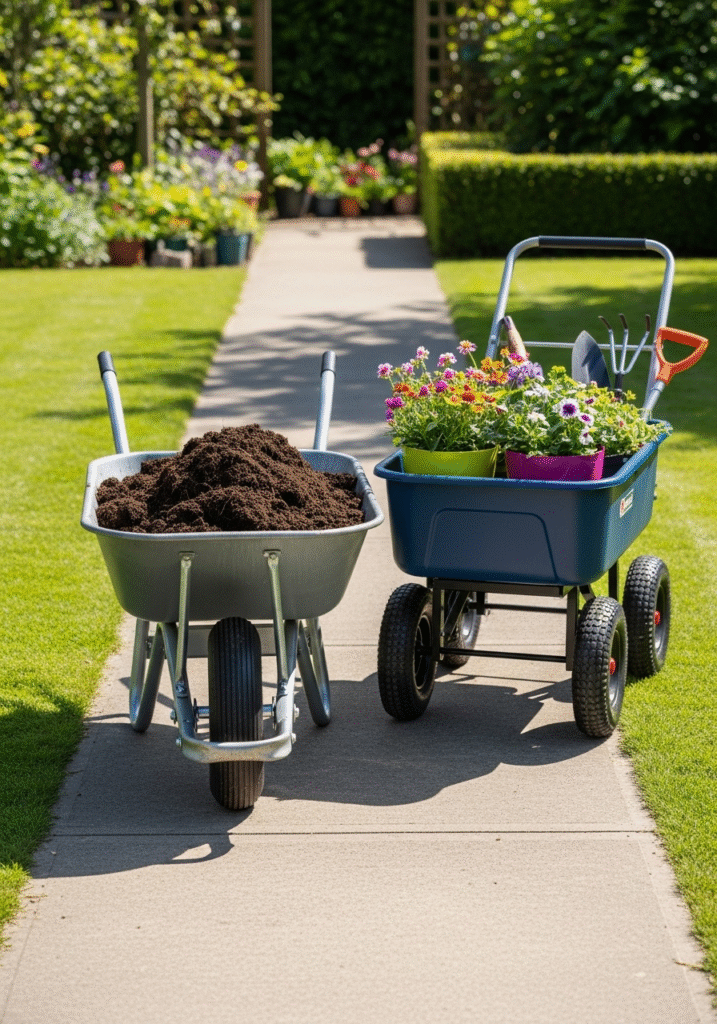
A wheelbarrow typically has one or two wheels at the front and a deep, sloped tray. Its design lets you lift and tilt the load, making it easy to maneuver over uneven ground or narrow garden paths. It’s especially handy for tasks that involve dumping — like unloading soil or mulch directly onto a bed.
A garden cart, on the other hand, usually has two or four wheels and a flat or shallow bed. It’s designed to be pulled rather than lifted, which makes it more stable and easier to handle heavy loads on level ground. Many garden carts have higher sides to prevent items from falling out and can handle bulkier items like firewood, large potted plants, or bags of compost and fertilizer.
Both tools have their strengths, and the right choice depends on your garden’s layout, your strength, and the type of work you do most. Many gardeners find they use both — a wheelbarrow for heavy soil and dumping jobs, and a cart for moving multiple smaller items in one trip.
How to choose the right size
Choosing the right wheelbarrow or garden cart can make your gardening chores much easier. Here are some key points to consider:
- Capacity: Wheelbarrows and carts come in a range of sizes, usually measured in cubic feet or liters. For most home gardens, a capacity of 5 to 6 cubic feet is versatile enough for moving soil, mulch, or compost without being too heavy to handle when fully loaded. If you have a large garden, big landscaping projects, or plan to haul firewood or rocks, a larger capacity may be worth it — just remember you’ll need the strength and balance to maneuver it safely.
- Number of wheels: Traditional wheelbarrows have one wheel, which makes them very maneuverable and easy to tip and dump, but it can take some practice to balance a heavy load. Models with two front wheels offer more stability and are easier for beginners or anyone who struggles with balance. Garden carts typically have two or four wheels for maximum stability and are pulled along the ground, which means less lifting.
- Tray material: Trays are usually made of metal or heavy-duty plastic. Metal trays (often galvanized steel) are strong and durable, but they can rust if not properly cared for. Plastic trays are lightweight and rust-proof but may crack under very heavy loads or extreme cold.
- Handles: Make sure the handles feel comfortable in your hands and are long enough to give you good leverage when lifting or pulling. Some carts come with padded handles for extra comfort.
- Terrain: If your garden has lots of uneven ground, narrow paths, or slopes, a wheelbarrow’s single-wheel design might be easier to maneuver. For smoother lawns, gravel paths, or paved areas, a four-wheel garden cart glides easily and carries heavier loads with less effort.
Maintenance
Taking good care of your wheelbarrow or garden cart will keep it rolling smoothly and extend its life for many years. Here are some simple maintenance tips:
- Clean after use: Soil, compost, and wet mulch can stick to the tray and cause rust or mildew over time. After each use, tip out any leftover material and rinse the tray with water. Let it dry thoroughly before storing.
- Check the wheel(s): Inspect tires regularly. Pneumatic (air-filled) tires should be inflated to the recommended pressure to keep them rolling easily. Solid tires don’t go flat but can crack or wear out over time — replace them if needed. Also, check that wheel axles and bolts are tight and spin freely. Lubricate them occasionally with a little oil to prevent squeaks and rust.
- Store properly: Keep your wheelbarrow or cart in a dry, sheltered place like a garage, shed, or under a covered area to protect it from rain and sun. Prolonged exposure to moisture can cause metal trays to rust and wooden handles to rot, while harsh sun can weaken plastic trays.
- Fix rust spots: If you notice small rust spots on a metal tray, sand them lightly and touch up with rust-resistant paint to prevent them from spreading.
- Check handles: Wooden handles can dry out and crack over time. Sand any rough spots and apply linseed oil once or twice a year to keep the wood in good condition.
A good wheelbarrow or garden cart makes gardening more efficient and less physically taxing — especially when you need to move large quantities of soil, mulch, compost, or other supplies. By choosing the right style and taking care of it properly, you’ll have a reliable helper that makes your gardening projects much easier and far more enjoyable.
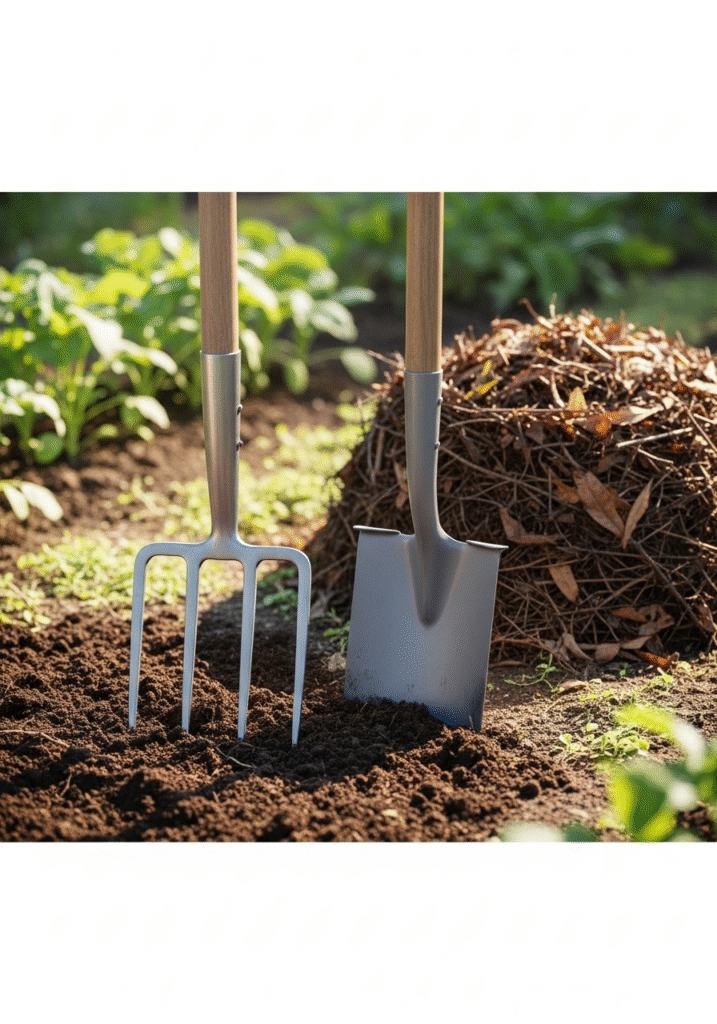
Garden Fork
Loosening soil, turning compost
A garden fork — sometimes called a digging fork or spading fork — is one of the most indispensable tools for any gardener who works with soil regularly. At first glance, it looks a bit like a large pitchfork, with a sturdy handle and several strong, pointed tines (usually four). But unlike a pitchfork, which is designed for lifting light, loose materials like hay or straw, a garden fork is built to tackle heavier, denser tasks.
One of its main jobs is loosening soil. When soil becomes compacted — either through foot traffic, rain, or time — plant roots struggle to spread and get the air, water, and nutrients they need. A garden fork lets you break up and aerate the soil without turning it over completely, preserving beneficial soil layers and organisms.
A fork is also invaluable for turning compost. Regular turning speeds up decomposition by mixing in oxygen, redistributing moisture, and ensuring that the outer parts of the pile get hot enough to break down properly. The strong tines slide easily into tangled, dense compost, lifting and flipping it without clogging up like a shovel might.
Beyond soil and compost, a garden fork is great for digging up root crops like potatoes, carrots, or onions without damaging them, and for lifting and dividing perennials when they get too crowded. It’s a true multitasker that earns its place in any garden shed.
Difference between fork and spade
Garden forks and spades often get grouped together, but they serve slightly different — and complementary — purposes in the garden.
A spade has a flat or slightly curved, solid metal blade with a sharp edge and a straight handle. It’s designed for digging, edging, cutting turf, and slicing through soil with clean, straight lines. If you need to make neat planting holes, edge a flower bed, or lift and move a clump of soil, a spade is your go-to tool.
A garden fork, on the other hand, is designed to penetrate soil with less effort, especially in tougher or stonier ground where a spade might get stuck. The tines slip between clumps of earth to gently break them apart without chopping through roots or beneficial organisms. This makes a fork better for aerating, loosening, or lifting tasks where you don’t want to cut as you dig. Many gardeners use both tools side by side — the spade for digging and shaping, the fork for loosening and turning.
Tips for beginners
If you’re new to gardening or haven’t used a garden fork before, here are some beginner-friendly tips to help you get the most out of this classic tool:
- Choose the right fork: Look for a fork with strong, rust-resistant steel tines that won’t bend easily in heavy soil. A stainless steel head is durable and easy to clean. The handle should be sturdy — many forks come with ash wood or fiberglass handles that balance strength with a comfortable grip.
- Mind the handle length: Standard garden forks usually come with a long handle for better leverage, but if you’re working in tight spaces or raised beds, a shorter handle or border fork might be more practical and easier to maneuver.
- Use proper technique: Insert the tines into the soil by stepping down gently on the fork’s crossbar (the flat area at the top of the tines) to push them in deeply. Then, rock the handle back slightly to loosen the soil. Work in small sections rather than trying to tackle a whole bed at once — this reduces strain on your back and arms.
- Turning compost: To turn compost, plunge the fork into the pile and lift sections from the bottom to the top. This mixes materials thoroughly and keeps the pile well-aerated, speeding up decomposition and minimizing odors.
- Work with moist soil: For digging or loosening soil, aim to work when it’s slightly moist but not soaking wet. Wet soil can be heavy and sticky, while dry, compacted soil can be hard to penetrate — moist soil makes the job easier and reduces wear on your fork.
- Store it properly: After use, clean off soil clumps with a hose or brush and dry the fork thoroughly to prevent rust. Store it in a dry shed or hang it up to keep the tines sharp and straight.
By choosing the right garden fork and using it well, you’ll find that many tough jobs — from revitalizing tired soil to managing a healthy compost pile — become easier, faster, and much more satisfying. It’s a simple, reliable tool that rewards regular use and good care, making it a long-term companion for anyone serious about nurturing healthy, productive garden beds.
Garden Spade
Digging, edging, transplanting
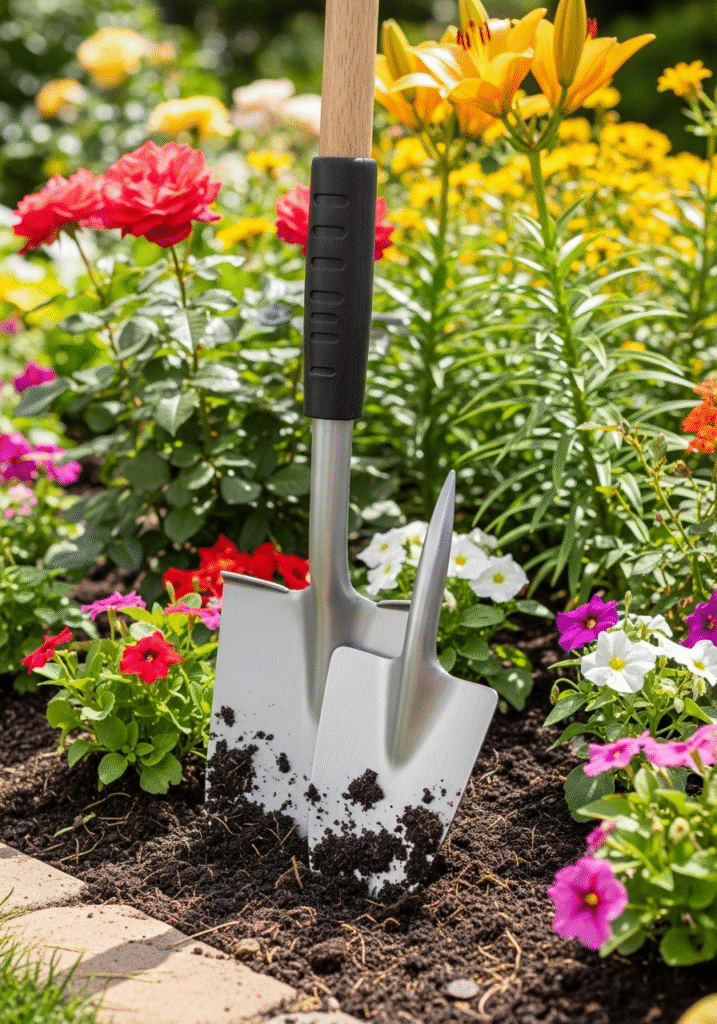
A garden spade is one of the most classic and trusted tools in any gardener’s shed — so much so that it’s often the first digging tool people buy when starting a garden. Simple yet versatile, a spade makes many heavy tasks not only possible but far more manageable.
A spade differs from a regular shovel in its shape and purpose. While a shovel typically has a curved, scooped blade designed for lifting and moving loose materials like sand, gravel, or mulch, a spade has a flat, straight-edged blade that excels at digging, edging, and transplanting. Its sharp edge slices cleanly into the soil, turf, or roots with precision and minimal effort.
Digging: When you need to break new ground for planting beds, vegetable patches, or borders, a spade is the tool for the job. It can cut through compacted soil, lift and turn earth, and help you create neat, straight planting trenches or holes.
Edging: A spade is also perfect for creating crisp, tidy edges around lawns, flower beds, or garden paths. By pressing the blade into the ground along a marked line, you can define borders that keep grass from creeping into beds and give your garden a professional, manicured look.
Transplanting: Need to move a shrub or divide a perennial? A spade makes it easy to dig around and under the root ball without damaging roots. Its flat blade allows for precise digging and lifting, which helps plants survive the move with minimal shock.
Because it’s designed for so many foundational tasks, a good spade is one of those tools you’ll reach for again and again, season after season.
Blade shapes and sizes
While the classic spade is fairly straightforward, there are a few variations worth knowing so you can pick the one that best suits your garden work.
Blade Shape:
- Square-bladed spades are the most common and versatile. The flat, straight edge is ideal for cutting straight lines in turf, slicing through roots, and lifting compacted soil.
- Pointed spades (sometimes called digging spades or drain spades) have a more tapered blade with a rounded point. This shape makes it easier to penetrate hard or rocky soil and is handy when digging planting holes or trenches where precision matters less than breaking tough ground.
Blade Size:
Spades come in different blade widths and lengths. A wider blade moves more soil with each dig but can be heavier to lift when filled. Narrower blades are easier to handle in tight spaces, such as between densely planted shrubs or beds.
The length of the handle also affects how the spade feels in use. Long-handled spades give you more leverage for digging deep, while shorter D-handle or T-handle spades offer better control for tasks like edging or transplanting. Some gardeners like to have both types on hand for different jobs.
Keeping it sharp
A sharp spade is a joy to work with — it slices cleanly through soil, sod, and roots with much less effort, saving you time and strain on your back and shoulders. Unfortunately, many gardeners let their spades go dull over time, which can make digging feel like twice the work. Here’s how to keep your spade in peak condition:
- Clean after every use: After digging, knock off soil clumps with a stick or brush and rinse the blade with water if needed. Dry it thoroughly to prevent rust, especially if the blade is carbon steel.
- Sharpen regularly: Every few weeks during heavy use, or at least once or twice a season, sharpen your spade’s blade with a flat file, sharpening stone, or a dedicated garden tool sharpener.
- Secure the spade in a vice or hold it firmly.
- File the edge of the blade at a 30–45 degree angle, moving in one direction away from your body.
- Work evenly along both sides to create a clean, sharp edge.
- Check for rust spots: If you see any rust developing, scrub it off gently with a wire brush or steel wool. After cleaning, you can apply a light coat of oil (like vegetable oil or motor oil) to the blade to help prevent future rusting.
- Store properly: Store your spade in a dry place, ideally hanging up or in a rack where the blade isn’t resting directly on the ground. This helps prevent dulling and corrosion.
With a sharp, well-cared-for spade, digging feels smoother, edging looks cleaner, and transplanting becomes far less stressful — for you and your plants. It’s the kind of tool that, once you learn to use and maintain it properly, will earn its keep in your garden for decades to come.
Rake
Removing leaves, leveling soil
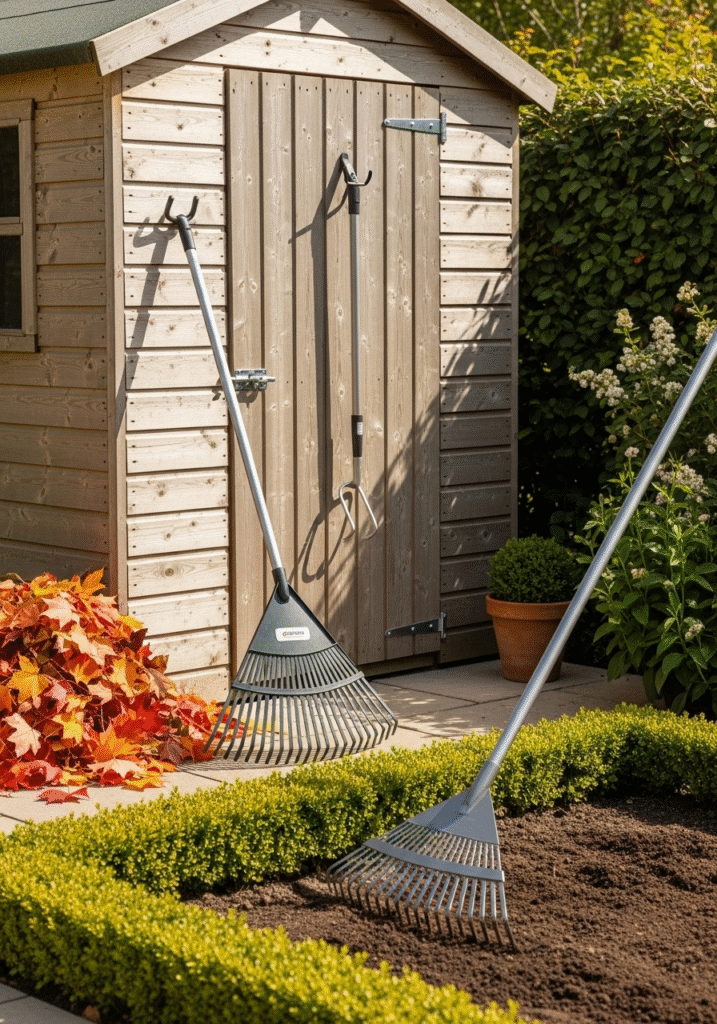
A rake is one of those simple yet indispensable garden tools that quietly keeps everything tidy and manageable, season after season. While many people think of rakes mainly for gathering fallen leaves in autumn, this versatile tool does much more than that — and having the right type of rake for the task makes all the difference.
One of the rake’s most common uses is clearing away leaves, twigs, grass clippings, and other loose debris that would otherwise smother your lawn or garden beds. A rake sweeps the ground clean, allowing air and sunlight to reach your plants and keeping pests and mold at bay.
Beyond tidying up, rakes play an important role in soil preparation. A sturdy rake can break up soil clumps, level garden beds, and smooth out freshly tilled areas so seeds can be planted evenly. Rakes are also handy for spreading mulch or compost, mixing soil amendments into garden beds, or evening out gravel paths and driveways. Whether you’re prepping a new flower bed, seeding a lawn, or just doing seasonal cleanup, a reliable rake saves you time and effort.
Leaf rake vs. bow rake
There are many kinds of rakes, but the two that every gardener should know about are the leaf rake and the bow rake. Each has its own strengths and is designed for very different tasks:
- Leaf Rake:
Also called a lawn rake, this is what most people picture when they think of a rake. It has a wide, fan-shaped head with long, flexible tines (usually made of metal, plastic, or bamboo). Leaf rakes are lightweight and designed to gather lightweight debris like leaves, grass clippings, or pine needles without digging into the soil underneath. The flexible tines glide over the surface, gently pulling debris into piles without damaging your lawn or delicate ground covers. Leaf rakes come in different widths — wider ones cover more ground quickly, while narrower versions are better for maneuvering around shrubs and flower beds. Some modern leaf rakes have adjustable heads that expand or contract to suit your task and storage space. - Bow Rake:
The bow rake, sometimes called a garden rake, has a completely different design. It features a short, sturdy head with rigid metal tines set at a right angle to the handle. The head is attached to the handle by two curved metal supports called bows, which give the tool its name. Bow rakes are made for heavier work — they’re perfect for breaking up soil clods, spreading and leveling soil or gravel, working compost into garden beds, or removing stones and debris from soil. The rigid tines dig in and pull through the dirt, making this rake an essential tool for serious soil preparation and landscaping projects.
Many gardeners keep both types on hand: a leaf rake for gentle cleanups and a bow rake for tougher ground work.
Storage tips
Proper storage will keep your rake — whether leaf or bow — in good working order for many years. Here’s how to care for and store your rakes so they’re always ready when you need them:
- Clean after use: After each use, shake off leaves, soil, or grass clippings. If dirt is stuck between the tines, rinse the rake with a hose and dry it thoroughly to prevent rust on metal parts.
- Inspect regularly: Check metal tines for signs of bending or loosening. Gently bend tines back into shape if needed. Tighten any screws or bolts if the head starts to wobble.
- Store dry: Always store your rake in a dry spot, like a shed, garage, or covered storage area. Prolonged exposure to moisture can cause metal tines to rust and wooden handles to rot or splinter.
- Hang it up: The best way to store a rake is to hang it on a wall hook or rack with the tines pointing down or flat against the wall. This keeps the tines from getting bent or damaged and helps prevent accidents — nobody wants to step on a rake and get a surprise bump on the head!
- Condition wooden handles: If your rake has a wooden handle, check for splinters or cracks once or twice a season. Sand any rough spots smooth and apply linseed oil to keep the wood strong and weather-resistant.
A good rake may seem simple, but when properly chosen, cared for, and stored, it can last you for decades — helping you keep your garden neat, your soil ready for planting, and your outdoor space looking its best year-round.
Garden Kneeler or Pad
Protect your knees
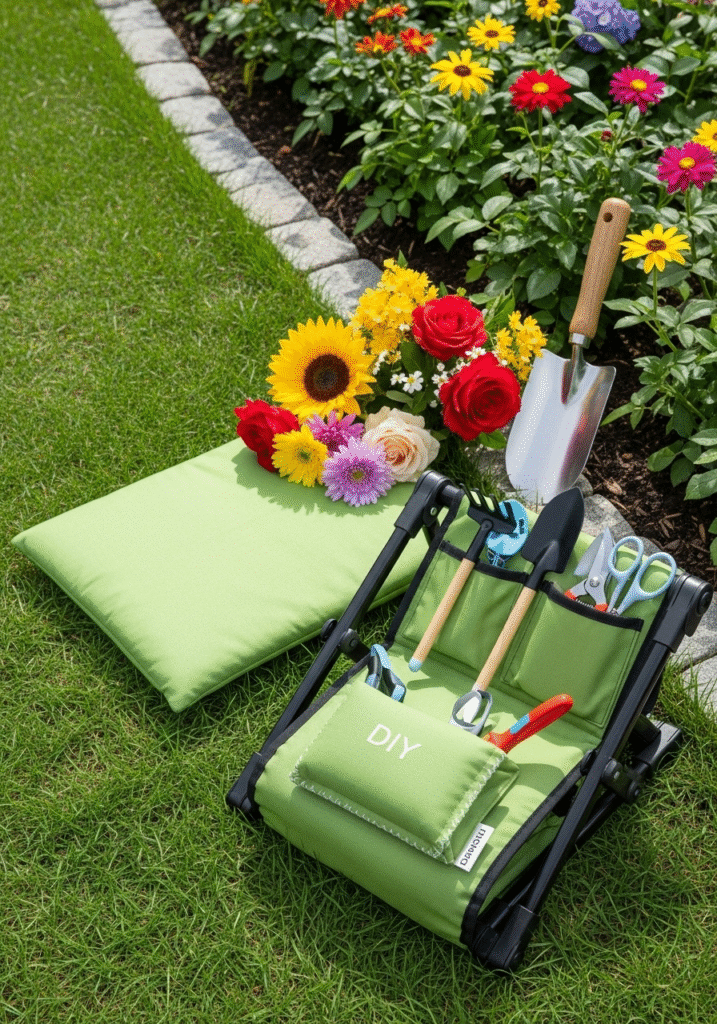
Gardening can be incredibly rewarding, but it often demands long hours spent crouching or kneeling on hard ground. Over time, this can be tough on your knees, hips, and lower back — especially if you have sensitive joints or existing knee issues. That’s where a garden kneeler or pad comes in: this simple but often-overlooked tool can dramatically increase your comfort and protect your body while you tend to your plants.
A garden kneeler or knee pad acts as a soft barrier between your knees and the cold, damp, or uneven ground. It cushions your joints against rocks, twigs, or rough surfaces, helping prevent soreness and bruising. It also keeps your clothes cleaner and drier when you’re planting, weeding, or pruning close to the ground.
For older gardeners or anyone with limited mobility, a garden kneeler can make it much easier to stay active in the garden without pain or strain. Many people find that when they’re comfortable kneeling, they can garden longer and with more enjoyment — and that means more time doing what they love.
Extra features: foldable, storage pockets
Today’s garden kneelers come in a range of clever designs that add convenience and versatility to the basic idea of knee protection. Here are a few popular features to look for:
- Foldable frames: Many garden kneelers are more than just pads — they include sturdy metal or plastic frames that double as low benches. When upright, you can sit on them to prune, plant, or tend to raised beds without crouching. When flipped over, the bench becomes a supportive kneeler, with side handles that help you lower yourself down or push yourself back up safely — a big help if you have stiff joints or balance concerns. Most of these frames fold flat for easy storage in your shed or garage.
- Built-in storage: Some kneelers include attached pouches or pockets for holding small hand tools, seed packets, gloves, or even your phone. Having these essentials within reach means you spend less time getting up and down or rummaging through a tool bag — keeping you focused and comfortable.
- Durable, easy-to-clean materials: Look for kneelers or pads made from high-density foam or memory foam covered with a waterproof, wipe-clean surface. This keeps the pad supportive and comfortable even after heavy use and protects it from moisture and mold.
A good garden kneeler with extra features can quickly become one of your most-used garden helpers, saving your knees and keeping your tools close at hand all at once.
DIY ideas
If you don’t want to buy a garden kneeler, or if you enjoy simple DIY projects, you can easily make a custom kneeling pad at home. Here are a few easy ideas:
- Upcycled foam pad: One of the easiest options is to repurpose an old piece of foam — like a camping mat, yoga mat, or even a leftover cushion. Cut it to your desired size, layer it for extra thickness, and wrap it in a durable, waterproof fabric. Secure the fabric with strong tape, stitching, or a staple gun.
- Recycled towel pad: Roll up an old thick towel or blanket, fold it to the right thickness, and wrap it tightly with duct tape or fabric to hold its shape. This makes a quick, soft knee pad that can be tossed in the wash when it gets dirty.
- Wooden kneeler with handles: If you’re handy with tools, you can build a simple wooden frame that works just like a store-bought kneeler bench. Use scrap wood to make a small bench with legs and side handles, then attach a piece of foam or an old cushion to the top for comfort. Sand and seal the wood to protect it from moisture, and add hinges so it can fold flat for easy storage.
A homemade kneeler can be just as effective as a store-bought one, and building it yourself can add a personal touch to your gardening routine.
No matter which option you choose — a simple foam pad, a sturdy folding bench, or your own custom DIY creation — a good garden kneeler helps you protect your knees, work longer in comfort, and enjoy every moment you spend close to the soil.
Garden Scissors
Cutting flowers, herbs, light pruning
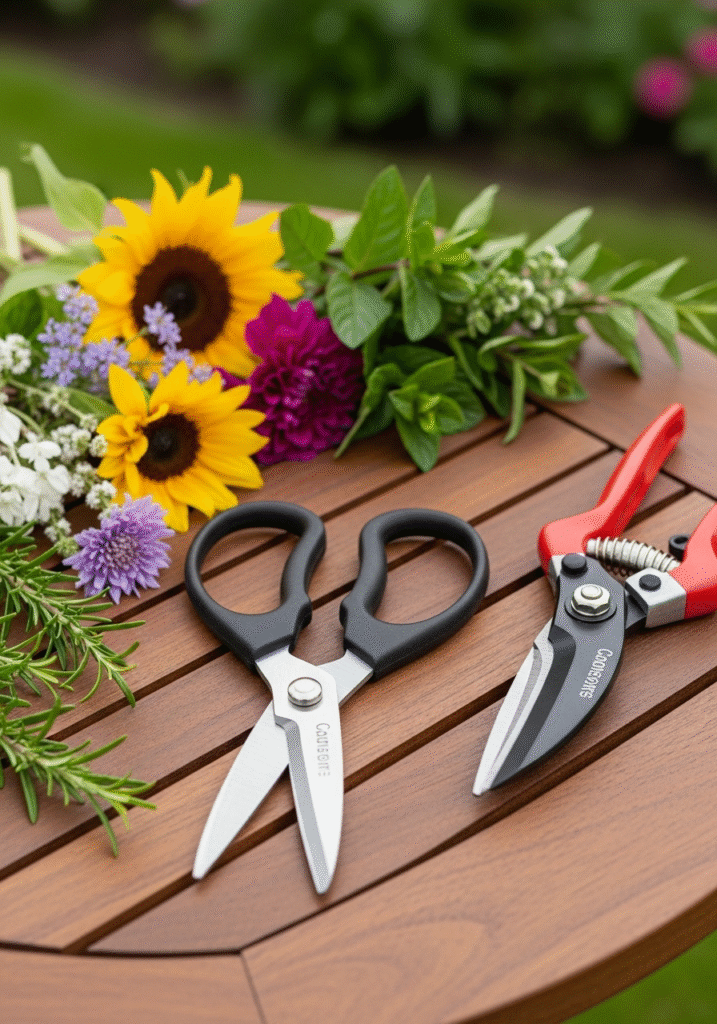
Garden scissors are a simple but surprisingly essential tool for any gardener who loves neat, precise cuts and gentle harvesting. Unlike larger pruning shears, garden scissors are lighter, smaller, and more delicate — designed for tasks that need precision and a gentle touch rather than brute force.
One of their main uses is cutting flowers. If you grow cut flowers in your garden, garden scissors help you snip blooms cleanly without crushing stems. Clean cuts help flowers last longer in a vase by keeping the stems open to absorb water and nutrients. The sharp blades allow you to reach into dense flower beds or delicate stems without damaging surrounding growth.
Garden scissors are also a favorite for harvesting herbs, whether you’re snipping fresh basil, parsley, rosemary, or mint for the kitchen. The clean cuts keep herb plants healthy and encourage bushier growth. Many gardeners also use garden scissors for light pruning of soft new growth, deadheading faded blooms, or snipping away yellowing leaves — all tasks that benefit from precision and care.
Because they’re so light and easy to maneuver, garden scissors are perfect for those quick, everyday gardening jobs where larger pruners would be too bulky or aggressive.
Difference from pruning shears
Many new gardeners wonder: Why do I need garden scissors if I already have pruning shears? The answer is that while they look similar at first glance, they’re made for different jobs — and using each for its intended purpose makes your gardening easier and your plants healthier.
Pruning shears (also called secateurs) are built for heavier cutting — think woody stems, small branches, or thick flower stalks. They’re robust, with a spring-loaded mechanism and thicker, more powerful blades that can cut through tougher material without much effort.
Garden scissors, in contrast, are like the fine-tipped paintbrush in a gardener’s toolkit. They’re lighter, usually springless, and have thinner, sharper blades designed for clean, quick cuts on tender stems and soft growth. Using scissors for flowers, herbs, or deadheading prevents you from accidentally crushing soft stems, which can cause bruising or open the plant up to disease.
Put simply: pruning shears for tough cuts, garden scissors for delicate cuts. Most gardeners keep both in their apron pocket or tool bag for good reason.
Best materials
A good pair of garden scissors should feel comfortable in your hand, cut smoothly with minimal effort, and last for years with proper care. Here are a few things to look for when choosing the best pair:
Blades:
- Stainless steel blades are rust-resistant, stay sharp for a long time, and are easy to clean. They’re a great all-around choice for garden scissors, especially if you’re working with moist plants like herbs and flowers.
- Carbon steel blades tend to hold an edge even longer than stainless steel and can be sharpened to a razor-like finish. However, they’re more prone to rust if not cleaned and dried properly — so regular care is a must.
Handles:
- Look for handles with an ergonomic design that fits comfortably in your hand, especially if you’ll be using them for long periods.
- Many garden scissors have soft, non-slip grips that reduce hand fatigue and give you better control, even if your hands are wet.
- Lightweight aluminum or stainless steel handles can add durability without making the scissors too heavy.
Spring or no spring:
Some garden scissors include a small spring mechanism that gently opens the blades after each cut, similar to pruning shears. This can make repetitive cutting easier on your hand muscles. Others are designed more like traditional craft scissors, with two simple blades that open and close by hand. Try both styles to see which feels more comfortable for you.
Maintenance tip:
Whatever material you choose, keep your scissors clean and dry after each use. Wipe the blades to remove plant sap, which can cause sticking and dull the edge. A quick swipe with a sharpening stone or fine file every so often keeps the blades razor-sharp, ensuring clean cuts every time.
Store your garden scissors in a dry place — ideally in a protective sheath or pocket — to prevent accidental nicks to the blade or injuries when rummaging through your tool bag.
A high-quality pair of garden scissors might seem like a small investment, but once you start using them for cutting fresh flowers, snipping herbs for dinner, or tidying up delicate plants, you’ll wonder how you ever gardened without them.
Soil Tester Kit
Importance of testing soil pH
Healthy soil is the foundation of every thriving garden — and knowing exactly what’s going on beneath the surface can make the difference between struggling plants and a lush, productive garden. That’s where a soil tester kit comes in.
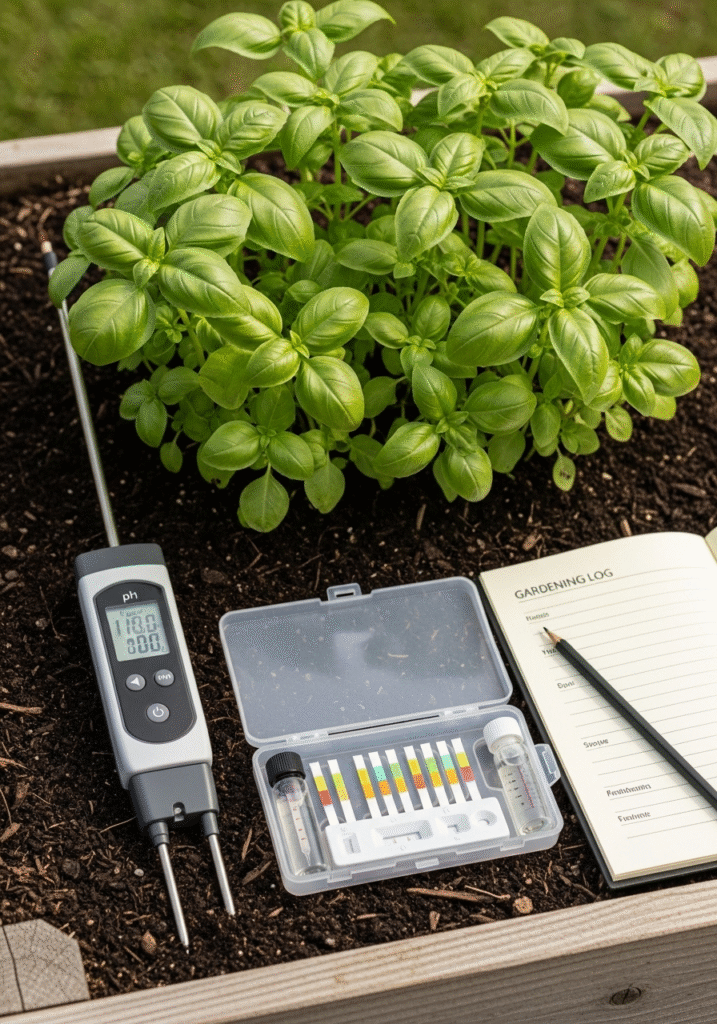
A soil tester kit measures important factors like pH level, and in some cases, nutrient content (such as nitrogen, phosphorus, and potassium). Of these, pH — the measure of how acidic or alkaline your soil is — is one of the most crucial. Plants rely on specific pH ranges to absorb nutrients from the soil effectively.
If the pH is too acidic or too alkaline, certain nutrients become locked up in the soil, meaning your plants can’t take them in — even if you’re feeding them with fertilizers or compost. For example, blueberries and azaleas thrive in acidic soil (low pH), while most vegetables prefer neutral to slightly acidic soil (around pH 6–7). If you don’t know your soil’s pH, you might unknowingly fight an uphill battle with stunted plants, yellow leaves, or poor yields, all because the nutrients you’re adding are simply out of reach for your plants.
Testing your soil regularly helps you make informed decisions about what to plant, how to amend your soil, and how to get the best possible results from your time, money, and effort.
How to use a soil tester
Soil tester kits come in a few forms, but the basic process is straightforward — and you don’t need to be a scientist to get useful results!
1. Choose the right tester:
Basic soil tester kits include simple pH test strips or capsules that change color when mixed with a soil sample and a bit of water. Digital soil testers give a quick reading when inserted directly into the ground. Some kits also measure moisture and light levels, or additional nutrients, but pH is the core function.
2. Take a good sample:
Dig small samples from multiple spots in your garden bed (about 4–6 inches deep for most plants). This gives you an average reading instead of just one spot, which might not represent your entire bed. Mix the samples in a clean bucket.
3. Follow the kit’s instructions:
- For chemical kits, place the recommended amount of soil into the provided container, add the test solution or capsule, and mix with distilled water if required.
- Wait for the reaction time (usually a few minutes). The liquid will change color.
- Compare the color to the chart provided to determine your soil’s pH.
4. For digital meters:
Insert the probe into moist soil, wait for the display to stabilize, and read the pH directly. Some digital testers also measure moisture or light levels, giving you a quick snapshot of your soil conditions.
5. Record your results:
Keep a gardening notebook or digital record. This helps you track changes over time and decide when to apply lime (to raise pH) or sulfur (to lower pH), or to add specific fertilizers.
When to test your soil
Knowing when to test your soil is just as important as how you test it. For the best results:
- Before planting: Test your soil a few weeks before you start planting in spring or fall. This gives you time to add amendments and adjust pH if needed before plants go in the ground.
- When plants struggle: If your plants show signs of nutrient deficiency — yellow leaves, stunted growth, poor flowering — a soil test can help you figure out whether an incorrect pH might be the cause.
- Annually: For vegetable gardens or high-demand beds, test at least once a year. If you’re planting perennial shrubs, fruit trees, or flower beds, a soil test every few years helps keep long-term soil health in check.
- After big changes: If you’ve added large amounts of compost, manure, mulch, or other amendments, or if you’ve had heavy rain that may have washed nutrients away, it’s wise to test again to see how your soil balance has shifted.
A simple soil tester kit is one of the most affordable, beginner-friendly tools you can own — yet it gives you the power to make smarter decisions that keep your plants healthy and productive year after year. With just a few minutes of testing, you gain valuable insight that saves time, effort, and money in the long run — and helps your garden truly thrive from the ground up.
Garden Sprayer
For fertilizers and pest control
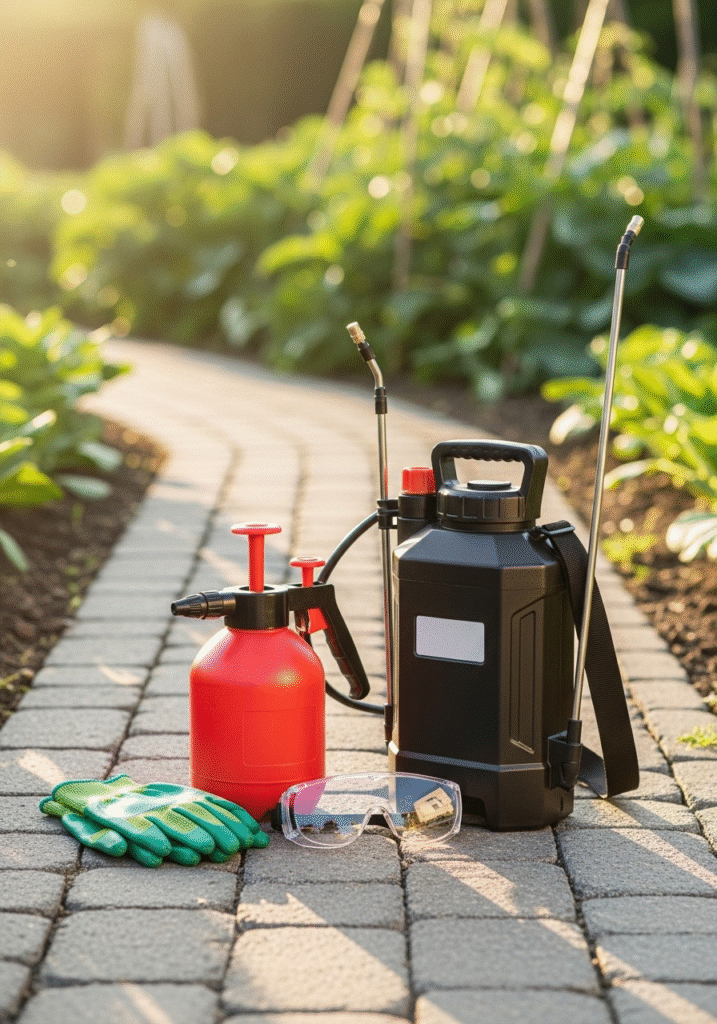
A garden sprayer is a must-have tool for any gardener who wants to apply liquid treatments efficiently and evenly across their plants and garden beds. Whether you’re feeding your plants with liquid fertilizers, applying foliar nutrients, controlling pests with insecticides, or even spraying organic treatments like compost tea, a sprayer helps you cover more area in less time — with far greater precision than watering cans or hand sprinkling alone.
A garden sprayer works by creating pressure that pushes liquid through a nozzle, turning it into a fine mist or targeted stream. This ensures that leaves, stems, and soil are coated evenly, improving the effectiveness of your treatments.
Sprayers are especially helpful for pest control, where it’s important to coat the undersides of leaves and hard-to-reach plant parts where insects like aphids and mites hide. A good sprayer saves you time and reduces waste, as you can direct just the right amount of solution exactly where it’s needed — which is better for your plants and the environment.
Manual vs. battery sprayers
There are two main types of garden sprayers: manual sprayers and battery-powered sprayers. Both have their pros and cons, depending on the size of your garden and how often you use them.
Manual Sprayers:
Manual sprayers are the traditional choice for home gardeners. They come in handheld sizes (1–2 liters) for small jobs like misting houseplants or applying spot treatments, or larger backpack or pump sprayers (up to 5–8 gallons) for bigger tasks like spraying fruit trees or large vegetable beds.
To use a manual sprayer, you create pressure by pumping a handle — either before you spray (in the case of a pump sprayer) or continuously while spraying (like a handheld mister). Manual sprayers are lightweight, portable, and don’t rely on batteries or chargers, which makes them reliable and budget-friendly.
Battery-Powered Sprayers:
Battery sprayers take the effort out of pumping. These sprayers use a rechargeable battery to power an internal pump, creating steady, consistent pressure with the push of a button. They’re a great choice if you have a large garden, orchard, or frequent spraying tasks that would make hand-pumping tiring and time-consuming.
Most battery sprayers come as backpacks or wheeled units, making it easier to carry larger volumes of liquid. They also often have adjustable nozzles and pressure settings, so you can switch between a fine mist for delicate flowers and a strong stream for deep soil drenching.
The tradeoff is that battery sprayers are usually more expensive upfront and require charging and occasional battery maintenance. But for frequent use, they can be a worthwhile investment that saves you time and physical effort.
Safety precautions
While garden sprayers are straightforward to use, it’s important to remember that many fertilizers, pesticides, and herbicides contain chemicals that can irritate your skin, eyes, or lungs if not handled properly. Here are some essential safety tips to keep you protected:
Read labels carefully: Always follow the manufacturer’s instructions for any product you’re mixing in your sprayer. Pay attention to dilution rates — too strong a solution can damage your plants and harm beneficial insects.
Wear protective gear: When mixing or spraying chemicals, wear gloves, long sleeves, long pants, and closed-toe shoes. Goggles or safety glasses and a mask or respirator can protect your eyes and lungs, especially if you’re spraying in breezy conditions or using strong chemicals.
Spray on calm days: Choose a day with little to no wind to prevent drift onto other plants, pets, or people. Early morning or late evening is best, as temperatures are cooler and beneficial insects like bees are less active.
Mix and clean up safely: Always mix chemicals outdoors or in a well-ventilated area. Never mix or store pesticides in food or drink containers. After spraying, clean your sprayer thoroughly with water (following any product-specific cleaning instructions) and store it out of reach of children and pets.
Keep sprayers labeled: If you have more than one sprayer — for example, one for herbicides and one for fertilizers — clearly label each one and never mix them up. Even trace amounts of herbicide in a sprayer can damage your plants if you use it for fertilizers or foliar sprays later.
Store solutions properly: Never leave leftover chemicals sitting in the sprayer for long periods. Dispose of them according to local guidelines and rinse the tank well before storing.
A well-chosen garden sprayer makes feeding, treating, and protecting your plants so much more efficient. By picking the right type for your garden size and following safe, responsible spraying practices, you’ll help your garden thrive while keeping yourself, your family, and your local ecosystem safe and healthy.
Weeder Tool
Remove weeds from the root
Weeds are every gardener’s unwelcome guests — they compete with your plants for sunlight, water, and nutrients, and if left unchecked, they can quickly take over beds, lawns, and pathways. The most frustrating part is that simply cutting weeds off at the surface doesn’t solve the problem; most weeds will regrow from any root pieces left behind. That’s why a good weeder tool is essential — it helps you tackle weeds properly by removing them from the root, so they’re much less likely to return.
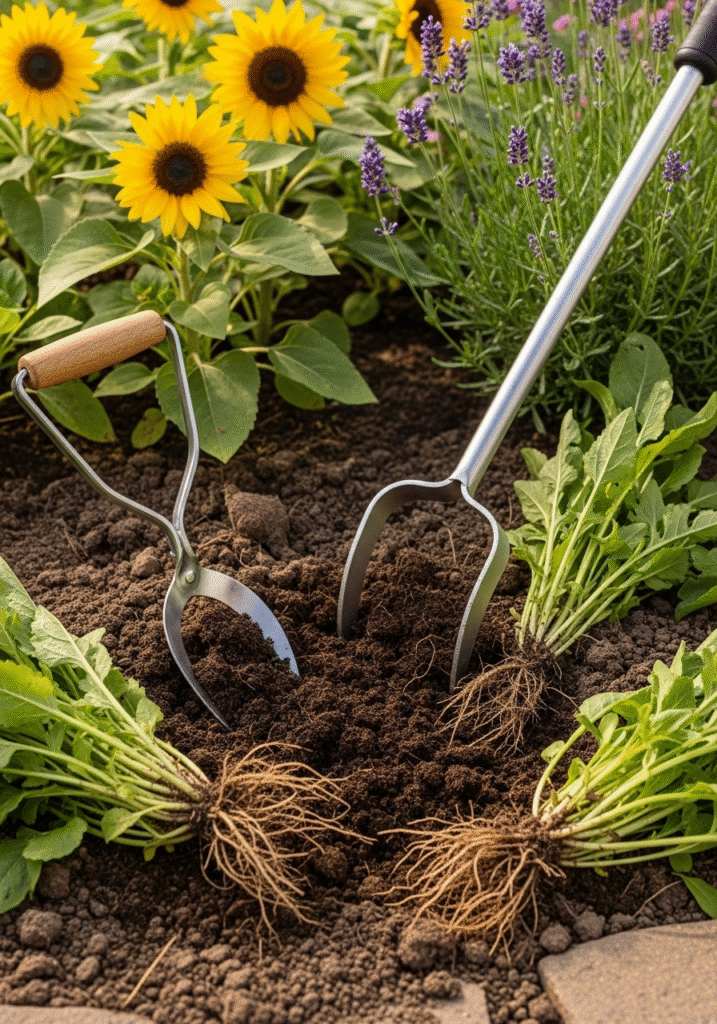
A weeder tool is designed to get under the soil and lift the entire weed — roots and all — with minimal disturbance to the surrounding plants and soil. Compared to pulling by hand (which often snaps the top but leaves roots behind), a proper weeder saves you time, effort, and frustration.
Gardeners find a good weeder especially helpful for dandelions, thistles, crabgrass, and other stubborn deep-rooted or tap-rooted weeds that are hard to remove by hand.
Types of weeders: hand vs. long handle
There are two main types of weeders, each with its own strengths:
Hand Weeder:
A hand weeder is a small, handheld tool — often shaped like a short, forked blade or a narrow, notched metal spike with a comfortable handle. It’s lightweight and compact, making it perfect for precision work in garden beds, flower borders, and around delicate plants.
A classic design is the dandelion weeder, with a narrow shaft and a V-shaped notch at the end. You slide the blade down alongside the weed’s root and gently pry it out. This minimizes soil disturbance and lets you remove deep taproots with surprising ease.
Hand weeders are also great for working in raised beds, containers, or tight garden spaces where a long-handle tool would be awkward.
Long-Handle Weeder:
A long-handle weeder does the same job but saves your back and knees by allowing you to weed while standing. These tools come in several designs, including claw-style weeders, push-pull hoes, and stand-up weeders with foot pedals that grab and pull out weeds in one motion.
Long-handle weeders are ideal for larger areas like lawns, vegetable rows, or open beds where you have plenty of space to maneuver. They reduce the strain on your back and make weeding less tiring — especially if you have mobility or joint issues.
Many gardeners keep both types on hand: a hand weeder for precise jobs near delicate plants, and a long-handle weeder for covering bigger patches without stooping or kneeling for hours.
Technique for effective weeding
Using a weeder tool correctly makes all the difference in keeping your garden tidy and weed-free for longer. Here’s how to get the best results:
1. Weed when the soil is moist:
Weeding after a light rain or watering session is ideal. Moist soil is softer and allows roots to come out more easily and cleanly. Dry, compacted soil can break roots, leaving pieces behind to regrow.
2. Get as close to the root as possible:
Insert the blade or claw of your weeder deep into the soil, right alongside the base of the weed. The goal is to loosen the soil around the root rather than tugging on the stem alone, which often just snaps it off.
3. Pry, don’t yank:
Gently rock the weeder back and forth to loosen the soil, then lift the entire plant and root out in one smooth motion. Take your time — forcing a weed out too quickly can break the root, making your effort pointless.
4. Fill in holes:
Once the weed is out, pat the soil back in place to prevent weed seeds from blowing in and settling into fresh gaps.
5. Weed regularly:
No tool can remove every weed forever, so consistent weeding is key. Small weeds are easier to remove than mature ones, and regular weeding stops them from going to seed and spreading further. Aim for a quick weeding session every week or two during the growing season.
Pro Tip: Keep your weeder clean and dry after each use. Wipe off soil, rinse if needed, and store it in a dry place to prevent rust and prolong its life.
A good weeder — whether hand-held or long-handle — is one of the simplest, most satisfying tools you can own. It keeps your garden neat, saves your back and knees, and helps your flowers, vegetables, and lawn thrive without having to compete with unwanted invaders.
Garden Storage Shed or Tool Organizer
Keep tools safe and organized
A garden shed or tool organizer might not seem as exciting as a shiny new spade or a clever weeder, but it’s easily one of the most important parts of your gardening setup. Why? Because even the best tools can quickly become damaged, lost, or unsafe to use if they’re not stored properly. A dedicated space to keep everything in order protects your investment, saves you time and hassle, and extends the life of your gear.
A garden storage shed gives you a secure, weatherproof place to keep larger tools like spades, forks, rakes, wheelbarrows, hoses, sprayers, and even bags of soil, compost, or fertilizer. It keeps tools out of the rain and sun, preventing rust, rot, and UV damage that can weaken handles and metal parts over time. A shed also keeps sharp tools and chemicals safely locked away from children and pets — an important safety factor for any home gardener.
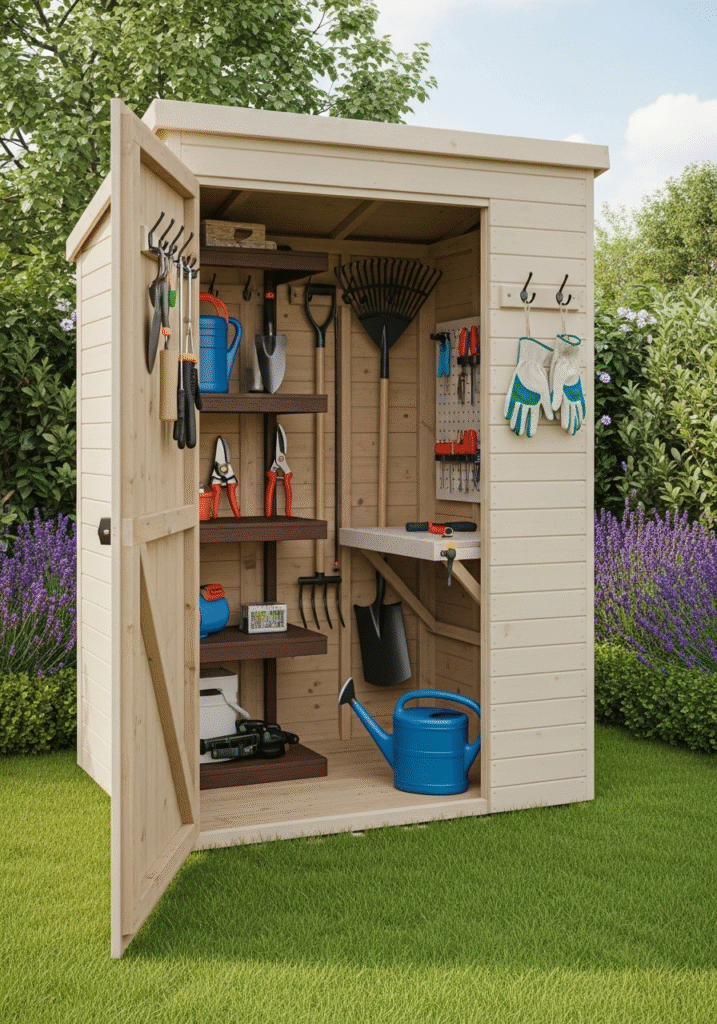
If you don’t have space for a full shed, a tool organizer or compact storage solution can still make a big difference. Wall-mounted racks, pegboards, hooks, shelves, or storage benches help you keep tools off the ground, easy to find, and protected from the elements. Knowing exactly where your tools are saves you valuable time, especially during busy planting or harvest seasons.
A tidy, well-organized storage area means less clutter in your yard or garage — and makes gardening feel more enjoyable and stress-free every time you head outside to work.
DIY ideas for small spaces
Not everyone has room for a big garden shed, but you don’t need a large backyard to keep your tools organized. Here are a few smart DIY ideas for storing your garden tools in small spaces:
Wall-mounted tool rack:
Mount sturdy hooks or a pegboard on an outdoor wall, garage wall, or fence. Hang larger tools vertically — like spades, rakes, and hoes — to keep them off damp ground and out of the way. Add smaller hooks or baskets for gloves, trowels, or pruning shears.
Upcycled pallet organizer:
An old wooden pallet can easily become a simple outdoor tool rack. Stand it upright against a shed wall or fence and slide tools like rakes, forks, and hoes through the slats for easy access. You can add extra hooks or small shelves for smaller tools.
Garden storage bench:
If you have a patio or deck, build or buy a bench with built-in storage underneath. It doubles as a place to sit and as a weather-protected spot to keep small tools, watering cans, and cushions tidy and dry.
Portable tool caddy:
For tiny gardens or balconies, a rolling storage bin or caddy can hold all your essentials and be moved where you need it. Use an old wheeled laundry basket, a plastic tote with dividers, or a sturdy toolbox with compartments for your gloves, scissors, twine, and seed packets.
Vertical shed:
If you don’t have space for a full-size shed, look into a slim, vertical storage cabinet or locker. Many ready-made versions are weather-resistant plastic or resin, with shelves and hooks inside. Tuck one beside your house or in a tight corner to keep tools safe but close at hand.
These DIY options help you stay organized without taking up much square footage — proof that even the smallest garden deserves neat, reliable tool storage.
Maintenance
Your shed or tool organizer needs occasional care, too. A neglected storage space can become cluttered, damp, or infested with pests — all of which can damage your valuable tools. Here’s how to keep your storage area in good shape:
Keep it dry:
Moisture is the enemy of most garden tools. Make sure your shed is weatherproof, with a tight roof, sealed walls, and good ventilation to prevent dampness and rust. For smaller outdoor racks, consider adding a tarp cover or positioning them under an overhang to protect them from rain.
Organize regularly:
A tidy shed or rack stays useful only if you maintain it. Every few months, take time to put tools back in their proper places. Wipe down muddy or damp tools before storing them to keep your shed clean and dry inside.
Pest-proof it:
Garden sheds sometimes attract rodents or insects, especially if you store seeds, bulbs, or organic fertilizers inside. Keep these items sealed in metal or heavy plastic containers, sweep up debris regularly, and check for gaps where critters could get in.
Check for damage:
Inspect the shed structure every season — look for leaks, warped boards, rusting hinges, or loose hooks. Repair issues promptly to keep your storage area safe and weather-tight.
Store smart:
Hang sharp tools with the blades facing down or cover them with blade guards to prevent accidental cuts. Store chemicals, fertilizers, and sprays on high shelves or in locked boxes to keep them away from children and pets.
By investing a little time in setting up and maintaining a good garden storage system — whether that’s a full shed or a clever wall rack — you’ll protect your tools, save money, and enjoy a tidy, stress-free gardening experience year after year.
Additional Gardening Tips for Beginners
Once you’ve invested in the right gardening tools, knowing how to care for them — and when to invest in new ones or make your own — is just as important. Well-maintained tools save you money in the long run, make gardening safer and more enjoyable, and help you work more efficiently. Here are some practical tips every beginner should know.
How to maintain your tools
Your garden tools are your best allies in the yard — but only if they stay in good working order. Dirty, dull, or rusty tools make every job harder and can even damage your plants. Luckily, basic tool maintenance is simple and doesn’t take much time.
Clean after every use:
Before putting tools away, always remove dirt, sap, or plant residue. Use a stiff brush, an old rag, or a putty knife to scrape off stuck-on soil. Rinse tools with water if needed, then dry them thoroughly.
Keep blades sharp:
Sharp blades make cutting cleaner and easier, whether you’re pruning, digging, or trimming. Use a flat file, sharpening stone, or specialized garden tool sharpener to touch up spade edges, pruning shears, and scissors regularly.
Prevent rust:
Metal tools, especially those made of carbon steel, are prone to rust if stored damp. After cleaning, you can wipe blades and metal parts with a light coat of oil (vegetable oil or machine oil both work well) to create a protective barrier.
Check wooden handles:
Wooden handles can crack or splinter over time. Lightly sand rough spots and apply linseed oil once or twice a year to keep the wood strong and smooth.
Store properly:
Hang tools on a rack or pegboard to keep blades off damp floors and avoid accidental damage. Never leave tools lying on the ground, where they’re exposed to rain and pests.
Regular tool care doesn’t just protect your investment — it makes your gardening work smoother, safer, and far more satisfying.
When to buy vs. DIY
Many gardeners wonder: Do I really need to buy every tool? The answer is no — smart gardening is about knowing when to invest in quality gear and when a homemade or improvised solution will do the job just fine.
When to buy:
- Essential tools: Good-quality essentials like a spade, hand trowel, pruning shears, and a sturdy rake are worth buying upfront. Poorly made versions break easily and often cost you more in replacements and frustration.
- Specialized tools: Tools with moving parts (like sprayers, battery pruners, or advanced soil testers) are best purchased from reputable brands. The better the design and materials, the safer and more effective they’ll be.
- When you garden regularly: If you garden often, spending a little more on durable, comfortable tools will pay off in comfort and time saved.
When to DIY:
- Simple helpers: Items like garden kneelers, small tool caddies, seed trays, or simple organizers can often be made cheaply with leftover household materials.
- Temporary solutions: If you’re just starting out and testing what you need, it’s fine to repurpose old buckets, containers, or spare wood for temporary tool storage or planting jobs.
- Fun projects: DIY garden hacks — like turning old milk jugs into watering cans or using an old spoon as a seedling transplant tool — can save money and give your garden a personal touch.
The key is to be realistic: buy quality where it counts, and enjoy being creative with low-cost or upcycled solutions for the rest.
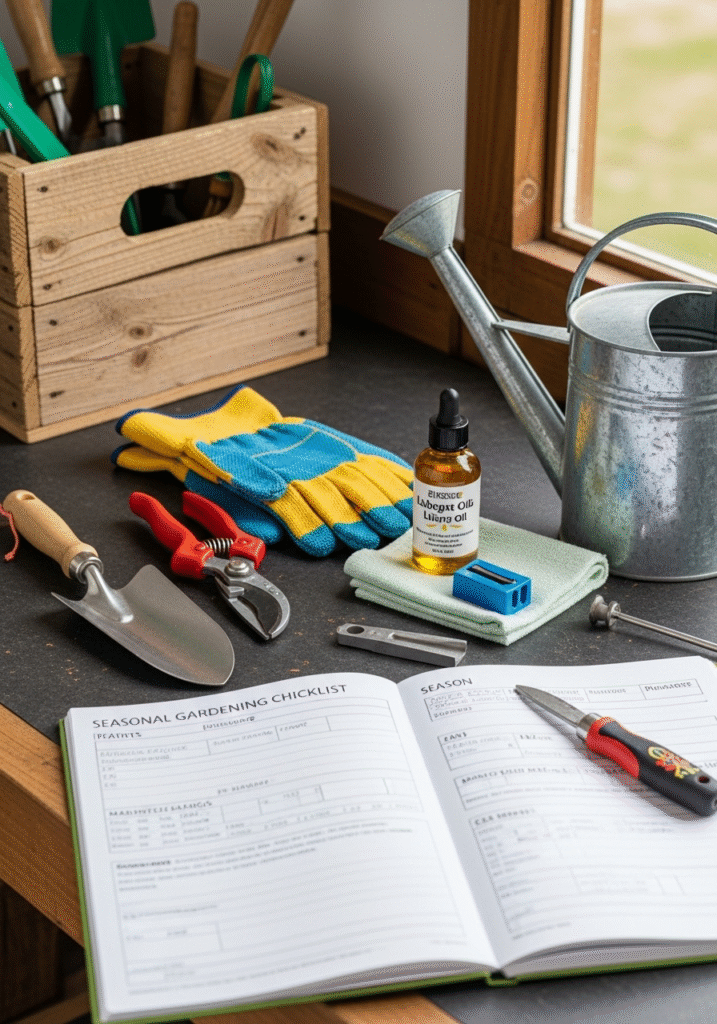
Seasonal tool care checklist
Good maintenance is much easier if you follow a simple routine through the year. Here’s a handy seasonal checklist to help you stay on top of it:
Spring:
- Inspect all tools before the busy season starts.
- Sharpen blades on spades, pruners, scissors, and shears.
- Check handles for cracks or loose bolts — repair or replace as needed.
- Clean and test sprayers, hoses, and watering cans to make sure they work properly.
Summer:
- Rinse tools more often — summer tasks like pruning and weeding often leave sticky sap and plant residue.
- Check storage areas for pests or moisture problems.
- Keep sharpening blades if you’re using them heavily.
Autumn:
- Deep-clean tools after major garden clean-ups.
- Sharpen and oil metal parts to prevent rust during winter storage.
- Drain hoses and sprayers completely before freezing temperatures hit to avoid cracks or burst seals.
Winter:
- Store tools in a dry, sheltered spot.
- Hang tools up or keep them off cold, damp floors.
- If you have time, give wooden handles a coat of linseed oil so they stay in good shape for next season.
- Take stock: make a list of tools you might want to replace or add next year. Winter is a great time to plan upgrades!
Final tip: A little care goes a long way. Well-maintained tools can easily last for decades — and there’s something deeply satisfying about pulling out a sharp, clean spade or smooth pair of pruners every time you step into your garden.
By investing just a few extra minutes in tool care, smart storage, and thoughtful upgrades, you’ll make your gardening life easier, safer, and more rewarding, season after season.
Conclusion
Gardening is one of the most rewarding hobbies you can have — it brings you closer to nature, adds beauty and fresh food to your life, and gives you a sense of calm and accomplishment with every seed you plant and flower you grow. But no matter how big or small your garden is, having the right tools can truly make the difference between backbreaking frustration and a relaxing, enjoyable gardening experience.
From the humble hand trowel that helps you tuck seedlings into fresh soil, to the sturdy garden spade that turns over beds for a new season, each tool in your shed has a purpose that makes your gardening safer, faster, and more productive. Well-chosen tools like pruning shears, garden forks, hoses, and weeders save you time and effort, helping you do tasks properly — whether that’s trimming branches, aerating the soil, watering wisely, or keeping weeds from taking over.
Beyond the basics, investing in smart extras — like a garden sprayer, soil tester, or even a simple garden kneeler — can protect your body, help you understand your soil better, and give your plants the healthiest start possible. And of course, keeping everything organized in a garden shed or tool rack ensures your tools stay in top condition for years to come.
Remember, you don’t need to buy everything at once. Gardening is a journey — start with the essentials, build your collection as your needs grow, and take good care of each tool along the way. A well-tended garden is built on well-tended tools.
If you’re a new gardener, don’t be intimidated by the variety of tools out there. Focus on what makes your work easier and more enjoyable — and don’t be afraid to try simple DIY solutions or adapt your tools to suit your space and style. Over time, you’ll discover which tools you reach for again and again, and those will become trusted companions season after season.
We’d love to hear from you! What gardening tools do you swear by? Do you have a favorite shovel, an old pair of scissors that’s never let you down, or a clever DIY tool organizer that keeps your shed tidy? Share your thoughts, tips, or questions in the comments below — your experience might inspire another gardener to dig in and grow something beautiful.
Happy gardening — and here’s to many seasons of healthy plants, fruitful harvests, and the simple joy of working with your hands in the soil.
