Introduction
Looking to upgrade your living room without breaking the bank? A DIY coffee table might be exactly what you need. Coffee tables are more than just functional furniture—they serve as the focal point of your living space and offer a great opportunity to express your personal style. Whether you’re a fan of rustic farmhouse vibes, sleek modern designs, or upcycled vintage pieces, building your own coffee table allows you to customize every detail to fit your aesthetic and practical needs.
In this in-depth guide, we’ll explore a variety of creative and budget-friendly DIY coffee table ideas that cater to all skill levels—from beginner woodworkers to experienced crafters. You’ll discover step-by-step tutorials, a list of tools and materials, and styling tips to help you craft a beautiful and durable centerpiece for your home. We’ll also cover sustainable options using reclaimed wood, pallets, crates, and other affordable materials to keep your project eco-friendly.
Whether you’re renovating your living room, furnishing a new apartment, or simply want to try your hand at a rewarding weekend project, this collection of DIY coffee table inspirations will guide you from concept to completion. Not only will you gain a custom-made piece that fits your decor perfectly, but you’ll also enjoy the pride that comes with creating something beautiful with your own hands.
Get ready to transform your living space with charm, character, and creativity—one coffee table at a time!
Why DIY Coffee Tables?
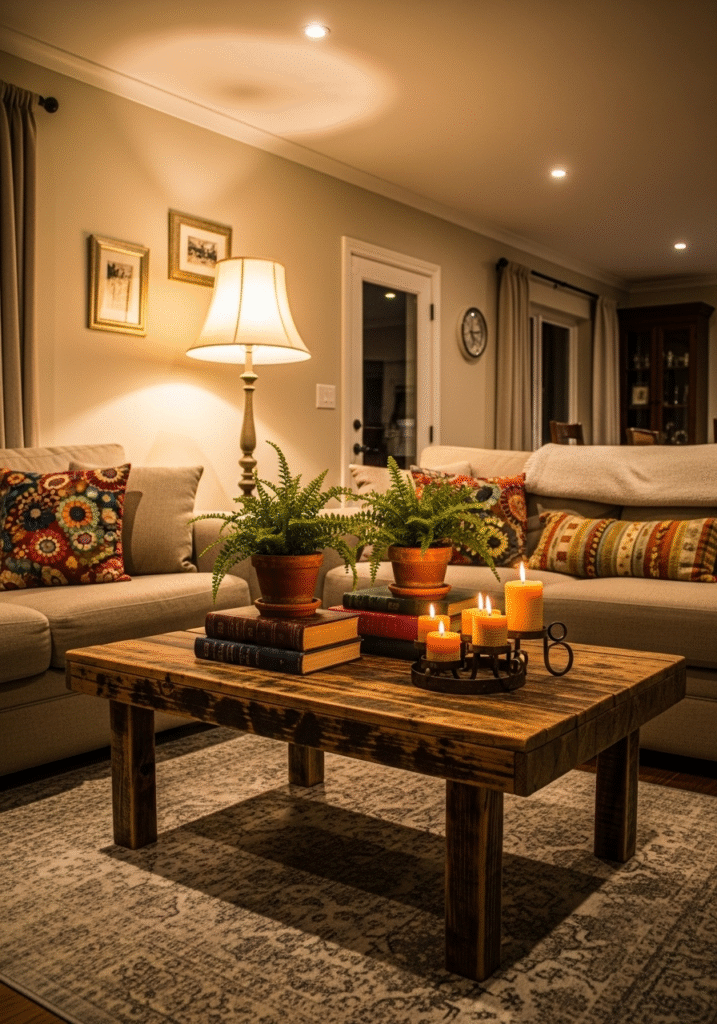
DIY coffee tables are becoming a top choice for homeowners and renters—and it’s easy to see why. These handcrafted pieces offer a wide array of advantages that go far beyond just looking good in your living room. From cost savings to environmental impact, making your own coffee table is a smart, stylish, and satisfying option. Here’s a closer look at why DIY coffee tables are so popular:
1. Budget-Friendly and Cost-Effective
Let’s face it—furniture shopping can be expensive, especially when it comes to coffee tables from high-end brands or designer collections. A well-made store-bought table can easily set you back several hundred dollars or more. With DIY, you’re in control of the budget. Many DIY coffee table projects can be completed for as little as $20 to $100 depending on the materials you use. Whether you’re repurposing scrap wood or shopping smart at your local hardware store, the savings are significant.
2. Fully Customizable to Your Space
One of the biggest perks of building your own coffee table is the ability to design it exactly how you want. You’re not limited by what’s available in stores—you can choose the dimensions, materials, color palette, finish, and even unique features like storage, wheels, or hidden compartments. This means your table won’t just fit your living room, it will enhance it. From narrow spaces to large open-plan areas, DIY allows you to tailor your coffee table to perfectly complement your home’s layout and style.
3. Eco-Friendly and Sustainable
Sustainability is more than a trend—it’s a lifestyle. DIY coffee tables are an excellent way to practice eco-conscious living. By repurposing old furniture, wood pallets, reclaimed barn wood, industrial crates, or even discarded doors, you can create a beautiful table while reducing your carbon footprint. Not only are you saving materials from ending up in a landfill, but you’re also avoiding the mass-manufacturing process that contributes to pollution and overconsumption.
4. A Creative and Rewarding Experience
There’s something incredibly fulfilling about building something with your own hands. A DIY coffee table isn’t just another piece of furniture—it’s a conversation starter, a source of pride, and a personal achievement. The process encourages creativity, problem-solving, and craftsmanship. Whether you’re following a step-by-step plan or designing something from scratch, each cut, screw, and stain adds a sense of accomplishment. It’s not just about the finished product—it’s about the journey to get there.
5. A Fun Project for All Skill Levels
You don’t have to be a seasoned carpenter to make a coffee table. Many beginner-friendly projects use basic tools and require minimal experience. If you’re more advanced, you can challenge yourself with intricate joinery or clever upcycled designs. Either way, it’s a fun and engaging project that you can do solo, with a partner, or even as a family weekend activity.
15 Stylish DIY Coffee Table Ideas
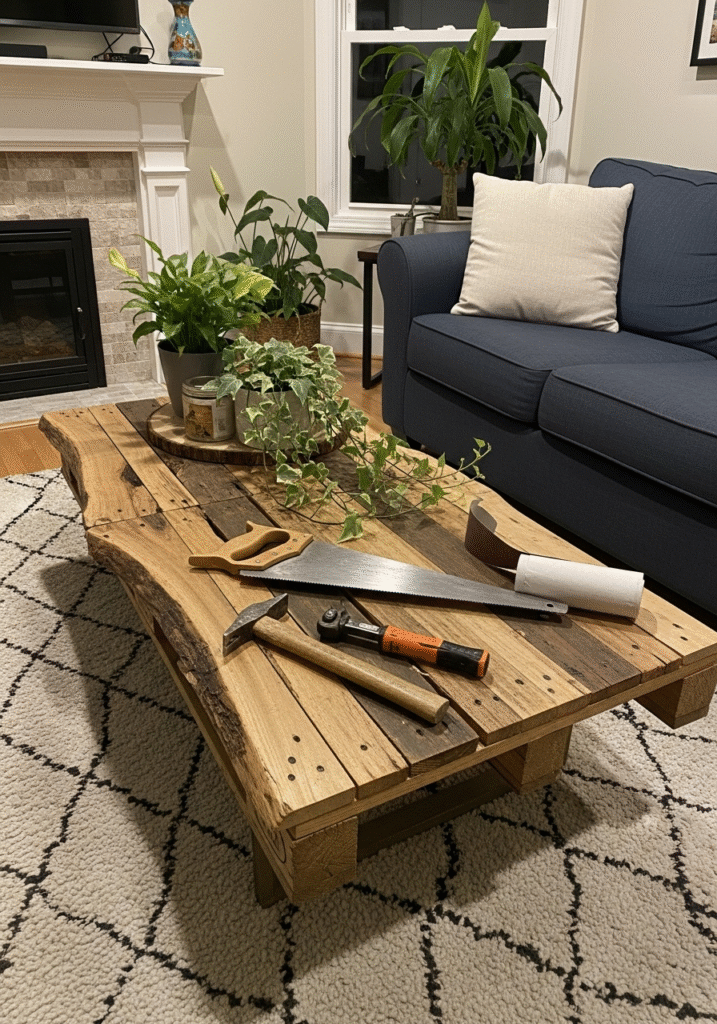
Let’s dive into some brilliant and doable ideas for your next home project:
1. Rustic Wooden Pallet Table
If you’re looking for an affordable, stylish, and eco-friendly coffee table idea, a rustic wooden pallet table should be at the top of your list. Wooden pallets are one of the most accessible materials for DIY projects. Often used in shipping and storage, these sturdy platforms can easily be transformed into beautiful furniture pieces with a bit of creativity and elbow grease.
Why Choose Pallets?
Wooden pallets are widely available, often for free or at a very low cost from local warehouses, hardware stores, or even supermarkets. Not only are they budget-friendly, but they also offer a charming, weathered look that perfectly suits rustic and farmhouse-inspired interiors. Their natural imperfections—knots, grain lines, and slight cracks—add character and authenticity to the final design.
How to Build a Rustic Pallet Coffee Table
Creating a rustic pallet coffee table is simpler than you might think. Here’s a step-by-step breakdown:
- Find Two Matching Pallets: Start by sourcing two pallets of the same size. Check that they’re in good condition—free from rot, mold, or major cracks.
- Clean and Sand: Use a brush to remove any dirt and then sand down the surfaces with medium- to fine-grit sandpaper. This helps smooth the rough wood and prepares it for staining or painting.
- Stack and Secure: Stack the two pallets on top of each other to create a thicker, more substantial table. Secure them together using wood screws and a drill to ensure stability.
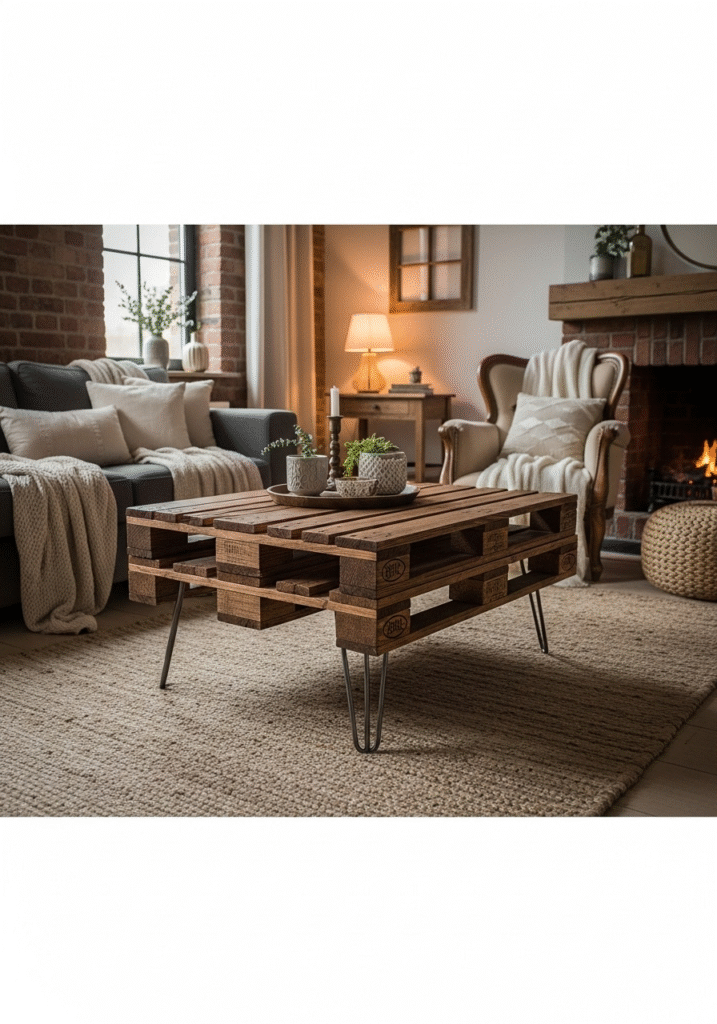
- Add Legs or Casters: For a more functional and stylish design, attach four hairpin legs for a mid-century modern look or add industrial-style caster wheels for mobility. This elevates the table, making it more practical and visually appealing.
- Stain and Finish: Choose a wood stain that complements your décor. For a classic rustic vibe, a dark walnut or espresso stain works beautifully. Apply the stain evenly with a cloth or brush, then finish with a clear polyurethane coat for protection and durability.
- Optional Add-Ons: You can also add a glass top for a more refined finish or create a storage shelf between the pallets for magazines, remotes, or decor items.
Styling Tip: Embrace the Farmhouse Charm
Pair your rustic pallet table with cozy textiles like woven rugs, plaid throws, or a jute area rug. Decorate the tabletop with a vintage tray, mason jar candles, a stack of hardcover books, or a small succulent arrangement to enhance the farmhouse aesthetic. The key is to keep it natural, warm, and inviting.
2. Industrial Pipe Frame Coffee Table
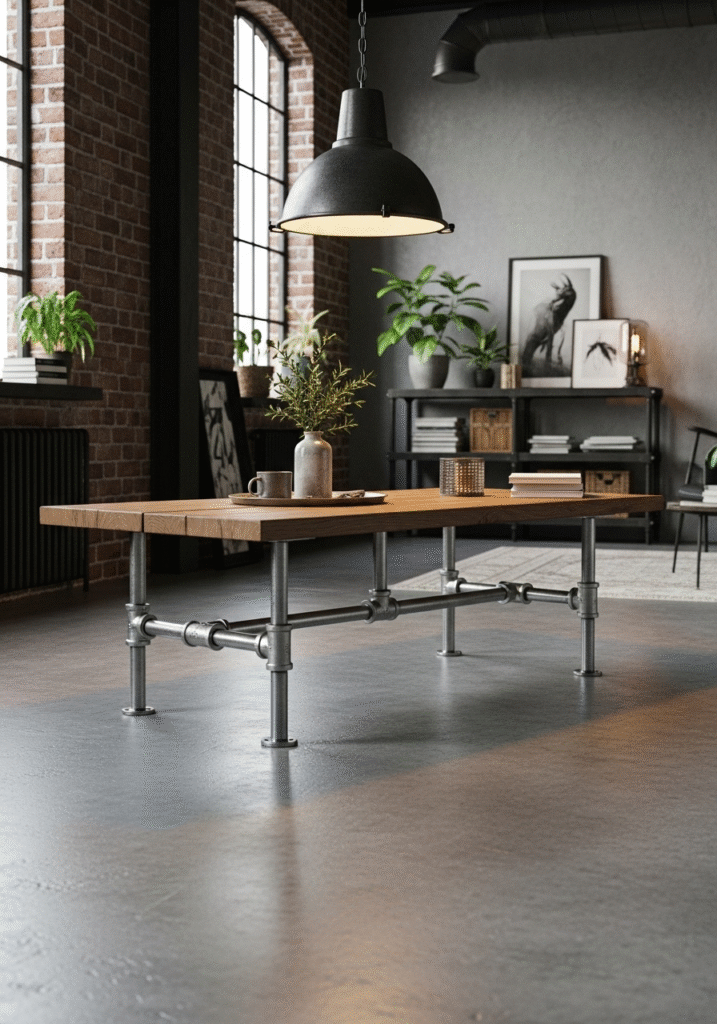
If you’re drawn to the sleek, raw aesthetics of urban lofts and modern warehouses, the industrial pipe frame coffee table is a must-try DIY project. This design blends rugged materials—such as steel plumbing pipes and solid wood—into a sturdy, functional, and visually striking furniture piece. It’s the perfect combination of form and function for those who love a minimalist, edgy interior style.
Why Choose an Industrial Design?
The industrial look is all about exposing structure and embracing raw beauty. It highlights materials in their most natural state—think steel, iron, wood, and concrete. A pipe-frame coffee table embodies this ethos, giving your living room an urban, masculine energy while still being warm and inviting when paired with the right décor. The metal frame brings durability and character, while the wood top offers contrast and texture.
Materials You’ll Need:
- Galvanized steel pipes (various lengths, typically ¾” or 1” diameter)
- Pipe fittings (T-joints, elbows, floor flanges)
- Thick wooden plank or butcher block for the tabletop
- Pipe wrench or pliers
- Wood screws
- Sandpaper and wood stain or finish
Optional: Furniture felt pads (to protect your floor), clear coat for metal (to prevent rust)
How to Build an Industrial Pipe Coffee Table
- Plan and Measure: Decide on your table’s dimensions based on your space. A standard coffee table is about 16–18 inches tall and 36–48 inches long.
- Assemble the Pipe Frame:
Begin building the table base using the galvanized steel pipes and fittings.- Use T-joints and elbows to form the corners and legs.
- Secure each joint tightly with a pipe wrench.
- Attach floor flanges at the base of each leg to stabilize the table and allow for floor protection pads if needed.
- Prepare the Wooden Top:
Sand the plank to smooth the surface and edges. Apply your desired wood stain—dark walnut, weathered gray, or natural oak are great choices depending on the vibe you want. Once dry, apply a protective finish like polyurethane or linseed oil to seal and enhance the wood grain. - Attach the Top:
Center the pipe frame beneath the wood top and screw the metal flanges into the underside of the wood using wood screws. Ensure it’s secure and level before placing it upright. - Optional Customizations:
- Add a lower shelf using another wood plank and more pipes for extra storage.
- Spray paint the pipes matte black or bronze for a different industrial finish.
- Use reclaimed wood for a more eco-conscious and rustic twist.
Perfect For:
This coffee table fits beautifully in loft-style apartments, urban studios, and modern industrial homes. It also works well in spaces with concrete floors, exposed brick walls, or high ceilings with visible beams and ductwork. Pair it with leather furniture, metal accents, and Edison bulb lighting for a cohesive look.
Style Tip:
Decorate the tabletop with minimal, masculine elements—think a steel tray, vintage books, a geometric sculpture, or a potted snake plant. A neutral-toned area rug underneath will help soften the overall look while grounding the table visually.
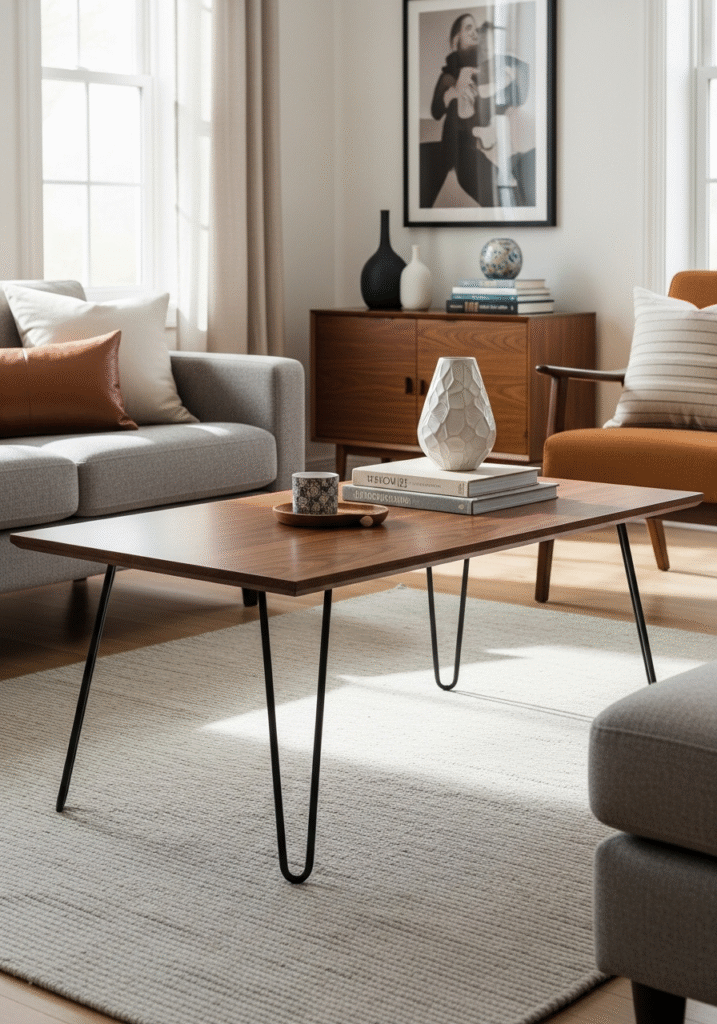
3. Mid-Century Modern Hairpin Table
The mid-century modern hairpin coffee table is a timeless piece that blends simplicity, elegance, and functionality. This DIY project is ideal for those who love clean lines, vintage flair, and minimalist aesthetics. Characterized by its iconic hairpin legs and simple wood top, this table adds sophistication and charm to any living space without overwhelming the décor.
Why Choose a Mid-Century Modern Style?
Mid-century modern design is known for its sleek lines, organic shapes, and focus on practicality. Popularized in the 1950s and 1960s, this style remains a staple in modern homes due to its versatility and timeless appeal. The hairpin-leg coffee table, in particular, embodies the essence of this era—offering a lightweight, airy look that pairs well with both retro and contemporary interiors.
Materials You’ll Need:
- Pre-made metal hairpin legs (usually 3 or 4 depending on table shape)
- Solid wood tabletop (circular, square, or rectangular)
- Wood stain or paint (optional based on desired finish)
- Polyurethane or sealant
- Screws and screwdriver or drill
- Sandpaper
Optional: Wood filler (for smoothing imperfections), rubber or felt leg caps (to protect floors)
How to Build a Mid-Century Hairpin Table
- Choose Your Wood Top:
Decide on the shape and size of your table—a round top offers a soft, retro look while a rectangular or oval top feels more modern. You can buy a pre-cut wood round from a hardware store or repurpose an old tabletop. - Prepare the Surface:
Sand the tabletop thoroughly to remove rough spots, old finishes, or imperfections. If desired, use wood filler to smooth out any cracks or holes. - Stain or Paint the Wood:
Apply your chosen stain to enhance the natural wood grain, or paint it for a bolder, colorful look. Warm walnut, honey oak, or matte black are popular choices for mid-century styles. After staining or painting, seal the wood with polyurethane to protect against wear and moisture. - Attach the Hairpin Legs:
Flip the tabletop over and position the hairpin legs evenly near each corner or edge. Use a pencil to mark the holes, then screw them into place using the included hardware or wood screws. Be sure to measure carefully to ensure the legs are balanced and straight. - Finishing Touches:
Add felt pads or rubber tips to the legs to prevent floor scratches. Flip the table upright, and you’re done!
Bonus Features: Lightweight and Portable
One of the best things about this table design is how lightweight and easy to move it is. The minimalist frame means you can rearrange your space with ease—perfect for small apartments, studios, or rooms where you like to change things up frequently. Despite its light feel, the steel hairpin legs are strong and durable, capable of supporting a solid wood top with ease.
Perfect For:
This DIY hairpin coffee table fits beautifully in mid-century modern, Scandinavian, boho, or contemporary interiors. It’s great for both small and large spaces due to its minimal footprint and airy visual appeal.
Style Tip:
Pair your hairpin table with a vintage rug, sleek sectional sofa, and accent décor in earthy tones or pastel colors. Add a ceramic vase with dried flowers, a stack of coffee table books, or a brass tray for a curated, designer-worthy look.
4. Farmhouse-Style Coffee Table
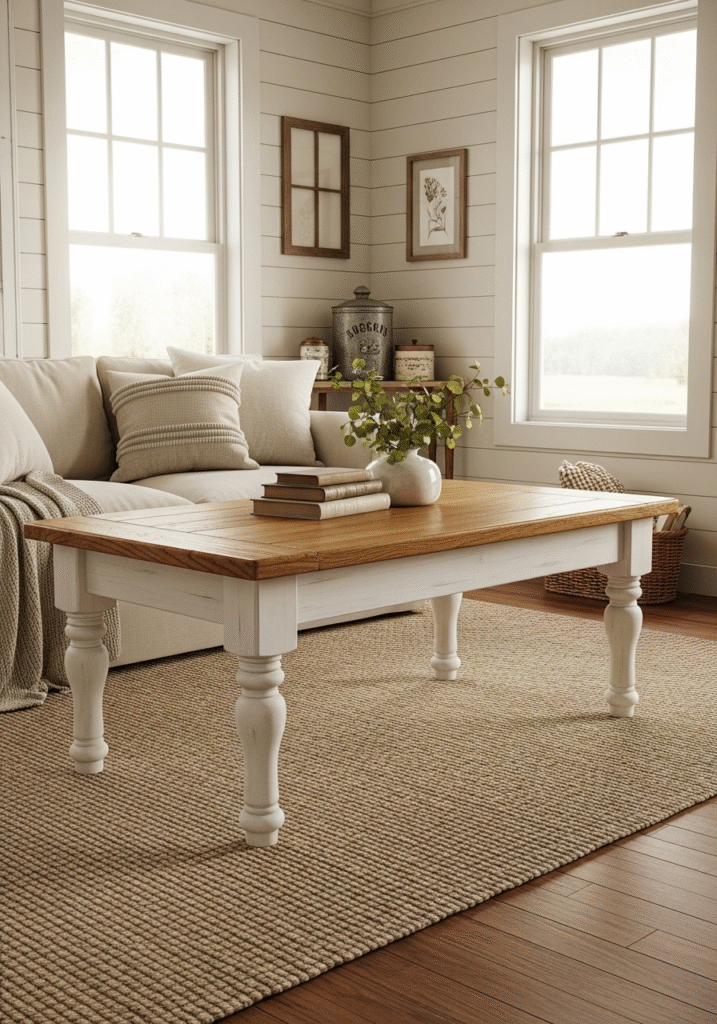
If you love the cozy, inviting charm of country living, a farmhouse-style coffee table is the perfect DIY project to bring that warmth into your home. With its sturdy construction, classic lines, and rustic elegance, this table design captures the essence of farmhouse decor—a timeless blend of comfort, simplicity, and craftsmanship.
Featuring turned wooden legs and a thick, solid top, this table looks like it came straight from a country cottage or vintage antique shop. Best of all, building one yourself allows you to customize the finish, size, and materials to perfectly suit your space and budget.
Why Choose Farmhouse Style?
The farmhouse aesthetic is all about creating a sense of home. It emphasizes natural materials, handcrafted details, and soft, neutral tones that make any space feel more relaxed and welcoming. A farmhouse-style coffee table acts as both a centerpiece and a conversation piece, anchoring your living room with rustic charm and a lived-in look that never goes out of style.
Materials You’ll Need:
- Pine boards or other softwood for the tabletop and apron
- Table legs (turning/spindle-style legs, available at home improvement stores or salvaged from old furniture)
- Wood glue
- Wood screws and pocket hole jig (optional but recommended)
- Sandpaper
- Wood stain and white paint or whitewash
- Clear protective finish (polyurethane or matte sealer)
Optional: Wood filler, clamps, decorative corner brackets
How to Build a Farmhouse-Style Coffee Table
- Build the Tabletop
Use pine boards or your preferred wood to create a thick, rustic tabletop. Cut your boards to size and join them side by side using wood glue and clamps. For a more polished look, use a pocket hole jig to screw them together from the underside, avoiding visible fasteners. - Add the Apron (Frame)
Cut apron boards (the horizontal frame around the legs) to fit under the tabletop. Attach them to the underside using screws and glue. The apron provides structure and support, keeping the table sturdy over time. - Attach the Legs
Screw in your turned or spindle legs—either pre-purchased or salvaged. These add the distinctive farmhouse flair and should be evenly spaced for stability. Use corner brackets or wooden blocks for extra support, especially if the legs are heavy. - Sand and Prep the Surfaces
Smooth all surfaces with sandpaper to remove any rough spots, glue residue, or splinters. Pay extra attention to the tabletop, as it will see the most use. - Apply the Farmhouse Finish
- Top: Choose a rich, warm wood stain like Early American, Provincial, or Dark Walnut for the tabletop. This enhances the natural grain and adds warmth to the piece.
- Base: For the classic two-tone farmhouse look, apply a whitewash or distressed white paint to the legs and apron. You can lightly sand the edges after painting for a weathered, vintage feel.
- Finish everything with a protective coat to seal the wood and prolong the life of your table.
Perfect For:
This table fits beautifully in farmhouse, cottagecore, coastal, and shabby chic interiors. It pairs especially well with slipcovered sofas, woven rugs, and vintage-inspired decor. Whether you’re furnishing a country home or just want to add rustic charm to a city apartment, this piece adds heart and soul to any space.
Style Tip:
Top your farmhouse table with a linen runner, a basket of seasonal greenery, or a trio of ceramic candle holders for that cozy, lived-in look. A distressed wooden tray holding a few books and a scented candle adds both style and function.
5. Vintage Trunk Table
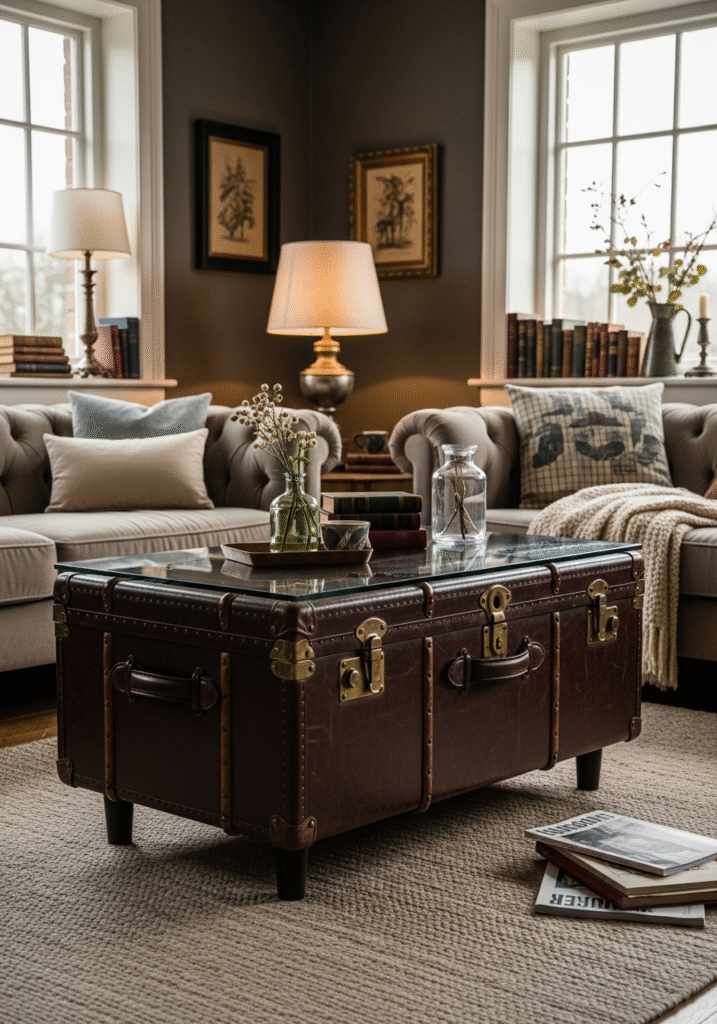
Looking for a coffee table that adds personality and hidden storage to your living room? A vintage trunk coffee table is a creative and stylish way to upcycle an old item into a functional, conversation-worthy centerpiece. This DIY idea combines rustic charm, practicality, and a touch of nostalgia—all in one unique piece of furniture.
Whether you’ve got an old travel trunk in the attic or you score one at a flea market or thrift store, transforming it into a coffee table is easier than you might think. And best of all, it offers hidden storage, making it perfect for small spaces or busy family living rooms.
Why Choose a Vintage Trunk Table?
Vintage trunks bring a sense of history, texture, and character to any space. With their worn leather handles, metal latches, and distressed finishes, these timeless pieces can evoke everything from antique glamour to boho charm. When repurposed as a coffee table, they create a bold focal point while offering practical storage—something most traditional tables lack.
Materials You’ll Need:
- Old trunk or steamer chest (metal, wood, or leather-covered)
- Short legs, hairpin legs, or caster wheels
- Wood screws and drill
- Glass top (optional but recommended for flat surface usability)
- Cleaning supplies (mild soap, soft cloth, polish)
- Protective felt pads or rubber leg tips
Optional: Leather conditioner (for older trunks), metal polish, interior fabric lining
How to Turn a Vintage Trunk Into a Coffee Table
- Find the Right Trunk
Look for a trunk that’s structurally sound. It doesn’t have to be perfect—scratches and patina add to the vintage charm—but it should close securely and be able to support weight. - Clean and Restore
Gently clean the exterior with mild soap and a damp cloth. If it’s a leather-covered trunk, use a conditioner to bring back softness and shine. For metal trims or latches, use metal polish to remove rust and restore detail. Inside, vacuum out any dust or debris, and consider adding a fresh fabric liner for a clean look. - Add Legs or Casters
Flip the trunk over and attach short furniture legs or casters to raise it to coffee table height (typically 16–18 inches). Hairpin legs give it a modern edge, while bun feet or antique legs enhance the vintage vibe. Use a drill and screws to secure the legs firmly to the trunk’s base. If the trunk is particularly heavy, consider additional support. - Optional: Add a Glass Top
If the trunk’s surface is uneven, a custom-cut glass top is a smart upgrade. It provides a flat, stable surface for drinks and décor while preserving the look of the trunk underneath. You can have one cut to size at most glass or home improvement stores. - Final Touches
Stick felt pads or rubber tips under the legs to protect your floor. You can also use interior dividers or fabric baskets to organize items inside the trunk.
Storage Win: Function Meets Style
One of the biggest benefits of a vintage trunk table is its built-in storage. It’s the perfect place to stash:
- Cozy throw blankets
- Coffee table books
- Remote controls and chargers
- Board games and puzzles
- Seasonal décor
This makes it a smart, stylish solution for small apartments, family rooms, or anyone who loves clutter-free spaces with charm.
Perfect For:
This DIY table suits a variety of home styles, including bohemian, industrial, eclectic, farmhouse, or traditional. It’s also a great piece for those who love mixing old with new—pair it with a modern sofa or a patterned rug for a curated, layered look.
Style Tip:
Top your vintage trunk table with a small tray to hold drinks or candles, a stack of antique books, or a decorative bowl. You can also drape a lightweight textile or runner over one corner for a soft, lived-in touch.
6. Concrete Top Coffee Table
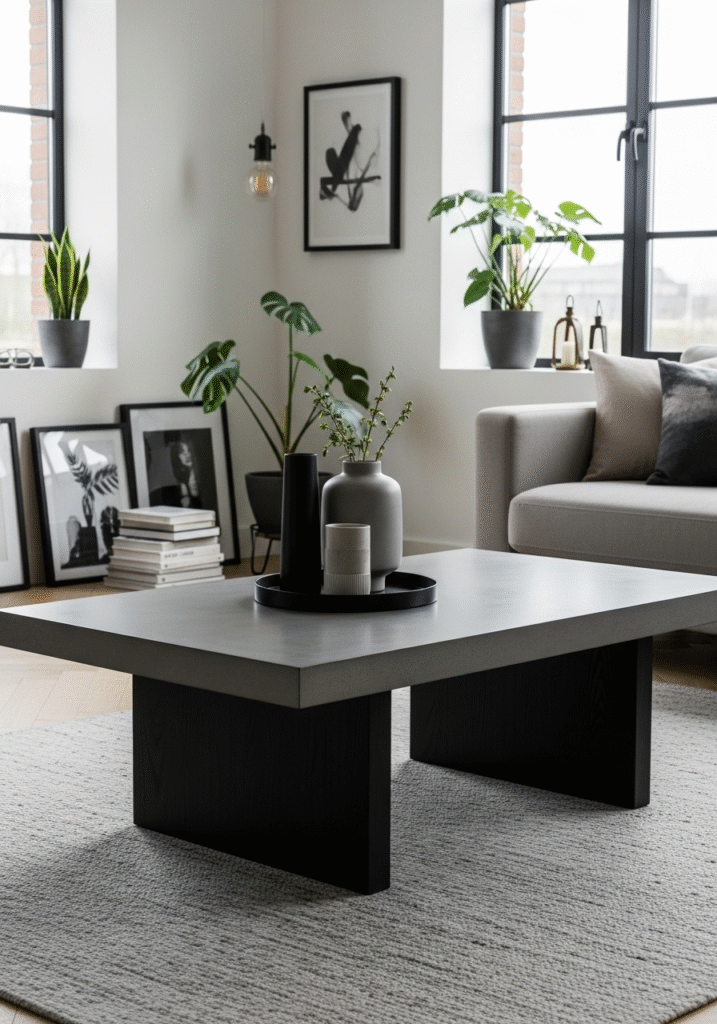
Looking to add a bold, modern statement piece to your living room? A concrete top coffee table offers the perfect combination of industrial style, durability, and minimalist beauty. With its clean lines and cool gray tones, concrete brings an architectural, contemporary edge to any space—making it a favorite for modern, loft-inspired, and Scandinavian interiors.
While concrete may sound like a complex material to work with, creating a custom concrete tabletop is surprisingly achievable with the right tools, a bit of patience, and a simple mold. Pair it with a wooden or metal base, and you’ve got a one-of-a-kind piece that’s as stylish as it is sturdy.
Why Choose a Concrete Coffee Table?
Concrete furniture has grown in popularity due to its raw, elemental look and long-lasting strength. It resists wear, is easy to clean, and brings texture and visual weight to your room. Whether you prefer a refined industrial aesthetic, a minimalist vibe, or a bold centerpiece with contrast, a concrete top coffee table fits a wide range of styles.
It’s also highly customizable—you can alter the shape, color (yes, concrete can be tinted!), and finish to suit your taste.
Materials You’ll Need:
- Concrete mix (preferably quick-set or countertop-grade concrete)
- MDF or melamine boards (to create the mold)
- Screws and drill (for mold assembly)
- Cooking spray or mold release agent
- Rebar, wire mesh, or fiberglass mesh (for reinforcement)
- Trowel and mixing bucket
- Sander or orbital polisher
- Concrete sealant (matte or glossy)
- Base frame (wood or metal legs)
- Construction adhesive or screws (to attach the base)
Optional: Concrete color pigment, edge trimmer, silicone caulk (for smooth edges)
How to Build a Concrete Top Coffee Table
- Build the Mold
Use melamine or MDF boards to construct a mold in the size and shape of your desired tabletop. Melamine is ideal because its smooth surface prevents sticking. Seal all the edges with silicone caulk to prevent concrete leaks and ensure crisp, smooth sides. - Apply Mold Release
Spray the inside of the mold with cooking spray or a mold release product to make it easier to remove once the concrete has cured. - Mix and Pour the Concrete
Prepare the concrete according to the package instructions. Pour it into the mold about halfway, then place your wire mesh or rebar for added strength. Fill the mold completely and use a trowel to level the surface. Tap the sides with a rubber mallet or shake the mold to remove air bubbles for a smoother finish. - Let It Cure
Allow the concrete to cure for at least 24–48 hours, depending on the mix. Once fully set, carefully remove the mold and smooth any rough edges with sandpaper or a concrete polisher. - Seal the Surface
Concrete is porous and can stain easily, so it’s essential to apply a concrete sealant. Choose between matte, satin, or glossy finishes depending on the look you prefer. Sealing also helps protect the surface from water rings, food stains, and scratches. - Attach the Base
Mount your concrete top onto a wooden or metal base using construction adhesive or screws. A warm-toned wood base creates beautiful contrast with the cool concrete, while a sleek metal frame enhances the industrial feel.
Perfect For:
This table design fits seamlessly in industrial lofts, modern apartments, minimalist homes, and contemporary living rooms. It’s especially effective in open-plan spaces where you want a furniture piece that stands out while staying clean and unfussy.
Style Tip:
Because concrete has a cool, neutral tone, pair it with soft textures to warm up the room—like a woven area rug, linen sofa, or plush throw pillows. Use wood, leather, or brass accents to introduce warmth and balance the table’s industrial vibe. A low-profile tray or ceramic planter on top adds a perfect finishing touch.
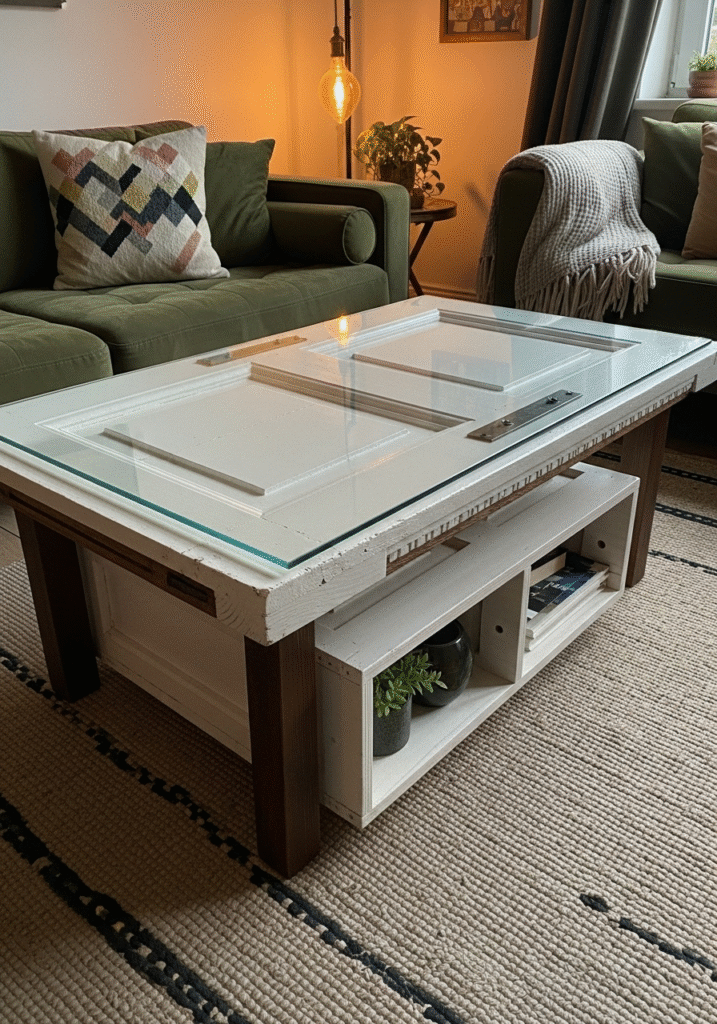
7. Repurposed Door Table
If you love the idea of turning something old into something beautiful and functional, a repurposed door coffee table is the perfect DIY project. With a bit of vision and craftsmanship, an old, discarded door can be transformed into a stunning and unique centerpiece for your living room. Whether it features classic paneling, ornate carvings, or distressed paint, a vintage door offers instant character and charm—making it a budget-friendly and eco-conscious choice.
This project is perfect for anyone who appreciates upcycling, sustainability, and one-of-a-kind furniture pieces that tell a story.
Why Use an Old Door?
Old doors are often crafted from solid wood and feature beautiful panel details, molding, or decorative accents that can’t be easily replicated with modern manufactured furniture. They provide a flat, strong surface and are available in a range of sizes, making them ideal for tabletops. Best of all, using a salvaged door keeps it out of the landfill and gives it new life in your home.
Whether you’re going for a farmhouse, vintage, shabby chic, or even industrial look, the versatility of this design makes it easy to match your interior style.
Materials You’ll Need:
- Old wooden door (solid wood preferred; avoid hollow core)
- Circular saw or jigsaw (to cut to size if needed)
- Sandpaper or electric sander
- Wood paint or stain
- Table legs or base frame (wood or metal)
- Glass top (optional for a smooth surface)
- Wood screws, brackets, and drill
- Wood filler (optional)
- Sealant or polyurethane
Optional: Additional door for a lower shelf, casters for mobility, decorative corner braces
How to Build a Repurposed Door Coffee Table
- Select the Right Door
Look for an old, solid wood door at flea markets, salvage yards, thrift stores, or even construction sites. Panel doors with symmetrical sections work especially well. Check for cracks, rot, or structural weakness before purchasing or picking it up. - Cut and Prep the Door
Measure and cut the door to your desired size using a circular saw or jigsaw. Standard coffee table dimensions are about 36–48 inches in length and 16–18 inches in height (including legs).- Sand down the entire surface, edges, and corners to remove rough spots, old finishes, and dirt.
- Use wood filler to repair any deep scratches or holes, if necessary.
- Paint or Stain
Choose a finish that matches your décor. For a farmhouse or shabby chic look, go with a distressed white paint or chalk paint and gently sand the edges to add a vintage feel. For something more modern or rustic, opt for a dark wood stain or a natural finish that highlights the grain.
Once finished, seal the surface with polyurethane to protect against wear and spills. - Add a Glass Top (Optional but Recommended)
Doors often have raised panels or grooves that create an uneven surface. A custom-cut glass top not only gives you a smooth, functional surface for drinks and décor but also enhances the table’s appearance while preserving the door’s details beneath. Make sure to use tempered glass for safety. - Attach Legs or Base
Choose from a variety of leg styles depending on your preferred look—hairpin legs for mid-century modern, turned wood legs for a traditional feel, or industrial metal legs for an urban edge. Secure them evenly using wood screws or brackets. - Add Extra Storage (Optional)
Want more functionality? Use a second door or wooden shelf underneath as a bottom tier. Attach it using additional legs or support brackets, giving you space to store books, magazines, or baskets.
Bonus Tip: Add Casters for Mobility
For added convenience, install four caster wheels at the bottom of the legs. This makes it easy to move your table around—a smart choice for multi-functional living rooms or small spaces.
Perfect For:
This DIY coffee table is ideal for vintage lovers, farmhouse decorators, eco-conscious upcyclers, and anyone who enjoys mixing old-world charm with modern function. It works beautifully in cozy living rooms, reading nooks, or even covered porches.
Style Tip:
Decorate your door table with antique books, a small ceramic vase, and a candle tray to enhance its vintage appeal. Layer it over a woven rug or place it beside distressed furniture pieces to complete the look.
8. Crate-Style Storage Table
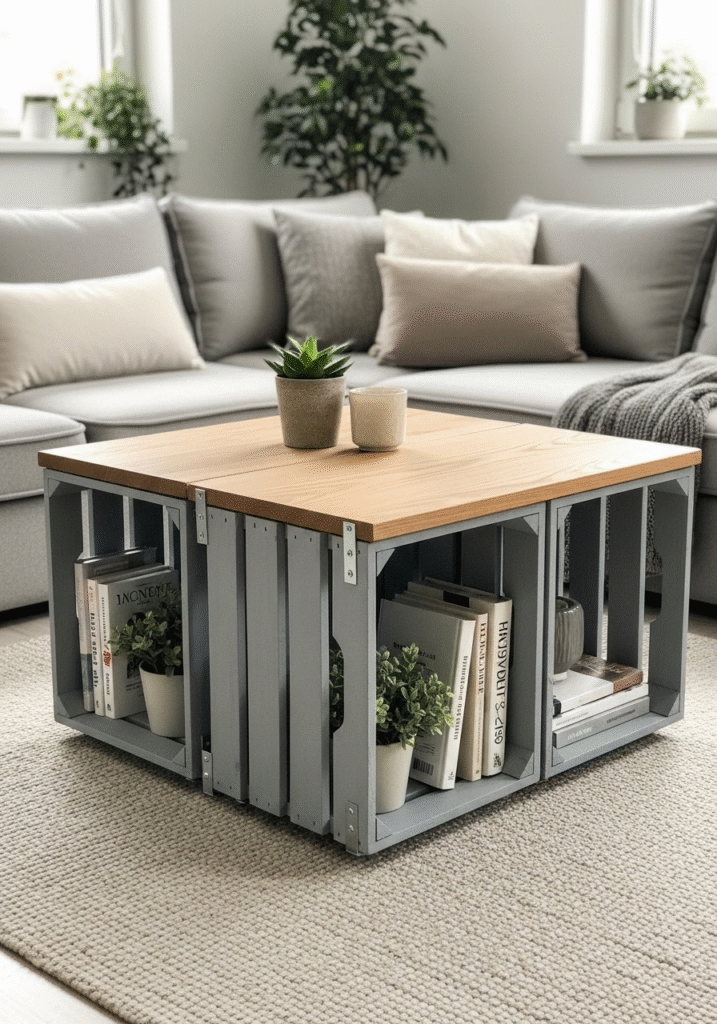
If you’re short on space but big on creativity, a crate-style storage coffee table is the perfect DIY solution. This project is affordable, highly functional, and easily customizable, making it a favorite among apartment dwellers, renters, and small-home enthusiasts. Built using simple wooden crates, this table not only serves as a stylish centerpiece but also provides ample storage space for everyday essentials like books, magazines, blankets, or games.
Whether you’re looking to organize your living room or add a touch of rustic charm, this crate-style table is both budget-friendly and versatile—a great project for DIY beginners and seasoned makers alike.
Why Choose a Crate Coffee Table?
Crate furniture has grown in popularity due to its modular design, rustic look, and adaptability. Wooden crates are inexpensive, easy to find at craft stores or home improvement centers, and offer built-in storage that’s perfect for tight spaces. By arranging them in different layouts or painting them to match your décor, you can create a coffee table that is truly your own.
Plus, since crates are lightweight and easy to move, this table works especially well in small apartments, dorms, or multipurpose living areas where flexibility is key.
Materials You’ll Need:
- 4 wooden crates (standard size, unfinished or pre-stained)
- Wood screws and drill
- Wood glue (optional, for added strength)
- Sandpaper or electric sander
- Stain or paint (optional for finish)
- Top board or plywood sheet (optional if you want a flat tabletop)
- Caster wheels (optional for mobility)
- Protective sealant or polyurethane
Optional: Center storage box or basket, felt pads, hinges for hidden compartments
How to Build a Crate-Style Coffee Table
- Prepare the Crates
Start by sanding each crate to remove rough edges or splinters. If you’re going for a rustic or farmhouse look, you can leave them unfinished. Otherwise, paint or stain the crates in your desired color. White, gray, espresso, or natural pine are popular choices for versatile decor. - Arrange the Crates
Lay the crates on their sides and position them in a square formation, with the openings facing outward. This creates four cubby-style compartments—perfect for storage baskets, books, or decor. You’ll notice a square-shaped opening in the center, which can be used for additional storage or décor like a basket, lantern, or plant. - Secure the Structure
Use wood screws and a drill to secure the crates to each other. Apply wood glue at the seams for extra strength. Make sure everything is aligned and level before tightening the screws. - Add a Top Board (Optional)
For a smoother, more traditional tabletop, you can add a flat wood board or a piece of tempered glass on top. This makes the table more functional for holding drinks or décor. If left open, the crate tops can still be used for casual surfaces but may not be perfectly flat. - Attach Wheels or Feet (Optional)
If you want to make the table mobile, add caster wheels to the bottom corners. This is especially useful for small living rooms or spaces where furniture needs to move easily. Alternatively, you can add short legs or rubber feet for a more elevated look. - Seal and Protect
Finish the table with a coat of polyurethane or wood sealant to protect it from scratches, stains, and wear. This step is especially important if you plan to use it daily.
Perfect For:
This crate-style storage coffee table is ideal for small spaces, studio apartments, kids’ play areas, and even entryways. It combines form and function, giving you a stylish centerpiece with plenty of built-in storage—no need for extra shelves or bins.
Style Tip:
Customize your crate table to match your interior.
- For a modern look, paint the crates matte black or navy and pair with a glass top.
- For a rustic vibe, use a weathered stain and add rope handles or metal accents.
- Add labeled baskets in each cubby to keep things tidy and visually appealing.
Top the table with a small tray, a stack of books, or a candle holder to complete the look without losing functionality.
Keep your entryway organized and clutter-free with our easy guide on How to Make a Shoe Rack using simple materials.
9. Marble Contact Paper Table
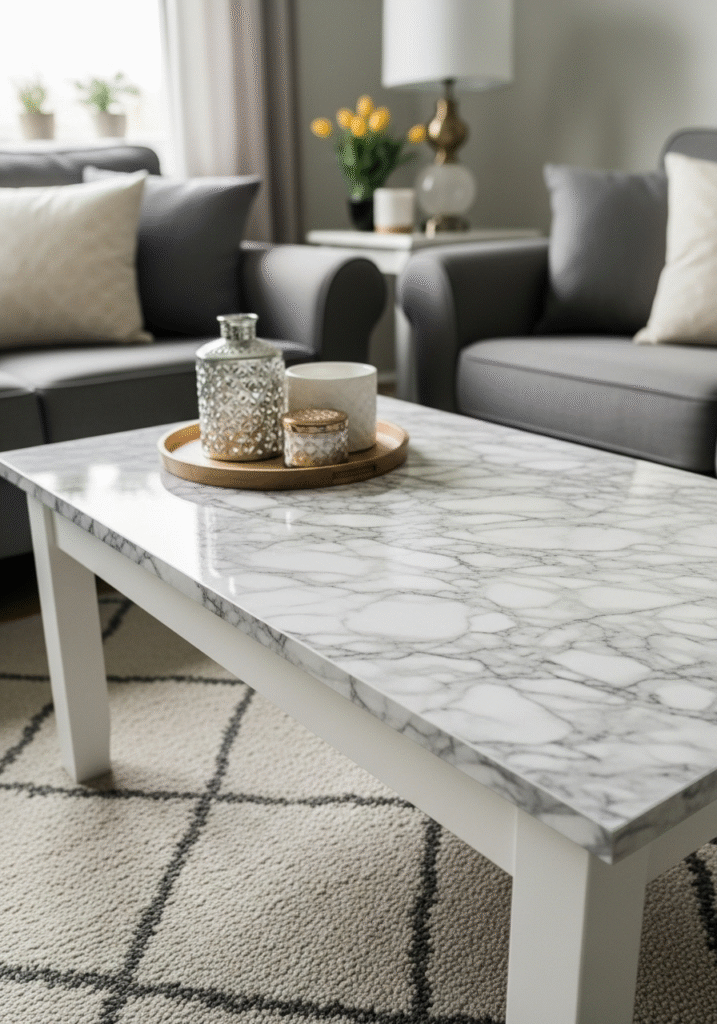
If you’re dreaming of a high-end, marble coffee table but working with a tight budget, this marble contact paper table hack is the perfect DIY solution. With just a few inexpensive materials, you can transform a plain wooden table into a glamorous, modern showpiece that mimics the luxurious look of real marble—at a fraction of the cost.
This DIY project is simple, renter-friendly, and great for beginners. It’s also a fantastic way to give new life to an old or thrifted table using minimal tools, making it ideal for those who want style without spending hundreds.
Why Choose Marble Contact Paper?
Real marble is heavy, expensive, and difficult to maintain. In contrast, marble adhesive paper is affordable, easy to apply, and widely available in a variety of realistic patterns. When properly sealed, it creates a sleek, wipeable surface that’s surprisingly durable and visually stunning.
This project gives your living room a chic, polished look—perfect for modern, glam, minimalist, or Scandinavian interiors. Plus, it’s fully customizable. You can choose from white Carrara marble, dark marquina, or gray veining patterns to match your décor style.
Materials You’ll Need:
- Basic wood table (new, used, or thrifted)
- Marble contact paper / adhesive vinyl
- Utility knife or X-Acto blade
- Squeegee or credit card (to remove bubbles)
- Ruler or measuring tape
- Clear epoxy resin or polyurethane sealant (for durability)
- Painter’s tape (optional for clean resin edges)
- Sandpaper (for prepping the surface)
- Cleaning wipes or cloth
Optional: Gold or brass spray paint (for legs), furniture feet pads
How to Create a Marble Contact Paper Coffee Table
- Choose Your Table Base
Start with a clean, flat-surfaced table. This could be a budget-friendly IKEA table, a small thrift store find, or even a repurposed side table. The smoother the surface, the better the results with contact paper. - Prep the Surface
- Clean the table thoroughly with a damp cloth to remove dust and oils.
- Lightly sand any shiny or slick surfaces so the adhesive sticks better.
- Wipe off any residue and let it dry completely before proceeding.
- Apply the Contact Paper
- Measure and cut your contact paper, leaving a few extra inches on each side for wrapping.
- Peel off the backing slowly and apply from one side to the other, using a squeegee or credit card to smooth out air bubbles as you go.
- For corners and edges, carefully cut slits and fold the paper underneath for a seamless look. Use your utility knife for trimming excess.
- Seal the Surface (Optional but Recommended)
For added durability and a glossy, glass-like finish, seal your contact paper with a clear epoxy resin or a water-based polyurethane.- Tape off the table edges with painter’s tape.
- Mix and pour the resin over the surface, spreading it evenly with a brush or paddle.
- Let it cure fully (usually 24–72 hours depending on the product) for a hard, protective coating that resists scratches, spills, and heat.
- Upgrade the Legs (Optional)
Spray paint the legs gold, brass, or matte black for a designer look that complements the faux marble top. Metallic tones pair especially well with the luxe marble aesthetic.
Perfect For:
This faux marble coffee table is ideal for small apartments, glam living rooms, modern interiors, home offices, or even as a vanity or side table. It gives you a high-end look with zero risk—great for renters or anyone decorating on a budget.
Style Tip:
Enhance your marble table’s elegance with accents like a brass tray, white candles, a geometric vase, or a stack of glossy magazines. Pair it with velvet furniture, metallics, or monochrome decor for a chic and cohesive vibe.
10. Tree Stump Table
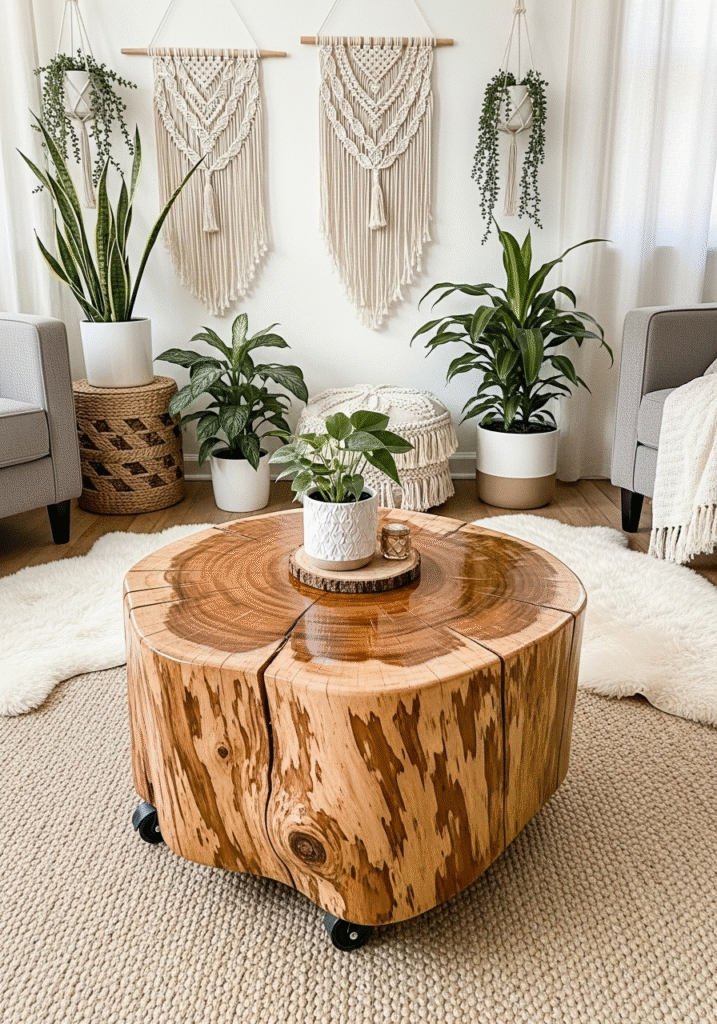
Bring a touch of the outdoors into your living space with a tree stump coffee table—a DIY project that celebrates the raw beauty of nature. These tables are rustic, earthy, and full of organic charm, making them the perfect accent piece for boho, farmhouse, Scandinavian, or rustic interiors. Each stump is naturally one-of-a-kind, with unique rings, cracks, and grain patterns that tell the story of the tree it came from.
Whether you find your stump during a backyard cleanup or source one from a firewood supplier or arborist, turning it into a coffee table is easier than it seems—and the results are stunning.
Why Choose a Tree Stump Table?
Natural wood furniture has a timeless appeal that adds warmth, texture, and character to any room. A tree stump table is more than just a trend—it’s a sustainable, artistic statement that showcases nature’s imperfections in the most beautiful way. Unlike mass-produced tables, your finished piece will be completely unique, with no two stumps ever looking the same.
Plus, it’s incredibly versatile—use it as a main coffee table, a side table, or even as a plant stand in smaller spaces.
Materials You’ll Need:
- Tree stump (cut to size—ideally 16–18 inches tall)
- Sandpaper or electric sander (coarse and fine grit)
- Chisel or drawknife (to remove bark, if desired)
- Wood filler (optional)
- Clear polyurethane or wood sealant
- Caster wheels or short legs (optional)
- Protective gloves and mask
- Drying space (for seasoning the stump)
Optional: Wood bleach (to lighten the stump), leveling tool, linseed oil for a more natural finish
How to Make a Tree Stump Coffee Table
- Dry the Stump Properly
Before working with your stump, make sure it’s completely dry to avoid cracking or mold over time.- Let it season (dry out) for at least a few weeks to several months, depending on its moisture level and environment.
- Store it in a dry, well-ventilated area—indoors is best. You’ll know it’s ready when it feels dry to the touch and no longer leaks sap.
- Remove the Bark (Optional)
Some DIYers prefer to keep the bark for a rustic look, but it may flake over time.- To remove, use a chisel, pry bar, or drawknife to carefully peel off the bark.
- After removal, sand the exposed surface to smooth any ridges or rough spots.
- Sand the Surface Smooth
Use coarse-grit sandpaper to even out the top and sides, followed by fine-grit to achieve a smooth, splinter-free finish.- Pay special attention to the tabletop surface where items will sit.
- You can round off the edges slightly for a softer look.
- Fill and Level (If Needed)
- If there are large cracks or holes you don’t want to keep, fill them with wood filler.
- Use a level to make sure the top is flat, especially if you’re using the stump as a coffee table rather than a side table.
- Apply a Finish
To protect the wood and enhance the grain, apply clear polyurethane or your choice of wood finish.- For a glossy look, apply 2–3 coats of polyurethane with light sanding in between.
- For a more natural, matte finish, use Danish oil or linseed oil.
- Let each coat dry fully before applying the next.
- Add Legs or Casters (Optional)
If you want extra height or mobility, attach short hairpin legs, metal feet, or caster wheels to the base.- This also helps protect floors and allows easier cleaning underneath.
- Use screws or brackets depending on the hardware.
Perfect For:
A tree stump table fits seamlessly into bohemian, rustic, cabin-style, nature-inspired, or even Scandinavian modern homes. Its organic form softens minimalist spaces and adds contrast to modern materials like metal, glass, or concrete.
Style Tip:
Place your tree stump table atop a woven or jute rug, and top it with a simple ceramic vase, candles, or a stack of design books. Pair it with plants, macramé wall hangings, or leather furniture to complete the boho or nature-themed vibe.
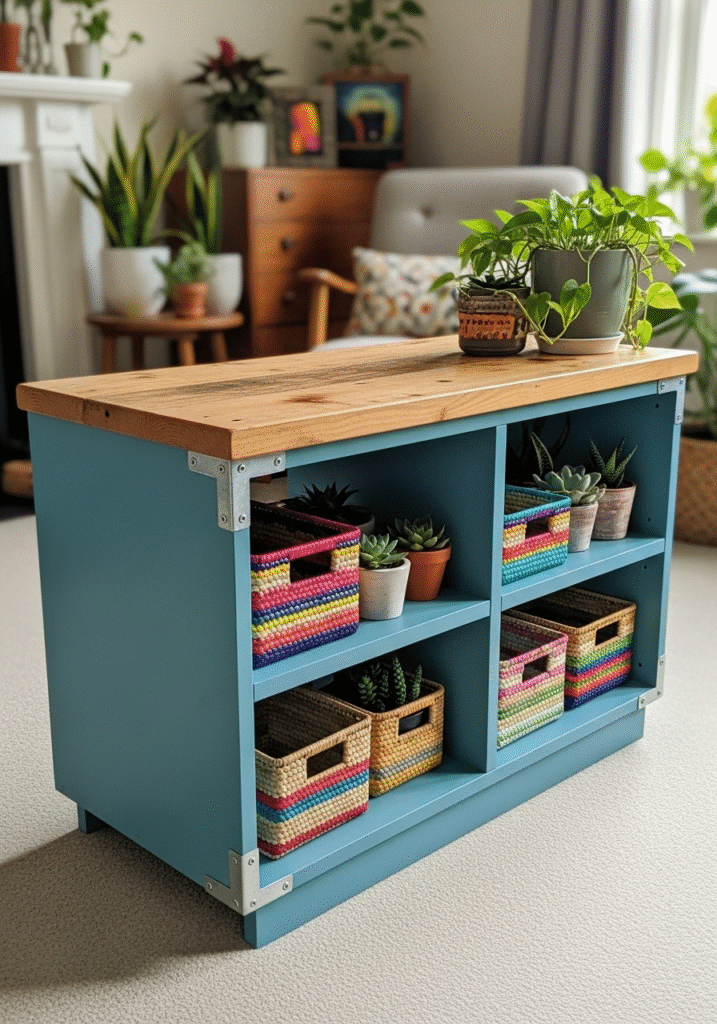
11. Bookshelf Coffee Table
Looking for a creative and practical DIY coffee table idea? The bookshelf coffee table is a clever upcycling project that turns a simple storage unit into a multifunctional centerpiece. By flipping a bookshelf on its side and giving it a stylish makeover, you can create a unique coffee table that combines form and function — offering a sleek surface for décor and built-in cubbies for books, baskets, or blankets.
This project is perfect for anyone who wants extra storage without sacrificing style, and it works especially well in small spaces, apartments, or family-friendly homes where organization is key.
Why Choose a Bookshelf Coffee Table?
This DIY solution is ideal if you:
- Have an old or unused bookshelf collecting dust.
- Want to minimize clutter with hidden or organized storage.
- Love furniture that serves more than one purpose.
Instead of buying a pricey storage coffee table, you can repurpose furniture you already have or pick up a secondhand shelf at a thrift store for a fraction of the cost. With a little paint and a top board, your bookshelf becomes a custom piece of furniture that fits your space perfectly.
Materials You’ll Need:
- Bookshelf unit (low-profile works best; cube organizers are ideal)
- Wooden board or plywood (for the tabletop)
- Wood screws and drill
- Wood glue (optional for added reinforcement)
- Sandpaper or sander
- Paint or stain (and primer, if painting laminate)
- Storage bins or baskets (for organizing the interior)
- Caster wheels or furniture feet (optional)
- Sealant or polyurethane top coat
Optional: Decorative trim, edge banding, contact paper for inside panels
How to Make a Bookshelf Coffee Table
- Choose the Right Bookshelf
Look for a low and sturdy bookshelf—a cube organizer (like IKEA’s KALLAX or similar) works great. Avoid tall or flimsy units. You can use an old bookshelf you already own or buy an inexpensive one secondhand. - Reinforce the Structure
When turned on its side, the bookshelf will bear weight differently, so it’s important to reinforce the back and interior shelves.- Use wood screws and brackets to secure wobbly joints.
- Add a piece of plywood to the back for extra strength if needed.
- Sand and Prep for Paint
Lightly sand all surfaces to help the paint or stain adhere better, especially if your shelf has a glossy laminate finish. If painting, apply a primer before your final coat. - Paint or Stain the Bookshelf
Choose a color that complements your décor—white for a clean modern look, espresso or gray for a classic feel, or bold tones like navy or emerald for a statement piece. For a rustic style, stain the bookshelf to highlight the wood grain. - Add a Top Board
Cut a wooden board or plywood sheet to the dimensions of your bookshelf’s top surface. Sand the edges and either paint or stain it to match or contrast with the base.- Secure it with wood glue and screws for a sturdy finish.
- Optional: Add decorative trim or edge banding for a more polished look.
- Install Casters or Legs (Optional)
Want to make your table mobile or raise it slightly? Attach casters or short furniture legs to the bottom using screws. This also helps elevate the piece for better airflow and ease of cleaning. - Style the Storage
Insert bins, baskets, or fabric boxes into the cubby spaces for a clean, organized appearance. Use them to store:- Magazines and books
- Remote controls
- Toys and games
- Chargers and small electronics
- Decorative accents like candles or vases
Perfect For:
A bookshelf coffee table works beautifully in modern apartments, family rooms, small spaces, and kids’ play areas. It’s also a great addition to studio apartments where space-saving, dual-purpose furniture is essential.
Style Tip:
Top your table with a decorative tray to hold drinks, candles, or small plants. Add a linen runner across the surface to soften the look and balance the straight lines of the bookshelf base. Choose coordinating baskets to keep the cubbies tidy and color-cohesive with the rest of your space.
12. Window Frame Shadow Box Table
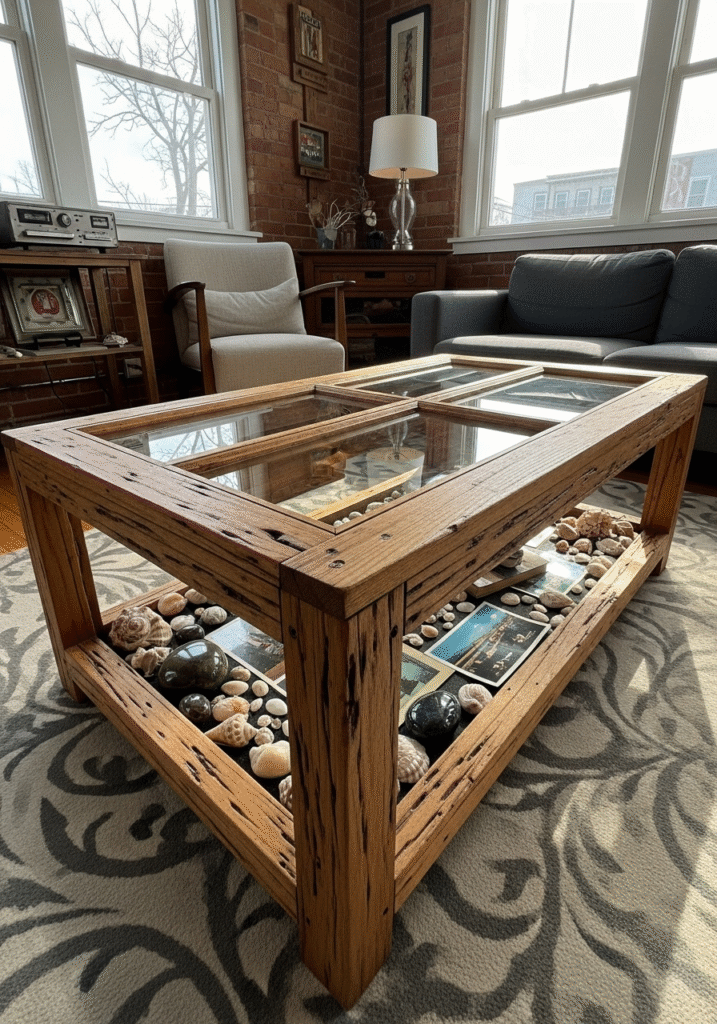
For a coffee table that tells a story and sparks conversation, look no further than the window frame shadow box table. This creative and nostalgic DIY project transforms a reclaimed window frame into a unique and functional coffee table, complete with a glass top and a built-in display compartment underneath. It’s the perfect combination of form, function, and personal expression—designed to showcase your favorite items while serving as a stylish focal point in your living room.
Whether you’re a vintage lover, a collector of small treasures, or simply looking for a standout piece of furniture, this table offers timeless charm and endless customization options.
Why Choose a Window Frame Shadow Box Table?
This table isn’t just furniture—it’s a display case, memory keeper, and work of art all rolled into one. Using a reclaimed window frame gives the table an authentic, rustic feel while allowing you to display meaningful items such as:
- Vintage postcards or photographs
- Natural elements like shells, stones, or dried flowers
- Souvenirs and travel mementos
- Artwork, kids’ drawings, or seasonal decorations
The glass top makes everything visible while protecting the display from dust, spills, and damage, creating a mini museum in your living room.
Materials You’ll Need:
- Old window frame with intact glass panes (or have glass cut to size)
- Wood for building the box frame (1×4 or 1×6 boards work well)
- Hinges and screws (to allow the top to open for changing displays)
- Drill and wood glue
- Sandpaper or sander
- Paint or wood stain
- Table legs or a base frame
- Plywood or MDF (for the shadow box base)
- Protective finish or polyurethane
- Display materials (small objects, photos, fabric lining)
Optional: Latch or clasp to secure the top, LED strip lighting inside the shadow box for dramatic effect
How to Make a Window Frame Shadow Box Coffee Table
- Source a Window Frame
Look for an old window at architectural salvage yards, flea markets, or thrift stores. Choose one with intact glass and a sturdy wooden frame. The size of the frame will determine your table’s dimensions. - Build the Shadow Box Base
- Use 1×4 or 1×6 boards to construct a rectangular box the same dimensions as your window frame.
- Cut a plywood or MDF sheet to fit the bottom and secure it with screws or glue.
- Sand all surfaces smooth and fill any gaps or imperfections with wood filler.
- Attach the Window Frame as a Lid
- Secure the window frame to the top of the shadow box using hinges on one side. This allows you to open the top and change or update your display items inside.
- Optionally, add a small latch or hook on the opposite side to keep it closed securely.
- Finish the Table
- Paint or stain the entire table, including the frame, box, and legs. You can distress the finish for a vintage look or use bold colors for a modern twist.
- Apply a protective sealant like polyurethane to preserve the finish and protect against spills.
- Add Legs or Base
Choose legs that match your style—turned wood legs for a farmhouse feel, hairpin legs for a mid-century modern look, or metal frames for industrial edge. Secure them firmly with screws or brackets. - Style the Shadow Box Display
- Line the bottom of the box with fabric, scrapbook paper, or velvet to enhance the presentation.
- Arrange your items—such as photos, collectibles, nature finds, or small trinkets—inside the box.
- Optional: Add LED strip lights or fairy lights for illumination and ambiance.
Perfect For:
The window frame shadow box table is ideal for vintage lovers, crafters, artists, memory keepers, or anyone who enjoys decorating with personal meaning. It fits beautifully in boho, rustic, coastal, farmhouse, cottagecore, or eclectic homes and makes a striking centerpiece in a living room, sunroom, or creative studio.
Style Tip:
Place the table over a textured rug and surround it with cozy furniture. Inside the shadow box, rotate your items seasonally—think autumn leaves in fall, ornaments in winter, or pressed flowers in spring—for a table that changes with the year. Keep the top clutter-free to allow the display below to shine.
13. Hexagon Modular Coffee Table
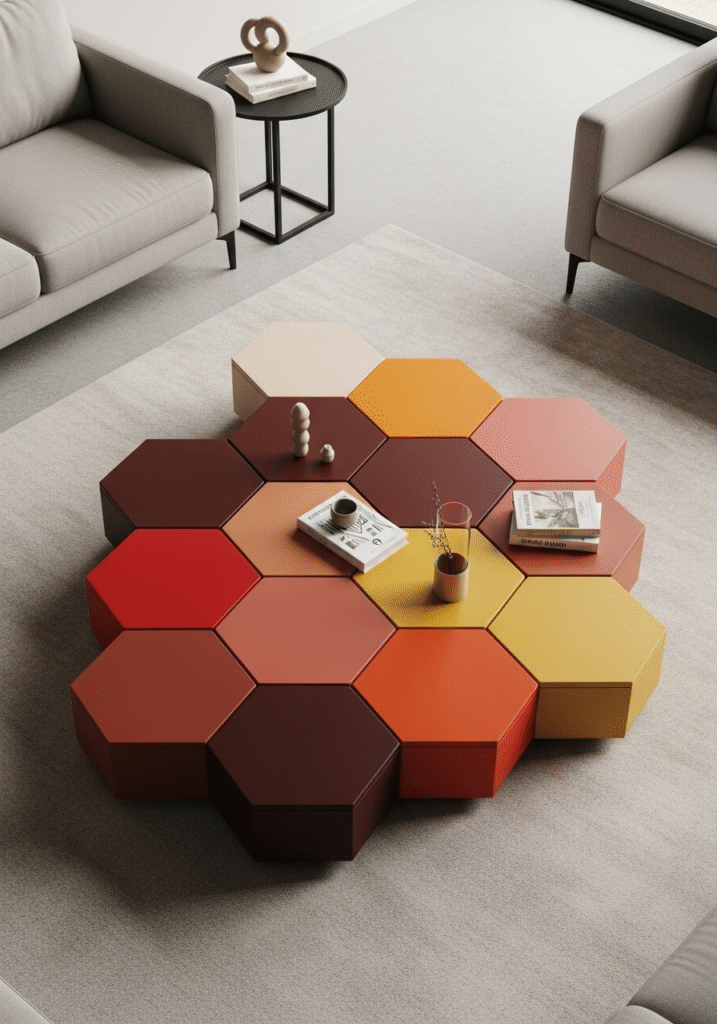
If you’re looking for a fresh, modern DIY project that’s both visually striking and incredibly functional, a hexagon modular coffee table is a brilliant choice. Inspired by geometric design and modern minimalism, these multi-unit tables are not only beautiful but also offer customizable flexibility for any room layout. Each table is shaped like a hexagon and can stand alone or be grouped together in different configurations, giving you complete control over how you style and use your space.
Perfect for contemporary, Scandinavian, or eclectic homes, this project is a fun, creative way to build functional art—right in your living room.
Why Choose a Hexagon Modular Table?
Unlike traditional coffee tables, the modular hexagon design allows for flexibility, creativity, and versatility. You can:
- Build 2–6 or more hexagonal units to create a large centerpiece or break them apart as needed.
- Rearrange the layout anytime—ideal for entertaining or changing seasons.
- Paint or stain each unit in coordinating or contrasting tones to match your room’s color scheme.
Whether you want to push the units together for one large statement piece or separate them into individual side tables, this design adapts to your needs and space—a dream for small apartments and open living areas alike.
Materials You’ll Need:
- Wood boards (e.g., pine or plywood)
- Miter saw or circular saw (for angled cuts)
- Wood glue and clamps
- Wood screws or nail gun
- Sandpaper or sander
- Paint or wood stain
- Measuring tape and protractor
- Protective finish or polyurethane
Optional: Furniture legs (hairpin, tapered, or block), caster wheels, felt pads
How to Build Hexagon Modular Coffee Tables
- Design Your Hexagon Units
A hexagon has six equal sides and interior angles of 120°. You can make each unit any size, but a side length of 8–10 inches typically works well for coffee tables.- Draw your template or use a hexagon jig if you’re cutting many units.
- Decide whether each unit will be fully enclosed (a solid top) or open (like a shadow box).
- Cut Wood Panels
Cut six trapezoid-shaped pieces per table to form the sides. Use a 30° angle on each end to allow them to come together in a perfect hexagonal shape.- Use a miter saw for precise angles.
- Optionally, cut a hexagonal top and base for each unit from plywood or MDF.
- Assemble the Hexagon
Arrange the six side pieces into a hexagon shape, applying wood glue at each joint. Clamp them together until dry. For extra strength, use screws or finishing nails.- Add the top and bottom panels using glue and screws, or leave the top open and cover with glass.
- Sand and Finish
Sand all edges and corners smooth, ensuring a consistent finish. Then apply your chosen paint, stain, or wood finish.- Consider painting each unit a different shade in the same color family (e.g., various grays or earth tones) for a subtle yet artistic effect.
- Seal with polyurethane to protect the finish.
- Add Legs or Leave as Floor Units
You can add hairpin legs or wooden feet for elevation, or keep them as low-profile floor units for a minimalist look. Adding caster wheels can turn them into easy-to-move storage pieces.
Perfect For:
The hexagon modular coffee table is ideal for modern, minimalist, geometric, boho, or Scandinavian-style interiors. It’s also a great project for:
- Small homes and apartments
- Open-concept living rooms
- Kids’ spaces (with smooth corners and customizable heights)
- Creative lounges or home studios
Style Tip:
Arrange your hex tables in a honeycomb layout or in a zigzag row to create movement and depth. Top each with small decor items like candles, plants, or books for a curated, gallery-like effect. You can also change the layout weekly for a fresh look without buying new furniture!
14. Upcycled Suitcase Coffee Table
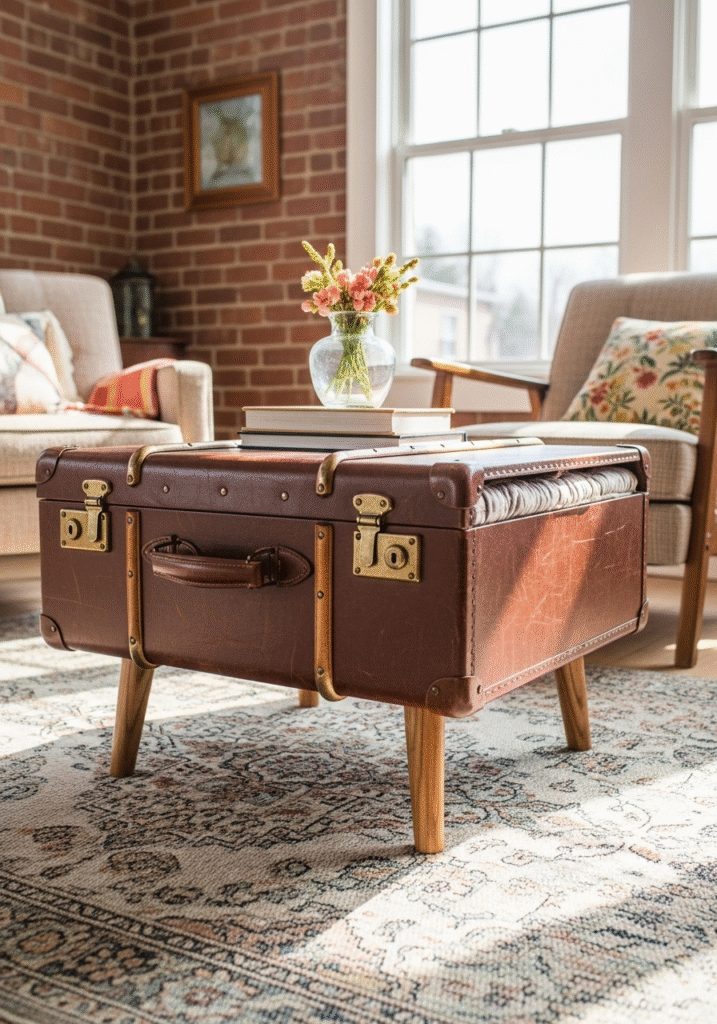
Looking for a truly unique DIY coffee table that adds personality, function, and vintage charm to your living room? An upcycled suitcase coffee table might be the perfect project. With just a few simple steps, you can turn an old, character-filled suitcase into a stylish and practical piece of furniture that serves as both a conversation starter and a hidden storage solution.
Whether you’re a fan of eclectic decor, vintage finds, or just love repurposing forgotten items, this DIY table blends history, creativity, and function—and can be completed in a weekend.
Why Choose an Upcycled Suitcase Table?
An upcycled suitcase coffee table is the perfect combination of quirky aesthetics and smart storage. Old suitcases, especially hard-shell or leather ones, often feature beautiful details like brass latches, aged patina, and travel stickers that can’t be replicated in mass-produced furniture. By adding legs and reinforcing the structure, you can breathe new life into a piece of history while giving your space a fresh focal point.
Plus, the interior doubles as hidden storage, making it perfect for small spaces where every bit of extra room counts.
Materials You’ll Need:
- Vintage or hard-shell suitcase (in good condition)
- Short wooden legs or furniture feet (4 pieces)
- Mounting plates for legs (angled or straight)
- Wood board or plywood (for internal support, optional)
- Drill, screws, and screwdriver
- Wood glue or epoxy (optional for reinforcement)
- Sandpaper or sander
- Interior lining materials (optional: fabric, velvet, or paper)
- Clear protective finish or furniture wax (optional)
Optional: Casters, decorative knobs or handles, leather conditioner for old cases
How to Make an Upcycled Suitcase Coffee Table
- Select the Right Suitcase
Look for a vintage suitcase at flea markets, thrift stores, estate sales, or even your attic. Choose one that’s sturdy, closes securely, and has minimal damage. Leather, hard plastic, or wood-reinforced cases are ideal. - Reinforce the Base
Depending on the suitcase’s construction, the bottom might not be strong enough to support weight.- Cut a piece of plywood to fit snugly inside the base for added support.
- Secure it with wood glue or epoxy and screws, if needed, through the suitcase’s bottom into the wood panel.
- Attach the Legs
- Mark and drill holes for the mounting plates on each corner of the suitcase bottom.
- Attach the legs securely using screws. Choose wooden legs in mid-century, turned, or modern styles based on your decor.
- Optionally, add casters for mobility or elevate with taller legs to use as a standing storage piece.
- Sand and Finish (Optional)
- If the legs are raw wood, sand and stain or paint them to match the suitcase or complement your room’s style.
- You can also apply furniture wax or clear sealer to the suitcase exterior to protect and preserve its vintage charm.
- Customize the Interior (Optional)
- Line the inside of the suitcase with fabric, velvet, or wallpaper to make it more elegant and clean.
- Use the inside to store magazines, blankets, remotes, board games, or anything you want tucked away.
Perfect For:
This upcycled suitcase coffee table is ideal for:
- Vintage lovers and travel enthusiasts
- Eclectic, boho, or retro interiors
- Small apartments or studios where storage is essential
- Creative spaces or home libraries that love storytelling through furniture
Style Tip:
Place the table on a patterned rug and top it with a brass tray, stacked books, or a decorative candle. You can lean into the travel theme with old maps, globes, or vintage postcards as decor. Pair it with leather chairs or velvet seating for a sophisticated, curated look.
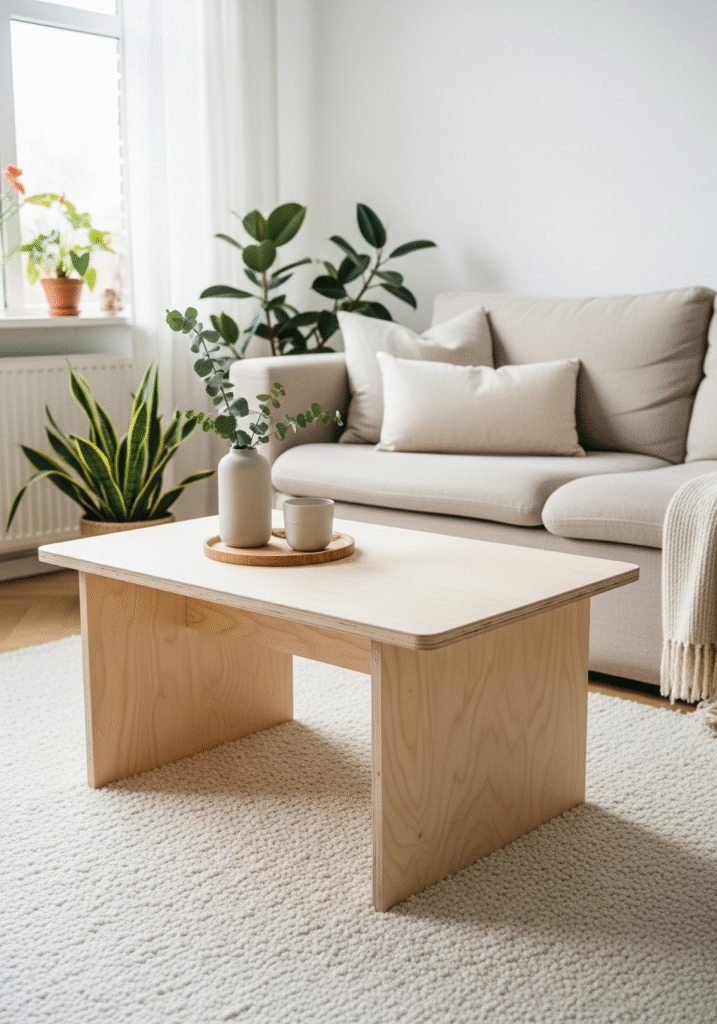
15. Minimalist Scandinavian Table
When it comes to timeless, versatile design, Scandinavian style stands out with its perfect blend of functionality, simplicity, and natural beauty. The Minimalist Scandinavian coffee table is a shining example of how less truly can be more. Characterized by clean lines, light wood tones, and a clutter-free aesthetic, this DIY coffee table idea is ideal for those who want a calm, cozy, and thoughtfully curated space.
Perfect for modern, Nordic, Japandi, or minimalist interiors, this project is both practical and beautiful—delivering a stylish surface that never overwhelms the room.
Why Choose a Scandinavian Coffee Table?
Scandinavian design emphasizes form and function, where every piece has a purpose and contributes to an uncluttered, harmonious environment. By making your own table, you can tailor it to your living space while maintaining the airy, refined aesthetic that makes Scandinavian interiors so appealing.
This table is ideal if you’re aiming to:
- Declutter and simplify your space
- Embrace light, natural materials
- Create a cozy yet modern home atmosphere
- Build something that’s elegant without being complicated
Plus, it’s a great beginner-friendly woodworking project thanks to its simple shapes and construction methods.
Materials You’ll Need:
- Birch plywood, pine, or ash boards (light wood preferred)
- Wood dowels or tapered legs (optional pre-made legs)
- Wood screws or dowel joinery kit
- Wood glue
- Drill and sander
- Natural wood stain or matte sealant
- Measuring tape and clamps
- Optional: Edge banding or decorative cutout template
How to Build a Minimalist Scandinavian Coffee Table
- Choose Your Dimensions
A standard coffee table height is 16–18 inches, but feel free to adjust it to suit your seating. Scandinavian designs favor rectangular or round shapes, often with a thin tabletop and light legs for an airy appearance. - Cut the Tabletop
Use birch plywood or a solid pine board to cut your tabletop to the desired size.- Sand the edges until smooth and round the corners slightly for a softer look.
- If using plywood, you can add edge banding for a clean, finished look.
- Prepare the Legs
Scandinavian tables often use round wooden dowel legs or tapered wood legs with a natural finish.- Either purchase pre-made legs or make your own by cutting and sanding wood dowels.
- Drill angled holes if you want splayed legs for a more mid-century vibe.
- Assemble the Table
- Attach the legs to the tabletop using wood screws or wooden dowel joinery.
- Apply wood glue for extra strength and clamp the joints until fully dry.
- If using angled brackets, ensure each leg is aligned properly to maintain symmetry.
- Finishing Touches
- Sand all surfaces smooth with fine-grit sandpaper.
- Apply a natural or whitewashed wood stain to keep the table looking light and fresh.
- Seal with a matte polyurethane finish to protect against spills and stains while maintaining a natural appearance.
Perfect For:
This minimalist Scandinavian coffee table is ideal for:
- Modern apartments and small spaces
- Nordic or Japandi interiors
- Bright and airy living rooms
- Those seeking a clutter-free lifestyle
- DIY beginners looking for a stylish but simple build
Style Tip:
Keep your table surface clean and clutter-free. Style it with a single ceramic vase, a neutral-toned tray, or a stack of lifestyle books. Pair it with a light area rug, soft throws, and muted color palettes to emphasize the Scandinavian “hygge” feeling—warm, inviting, and peaceful.
For a more modern edge, consider adding black metal hairpin legs or painting the legs a subtle gray for contrast while keeping the top in natural wood.
Tips for Building a DIY Coffee Table
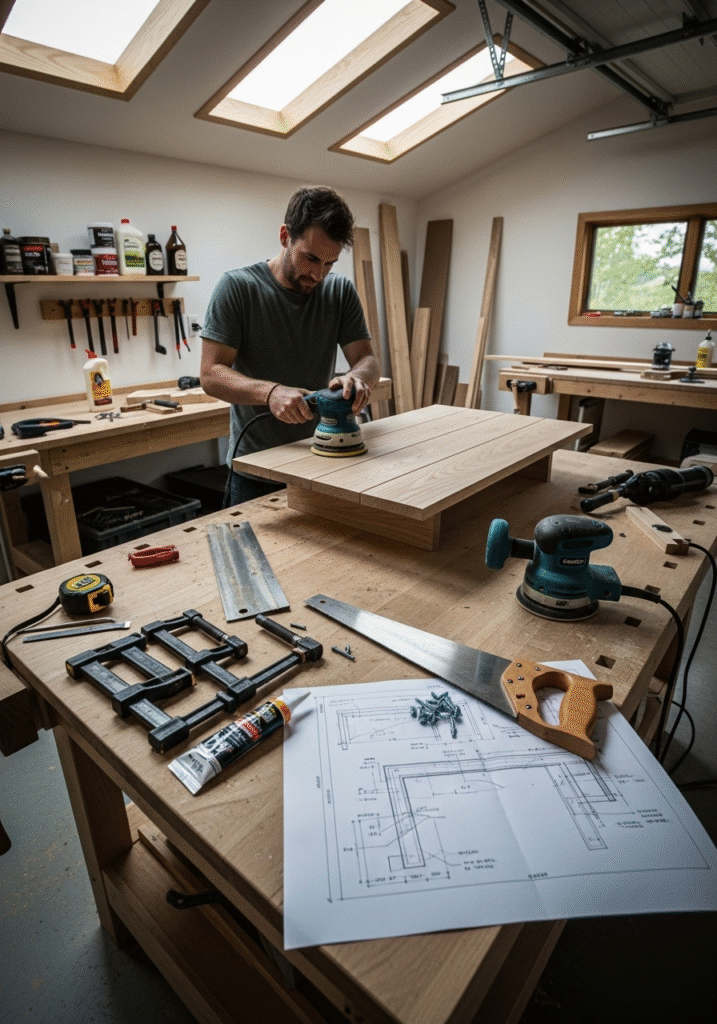
Creating a DIY coffee table is an exciting project that combines creativity, craftsmanship, and personal style. Whether you’re a first-time builder or an experienced DIYer, a few smart tips can make a big difference in the quality, durability, and final appearance of your coffee table. These guidelines will help ensure your project runs smoothly from start to finish—and that the end result is something you’re proud to showcase in your living room.
Below are essential tips to follow when building your own coffee table, no matter the design or material you choose.
1. Measure Twice, Cut Once
This classic carpenter’s rule is a must. Before you make any cuts, always double-check your measurements.
- Use a reliable measuring tape and mark dimensions clearly with a pencil.
- Take into account the thickness of the wood and any hardware you plan to use.
- It’s better to spend an extra minute verifying measurements than to waste valuable materials due to a simple error.
Accurate measuring not only saves time and money—it ensures your table fits your space perfectly and has a professional finish.
2. Sand Everything Thoroughly
No matter what kind of wood or finish you’re using, sanding is non-negotiable.
- Begin with a coarse-grit sandpaper (60–80 grit) to smooth rough surfaces and remove imperfections.
- Follow with a medium (120 grit) and then a fine grit (220+) for a silky-smooth surface.
- Don’t forget to sand edges and corners to remove splinters and sharp spots.
Sanding enhances both safety and appearance. A well-sanded table will accept paint or stain more evenly and feel more pleasant to the touch.
3. Use Both Wood Glue and Screws
To make your table structurally sound and long-lasting, combine mechanical fasteners with adhesive bonding.
- Wood glue strengthens joints and helps prevent wobbles or separation over time.
- Screws or nails provide the clamping force and physical stability to keep pieces securely in place.
- For added strength, consider pocket hole screws or dowel joinery, depending on your skill level.
This dual approach results in a solid, professional-quality piece that can handle daily use and last for years.
4. Protect Your Finish
After building and decorating your coffee table, protecting the finish is crucial—especially for a surface that will experience regular use. Choose a finish based on the look and durability you want:
- Polyurethane: Great for a clear, hard, and water-resistant finish. Available in matte, satin, semi-gloss, and gloss sheens. Ideal for family homes or high-use areas.
- Furniture wax: Offers a softer, natural finish and is perfect for rustic or vintage styles. Best for low-traffic tables.
- Tung oil or linseed oil: Penetrates the wood for a natural look while providing moderate protection and enhancing the grain.
Be sure to allow the finish to fully cure before placing items on the table. This not only protects your project but also keeps your decor from getting damaged.
5. Balance Style and Function
Your coffee table should look great—but it also needs to serve your daily needs. Before finalizing your design, ask yourself:
- Is the height comfortable in relation to your sofa or chairs?
- Will the shape fit your space? (Round tables work well in tight spaces, while rectangular ones suit long couches.)
- Do you need storage options like shelves, baskets, or hidden compartments?
- Will it be used mostly for display, dining, or storage?
By keeping function in mind, you’ll create a table that not only complements your room visually but also enhances your lifestyle.
Bonus Tips:
- Pre-drill holes before screwing to prevent the wood from splitting.
- Use clamps to hold pieces together while gluing for a secure, even fit.
- Level your table before attaching legs to prevent wobbling.
- Label parts when cutting multiple pieces to stay organized during assembly.
Common Tools and Materials Needed
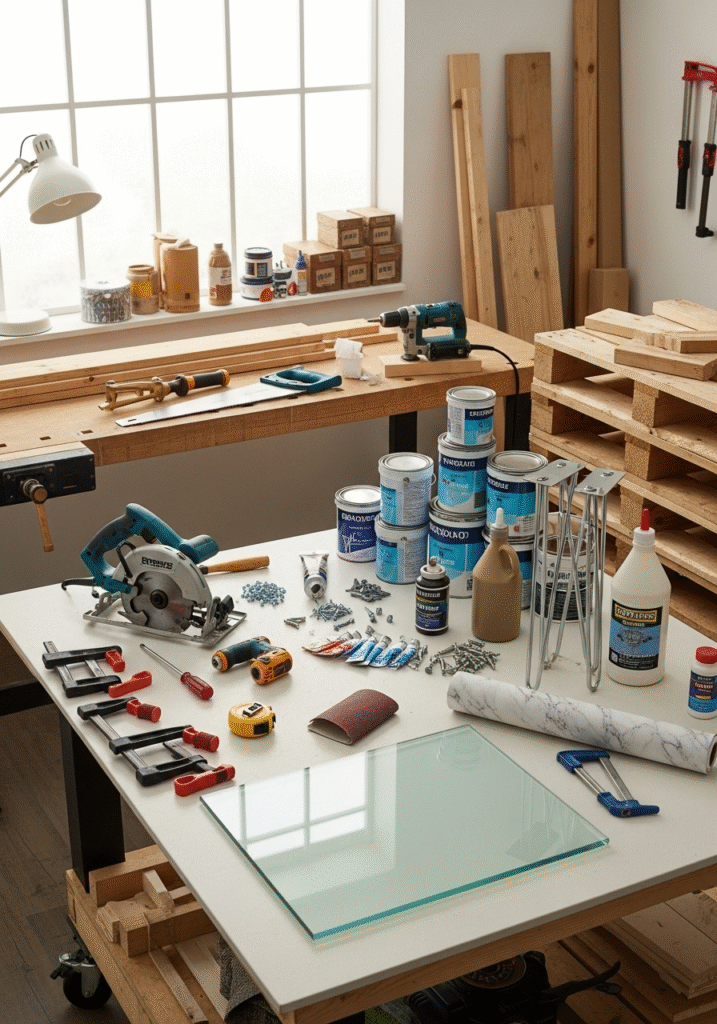
Before diving into any DIY coffee table project, it’s essential to gather the right tools and materials. Having everything prepared ahead of time will make the building process smoother, faster, and more enjoyable, especially if you’re working on multiple design ideas. Whether you’re constructing a rustic pallet table, an industrial pipe frame, or a sleek minimalist piece, these essentials will cover most builds and give you the flexibility to get creative.
Below is a comprehensive guide to the most commonly used tools and materials for DIY coffee tables, complete with helpful notes for beginners and seasoned DIYers alike.
Essential Tools
- Circular Saw or Hand Saw
A circular saw allows for quick, straight cuts on wood boards and plywood. It’s a must-have for larger builds like farmhouse or modular tables. If you’re working on smaller or more precise cuts, a hand saw or even a jigsaw may be more suitable for fine detailing. - Electric Drill (Corded or Cordless)
A drill is used for creating pilot holes, driving screws, and assembling furniture legs or frames. For best results, use a set with multiple drill bit sizes and screwdriver attachments. - Sander or Sandpaper
Smoothing wood is crucial for both aesthetics and safety. An electric sander saves time, but manual sandpaper (grits ranging from 80 to 220) will do the job just as well for smaller projects. Sand every edge and surface to prevent splinters and prepare for finishing. - Screwdriver (Manual or Electric)
For attaching hardware, legs, or brackets, a reliable screwdriver—especially a powered one—makes assembly quicker and easier. - Measuring Tape
Accuracy matters. A good-quality measuring tape ensures your cuts, placements, and designs are precise. Use a pencil or chalk to make temporary marks that are easy to erase or sand off. - Clamps
Wood glue takes time to set, and clamps help hold pieces in place for a tight, even bond. They’re especially useful when building frames or joining panels.
Common Materials
- Wood (Pallets, Boards, Crates, or Plywood)
The type of wood you choose will depend on your project style:- Pallets are great for rustic or reclaimed tables.
- Pine boards offer affordability and ease of use.
- Plywood is ideal for flat surfaces and modular shapes.
- Wooden crates can be repurposed for storage-friendly tables.
- Screws, Nails, and Wood Glue
These are the fundamental fastening elements of any build.- Wood glue strengthens joints, especially when combined with screws or nails.
- Screws are ideal for structural support.
- Nails can be used for decorative trim or quick assembly.
- Paint, Stain, or Varnish
How you finish your table sets the tone for your entire room:- Paint offers vibrant color and a modern or playful vibe.
- Wood stain enhances the natural grain and gives a classic or rustic look.
- Varnish or polyurethane protects the wood from moisture, heat, and wear.
- Metal or Hairpin Legs
These pre-made legs are perfect for Scandinavian, mid-century, or industrial styles. They’re easy to install and add a polished, professional look.- Metal pipe legs give a rugged, urban feel.
- Hairpin legs are sleek, minimal, and ideal for modern spaces.
- Glass Top (Optional)
A glass overlay adds elegance and protects wood or decorative items underneath—especially for shadow box or repurposed door tables. Be sure to use tempered glass for safety. - Adhesive Paper or Contact Paper (for Designs)
Want a marble or patterned look without the cost? Contact paper or adhesive vinyl can simulate high-end finishes on a budget. Seal with clear resin or epoxy for durability and shine.
Pro Tip:
Always consider safety when working with tools. Wear protective goggles when sawing or drilling, and work in a well-ventilated area when using paint, stains, or sealants. If you’re new to power tools, practice on scrap wood before working on your final materials.
Final Thoughts
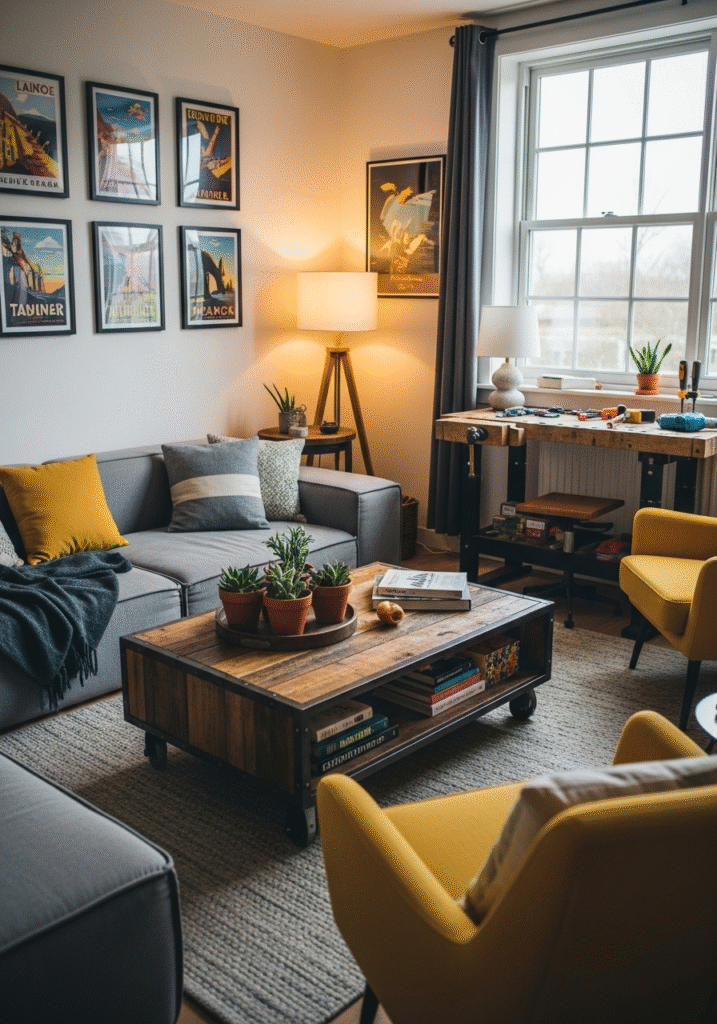
Building your own coffee table isn’t just about saving money—it’s about crafting something meaningful, personal, and deeply rewarding. DIY coffee tables give you the unique opportunity to turn everyday materials into beautiful, functional pieces that reflect your individual taste, creativity, and lifestyle. Whether you’re repurposing an old suitcase, assembling geometric modules, or creating a rustic wooden masterpiece from pallets, each project has the potential to become more than just furniture—it can become a conversation piece, a design statement, or even a family heirloom.
One of the greatest joys of DIY is the ability to tailor your furniture to suit your specific needs. You get to choose the dimensions, the finish, the materials, and the overall style. Prefer something modern and minimalist? Scandinavian tables with hairpin legs are just the thing. Want a warm, cozy touch? Go for a farmhouse-style or reclaimed wood table. Need extra storage? Crate-style tables, shadow boxes, or upcycled trunks offer both form and function. With a wide variety of designs—from industrial pipe frames to vintage-inspired suitcase builds—there’s truly something here for every aesthetic and every skill level.
Even better, most of these DIY coffee table ideas are budget-friendly and eco-conscious. By reusing materials like pallets, doors, or old furniture, you’re not just saving money—you’re also reducing waste and giving new life to forgotten items. It’s a sustainable way to decorate and a satisfying way to make your home more personal.
And let’s not forget the pride that comes with building something yourself. From measuring and cutting to assembling and finishing, the DIY process is a hands-on, skill-building experience that often becomes a source of pride and accomplishment. Every scratch, every smooth corner, and every brush of paint tells a story—your story.
Whether you’re:
- A seasoned DIYer ready for your next challenge
- A beginner looking to make your first handcrafted piece
- Or someone simply trying to add a personal touch to their home without breaking the bank
These 15 DIY coffee table ideas offer endless inspiration and practical guidance. With the right tools, a little patience, and a lot of creativity, you can design and build a one-of-a-kind centerpiece that truly brings your living room to life.
Your Next Step:
Feeling inspired? Choose a style that resonates with you and start small—you’ll be surprised how quickly your skills (and confidence) grow. Don’t forget to share your creation on social media, tag your progress, and connect with other DIY enthusiasts online. You never know who you might inspire!
And if you’re looking for more DIY furniture ideas, budget-friendly home upgrades, or creative repurposing projects, be sure to explore other posts on the blog.

Pingback: How to Build a Stylish Wooden Shoe Rack at Home (Step‑by‑Step DIY Guide) - pademoluxury.com